
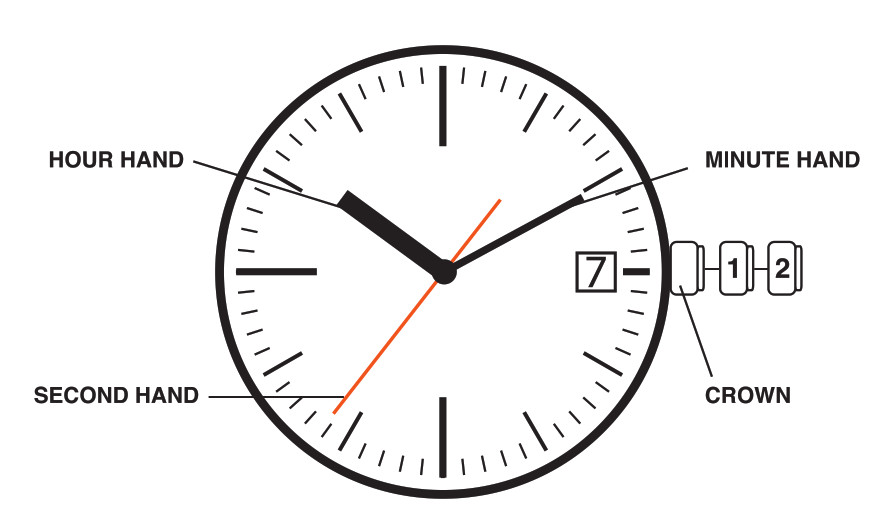
![]()
M1034
LIMITED LIFETIME WARRANTY & INSTRUCTIONS MANUAL
FEATURES
- Time Telling Mode (Hours, Minutes, Seconds, and Date)
- (2) 24 Hour Alarms
- Hourly Chime: One ‘Beep’ sound every full Hour
- Chronograph: Hours, Minutes, Seconds, and 1/100 of a Second with Lap Operation
- Countdown Timer
- World Time
- Daylight Savings Time
- 12/24 Hour (Military Time)
- Water Resistant as indicated on the watch
- INSTALITE- Electro Luminescent Display
EL LIGHT FEATURE
- Press ‘D’ in any mode to illuminate the watch face. The backlight will remain lit for 3 seconds.NOTE: Excessive use of the light will shorten battery life.
SELECTING FEATURES
- Time Telling Mode displays Hours, Minutes, Seconds, Month, Date, and Day of the Week.
- From Time Telling Mode, press ‘B’ once. Chronograph Mode appears. Press ‘B’ five times to return to Time Telling Mode.
- From Time Telling Mode, press ‘B’ twice. Timer Mode appears. Press ‘B’ four times to return to Time Telling Mode.
- From Time Telling Mode, press ‘B’ three times. Alarm Mode appears. Press ‘B’ three times to return to Time Telling Mode.
- From Time Telling Mode, press ‘B’ four times. Second Time Mode appears. Press ‘B’ twice to return to Time Telling Mode.
- From Time Telling Mode, press ‘B’ five times. Hourly Chime Mode appears. Press ‘B’ once to return to Time Telling Mode.
SETTING THE TIME AND CALENDAR
- From Time Telling Mode, press and hold ‘A’ until the Seconds flash. Press ‘C’ to zero out the Seconds.NOTE: Zeroing out 30 or more seconds automatically adds one minute to time.
- Press ‘B’. Minutes flash. Press ‘C’ to advance the Minutes.NOTE: Pressing and holding ‘C’ will advance digits rapidly.
- Press ‘B’. Hours flash. Press ‘C’ to advance the Hours.NOTE: When 12 Hour Format is selected, ‘PM’ indicates ‘p.m: times; there is no indicator for ‘a.m: times.
- Press ‘B’. The Year flashes. Press ‘C’ to advance the Year.
- Press ‘B’. Months flash. Press ‘C’ to advance the Month.
- Press ‘B’. The Date flashes. Press ‘C’ to advance the Date.
- Press ‘B’. 12/24 Hour Time Format flashes. Press ‘C’ to select either 12 Hour or 24 Hour (Military) Time.NOTE: ‘12’ indicates 12 Hour Format; ‘24’ indicates 24 Hour (Military Time).
- Press ‘B’. The ‘Beep’ sound flashes. Press ‘C’ to activate (“ON”) or deactivate (“OFF”) the ‘Beep’ sound.
- Press ‘A’ to end sequence and return to Time Telling Mode.
SETTING THE 24 HOUR ALARMS
- From Time Telling Mode, press ‘B’ three times to enter the Alarm Mode.
- Press ‘C’ to select the Alarm Number: (1-4) 24 Hour Daily Alarms and (5-8) Date Alarms.
- Press and hold ‘A’. The selected Alarm’s Hours flash. Press ‘C’ to advance the Alarm Hours.
- Press ‘B’. The selected Alarm’s Minutes flash. Press ‘C’ to advance the Alarm Minutes.
- Press ‘B’. The selected Alarm’s Time Zone flashes (T1 or T2). Press ‘C’ to select the Time Zone.
- Press ‘A’ to end sequence.
- Press ‘B’ to return to Time Telling Mode.
STOPWATCH
- From Time Telling Mode, press ‘B’ once to enter the Stopwatch Mode.
- Press ‘C’ to start timing.
- Press ‘D’ to stop timing.
- If desired, press ‘C’ to resume timing. Press ‘D’ to stop timing.
- Press ‘A’ to reset to zero.
- Press ‘B’ to return to Time Telling Mode.
SPLIT TIME
- While in the Stopwatch Mode, press and hold ‘A’. SPLIT/LAP Time flashes. Press ‘C’ to select SPLIT Time (SPL).
- Press ‘A’ to return to the Stopwatch Mode.
- Press ‘C’ to start timing.
- Press ‘C’ again to measure Split Times.
- Press ‘D’ to stop timing at the end of the event.
- Press ‘A’ to enter RECALL Mode.
- Press ‘C’ to display Split Times.
- Press and hold ‘A’ to reset the Split Times to zero.
- Press ‘B’ to return to Time Telling Mode.
DUAL TIME ZONE
- From Time Telling Mode, press ‘B’ four times to enter the Second Time Zone Mode.
- Press and hold ‘A’. Second Time Zone Minutes flash. Press ‘C’ to advance the Minutes.
- Press ‘B’. Second Time Zone Hours flash. Press ‘C’ to advance the Hours.
- Press ‘A’ to the end sequence.
- Press ‘B’ to return to Time Telling Mode.NOTE: The Second Time Zone (Dual Time) Clock may be used to keep track of a foreign time.
COUNTDOWN TIMER
- From Time Telling Mode, press ‘B’ twice to enter the Timer Mode.
- Press and hold ‘A’. Hours flash. Press ‘C’ to adjust the Hour.
- Press ‘B’. Minutes flash. Press ‘C’ to adjust the Minutes.
- Press ‘B’. Seconds flash. Press ‘C’ to adjust the Seconds.
- When the Countdown Timer is set, press ‘A’ to end set sequence and return to Timer Mode.
- Press ‘C’ to start the Countdown Timer.
- If desired, press ‘D’ to stop the Countdown Timer. Press ‘C’ again to resume the Countdown Timer.NOTE: The Countdown timing will continue in any mode until ‘0’ is pressed. During the last 10 seconds of the countdown, the alarm will beep once per second. When the Timer has expired, the alarm will sound for about 10 seconds or until any button is pressed.
- Press ‘D’ to stop the Timer.
- Press ‘B’ to return to Time Telling Mode.
ACTIVATING ALARM + HOURLY CHIME
- While in the Alarm Mode, press ‘C’ to select the Alarm Number: (1-4) 24 Hour Daily Alarms and (5-8) Date Alarms.
- Press ‘D’ to activate the selected Alarm.
- Press ‘D’ again to deactivate the selected Alarm.
- Press ‘B’ to return to Time Telling Mode.
- From Time Telling Mode, press ‘B’ five times to enter the Hourly Chime Mode.
- Press ‘C’ to activate the Hourly Chime.
- Press ‘C’ again to deactivate the Hourly Chime.
- Press ‘B’ to return to Time Telling Mode.NOTE: When an Alarm is activated, the selected Alarm will sound at the preset Alarm Time for 20 seconds or until any button is pressed. When the Hourly Chime is activated, the Hourly Chime will sound with one “Beep” every hour on the hour.
CHANGING THE BATTERY
Change the battery when the watch becomes slow, the readout darkens or does not appear, or the backlight fails. Before removing the old battery, be sure to denote its polarity so that the new battery is installed in exactly the same way. Replace with the same kind or equivalent only. This watch contains precise electronic components and should only be opened by a qualified watch technician. However, it is not necessary to return your watch to the manufacturer for battery replacement. It is recommended that you bring your timepiece to a local jeweler.
WATER RESISTANCE
This is a WATER RESISTANT watch. Do not operate push buttons below the surface of the water. Should water or condensation appear in the watch, immediately have the watch checked. Water can corrode electronic parts inside the case.
USE OUR NATIONWIDE SERVICE CENTERS. YOU CANNOT RETURN WATCH FOR SERVICE WHERE IT WAS PURCHASED.
If your watch requires cleaning, lubrication, battery changing, or needs a crystal replaced, Armitron Adventure-approved Service Centers are available in your area. These repair facilities use Armitron Adventure parts and components to assure quality and future performance. Free estimates are available in advance, should you need servicing or repairs not covered under the warranty. Repairs covered under the warranty may require proof of purchase, so retain the purchase receipt.
RETURN YOUR WATCH FOR SERVICING
Please call (718) 482-4195 for a listing of all approved and authorized service centers and locations, or visit our website at: WWW.ARMITRON.COMYOUR WATCH SHOULD NOT BE RETURNED TO THE PLACE OF PURCHASE. Carefully pack your watch in a sturdy box (do not send in a gift box for same will not be returned) and mail to the nearest approved authorized service station. Because of possible loss, we recommend that you insure the watch, return the receipt requested, when using the mail. If you do not receive a receipt within a reasonable time, start a tracer through the originating post office. Never include a special watch band or any other article of personal value in your shipment.
LIMITED WARRANTY
This Armitron Adventure Watch is warranted to you, the owner, for your lifetime against all defects in material or workmanship. This warranty does not apply to normal wear and tear or abuse and excludes batteries, case, strap, crystal, or bracelet. In the event of a defect or malfunction of the movement within this period it will be repaired or replaced, at our option, provided that it is returned prepaid with a check or money order for $9.95 to cover the cost of handling and return postage. This charge does not apply to California residents. (This is not a repair charge.) DO NOT SEND CASH. No additional charge will be made unless additional servicing is necessary for reasons beyond our control such as accident, misuse, neglect or replacement of parts not warranted is required such as case, crystal, strap, bracelet or batteries in which event a moderate charge will be made. The movement of any timepiece requires periodic cleaning/timing which is not a defect and, as such not warranted. After one year from the date of purchase each cleaning/timing with be performed as required without charging a fee in excess of the specified $9.95 handling charge. The above remedy is exclusive. Armitron Adventure shall not be liable for any incidental or consequential damages. Should any other part of your watch require repair, please use our Service Center for quick and inexpensive repairs on your watch. This warranty gives you specific legal rights and you may also have other rights which may vary from state to state. Some states do not allow limitations on how long an implied warranty lasts, or the exclusion or limitation of incidental or consequential damages, so the above limitations and exclusions may not apply to you. In the event of a problem with warranty service or performance, you may be able to go to Small Claims Court, a State Court or a Federal District Court. CALIFORNIA RESIDENTS ONLY!! There is no handling charge for in warranty service. Charges apply only for NON-WARRANTY ITEMS such as cleaning after one year and other routine maintenance.
Armitron ADVENTURE M1034 Series Watch User Manual – Armitron ADVENTURE M1034 Series Watch User Manual –
[xyz-ips snippet=”download-snippet”]