ARRMA OUTCAST 8S ARA5810 Instruction Manual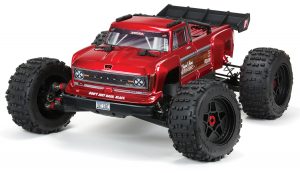
NOTICEAll instructions, warranties and other collateral documents are subject to change at the sole discretion of Horizon Hobby, LLC. For up-to-date product literature, visit horizonhobby.com or towerhobbies.com and click on the support or resources tab for this product.
Meaning of Special LanguageThe following terms are used throughout the product literature to indicate various levels of potential harm when operating this product:
WARNINGProcedures, which if not properly followed, create the probability of property damage, collateral damage, and serious injury OR create a create a high probability of superficial injury.
CAUTION: Procedures, which if not properly followed, create the probability of physical property damage AND a possibility of serious injury.NOTICE: Procedures, which if not properly followed, create a possibility of physical property damage AND a little or no possibility of injury.
![]() WARNING: Read the ENTI RE instruction manual to become familiar with the features of the product before operating. Failure to operate the product correctly can result in damage to the product, personal property and cause serious injury.This is a sophisticated hobby product. It must be operated with caution and common sense and requires some basic mechanical ability. Failure to operate this Product in a safe and responsible manner could result in injury or damage to the product or other property. This product is not intended for use by children without direct adult supervision. Do not use with incompatible components or alter this product in any way outside of the instructions provided by Horizon Hobby, LLC. This manual contains instructions for safety, operation and maintenance. It is essential to read and follow all the instructions and warnings in the manual, prior to assembly, setup or use, in order to operate correctly and avoid damage or serious injury.
WARNING: Read the ENTI RE instruction manual to become familiar with the features of the product before operating. Failure to operate the product correctly can result in damage to the product, personal property and cause serious injury.This is a sophisticated hobby product. It must be operated with caution and common sense and requires some basic mechanical ability. Failure to operate this Product in a safe and responsible manner could result in injury or damage to the product or other property. This product is not intended for use by children without direct adult supervision. Do not use with incompatible components or alter this product in any way outside of the instructions provided by Horizon Hobby, LLC. This manual contains instructions for safety, operation and maintenance. It is essential to read and follow all the instructions and warnings in the manual, prior to assembly, setup or use, in order to operate correctly and avoid damage or serious injury.
![]() WARNING AGAINST COUNTERFEIT PRODUCTS: Always purchase from a Horizon Hobby, LLC authorized dealer to ensure authentic high-quality Spektrum product. Horizon Hobby, LLC disclaims all support and warranty with regards, but not limited to, compatibility and performance of counterfeit products or productsclaiming compatibility with DSM or Spektrum technology.
WARNING AGAINST COUNTERFEIT PRODUCTS: Always purchase from a Horizon Hobby, LLC authorized dealer to ensure authentic high-quality Spektrum product. Horizon Hobby, LLC disclaims all support and warranty with regards, but not limited to, compatibility and performance of counterfeit products or productsclaiming compatibility with DSM or Spektrum technology.
Age Recommendation: Not for children under 14 years. This is not a toy.
Saf ety Precautions and Warnings
As the user of this product, you are solely responsible for operating in a manner that does not endanger yourself and others or result in damage to the product or property of others.
This model is controlled by a radio signal subject to interference from many sources outside your control. This interference can cause momentary loss of control, so it is advisable to always keep a safe distance in all directions around your model as this margin will help avoid collisions or injury.
- Never operate your model with low transmitter batteries.
- Always operate your model in open spaces away from full-size vehicles, traffic and people.
- Never operate the model in the street or in populated areas for any reason.
- Carefully follow the directions and warnings for this and any optional support equipment (chargers, rechargeable battery packs, etc.) you use.
- Keep all chemicals, small parts and anything electrical out of the reach of children.
- Never lick or place any portion of the model in your mouth as it could cause serious injury or even death.
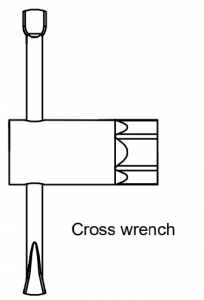
- Exercise caution when using tools and sharp instruments.
- Take care during maintenance as some parts may have sharp edges.
- Immediately after using your model, do NOT touch equipment such as the motor, electronic speed control and battery, because they generate high temperatures. You may burn yourself seriously touching them.
- Do not put fingers or any objects inside rotating and moving parts, as this may cause damage or serious injury.
- Always turn on your transmitter before you turn on the receiver in the car. Always turn off the receiver before turning your transmitter off.
- Keep the wheels of the model off the ground when checking the operation of the radio equipment.
WATER-RESISTANT VEHICLE WITH WATERPROOF ELECTRONICS
Your new Horizon Hobby vehicle has been designed and built with a combination of waterproof and water-resistant components to allow you to operate the product in many “wet conditions,” including puddles, creeks, wet grass, snow and even rain.
While the entire vehicle is highly water-resistant, it is not completely waterproof and your vehicle should NOT be treated like a submarine. The various electronic components used in the vehicle, such as the Electronic Speed Control (ESC), servo(s) and receiver are waterproof, however, most of the mechanical components are waterresistant and should not be submerged.
Metal parts, including the bearings, hinge pins, screws and nuts, as well as the contacts in the electrical cables, will be susceptible to corrosion if additional maintenance is not performed after running in wet conditions. To maximize the long term performance of your vehicle and to keep the warranty intact, the procedures described in the “Wet Conditions Maintenance” section below must be performed regularly if you choose to run in wet conditions. If you are not willing to perform the additional care and maintenance required, then you should not operate the vehicle in those conditions.
![]() CAUTION: Failure to exercise caution while using this product and complying with the following precautions could result in product malfunction and/or void the warranty.
CAUTION: Failure to exercise caution while using this product and complying with the following precautions could result in product malfunction and/or void the warranty.
General Precautions
- Read through the wet conditions maintenance procedures and make sure that you have all the tools you will need to properly maintain your vehicle.
- Not all batteries can be used in wet conditions. Consult the battery manufacturer before use. Caution should be taken when using Li-Po batteries in wet conditions.
- Most transmitters are not water-resistant. Consult your transmitter’s manual or the manufacturer before operation.
- Never operate your transmitter or vehicle where lightning may be present.
- Do not operate your vehicle where it could come in contact with salt water (ocean water or water on salt-covered roads), contaminated or polluted water. Salt water is very conductive and highly corrosive, so use caution.
- Even minimal water contact can reduce the life of your motor if it has not been certified as water resistant or waterproof. if the motor becomes excessively wet, apply very light throttle until the water is mostly removed from the motor. Running a wet motor at high speeds may rapidly damage the motor.
- Driving in wet conditions can reduce the life of the motor. The additional resistance of operating in water causes excess strain. Alter the gear ratio by using a smaller pinion or larger spur gear. This will increase torque (and motor life) when running in mud, deeper puddles, or any wet conditions that will increase the load on the motor for an extended period of time.Wet Conditions Maintenance
- Drain any water that has collected in the tires by spinning them at high speed. With the body removed, place the vehicle upside down and pull full throttle for a few short bursts until the water has been removed.
 CAUTION: Always keep hands, fingers, tools and any loose or hanging objects away from rotating parts when performing the above drying technique.• Remove the battery pack(s) and dry the contacts. If you have an air compressor or a can of compressed air, blow out any water that may be inside the recessed connector housing.
 - Remove the tires/wheels from the vehicle and gently rinse the mud and dirt off with a garden hose. Avoid rinsing the bearings and transmission.NOTICE: Never use a pressure washer to clean your vehicle.
- Use an air compressor or a can of compressed air to dry the vehicle and help remove any water that may have gotten into small crevices or corners.
- Spray the bearings, drive train, fasteners and other metal parts with a water-displacing light oil. Do not spray the motor.
- Let the vehicle air dry before you store it. Water (and oil) may continue to drip for a few hours.
- Increase the frequency of disassembly, inspection and lubrication of the following:
- Front and rear axle hub assembly bearings.
- All transmission cases, gears and differentials.
- Motor—clean with an aerosol motor cleaner and re-oil the bearings with lightweight motor oil.
![]() SupportAt ARRMA we want you to love running your kit and make owning a high performance RC car as simple as possible. If you have any questions about running, maintaining, tuning or repairing your ARRMA product there are two options for you to use to get help and advice. Visit ARRMA-RC.com for support, parts and upgrades for your kit. If you can’t find what you’re looking for then you can always email us at (USA) or [email protected] (ROVV) 24hrs a day and we will do our best to help you with your query.
SupportAt ARRMA we want you to love running your kit and make owning a high performance RC car as simple as possible. If you have any questions about running, maintaining, tuning or repairing your ARRMA product there are two options for you to use to get help and advice. Visit ARRMA-RC.com for support, parts and upgrades for your kit. If you can’t find what you’re looking for then you can always email us at (USA) or [email protected] (ROVV) 24hrs a day and we will do our best to help you with your query.
Kit Overview
Supplied
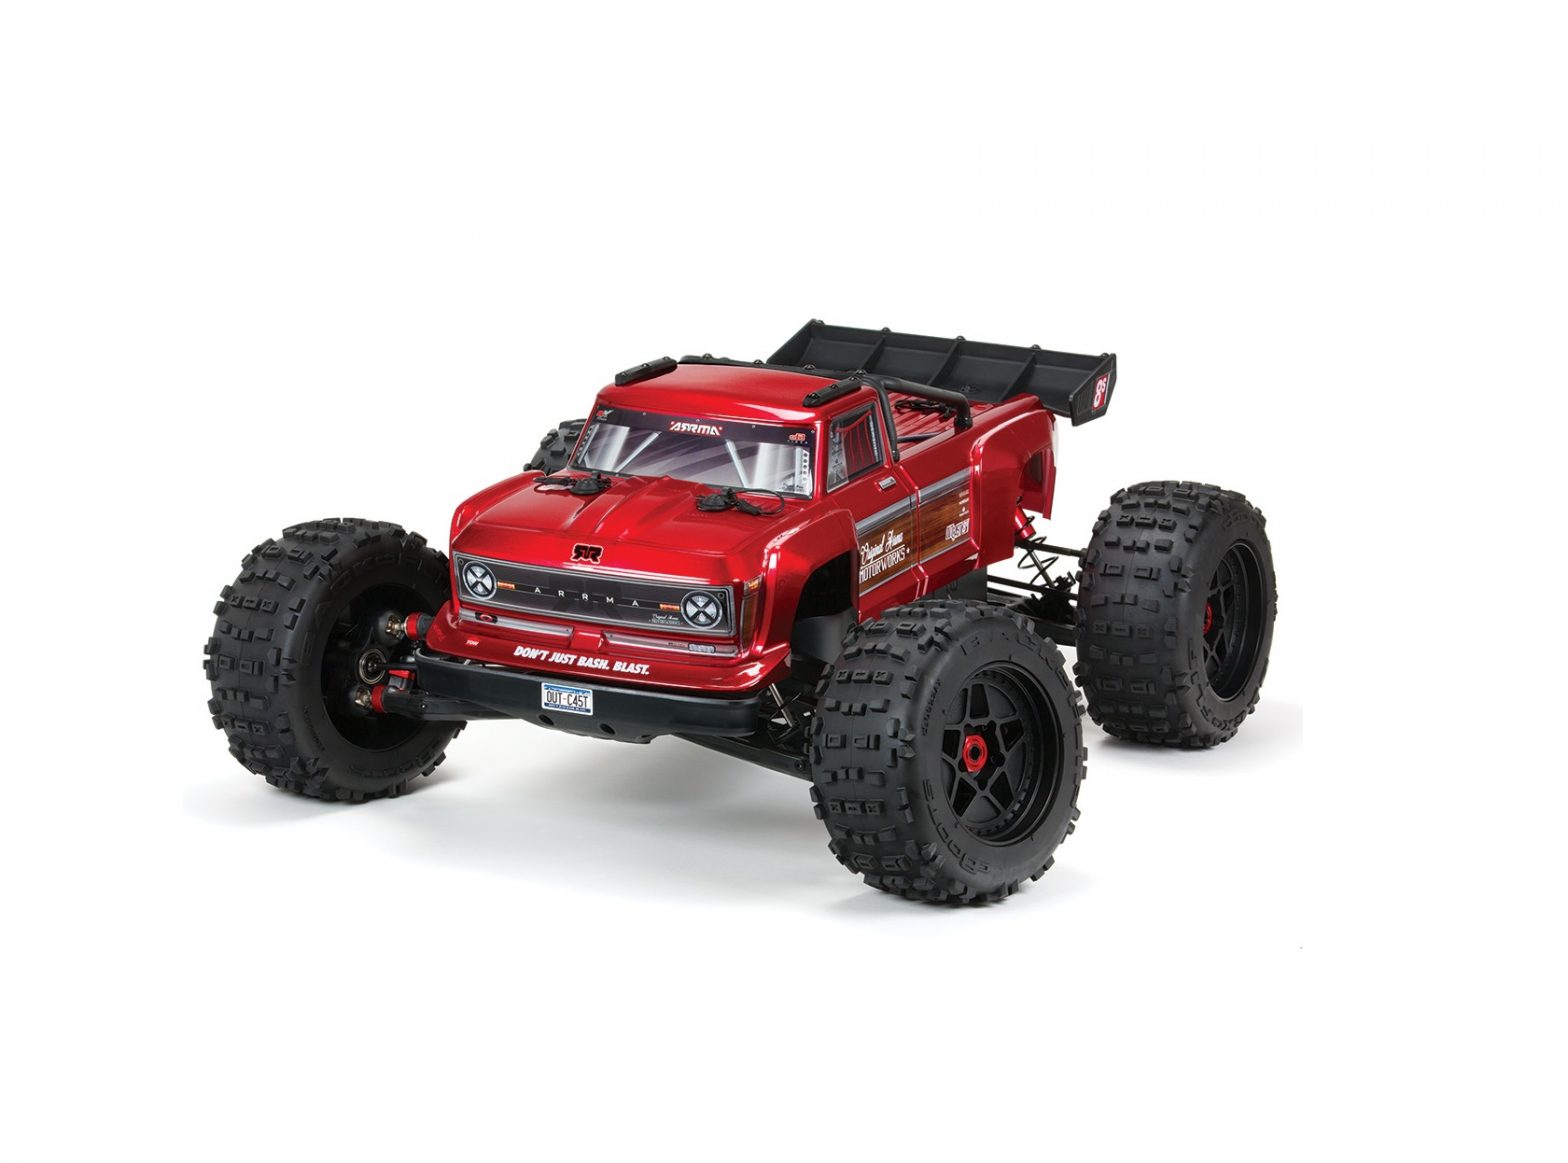
- ARRMA OUTCASTTM 8S (ARA5810)
- SpektrumTM 2.4GHz Transmitter (SPM2340)
- SpektrumTM 2.4GHz Receiver (SPMSR6100AT)
- SpektrumTM FIRMA ESC (SPMXSE1160CP)
- SpektrumTM 4685 1250Kv MOTOR (SPMXSM1200 or SPMXSM1205)
- SpektrumTM S905 40KG, Metal Gear Servo, 15T (SPMS905)
 SPEKTRUMTM DX3 SMART® 2.4.GHz TransmitterSPEKTRUMTM DX3 SMART® 2.4.GHz SenderSPEKTRUMTM DX3 SMART® 2.4.GHz Emetteur
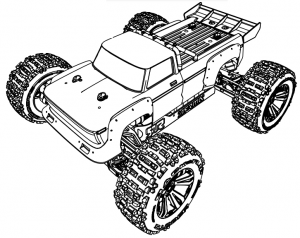
SPECIFICATIONS
ARRMA OUTCASTTM 8S (ARA5810)
|
Length |
714mm / 28.11 in |
|
Width |
596mm / 23.46 in |
|
Height |
266mm / 10.47 in |
| Wheelbase |
430mm / 16.93 in |
|
Battery Tray MAX dims |
L:170mm / 6.69 in x W:55mm / 2.16 in x H:53mm / 2.08 in |
| Weight |
11kg / 24.20lbs |
CARACTERISTICS
SpektrumTM S905 40KG, Metal Gear Servo, 15T (SPMS905)
|
Voltage |
6.0V – 8.4V |
| Torque @6V |
500 oz-in / 36 kg-cm |
|
Speed @6V |
0.20 sec |
|
Length |
59.5mm / 2.33 in |
| Width |
29.0mm / 1.14 in |
|
Height |
55.2mm / 2.16 in |
| Spline |
15T |
SpektrumTM 2.4GHz Transmitter (SPM2340)
|
Modulation |
DSMR®, DMS2® |
|
Band |
2.4GHz |
| Required batteries |
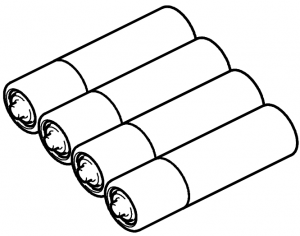
4xAA |
SpektrumTM 4685 1250Kv MOTOR (SPMXSM1200)
|
Kv Rating |
1250 |
| Poles |
4 |
|
Diameter |
46mm / 1.81 in |
|
Length |
85mm / 3.35 in |
|
Shaft Diameter |
5mm |
|
Weight |
732g / 25.82 oz |
SpektrumTM 2.4GHz Receiver (SPMSR6100AT)
|
Voltage |
3.5-9.6V |
|
Channels |
6 |
|
Length |
42.4mm / 1.66 in |
|
Width |
23.9mm / 0.94 in |
|
Height |
15.1mm / 0.59 in |
SpektrumTM FIRMA ESC (SPMXSE1160CP)
|
Continuous Current |
160 Amp |
|
Voltage |
6S (22.2V) 8S (29.6V) |
|
BEC Output |
6.0v/8.4v 5A Cont. 8A MAX |
|
Size / Weight |
L: 70mm / 2.75 in x W: 77mm / 3.03 in x H: 44mm / 1.73 in 280g / 9.87 oz |
Required
- 2x4S LiPo Battery
Battery Tray MAX dims
L:170mm / 5.51 in x W:55mm /2.16 in x H:53mm / 2.08 in
Voltage
2x 4S LiPo 50C 5000mAh Minimum Req. 100C 5000mAh Recommended
- AA batteries x4
- Charger
- LiPo Charging Bag

RADIO GEAR
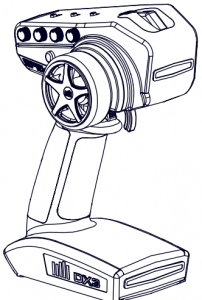
SPEKTRUM DX3 SMART RADIO SYSTEM
DXEtm
2.4GHZ DIGITAL RADIO SYSTEM
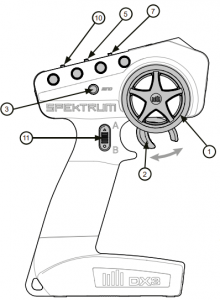
- Steering Wheel Controls direction (left/right) of the model
- Throttle Trigger Controls speed and direction (forward/brake/reverse) of the model
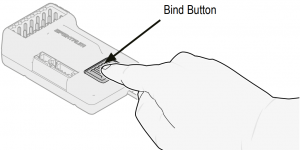
- BIND Button Puts the transmitter into Bind Mode
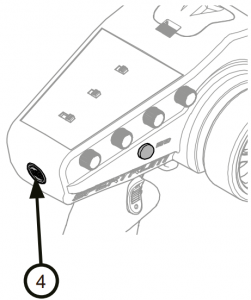
- On/Off Switch Turns the power ON/OFF for the transmitter
- TH REV Reverses function of the speed control when pulled back or pushed forward
- Indicator Lights
- Solid green light—indicates adequate battery power
- Flashing green light—indicates the battery voltage is critically low. Replace batteries
- ST REV Reverses the function of the steering when the wheels is turned left or right
- ST Trim Adjusts the steering center point
- TH Trim Adjusts the throttle neutral point
- TH Limiter Limits throttle output to 50, 70 or 100%.
- Channel 3 Button Used to control a third channel and is preset at -100%/Neutral/100%
- ST Rate Adjusts the sensitivity of AVC technology
- Brake Rate Adjusts the brake neutral point
- SMART Battery Level Indicator
SRS6100AT AVC TECHNOLOGY RECEIVER
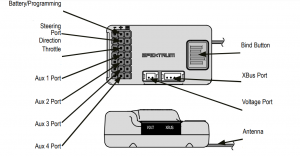
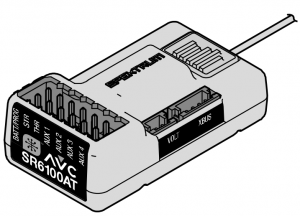
SERVO REVERSINGIf a right steering command does not result in the wheels turning right (and vice versa), the channel may need to be reversed. To reverse a channel, switch the position of the correlating switch—“N” is for normal, “R” is for reverse.
THROTTLE LIMITERGASBEGRENZERThe Throttle Limiter switch limits the throttle ouput from 50/70/100%.This is useful for limiting motor ouput on slick or loose traction tracks or to limit vehicle speeds for new drivers.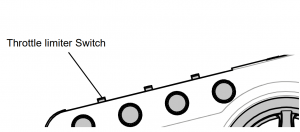
3-POSITION SWITCHThe 3-Position Switch is used to control a third channel and is factory preset at -100%/Neutral/100%.
STEERING TRIMThe steering trim dial is used to adjust the steering trim when the wheel is centered. Rotating the dial changes the steering trim (the steering at rest position). Normally, the steering trim is adjusted until the vehicle tracks straight.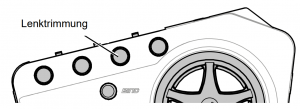
THROTTLE TRIMThe throttle trim dial is used to adjust the throttle trim when the throttle stick is released (neutral position). This is typically used to adjust the brakes. Rotating the dial causes the throttle trim (the throttle position at rest) to be changed.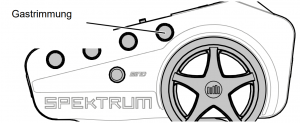
STEERING RATE AND GAIN CONTROLSteering rate (also known as dual rate) allows on-the-fly steering travel adjustments to be made using the ST Rate dial. Steering rate limits the amount of travel of the steering servo. The steering rate cannot be greater than 100%. When the DX3 is bound to a DSMR® AVC® receiver, the ST RATE knob controls the sensor gain value.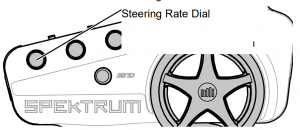
CHANGING THE TRAVEL ADJUST SETTINGS
The travel function supports precise endpoint adjustments in each direction for the steering and throttle channels.
- Hold the trigger in the full brake position and the steering wheel in full right position while powering on the transmitter. The LED flashes rapidly, indicating the programming mode is active.
- Throttle End Point: Hold the trigger in the full throttle position. Turn the BRAKE RATE knob to adjust the full throttle end point.
- Brake End Point: Hold the trigger in the full brake position. Turn the BRAKE RATE knob to adjust the full brake end point. Return the trigger to the center position.
- Left Steering End Point: Hold the steering wheel in the full left position. Turn the ST RATE knob to adjust the left end point.
- Right Steering End Point: Hold the steering wheel in the full right position. Turn the ST RATE knob to adjust the right end point. Return the steering wheel to the center position.
- Power off the transmitter to save the travel adjust settings. The minimum Travel is 75%, and the Maximum travel is 150%. The default travel settings are 125% steering and 100% throttle.IMPORTANT: If the travel is changed on the DX3, you must rebind and calibrate AVC® Receivers.
BINDING AND CALIBRATING
IMPORTANT: You must calibrate the SR6100AT receiver each time it is placed in bind mode, regardless of AVC being enabled or disabled.
BIND AND CALIBRATION PROCESS
Upon initial setup after the first bind, the model must be configured for servo direction, trim and travel. Then the receiver must be rebound and calibrated to those settings for proper operation. Center the steering trim and throttle trim on the transmitter before beginning.
- Press and hold the bind button on the receiver. 2. Power on the receiver. The orange LED flashes, indicating the receiver is in bind mode. Release the bind button after the orange LED illuminates.
- Put your transmitter in bind mode.
- The bind process is complete when the orange LED on the receiver remains lit. At this stage the receiver is connected but must complete calibration before it will operate.
- Pull the transmitter trigger to full throttle, pause, then retum the trigger to center.
- Push the transmitter trigger to full brake, pause, then return the trigger to center.
- Turn the transmitter steering wheel to full right, pause, then return the wheel to center.
- Turn the transmitter steering wheel to full left, pause, then return the steering wheel to center. The orange LED flashes to confirm the settings have been accepted.
- Turn off the vehicle to complete the binding and calibration process.
![]() CAUTION: When the bind process is complete, the throttle and steering channels are active. Keep hands and loose objects away from all spinning parts on the vehicle.
CAUTION: When the bind process is complete, the throttle and steering channels are active. Keep hands and loose objects away from all spinning parts on the vehicle.
IMPORTANT: You must rebind the transmitter and receiver if you:
- Change the servo reversing after binding
- Change the travel after binding
- Change the receiver mounting orientation
- Want to receiver in a different model memory
- Install the Recover in a different vehicle
FAILSAFEIn the unlikely event that the radio link is lost during use, the receiver will drive the throttle channel to the neutral position. If the receiver is powered on prior to turning on the transmitter, the receiver will enter the failsafe mode, driving the throttle channel to the neutral position. When the transmitter is turned on, normal control is resumed.IMPORTANT: Failsafe activates only in the event that signal is lost from the transmitter. Failsafe will NOT activate in the event that receiver battery power decreases below the recommended minimums or power to the receiver is lost.

[xyz-ips snippet=”download-snippet”]