Artie 3000 The Coding Robot User Guide
Power up!
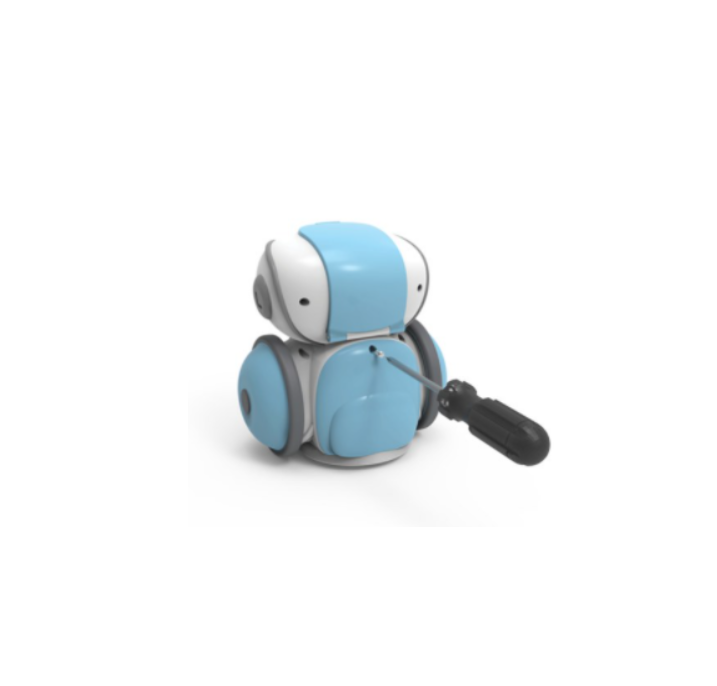
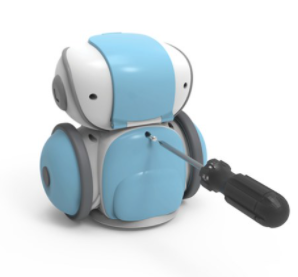
- Use a small Phillips screwdriver to open Artie’s battery door.
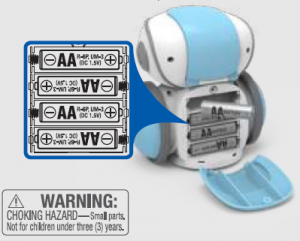
- Install 4 fresh AA batteries.(see back for more battery info)
- Close door, and tighten screw, and open Artie’s top flap.
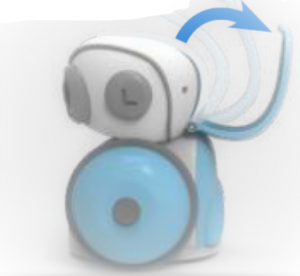
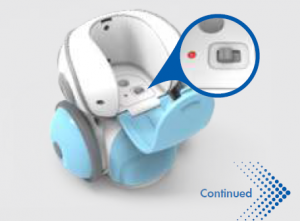
Switch Artie on!
- Slide the power switch on. The red LED should light up.
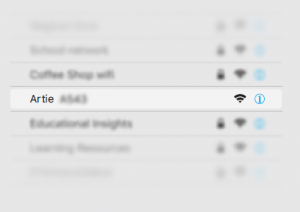
- On your computer or tablet, open your WiFi network list. Look for the “Artie” network name, and connect.
Connect with Artie
- On your computer or tablet, open your WiFi network list. Look for the “Artie” network name, and connect.
- Open your web browser, and enter:Note that you will not be able to access other sites on the internet while you are coding with Artie.The Artie user interface (Artie UI) – will open. You can code instructions here and Artie will follow them!You will know Artie is connected when the WiFi icon is green.If Artie UI does not appear, refresh your browser.

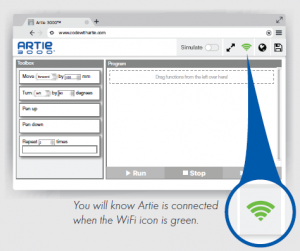 You will know Artie is connected when the WiFi icon is green.If Artie UI does not appear, refresh your browser.
Help Artie install his marker!
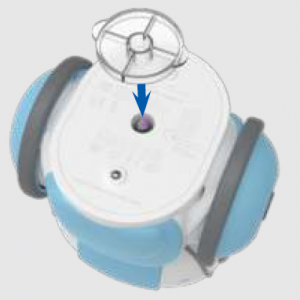
- Flip Artie upside-down.
- Place the marker-parker here: The marker-parker comes in Artie’s box
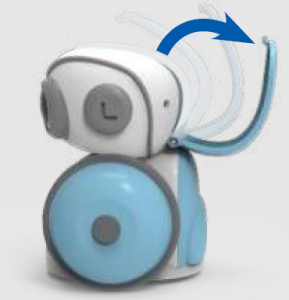
- Stand Artie up and open his top flap.
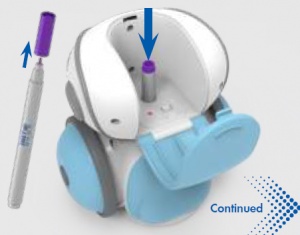
- Remove the marker cap and push marker into the holder until the tip touches the marker-parker.Artie’s markers are washable!
- Remove the Marker-Parker and save it for next time
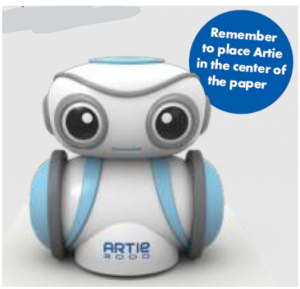
- Close Artie’s top flap and place him in the center of an 8.5”x11” or A4 sized sheet of paper.
Cleaning Instructions
Clean Artie with a slightly damp cloth or dry cloth. Do not immerse or spray any liquid or water on Artie.
Battery Information
- Do not mix old and new batteries.
- Do not mix different types of batteries: alkaline, standard (carbon zinc) or rechargeable (nickel-cadmium) batteries.
- Do not recharge non-rechargeable batteries.
- Remove rechargeable batteries from the toy before recharging.
- Only charge rechargeable batteries under adult supervision.
- Only use batteries of the same or equivalent type as recommended.
- Insert batteries with the correct polarity.
- Remove exhausted batteries from the unit.
- Do not short circuit the supply terminals.
- To prevent corrosion and possible damage to the product, we recommend removing the batteries from the unit if it will not be used for more than two weeks
Developed in Southern California by Educational Insights.
All rights reserved. Made in China. ©Educational Insights, Gardena, CA, USA. Learning Resources Ltd., Bergen Way, King’s Lynn, Norfolk, PE30 2JG, UK.Please retain this guide for future reference. educationalinsights.com This device complies with Part 15 of the FCC rules. Operation is subject to the following two conditions:(1) this device may not cause harmful interference and(2) this device must accept any interference received, including interference that may cause undesired operation.Note: This equipment has been tested and found to comply with the limits for a Class B digital device, pursuant to Part 15 of the FCC Rules. These limits are designed to provide reasonable protection against harmful interference in a residential installation. This equipment generates, uses, and can radiate radio frequency energy and, if not installed and used in accordance with the instructions, may cause harmful interference to radio communications. However, there is no guarantee that interference will not occur in a particular installation. If this equipment does cause harmful interference to radio or television reception, which can be determined by turning the equipment off and on, the user is encouraged to try to correct the interference by one or more of the following measures: • Reorient or relocate the receiving antenna. • Increase the separation between the equipment and receiver. • Consult the dealer or an experienced radio/TV technician for help.Note: The user is cautioned that changes and modifications made to the equipment without the approval of manufacturer could void the user’s authority to operate this equipment
Read More About This Manual & Download PDF:
References
[xyz-ips snippet=”download-snippet”]