![]()
10L Mini Fridge – V1.2 –
This manual contains important information regarding the safety, operation, maintenance, and storage of this product. Before using, read and understand all warnings, instructions, and product labels. Failure to do so could result in possible injury or property damage. Please keep this manual for future reference.
Thank you for purchasing the AstroAI 10L Compact Portable Mini Fridge. This is a portable fridge that can be used with both a 12-volt car and a standard wall outlet. With an included chill and heat function, you’ll be able to keep everything at the perfect temperature.
We hope you enjoy your new Mini Refrigerator! Questions or Concerns? You are welcome to contact us with your question via [email protected].
SAFETY INFORMATION
- This appliance can be connected to a 110V supply by means of a three-pin socket. (Countries with different voltages need to select products with corresponding voltages.)
- When using the 12V in-car adapter, the compact fridge should not be left connected for long periods of time when the engine is not running.
- DO NOT connect directly to a 24V lighter socket on a heavy-duty vehicle.
- Unplug this device during lightning storms or when not in use for long periods of time to prevent damage.
- DO NOT open or remove covers, doing so may expose you to dangerous voltages or other hazards.
- To prevent the risk of fire or electric shock, avoid overloading wall outlets, extension cords, or other devices that carry an electrical load.
- Only use suitable power sources – Plug the product into a suitable power source, as described in the operating instructions or as marked on the product.
- The supply voltage should be the same as that indicated in the technical specifications and the appliance rating plate.
- In order to disconnect the device from the mains completely switch off the outlet and remove the mains plug.
- Do not bend, stretch or pull the supply cable in order to avoid electric shock.
- When installed, the power socket must be within easy reach.
- Avoid using locations where dust or other airborne contamination may be drawn into the fan.
- Allow at least 2 inches of distance from the back and sides of the device to allow proper air circulation and heat dispersal.
- Never leave the fridge running in poorly ventilated areas e.g. a car’s trunk.
- Handle with ease and do not squeeze.
- Do not sit on the fridge.
- Allow 30 minutes for the compact fridge to return to room temperature before attempting to switch from heating to cooling mode, or vice versa.
- Do not expose the fridge to rain and keep the fridge away from corrosive gases and liquids.
- Disconnect the power supply when not in use for an extended period of time. Store in a cool, dry, and well-ventilated environment. Avoid exposing the device to direct sunlight.
- Not for children. This device should be used with adult supervision.
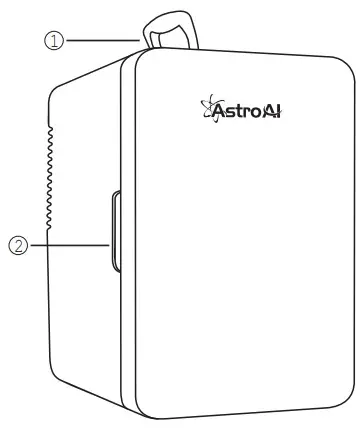
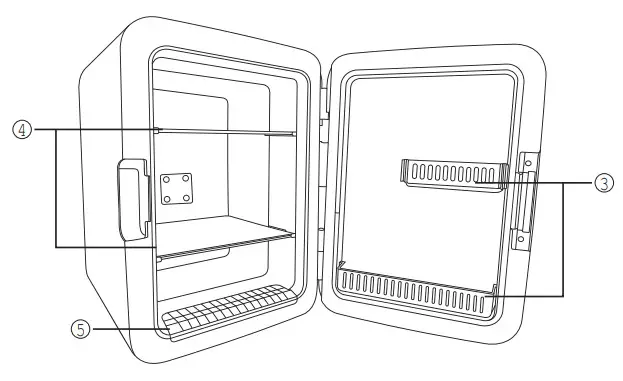
DIAGRAM
 |
 |
 |
 |
|
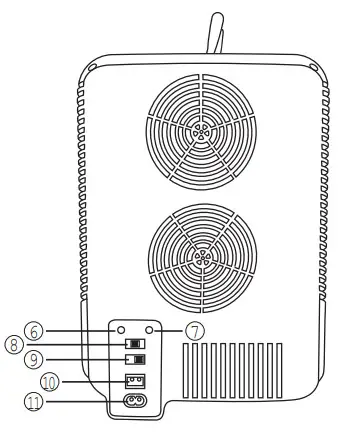
8. Warm/Off/Cool Switch |
| 2. Door Handle | 9. Non-ECO/ECO |
| 3. Shelf | 10. DC Power Port |
| 4. Removable Shelf | 11. AC Power Port |
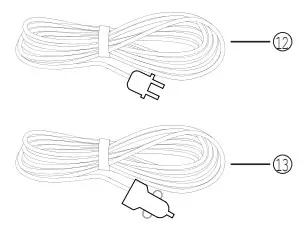
| 5. Condensation Water Tank | 12. AC Cord and plug |
| 6. Red Indicator Light | 13. DC Cord and plug |
| 7. Green Indicator Light |
SIZE DESCRIPTION
|
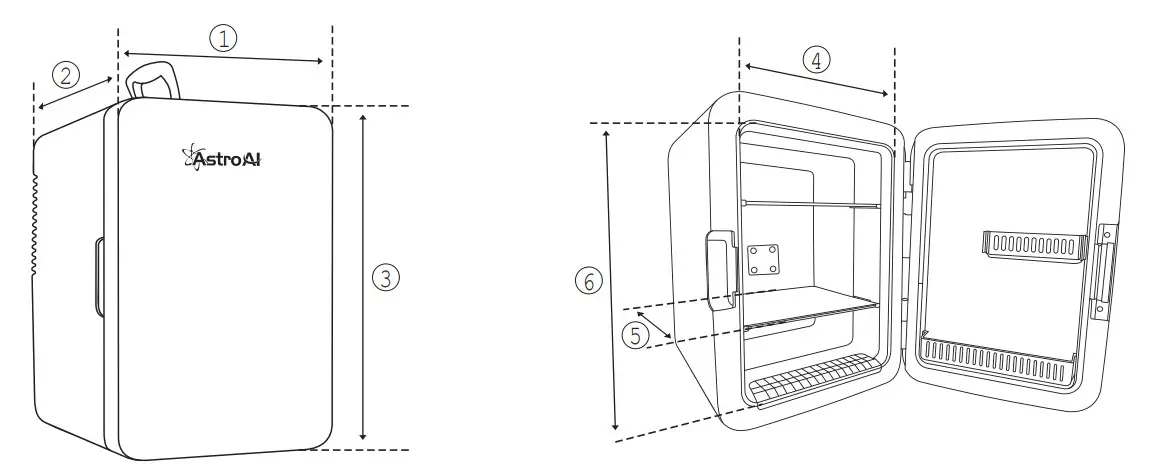
4. 19cm—7.5in |
| 2. 32.5cm—12.8in | 5. 18cm— 7.1in |
| 3. 35.2cm—13.9in | 6. 27cm—10.6in |
INSTRUCTIONS
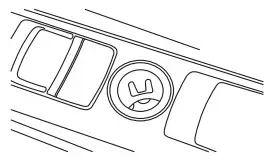
CONNECTING TO 12V CIGARETTE LIGHTER
- Set the MODE switch to the OFF position before connecting to the 12V outlet. The two indicator lights will be off.
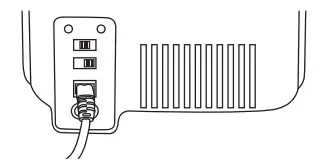
- Insert the DC power cord into the DC power port at the rear of the fridge.

- Secure the fridge in place and insert the power cord into the 12V socket.
- Turn the MODE switch to either WARM or COOL. The green indicator light will be on under the COOL mode and the red indicator light under the WARM mode. WARNING: Running the portable fridge while your vehicle is off may drain the vehicle’s battery.
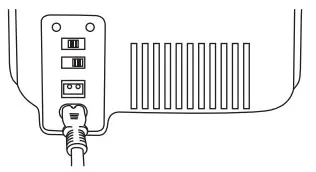
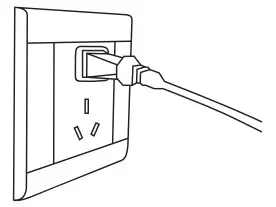
CONNECTING TO A WALL OUTLET
- Set the MODE switch to the OFF position before connecting to the wall outlet. The two indicator lights will be off.
- Insert the AC power cable into the AC power port at the rear of the fridge.
- Secure the fridge in place and insert the power cable into the wall outlet.
- Turn the MODE switch to either WARM or COOL. The green indicator light will be on under the COOL mode and the red indicator light under the WARM mode.
TIPS FOR MODES
 report this ad
ECO MODE
- ENERGY-SAVING MODE. The lowest cooling temperature in this mode is higher than that in the non-ECO mode, the cooling rate is slower than that in the non-ECO mode, and the noise is much lower than that in the non-ECO mode.
- The fridge will default to a mode. If the noise is too loud, you can switch from non-ECO mode to ECO mode; If you are not satisfied with the cooling operation, you can switch from ECO mode to non-ECO mode.
COOLING TIPS
- To achieve the quickest cooling, fill the fridge with beverages that have already been refrigerated.
- The lowest possible temperature depends on the ambient environment. The lowest temperature the fridge can achieve may rise if the ambient temperature is too high.
NOTE: Ambient temperature refers to the temperature of the surrounding air. For example, if the fridge is used for cooling, and your immediate surroundings are 75, then the fridge will keep the contents cool at anywhere between 35 – 40.
WARMING TIPS
- The fridge is designed to keep items warm. It is not designed to heat up cold items.
- Hot items will stay warm for several hours after the portable fridge has been turned off, provided that the door is closed properly.
CARE AND MAINTENANCE
- Ensure you disconnect the plug fully before performing regular maintenance.
- Clean the case with a damp cloth and mild cleaner. Ensure the inside is completely dry, when not in use, before storing.
TROUBLESHOOTING
|
Does not work |
|
| Does not cool |
|
| Condensate water |
|
| Poorheat dissipation |
|
SPECIFICATIONS
| Capacity | 10L | |
| Input voltage | DC 12V | cool mode: 4.2A |
| warm mode: 3.2A | ||
| AC 100-120V | cool mode: 0.85A | |
| warm mode: 0.7A | ||
| Operating temperature | Ambient Temp – 20°C Chill | |
| 140°F (60°C) Heat | ||
| Certifications | ETL, PSE, CE |
3 YEAR LIMITED WARRANTY FROM ASTORIA
Each AstroAI 10L Mini Fridge will be free from defects in material and workmanship. This warranty does not cover damage from neglect, misuse, contamination, alteration, accident, or abnormal conditions of operation or handling. This warranty covers the original purchaser only and is not transferable.
AstroAI always wants to provide our customers with excellent products as well as customer service. To know more about us, please visit astroai.com.
References
[xyz-ips snippet=”download-snippet”]