![]()
ATEN 4K HDMI DVI-D HDMI Converter Audio Embedder De-Embedder User Guide

Model: VC881
© Copyright 2018 ATEN® International Co., Ltd.ATEN and the ATEN logo are trademarks of ATEN International Co., Ltd. All rights reserved.All other trademarks are the property of their respective owners.Part No. PAPE-1223- N30G Printing Date: 06/2018

A. Hardware Review

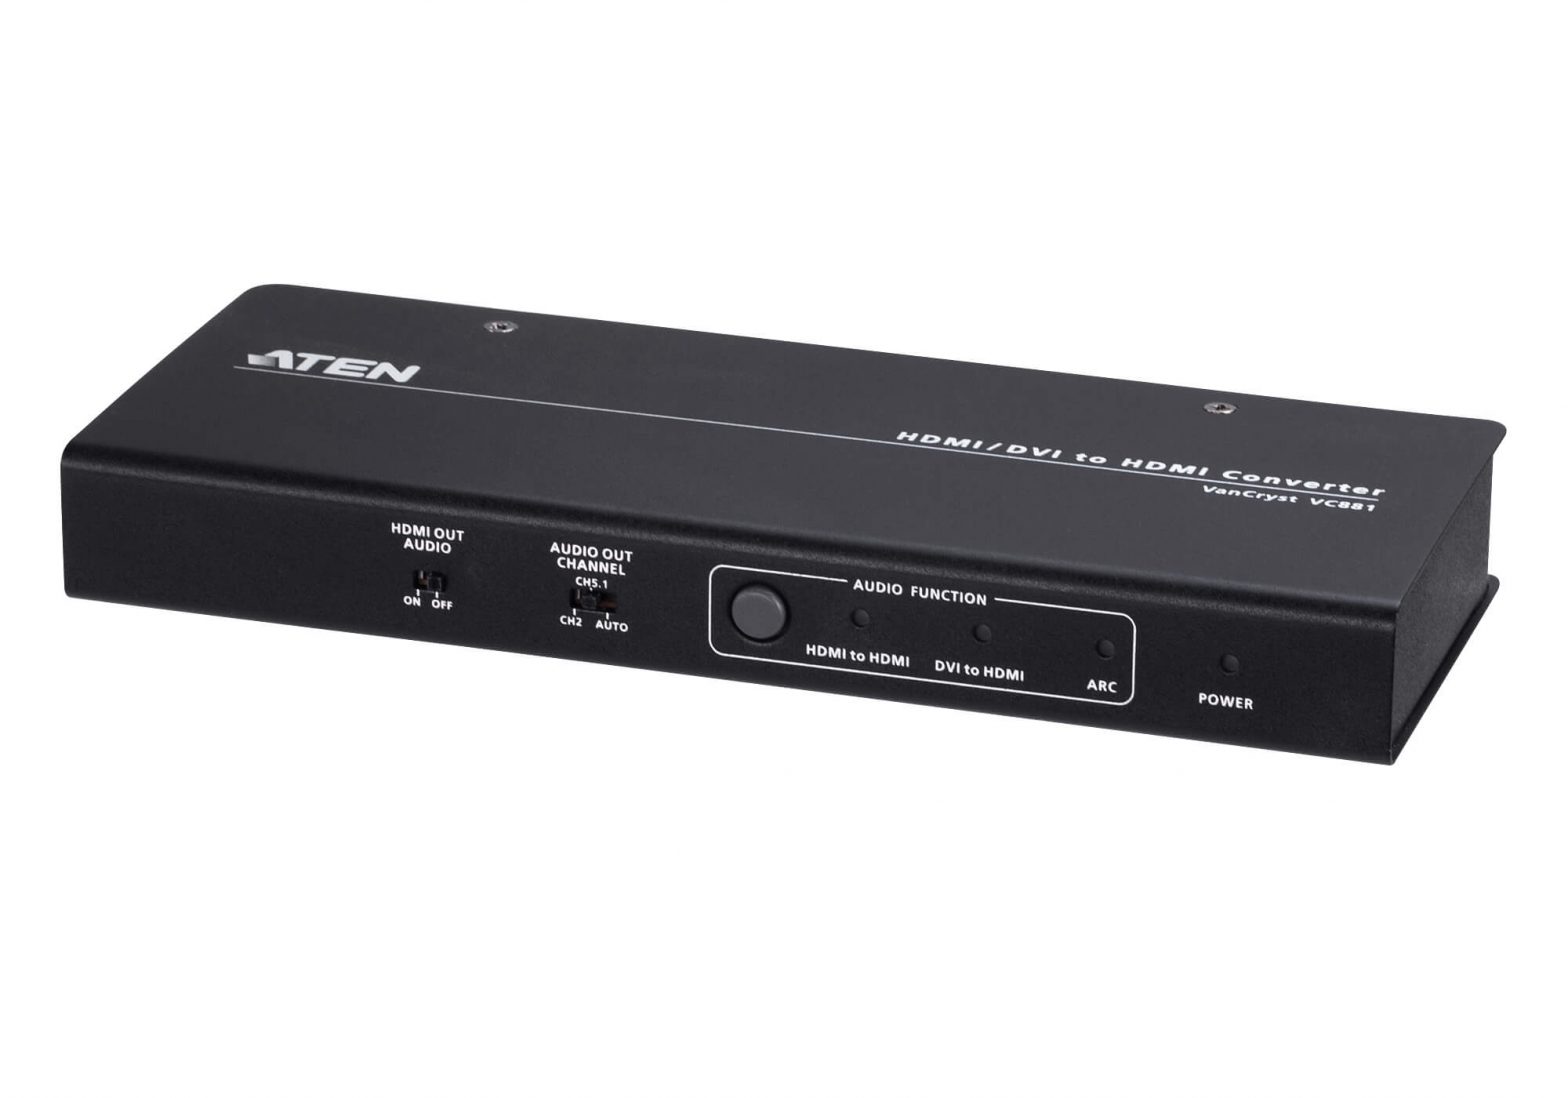
Front View
- HDMI Audio Out Switch
- Audio Out Channel Switch
- Audio Function Button
- HDMI to HDMI LED
- DVI to HDMI LED
- ARC LED
- Power LED
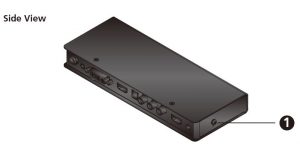
Side View
- Grounding Terminal
Rear View
- Power Jack
- Audio In
- DVI In
- HDMI Out
- Audio Out (S/PDIF)
- Audio Out (Coaxial)
- Audio Out (Stereo)
- HDMI In
- Firmware Upgrade Port
Package Contents
- 1 VC881 4K HDMI / DVI-D to HDMI Converter with Audio Embedder and De embedder
- 1 Power Adapter
- 1 User Instructions
B Hardware Installation

Follow the steps below to safely install the VC881 unit.
- Ground the VC881 by connecting one end of a grounding wire to the grounding terminal, and the other end of the wire to a suitable grounded object.Note: Do not omit this step. Proper grounding helps prevent damage to the unit from power surges or static electricity.
- Connect an HDMI and/or DVI source device to the VC881.• For an HDMI source device, use an HDMI cable to connect the source device’s HDMIOut port to the VC881’s HDMI In port.• For a DVI source device, use a DVI cable to connect the source device’s DVI Out port to the VC881’s DVI In port and use an audio cable to connect the source device’s Audio Out port to the VC881’s Audio In port.
- Connect an HDMI display to the VC881 using an HDMI cable.
- (Optional) To use an independent speaker or a home theater system, use an appropriate audio cable to connect the VC881’s Audio Out port(s) to the speaker/ home theater system’s Audio In port(s).
- Plug in the supplied power adapter to the VC881’s Power Jack.
- Power on all equipment. The VC881’s power LED lights green.
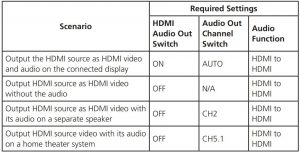
- Based on your setup scenario, adjust the VC881’s audio settings listed in the table:

Support and Documentation Notice
All information, documentation, firmware, software utilities, and specifications contained in this package are subject to change without prior notification by the manufacturer.
To reduce the environmental impact of our products, ATEN documentation and software can be found online at http://www.aten.com/download/
Technical Supportwww.aten.com/support
Scan for more information

EMC InformationFEDERAL COMMUNICATIONS COMMISSION INTERFERENCE STATEMENT:
This equipment has been tested and found to comply with the limits for a Class A digital device, pursuant to Part 15 of the FCC Rules. These limits are designed to provide reasonable protection against harmful interference when the equipment is operated in a commercial environment. This equipment generates, uses, and can radiate radio frequency energy and, if not installed and used in accordance with the instruction manual, may cause harmful interference to radio communications. Operation of this equipment in a residential area is likely to cause harmful interference in which case the user will be required to correct the interference at his own expense.
FCC Caution: Any changes or modifi cations not expressly approved by the party responsible for compliance could void the user’s authority to operate this equipment.
Warning: Operation of this equipment in a residential environment could cause radio interference.
This device complies with Part 15 of the FCC Rules. Operation is subject to the following two conditions: (1) this device may not cause harmful interference, and (2) this device must accept any interference received, including interference that may cause undesired operation.
References
[xyz-ips snippet=”download-snippet”]