![]()
Product Manual
 CC06 – 73878 | CC12 – 73879CC24 – 73880 | CC36 – 73881
1.330.274.8317www.ATLANTIC-OASE.com
Introduction
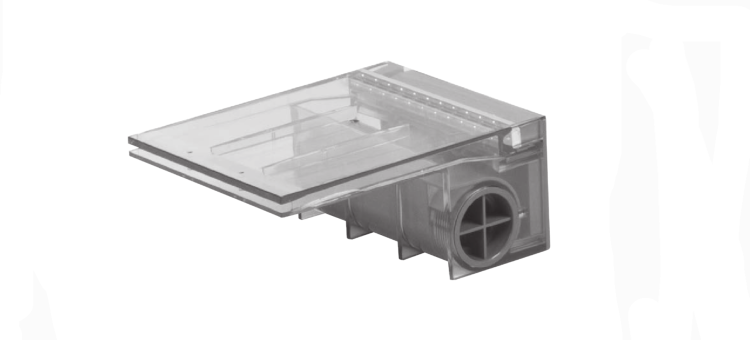
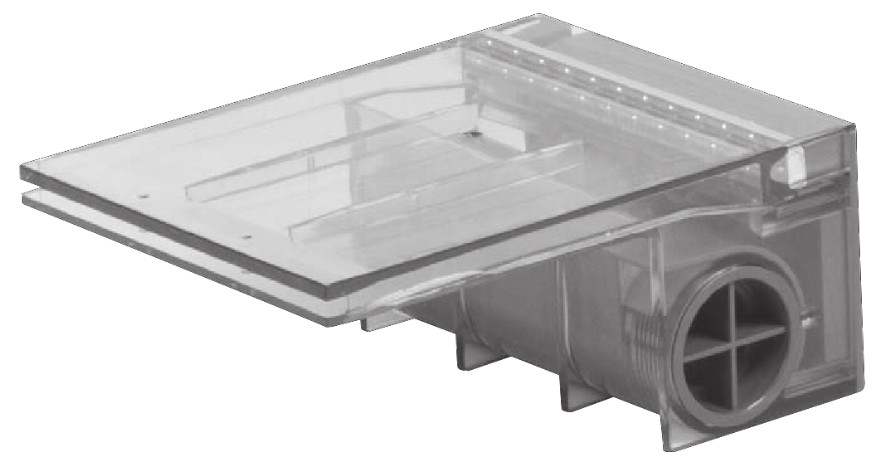
Thank you for choosing Atlantic’s Color Changing Colorfalls. The Colorfalls are designed for use in Pond-free and fountain applications. The Color Changing Colorfalls feature a larger opening which produces a thicker water sheer and less clogging from debris in the water, an app controlled Color Changing LED light bar, and a removable back plate that provides access to the interior of the spillway for easy maintenance and winterizing.
Prior to Operation and InstallationCaution:
- Colorfalls are designed for use in Pond-free and fountain applications. Colorfalls are not intended for use in water gardens or any pond with plant or aquatic life.
- DO NOT operate this product under any conditions other than those for which it is specified. Failure to observe these precautions can lead to electrical shock, product failure, or other problems.
- Follow all aspects of electrical codes when installing Color Changing Colorfalls.
- To reduce the risk of electrical shock, connect transformer to a 120 volt receptacle protected by a ground fault circuit interrupter (GFCI).
- Quick-connect plugs are gasketed for outdoor use and must be fully tightened to prevent water infiltration. Quick-connect plugs are not waterproof and should not be submerged.
- Always use dielectric grease on all connections and verify that the lens ring is tightly secured before submersing the fixture.
- Never shorten or cut the cord on Atlantic Color Changing Lights. Removing the driver or cutting/shortening the cord will damage the LED and void the warranty.
- The InfiColor Smart Module is weatherproof but must be mounted upright above the ground on a wall or post within reach of a properly grounded GFCI outlet. Do not submerse the Control Module or expose it to heavy rainfall. Failure to do so will void the warranty.
- The InfiColor Smart Module can be connected to an existing 12 volt AC lighting system by cutting and splicing the flat low voltage wire that supplies power to the Module.
The Colorfalls must be accessible for service and maintenance. Installing the Colorfalls so that the entire body is removable is highly recommended. Do not glue the cap stones above the Colorfalls or permanently mortar the Colorfalls in place.
The Colorfalls can support 40 lbs. per linear foot (e.g. a 24″ Colorfalls can support 80 lbs.). If the weight on the weir exceeds that amount, you will need to provide a lintel support for the added weight. This support should still make contact with the weir to prevent it from shifting.
See the chart below for the recommended placement of the Colorfalls above the basin or pool. If the placement of the Colorfalls exceeds the recommended height, water loss will increase significantly due to splash and wind drift.
|
Colorfalls |
Maximum Falls Height Above Basin |
Flow Rate |
|
CC06 |
18” | 600 GPH |
| CC12 | 24” |
1200 GPH |
| CC24 | 30” |
2400 GPH |
| CC36 | 36” |
3600 GPH |
Installation of Color Changing Colorfalls
The opening in the wall where the Colorfalls will be placed is important to the function of the Colorfalls. If it is not level and free of debris the Colorfalls will not function properly. The base of Colorfalls body as well as the bottom of the spillway lip must be supported by the opening in which it is placed. The Colorfalls Spillway must protrude from the wall a minimum of ½” and maximum of 1″. The top side of the opening must also be in contact with the Colorfalls to prevent it from shifting. See Figure 1 for the proper sizing of the opening for the Colorfalls.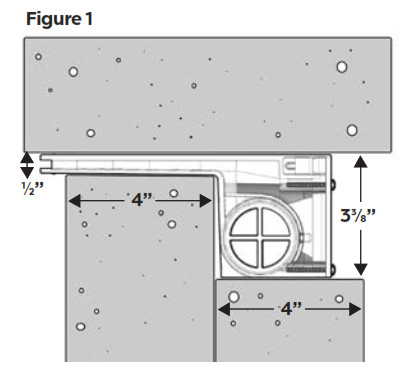
Plumbing A Single Colorfalls
Each Colorfalls spillway is equipped with three convenient 1½” threaded inlets to accommodate 1½” Sch 40 MPT fittings. Choose one or more of the three inlets for plumbing: you can either plumb directly into the back center of the unit, or into both sides. (Plumbing the Colorfalls from one side only will produce an uneven water sheer. Feed lines must be connected to both sides to ensure an even water flow.) Close off the unused inlet(s) with the provided plugs. The plugs have O-ring seals and can be installed without thread sealant.
Installing a ball valve (not included) on the feed line between the pump and the Colorfalls is recommended for added control of water flow.
Plumbing Modular Colorfalls
Connect the Colorfalls together using the 1½” threaded connector (included). Begin by installing one end of the connector into the side inlet of one Colorfalls. Align the second Colorfalls and spin it onto the threaded fitting (screwing the two units together). Before they are completely tightened, install the double sided gasket (included) at the end of the spillway between the units. This will create a watertight seal where the spillways meet. Pull the spillways of the Colorfalls apart while completing the final turn of the Colorfalls body. Once you have ensured proper alignment, press the spillways of the two units together (sandwiching the gasket) to ensure it is in contact with both units.When plumbing multiple Color Changing Colorfalls together, use the back center inlet on each individual Colorfalls, plugging the side inlets, regardless if you are using one pump or multiple pumps. This will balance the flow of water going to the falls.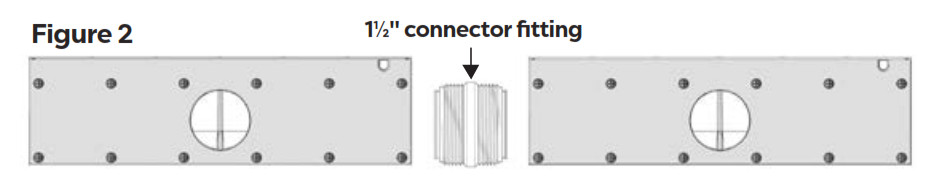 Note: If plumbing two different sized Colorfalls together, a ball valve must be added on each vertical feed line to balance the water flow into each unit.The individual feed lines to eachColorfalls should be 1½” PVC. If using one pump to feed multiple Colorfalls, the main feed line should be 2″ or larger. The main feed line should be run horizontally along the back of the wall with vertical 1½” feed lines branching off to each Colorfalls (Figure 3).
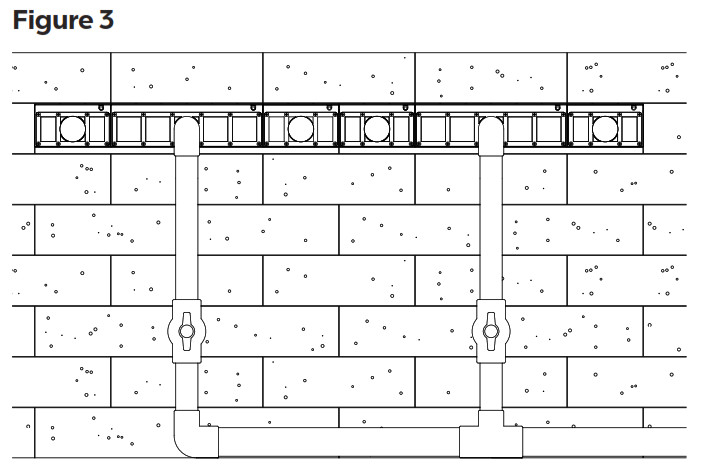
Connecting the Light Bar
All Color Changing Colorfalls and wiring components are connected via a quick-connect plug. Color Changing Colorfalls will not operate if plugs are aligned incorrectly. The connectors are keyed to ensure the connections line up properly. Color Changing quick-connect plugs carry both AC and DC current to the in-line driver. Moisture entering the connections will allow the AC and DC current to cross which can damage the lighting system.Quick-connect plugs are gasketed for outdoor use and must be fully tightened to prevent water infiltration. Quick-connect plugs are not waterproof and should not be submerged. Dielectric grease is included and should be used in all connections to eliminate water infiltration.
The transformer must be plugged into a properly grounded GFCI outlet. Please follow the connection diagram below for proper installation. Multiple Colorfalls can be connected by using Atlantic Color Changing Lighting components. For installations up to 40 watts, purchase additional Splitters (CCBSX4) and a larger Transformer (TRANS60). (ADD STUFF ABOUT CONNECTING TO LIGHTING)To connect multiple Colorfalls up to 120 watts, purchase an InfiColor 3 Light Wiring Kit (CCSM30X3), Splitters (CCBSX4) and 150 Watt Transformer (TRANS150).
INFICOLOR SMART MODULE
InstallationThe InfiColor Smart Module is weatherproof, but must be mounted above the ground on a wall or post within reach of a properly grounded GFCI outlet. Do not submerse the Control Module or expose it to heavy rainfall.
- Install the Module in a well-ventilated area to ensure that the module operates within its specified working temperature.
- Verify that the Smart Module input voltage is 12 volt AC. We recommend that you use the transformer provided with this unit.
- Use dielectric grease on all connections and ensure that all cable connections are secure.
- Do not connect the power before the cord connections are finished.
- Do not cut or alter any round cords. Cutting or damaging any round cord will void the warranty.
CONNECTING TO SOL COLOR-CHANGING MODULES
All Atlantic Color Changing Lighting and Colorfalls is fully forward and backward compatible. Adapters are included to adapt newer 5-wire lighting components and InfiColor Smart Module to older 6-wire fixtures and control modules. The adapters included with the InfiColor Smart Module are for use with older lighting. The adapters included with new lighting components are for use with the older Control Module.
CAUTION: COMBINING ADAPTERS WILL DAMAGE SYSTEM. DO NOT USE MORE THAN ONE ADAPTER PER ZONE OR SEGMENT.Apply dielectric grease, included with the InfiColor Smart Module, to the pins of the plugs on the Module and light cords. Line up the keys; the plugs will only fit one way. Connect the plugs to the adapter and tighten the threaded ring. Complete the tightening process by wiggling the connection and retightening the threaded ring 2-3 times until firmly seated.
INFICOLOR MOBILE APP
To connect your mobile device to the Smart Module, be sure the Module is plugged in and open the InfiColor App. The app should populate your Smart Module on the opening screen. Simply select the Module name. Please note the Module can be connected to one mobile device at a time. The Single Zone Module will only modify the settings of Zone 1 on the app.
To Configure Zone Name and TimerThe Smart Module that is supplied with the Colorfalls has a single zone with a timer function to turn the zone on and off at set times. Click dropdown menu. Edit the name of “Zone 1” on the “Zone Settings” page. This zone name will be visible throughout the app. Click the “Save” button to save changes. A box will come up confirming the settings have been saved. Click the “Back” button once configuration is complete.
Color TabUse the Color tab to choose colors using either the color picker or the red, green and blue sliders at the bottom. Choose the brightness of the color by adjusting the slider.
Favorites TabThe Favorites tab stores preset color-changing sequences. Select the zone, choose a sequence of colors, then choose the transition between them, the speed of the sequence and the brightness. The Edit button deletes stored Favorites you have created.
Custom tabThe Custom tab creates and stores custom color-changing sequences. Move the red, green and blue sliders to choose a color, or select it from the color picker. Once you have decided on the color, click the “Plus” button to add it to the sequence. Repeat as desired. Add up to 10 colors to a sequence. Once the sequence has been created it can be named and saved. The saved sequence will be available on the Favorites page.
Maintenance
Atlantic’s Color Changing Colorfalls has a removable back plate for easy cleaning of the interior of the spillway. To clean the interior of the spillway, simply remove the screws on the back plate and remove the baffle (Figure 4). Remove any large obstructions that may be present and wipe down the interior with a non-abrasive cloth. Once finished, install the baffle and re-attach the back plate, making sure that the gasket is in place to ensure a water-tight seal.
Caution: Be extremely cautious when tightening the screws. It is strongly recommended that you tighten the screws with a hand held screwdriver. Overtightening the screws could crack the back plate or strip the screw holes. The screws need only be snug for the gasket to make a seal.
Atlantic Color Changing Colorfalls are self-draining for easy winterization. When the pump is turned off the water inside the Colorfalls will drain back through the supply line. Ensure that the supply line is fully drained. Remove the pump and store it indoors for the winter. If the Colorfalls is installed with an Atlantic Formal Spillway Basin, please refer to the Basin instructions for proper basin winterization.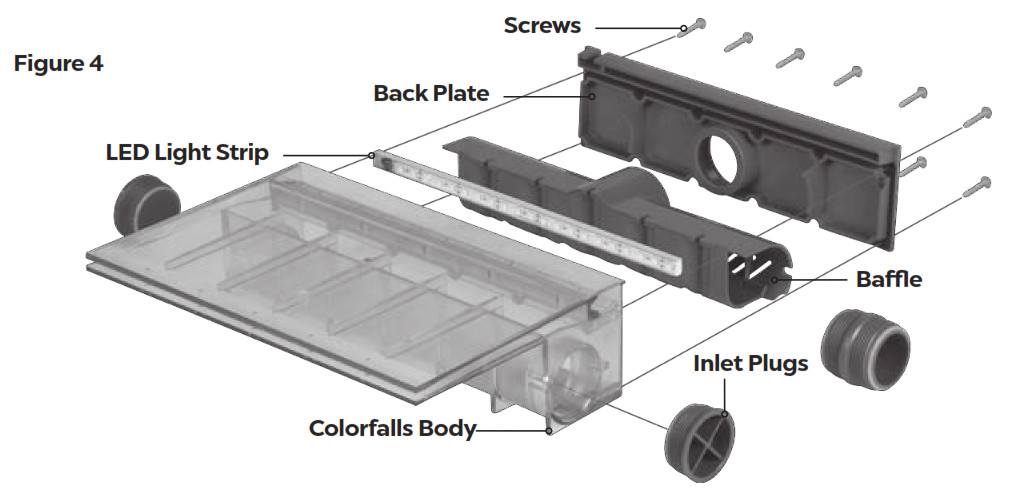
Warranty
Colorfalls and all its components carry a one-year limited warranty. This limited warranty is extended solely to the original purchaser commencing from the date of the original purchase receipt and is void if any of the following apply:
- Any round cord has been cut or altered.
- The Colorfalls has been misused or abused.
- The Colorfalls has been disassembled or modified other than as described in this manual.
- The Smart Module and quick-connect plugs have not been adequately protected from moisture with dielectric grease.
This warranty excludes labor/costs of labor for removal or installation of any product.
Troubleshooting Guide
Always turn off power before inspecting the Colorfalls. Failure to observe this precaution can result in a serious accident.Before ordering repairs, carefully read through this instruction booklet. If the problem persists, contact your dealer.
| Problem | Possible Cause | Possible Solution |
| Light bar will not turn on | No input power to the transfomer | Verify power to the outlet is on / Check GFCI reset |
| No outlet power from the transformer | Use a volt meter to verify transformer is producing 12 volt AC | |
| Light bar color differs from app | Improper connection between LED light bar and Smart Module | Inspect connections / realign plugs |
| Smart Module failure | Contact Dealer for repair / replacement | |
| Individual Colorfalls within alarger system not working /displaying different colors | Improper connection to Splitter / Smart Module | Verify connections are aligned |
| Defective 4-outlet Splitter | Switch positions with a working light on the same Splitter to identify if the splitter is causing the issue. | |
| Loose connection. Moisture or corrosion in connections | Inspect quick-connected plugs for moisture. corrosion or missing gasket.Clean/dry/apply dielectric grease and reassemble. | |
| Failed LED light bar | If possible, switch out the light bar with one from a working light of the same model to determine if the driver has failed.If driver has failed, replace light light bar.If test diode works, replacement light bar are available. | |
| Failed Light Bar | If possible, switch out the Light Bar with one from a working Colorfalls of the same model to determine if the driver has failed.Replacement Light Bars are available. | |
| Smart Module is not responding to app | App is not synced with Smart Module | Reconnect Smart Module through Bluetooth |
| Lights intermittently responding to app | Loose connection. Moisture or corrosion in connections | Inspect quick-connected plugs for moisture or corrosion.Clean/dry/apply dielectric grease and reassemble. |
| Water Leaking from Colorfalls body | Bad plumbing connection | Inspect all plumbing & plugs |
| Gasket out of place | Ensure gasket in back plate is in proper position | |
| Screws in back plate are too loose | Ensure screws are fully tightened | |
| Diminished water flow | Blocked pump intake | Clear debris from pump intake. |
| Obstruction in plumbing line | Inspect plumbing line and clear any debris | |
| Debris in Colorfalls spillway | Refer to Maintenance section on page 5 | |
| Waterfall sheer i s splitting | Debris in Colorfallsspillway | Refer to Maintenance section on page 5 |
1.330.274.8317www.ATLANTICWATERGARDENS.com
References
[xyz-ips snippet=”download-snippet”]