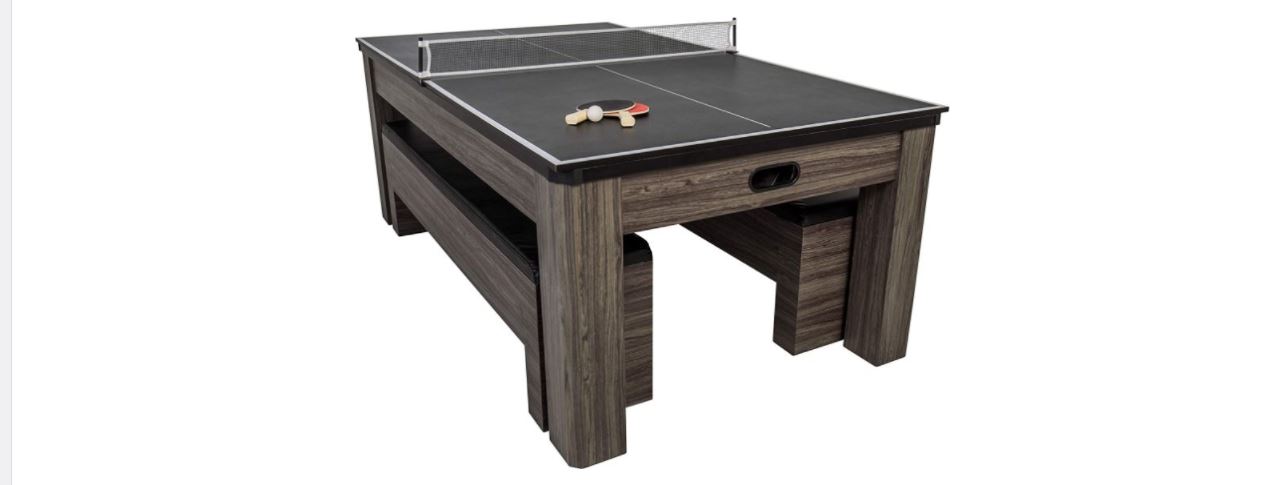
Atomic G05302F 3in1 Dining Pool Table Installation Guide
![]()
We strive to ensure that our products are of the highest qualityand free of manufacturing defects or missing parts. However, ifyou have any problems with your new product,
DO NOT RETURN IT TO THE STORE
please contact us toll free @:
1-888-996-2729
FAX: 1-866-873-3531
Or write to:Escalade SportsCustomer Service DepartmentP.O. Box 889Evansville IN 47706
Please visit our web site at:
Please have your model number when inquiring about parts.
When contacting Escalade Sports please provide your model number, date code (if applicable) and part number if requesting a replacement part. These numbers are located on the product, packaging, and this owners manual.
Your Model Number: G05302W/F
Date Code: 2-45-G05302W/F- -FS
Purchase Date ________________________
PLEASE RETAIN THIS INSTRUCTION MANUAL FOR FUTURE REFERENCE
IMPORTANT! READ EACH STEP IN THIS MANUAL BEFORE YOU BEGIN THE ASSSEMBLY.
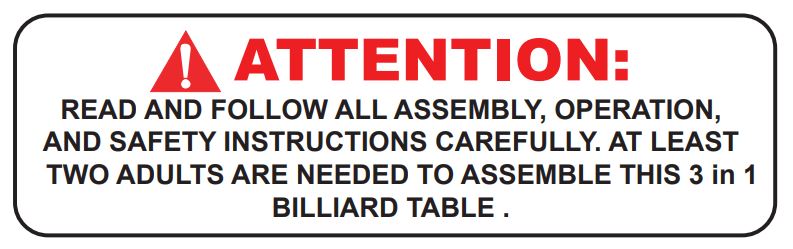
TWO ADULTS ARE REQUIRED TO ASSEMBLE
THIS 3 IN 1 BILLIARD, TABLE TENNIS, DINING TABLE
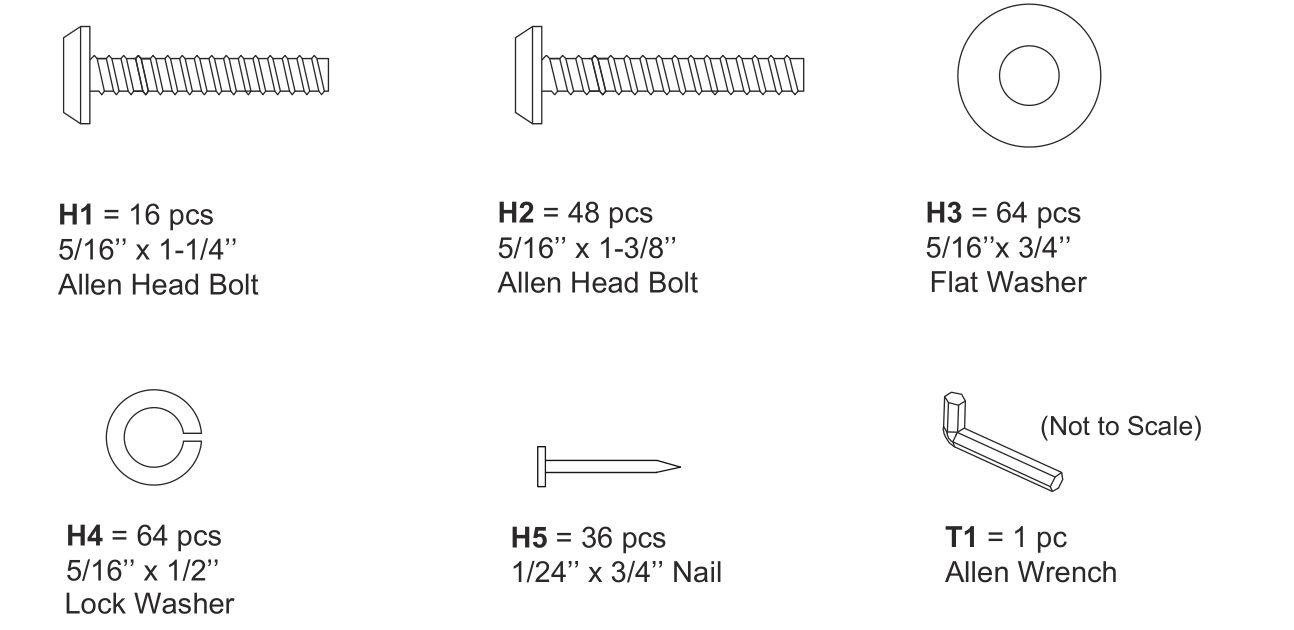
Tools Required :Allen Wrench T1 Included with the Hardware KitFurniture Polish and Soft ClothNeedle Nose PliersSmall Ball-peen HammerCarpenters Level
An electric screwdriver is helpful in assembly . However , please set at low torque and use extreme caution with an electric screwdriver because you could overtighten the hardware and strip the screws.
Assembly Tips
Make sure you understand the following tips before you begin to assemble your 3in1 billiard table.
- Start all bolts by hand before tightening.
- Some drawings or images in this manual may not look exactly like your product. Please read and understand the text before starting each assembly step.
HARDWARE IDENTIFIER
(To Scale)
HARDWARE KIT IS PACKED INSIDE OF CARTON A
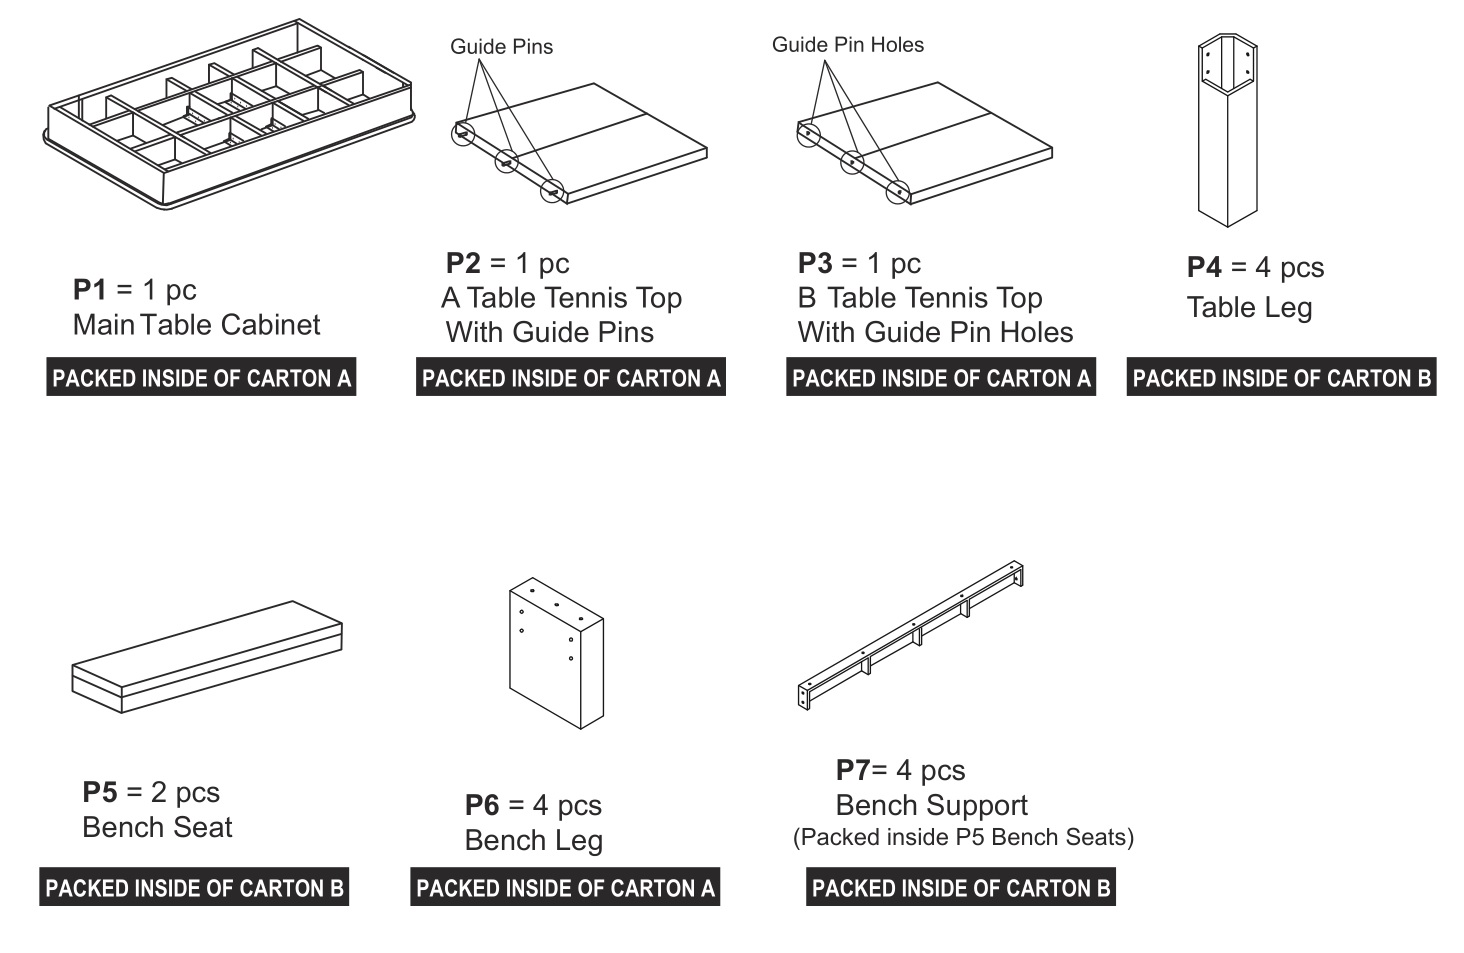
PARTS IDENTIFIER
(Not To Scale)

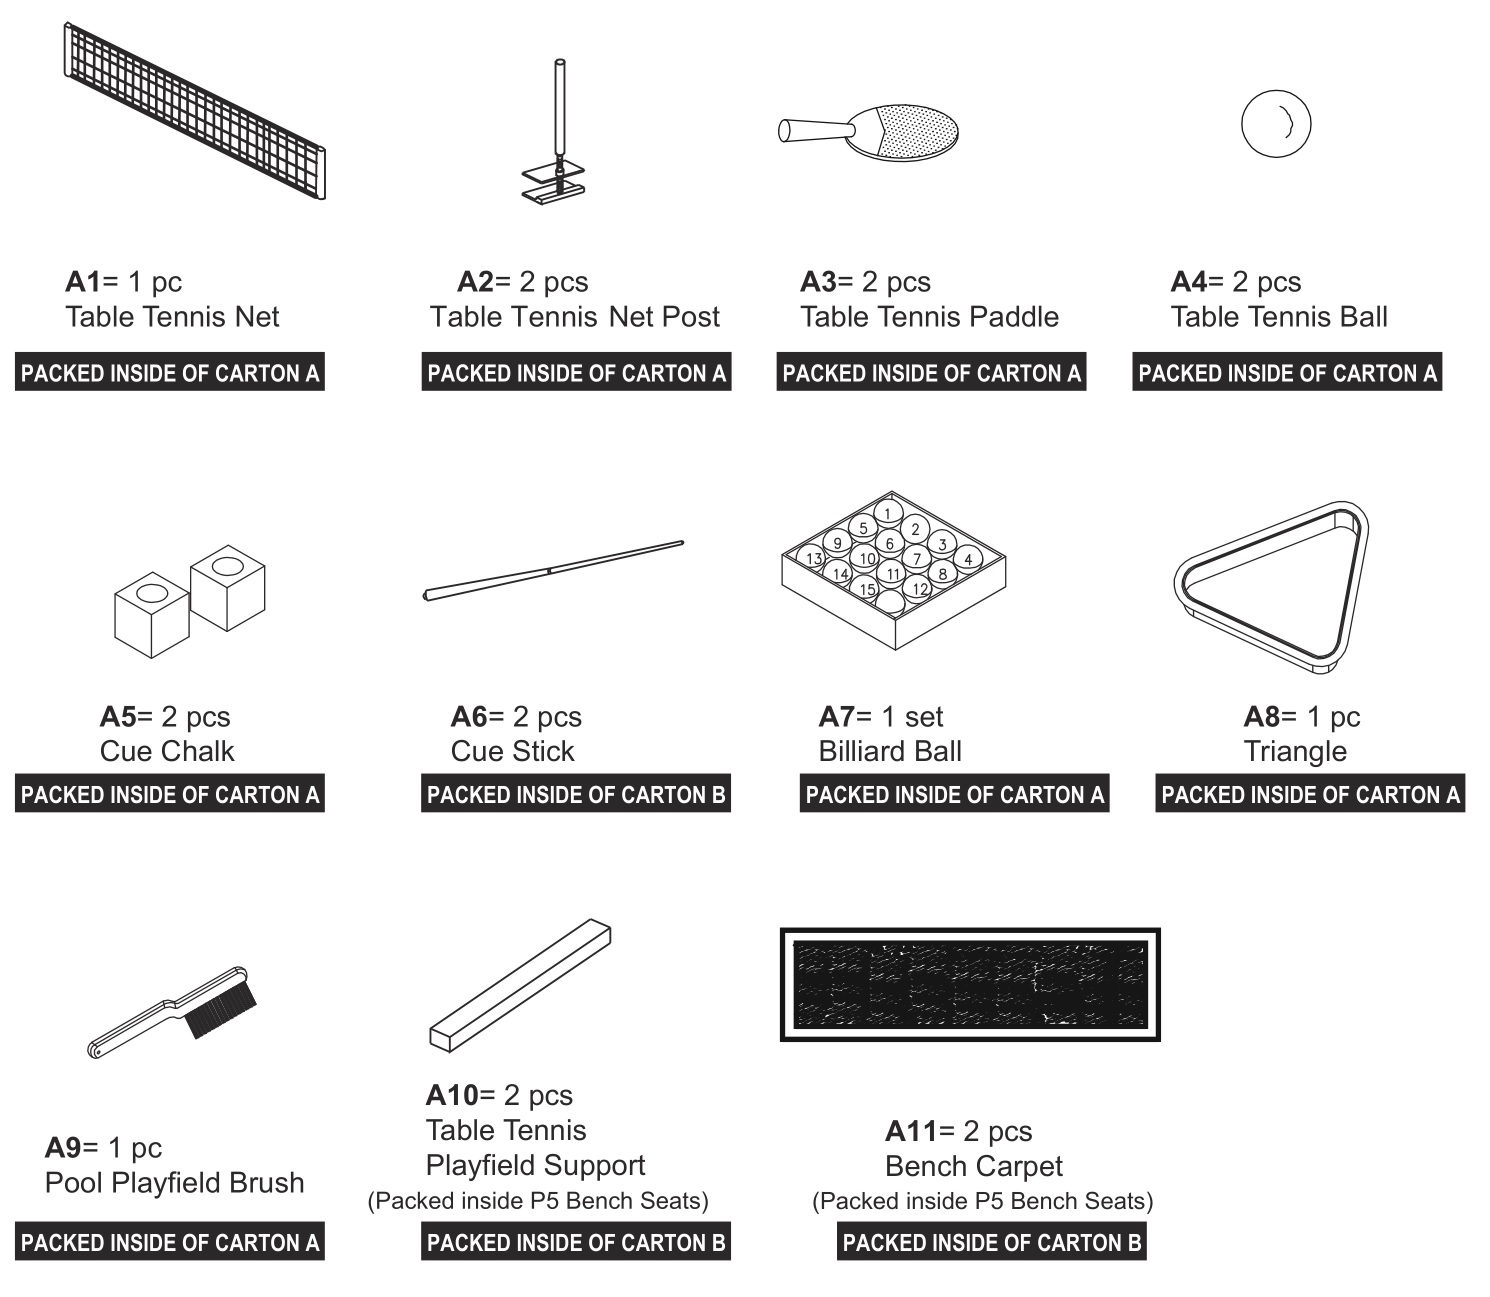
ACCESSORIES IDENTIFIER
(Not To Scale)
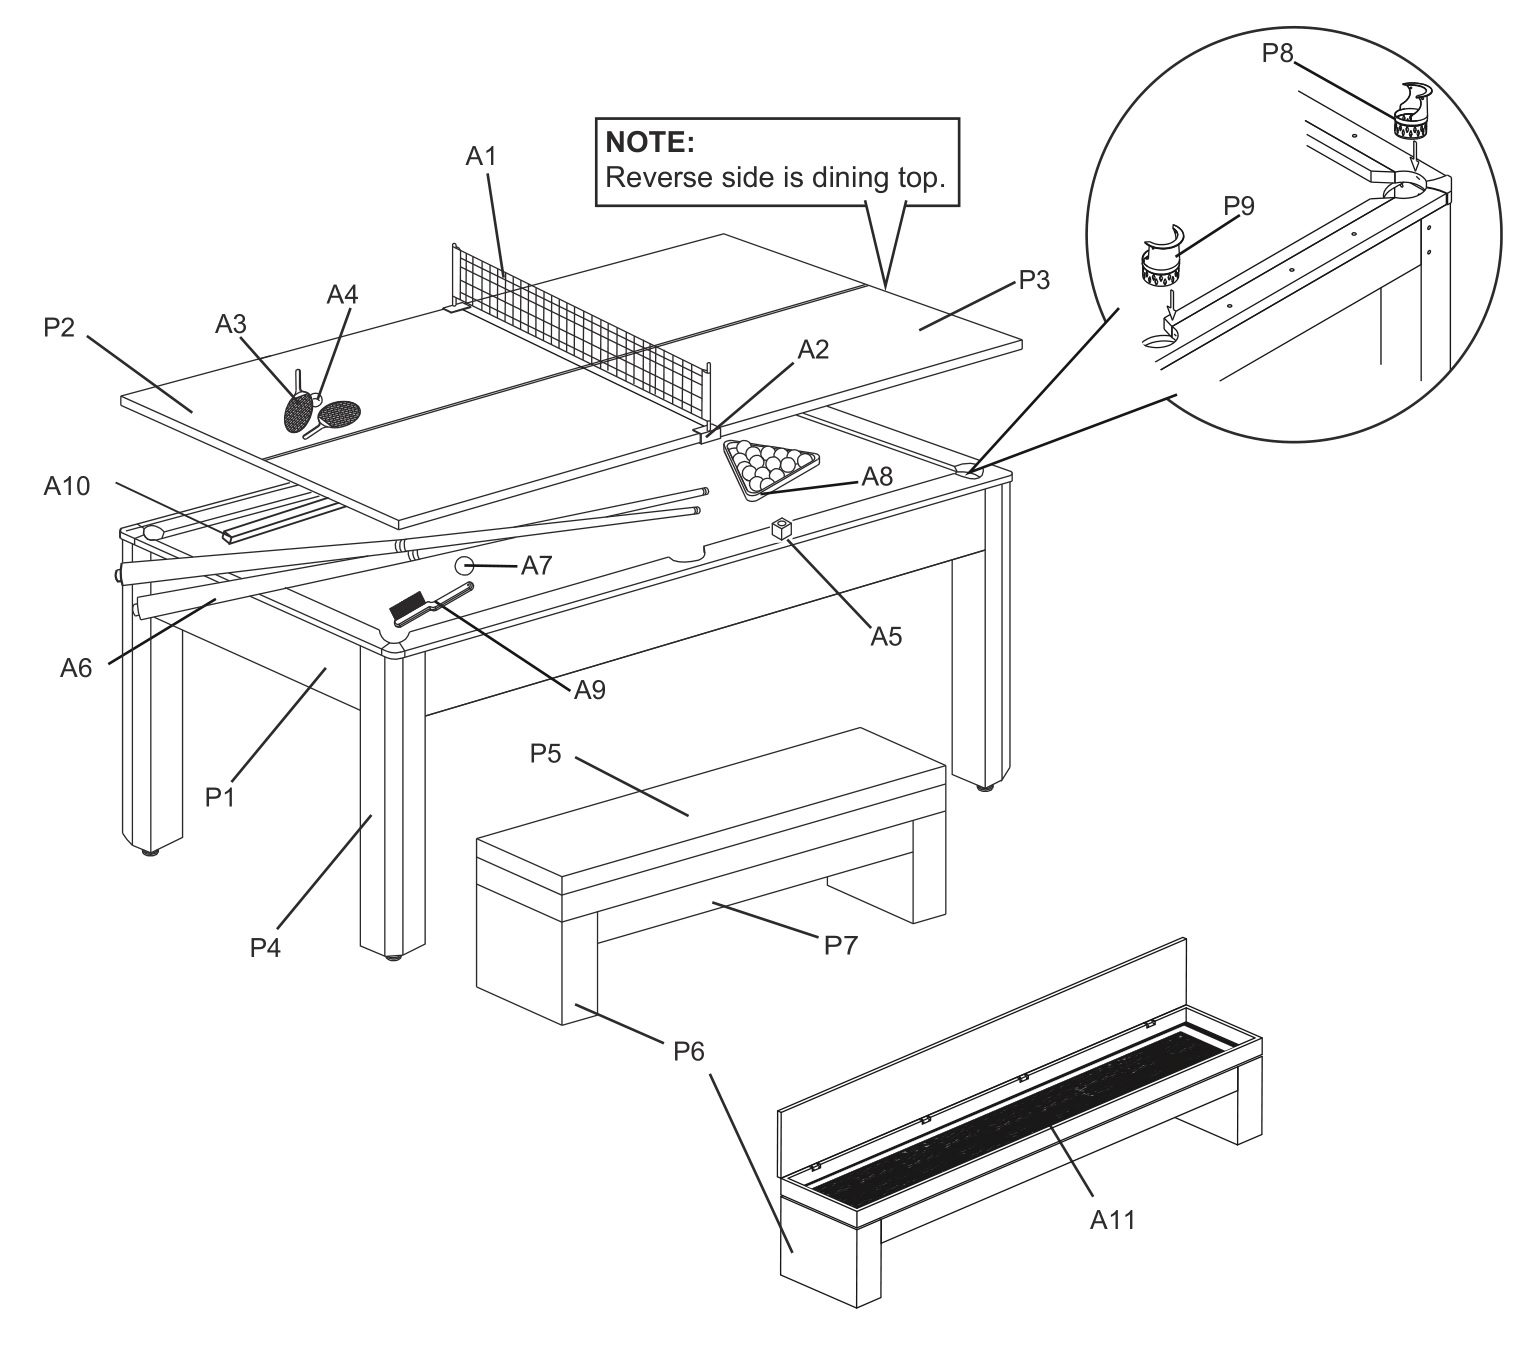
3 IN 1 BILLIARD,TABLE TENNIS,DINING TABLE
Parts List
(Not To Scale)
All items are packaged in larger Carton A, except, P4, P5, P7, A6, A10 and A11 are packaged in smaller Carton B.
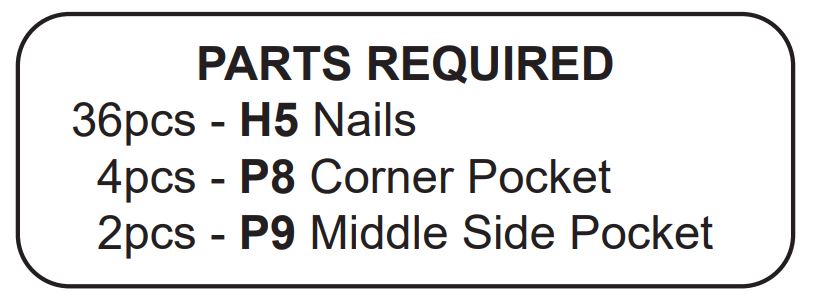
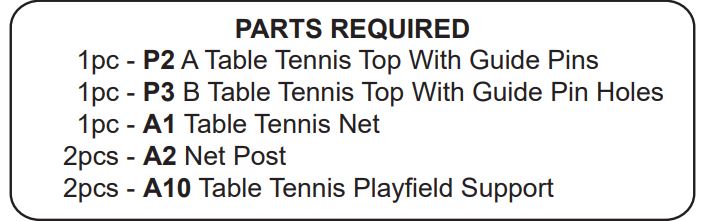
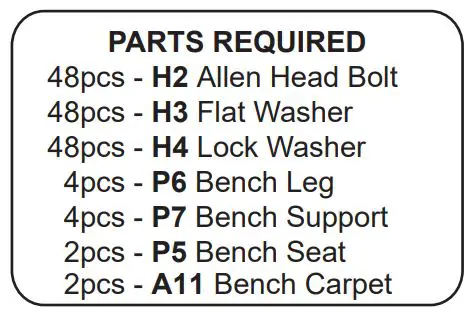
PARTS REQUIRED

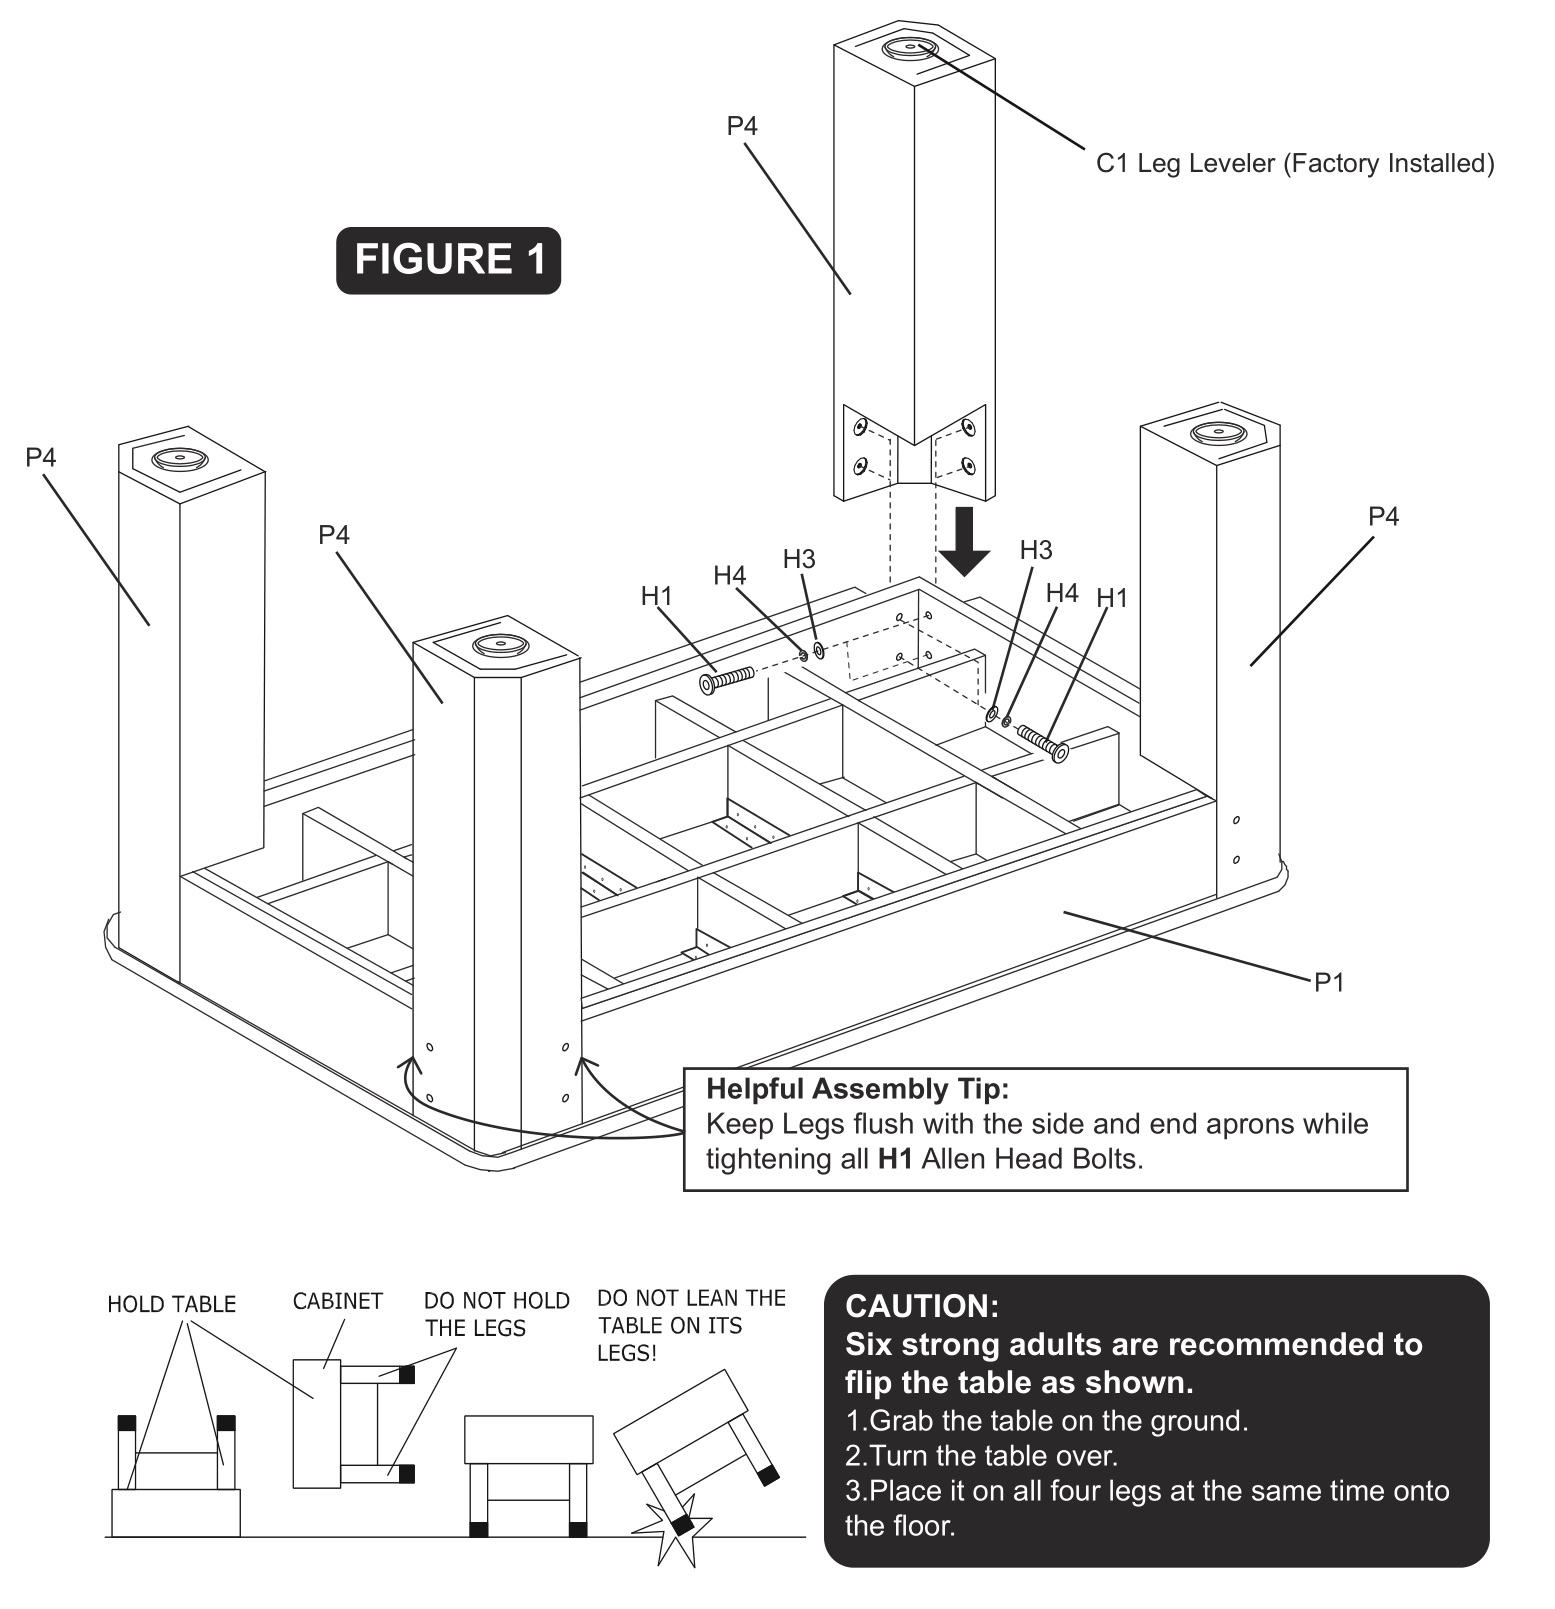
STEP 1:
Attach P4 Legs onto the Side Aprons and the End Aprons using H1 Bolts, H4 Lock Washers and H3 Flat Washers as shown in FIGURE-1 Use T1 Allen Wrench to tighten all H1 bolts.
STEP 2:
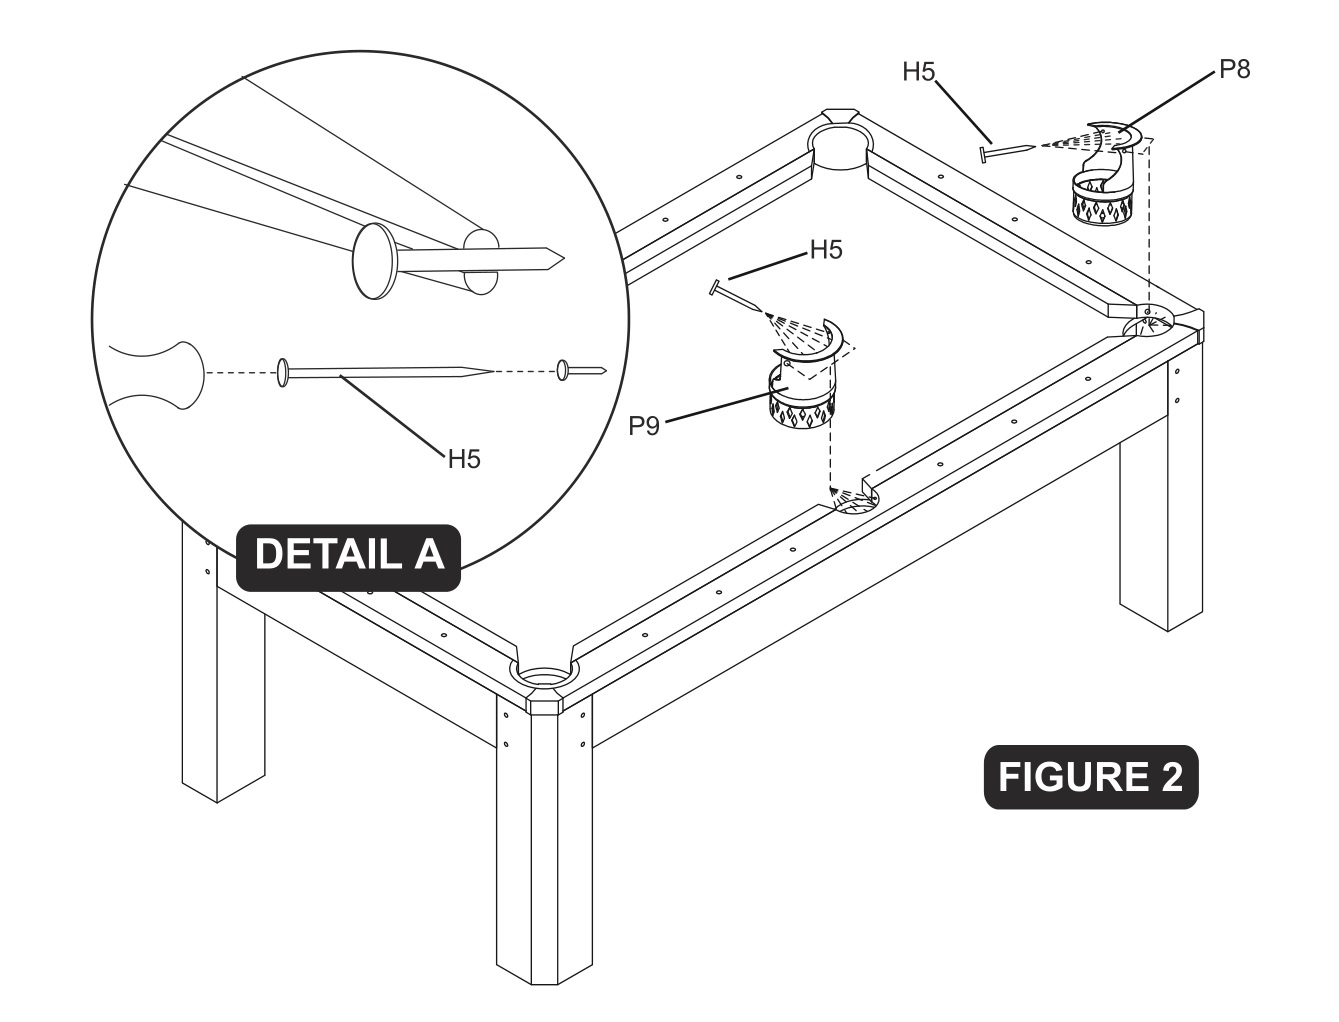
Insert the P8 Corner Pockets into each of the corner holes. Insert the P9 Middle Side Pockets into each of the middle holes. Attach drop pockets to rails by using six H5 Nails per pocket. Hold nails with a pair of Needle Nose Pliers and tap them into the plastic pocket with a small ball peen hammer as shown in DETAIL A & FIGURE 2. Place nails about 1/2 inch below the top of pocket so the balls will not hit the heads of the nails and get chipped. Once nails have been started into plastic pocket, hammer them in until the heads are flush with the plastic pocket. Use the “BALL” part of the ball-peen hammer to sightly countersink the nail heads.
STEP 3:
Using the guide pins carefully connect the P2 A Table Tennis Top With Guide Pins to P3 B Table Tennis Top With Guide Pin Holes as shown in DETAIL B. Place A10 Table Tennis Playfield Supports between Table Tennis Top and Billiard table. Install A1 Table Tennis Net by adjusting A2 Net Post as shown in DETAIL C & FIGURE 3.
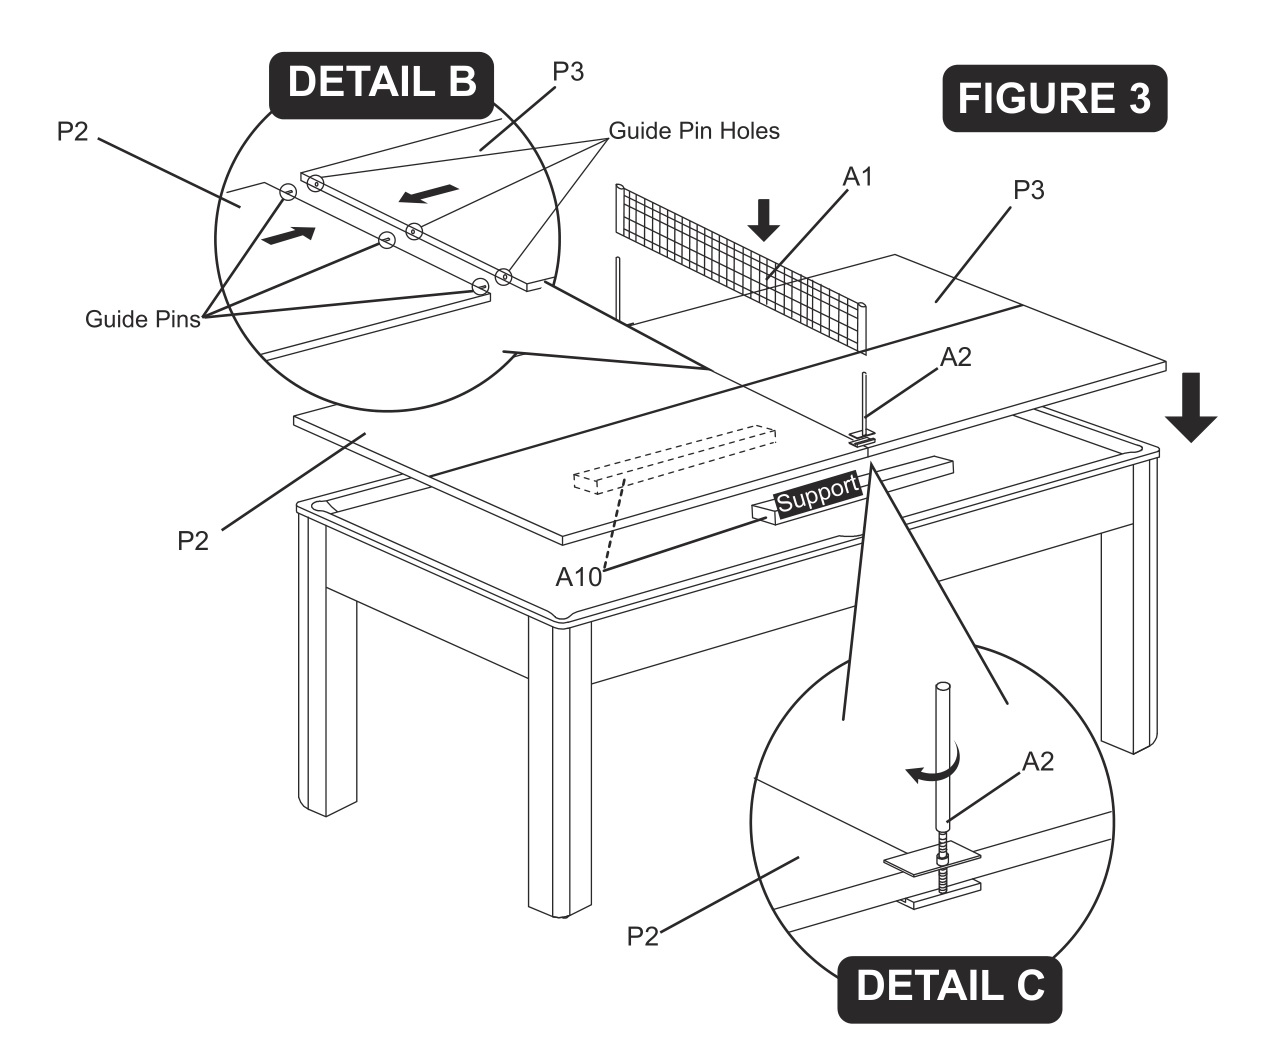
NOTE:Using Dining Top:Remove Table Tennis Net and Net posts. Carefully separate the two playfield halves, flip the halves and push halves together using the guide pins and guide pin holes in each half top.
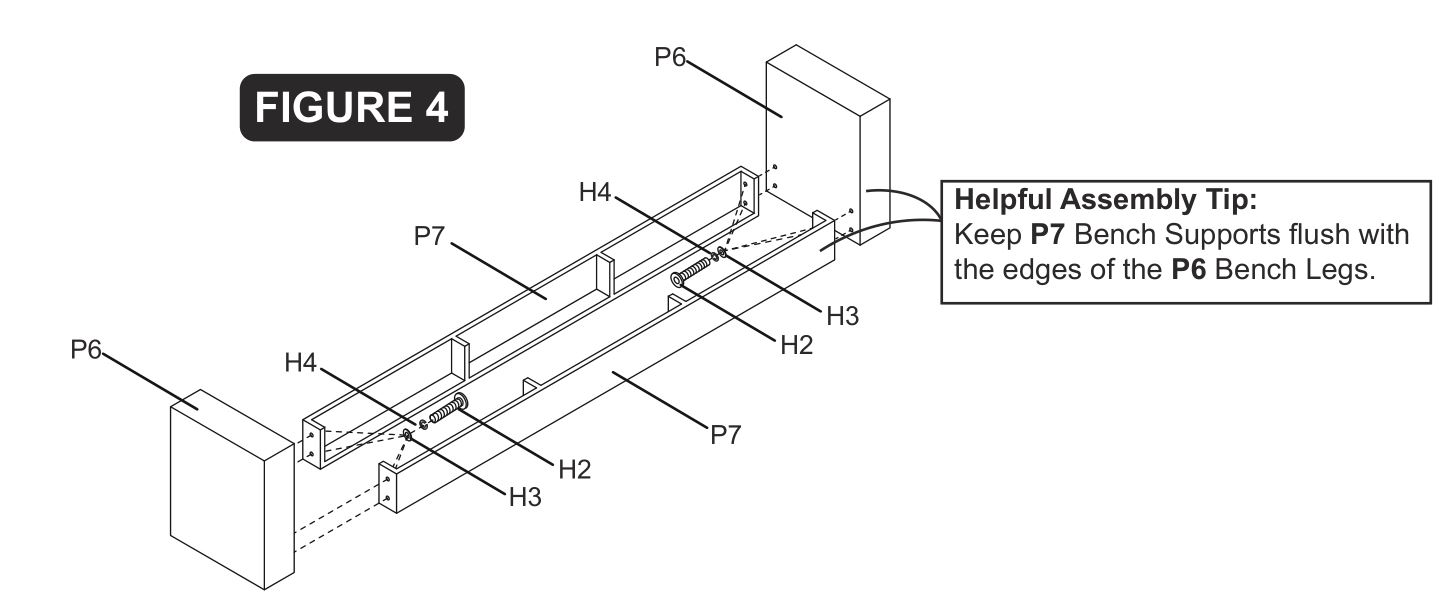
STEP 4:
Attach P6 Bench Legs to P7 Bench Supports using H2 Allen Head Bolts, H3 Flat Washers and H4 Lock Washers as shown in FIGURE 4. Tighten all H2 Allen Head Bolts.
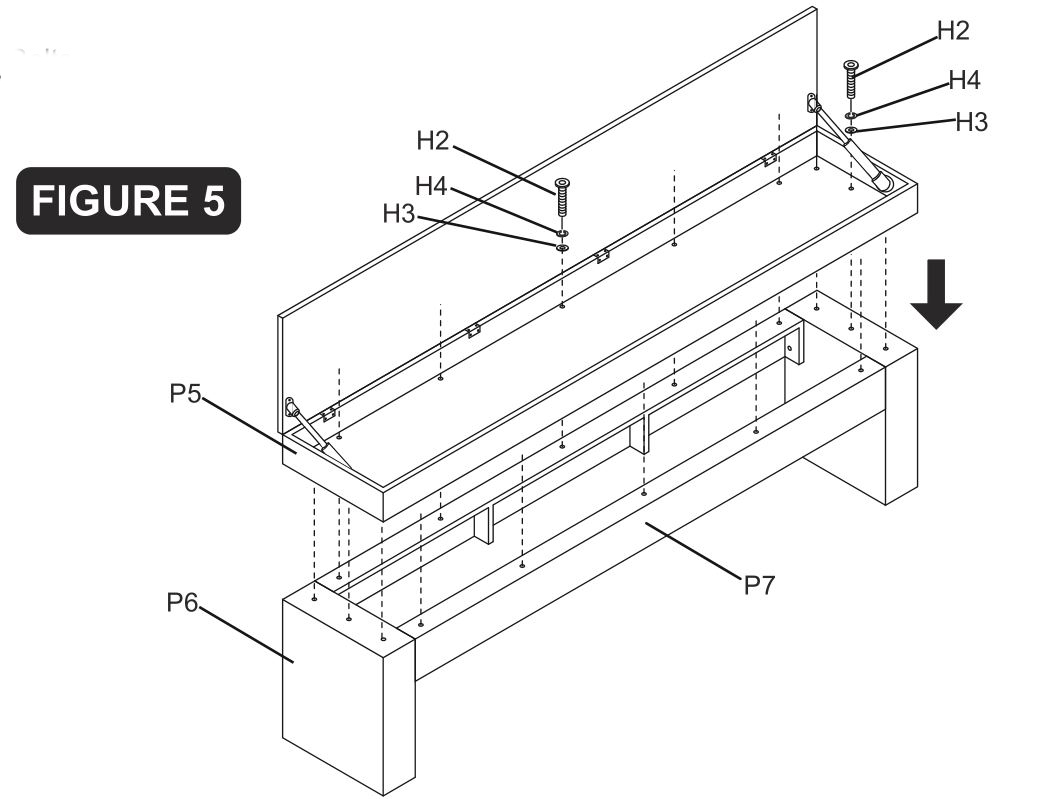
STEP 5:
Firstly, take the A11 Bench Carpets out from the P5 Bench Seats. P5 Bench Seat to the Leg assembly using H2 Allen Head Bolts, H3 Flat Washers and H4 Lock Washers as shown in FIGURE 5.
Tighten all H2 Allen Head Bolts.
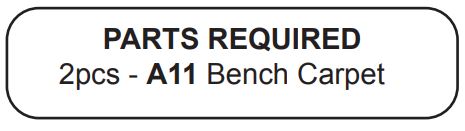
STEP 6:Install the A11 Bench Carpet into each bench as shown in FIGURE 6.
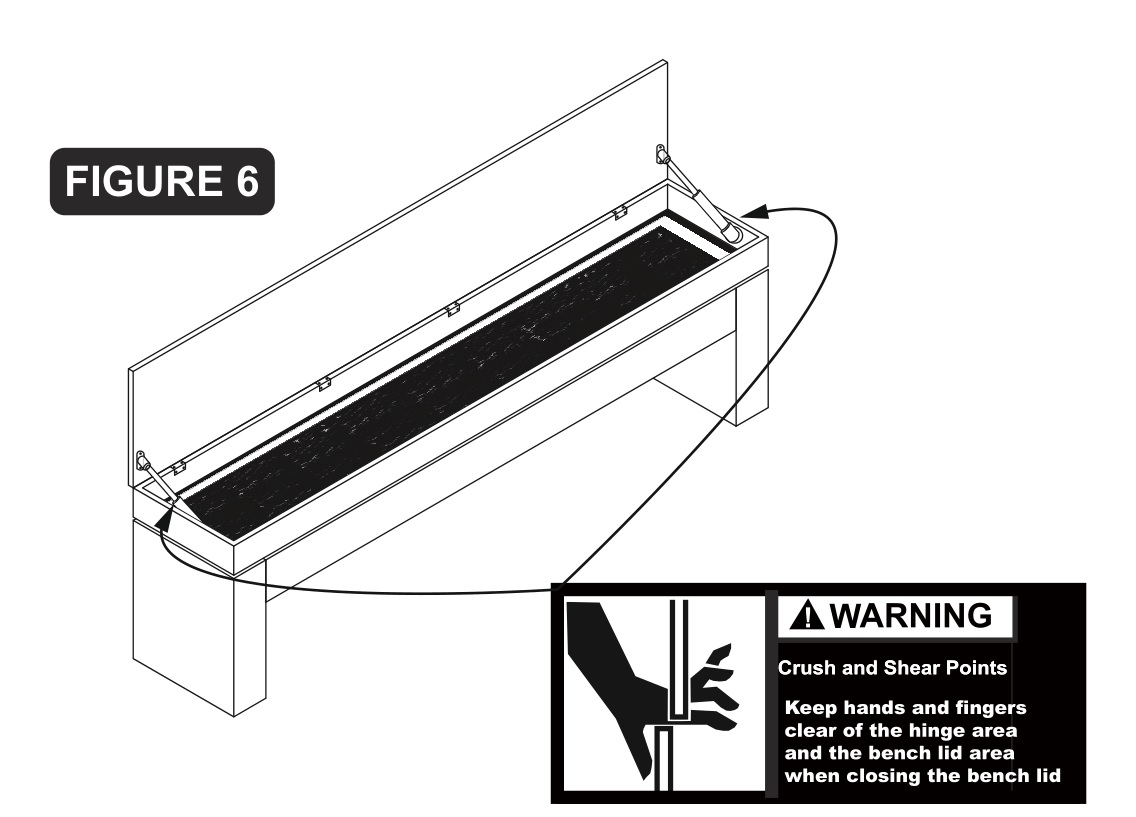
WARNING:To prevent injury, exercise caution when opening and closing the bench lid.DO NOT let bench lid drop shut.DO NOT let children operate bench lid.Be cautious when moving bench on floor, Lift bench ends to move.DO NOT STAND ON BENCH SEAT.
Congratulations! You have now assembled your 3 in1 Billiard table. Please note the Care and Use instructions below to insure many years of trouble free use of your 3 in1 Billiard table.
CARE AND USE OF YOUR TABLE
- Use spray furniture polish to clean all exterior surfaces of your pool table.
- Use the table brush provided to clean the cloth on the table.
- Use only a slightly damp soft cloth to clean the table tennis top (do not use Furniture Polish)
- This product is intended for INDOOR use only .
- DO NOT sit, climb or lean on the table.
- DO NOT drag the table when moving it. This will damage the legs.
- DO NOT set drinks on the table.
- The purchase of a pool table cover will both protect and help keep clean the entire top of the pool table.
- Lastly, using a carpenters level and the leg levelers, level table for best play.
PRODUCT PARTS LISTS

90 DAY LIMITED WARRANTY
This customer warranty extends to the original owner, on the purchase of any ESCALADE SPORTS Product (hereinafter referred as the “Product”).
WARRANTY DURATION: This Product is warranted to the original owner, for a period of 90 days from the original purchase.
WARRANTY COVERAGE: ESCALADE SPORTS warrants to the original owner, this product to be free from defects in material and workmanship when used for the intended purpose under normal use and conditions. THIS WARRANTY IS VOID IF THE PRODUCT HAS BEEN DAMAGED BY ACCIDENT, UNREASONABLE USE, NEGLIGENCE, IMPROPER SERVICE, FAILURE TO FOLLOW INSTRUCTIONS PROVIDED WITH THE PRODUCT OR OTHER CAUSES NOT ARISING OUT OF DEFECTS IN MATERIAL AND WORKMANSHIP
WARRANTY REPLACEMENT: During the above 90 day warranty period, ESCALADE SPORTS shall provide replacement components or replace with a comparable product at our choosing. If product is defective under normal use and proper care, please contact our Customer Service Dept.
1-866-556-2757 / Customer Service Dept.Or Write us at:Escalade® Sports, Inc. – P.O. Box 889, Evansville, IN 47706Attn: Customer Service Dept.Or E-mail us at:[email protected]
Other than shipping requirements no charge will be made for such replacement of in-warranty Products.
WARRANTY DISCLAIMERS: ANY IMPLIED WARRANTIES ARISING OUT OF THIS SALE, INCLUDING BUT NOT LIMITED TO THE IMPLIED WARRANTIES OF MERCHANTABILITY AND FITNESS FOR A PARTICULAR PURPOSE, ARE LIMITED IN DURATION TO THE ABOVE 90 DAY PERIOD. ESCALADE SPORTS SHALL NOT BE LIABLE FOR LOSS OF USE OF THE PRODUCT OR OTHER CONSEQUENTIAL OR INCIDENTAL COSTS, EXPENSES OR DAMAGES INCURRED BY THE CONSUMER OF ANY OTHER USE.
Some states do not allow the exclusion or limitation of implied warranties or consequential or incidental damages, so the above limitations or exclusions may not apply to you.
LEGAL REMEDIES: This warranty gives you specific legal rights and you may also have other rights which may vary from state to state.
[xyz-ips snippet=”download-snippet”]