
User’s Manual for the LAP-Animal Use Qualification (AUQ) Web-based Application
The AUQ web-based application has been designed to streamline data collection, update, and management of Animal User Qualifications and minimize administrative burden for both Administrators and Animal Users. In the following, we will outline how the application can be used to A) Create User Profile and collect information about new User Qualifications; for Animal Users who are not Supervisors, route User Profile and Qualification to Supervisors for review and sign off, and b) Annual Update and review of Animal User Qualifications.
After the user completes the processes described in either A) or B), the system will automatically send email messages with first notices to all identified “Users” asking them to complete and/or update their User Profile and Qualifications. These notifications will go out once a week at (for new users) and annually in September – for the Annual Review and Update of Profile and Qualifications). Additionally, the system will automatically send second and third reminders to Users who have not completed/updated their qualifications, 15(?), and then 30(?) days after their first notice.
How to Access the System
To access the AUQ Application on the web, please type: https://engineering.purdue.edu/VPR/LAP/ (add this link to your Bookmarks for future use).
How to Login
To log into the system Use your Career Account Login and Password. After Login, you will be taken to the main screen of the application.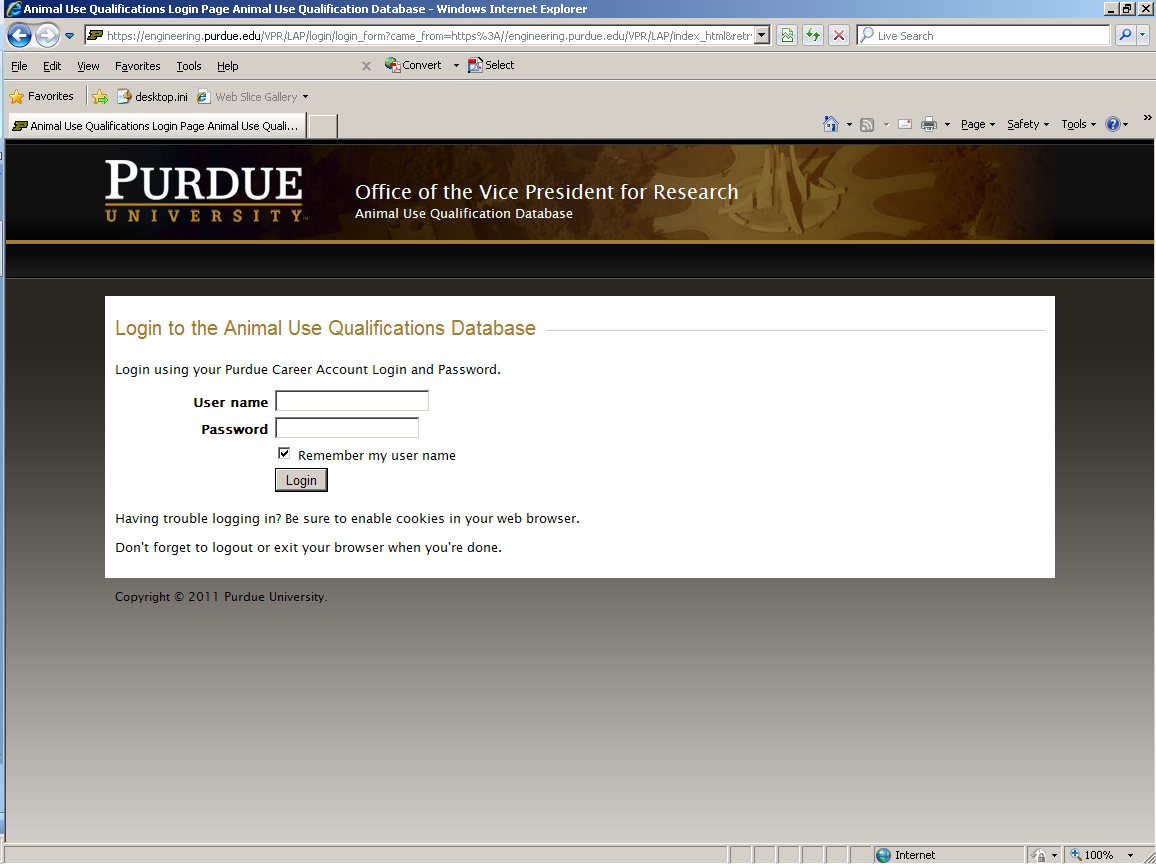
User Processes
If you are logging in as a user of the database, you should see the “My Profile” section, which consists of two tabs: your Profile and your Qualifications.
- Edit your user profile
By default, when you log on as a user of the database, you are directed to the Profile tab. If you have not entered your user profile, or your Profile is incomplete, you have an opportunity to enter or update data here. The profile consists of the areas of Identification, Classification and Supervisor, Education, Resource Questions, and Electronic Databases.
- To enter your Identification:
- Enter your first name and last name in the respective text boxes.
- In the Department or Unit drop down box, select the department that is related to your animal use; if it is not listed, select “OTHER.”
- Select the building in which your department is located in. All campus buildings are reflected here.
- Enter your phone, email, and address in the respective text boxes. These may reflect your Purdue department, your home address, or some other alternate location.
- To enter your Classification and Supervisor:
- Select the radio button that matches your classification that relates to the department you selected in the identification area. Note that a number of these classifications require supervisory signoff while others do not.
- In the Your Supervisor text box, enter the last name of your supervisor OR his or her email address and then click the search button. You should see a list of names, positions, campus locations, and email addresses that match your entry. Select the radio button that matches your supervisor’s name. If no such list appears, you may want to check the spelling of your search term, whether last name or email address. If you are searching by last name and the message “your search returned too many results” appears, you should try to enter more specific name, including first and last name or try searching by email address.

- After you click on the Update Profile and Enter Qualifications button (see image at the bottom of this section) future visits to the profile tab will display your supervisor. If you need to change this supervisor, click on the Change link and you will see the search text box as described in step b) so that you can make the change.

3. To enter your education
-
-
- In Licensures, check the checkboxes that indicate any lab animal or veterinary certifications, diplomats, licensures, or specialties that you have. If you have any that are not listed, click the checkbox next to “Other” and indicate the specialty in the accompanying text box.
- In Courses, click on the “Add a Course” link to add any courses you have taken that pertains to your animal training. Enter the name of the course and the year taken. If there are any additional courses, click on “Add a Course” to add more courses. You may also delete courses by clicking on “Remove Course”.
- In Degrees, click on the “Add a Degree” link to add a college degree. For each degree, enter the type of college degree (associates, bachelors, masters, etc.), the institution name in which the degree was earned, and the degree year. Click on “Add a Degree” for any additional degrees, and “Remove Degree” if you need to remove any degrees entered.
- To enter the answers to your resource questions: For each of the listed research questions, answer each one as to whether you have been informed about specific topics to the best of your ability by clicking on the appropriate radio button. If you are unsure as to how to answer a question, refer to the link below each question.
- To answer the Electronic Database questions: These questions refer to your ability to use electronic databases. This would be for Faculty only. Select the appropriate radio button for each one. If you are unsure as to how to answer a specific question, refer to the link below each question.
Once you are done, click on the Update Profile and Enter Qualifications button to add/update your profile and add those changes to the database. After clicking on the button, you are taken to the Qualifications tab.
-


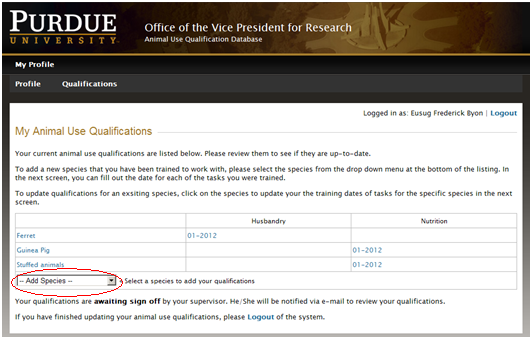
- Edit your Qualifications
This is where your animal qualifications are entered. On this tab, you may add a new species that you have been trained to work with, or update qualifications for an existing species. If you have no updates to make to this page, please log out.
- To add a new species:
- In the drop-down box with the caption “Select a species to add your qualifications,” select a species of animal. If your animal specialty is not listed, select “Other – Add a New Species.” You will then be taken to the new page named “My Qualifications.”
- If you selected “Other – Add a New Species” on the previous page, enter the name of your animal in the text box below the page’s title.
- On the My Qualifications page, for your animal specialty, enter the certified date for at least one of the tasks listed. You may either type in the date manually or use the calendar control that appears when you click on the appropriate text box for the task.
- If you have a specific protocol, technique, and/or procedure for your animal specialty, you may enter them in the memo box under Specific Protocol/Technique/Procedure.
- Optionally, you may enter the number of years you have been qualified to work with the animal in that text box.
- When finished, you may click on the “Save Qualifications for Primate” button to save your animal specialty to the database, or click Cancel to discard your animal data.
- After clicking on the button or the cancel link, you will be taken back to the Qualifications You will see a green background message that says Qualifications updated if you clicked on the button on the previous page, as well as your list of animal specialties with the task(s) and respective dates qualified.
- Repeat steps a through g if you have any additional animal specialties.
- In the drop-down box with the caption “Select a species to add your qualifications,” select a species of animal. If your animal specialty is not listed, select “Other – Add a New Species.” You will then be taken to the new page named “My Qualifications.”

2. To update an existing species:
-
-
- If you need to edit or delete any of your existing animal specialties, click on the name of the animal species OR one of the certification date(s) for your animal. You will be taken to the “My Qualifications” page.
- Follow steps c through e from the previous section of this document if you need to update your animal specialty.
- When finished, you may click on the Save Qualifications button to update your animal specialty, Remove Qualifications to remove your animal specialty or Cancel to discard your changes. If you click on Remove Qualifications, a dialog box will appear asking to confirm your deletion; click yes if you want to go forward with the deletion, or no to go back to the page.
- If you clicked on Save Qualifications, you will get the Qualifications updated If you clicked on Remove Qualifications, you will get the message Qualification for <animal name> removed.Note the message near the bottom of the screen indicating that your qualifications are awaiting signoff from your supervisor. This will be updated once an approval is noted in the database from your supervisor.When you are done with your qualifications, you may logout of the database by clicking on the logout link in either the upper left hand corner or at the bottom.When you have completed your work, please logout of the system using the Logout option at the top of your screen.
-
 Note the message near the bottom of the screen indicating that your qualifications are awaiting signoff from your supervisor. This will be updated once an approval is noted in the database from your supervisor.When you are done with your qualifications, you may logout of the database by clicking on the logout link in either the upper left hand corner or at the bottom.When you have completed your work, please logout of the system using the Logout option at the top of your screen.
LAP-Animal Use Qualification (AUQ) Web-based Application User’s Manual – LAP-Animal Use Qualification (AUQ) Web-based Application User’s Manual –
[xyz-ips snippet=”download-snippet”]