![]()
THE ULTIMATE HOME EXPERIENCE
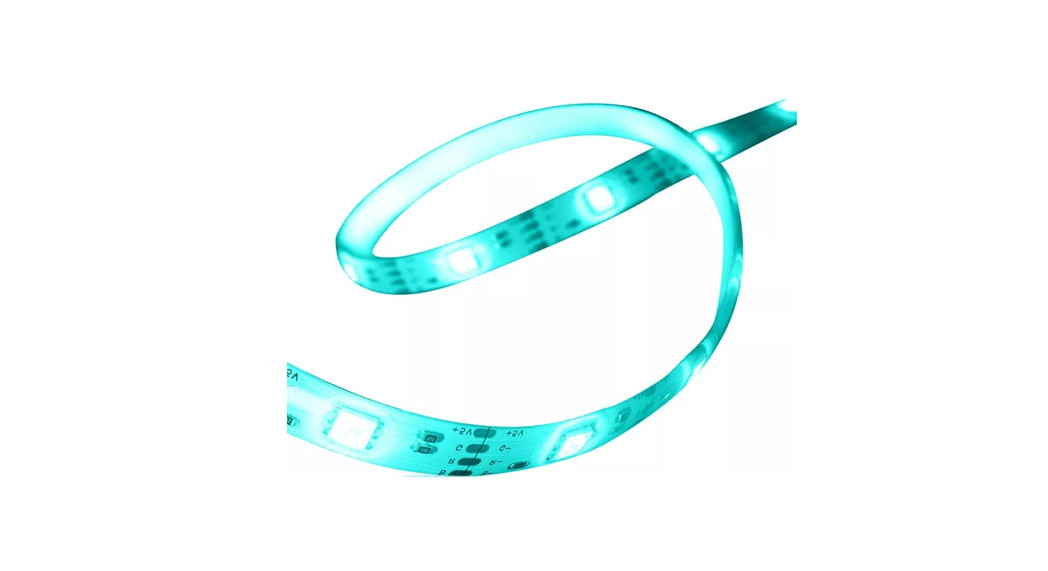
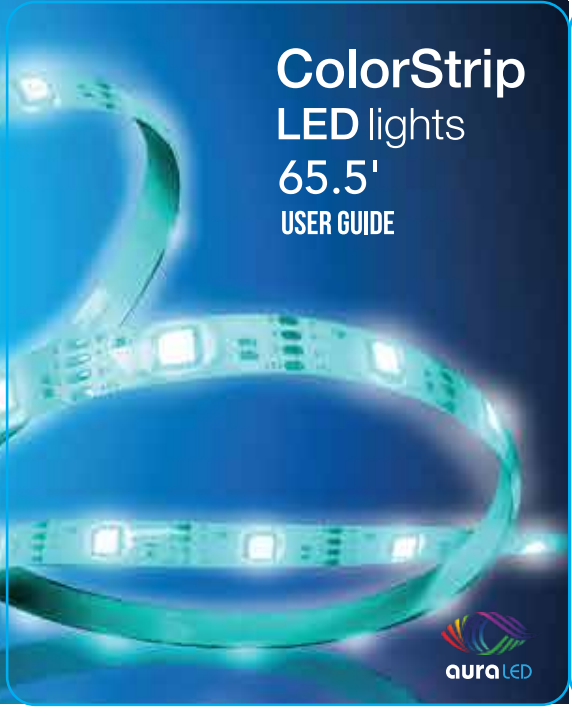
The ColorStrip 65.5′ LED lights are perfect for lighting up your room and are suitable for countless applications. From ceiling to cabinets to under furniture lightning, they brighten up your surroundings. Perfect for holiday decorations they can be
installed and mounted on the back of TVs, computers, doorways, and cabinets. The adhesive backing makes the ColorStrip affixable to almost any surface. It includes a wireless remote controller, which provides you with the freedom to customize your selection of 20 colors and find the perfect brightness, rhythm, and color scheme.
- 20 Color Selection – 6 DIY Color Combinations
- Adjustable Color Intensity & Brightness via Remote Control
- Relieve Eyes From Fatigue
- Create Ambiance & Unique Atmosphere
PACKAGE CONTENTS
ColorStrip 65.5′ LED lights (on two 32.75ft reels) AC AdapterLED ControllerWireless RemoteUser Manual
INSTALLATION
NOTE: Please make sure that the surface where you are affixing the ColorStrip is clean (i.e. no dust, oils, fingerprints, etc.) before attempting to apply the strip. Use an alcohol-based cleaning cloth to wipe the back of surfaces that are dirty.
- Locate a nearby power supply/plug to where you plan to affix the ColorStrip.
- Make sure that you are satisfied with the coverage area of the ColorStrip prior to peeling off the adhesive tape. Make sure that the AC Adapter is placed near the power supply/plug and has enough slack to reach safely. The Remote Receiver must also be visible in order to work properly.
- Peel off the backing of the strip to expose the adhesive.
- Apply to the cleaned surface. Press down for a couple of seconds to secure.
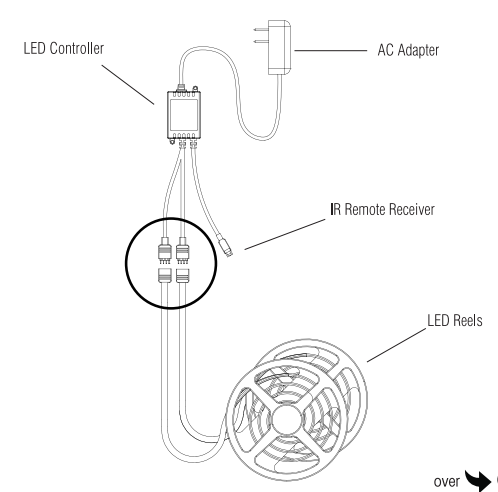
- Connect each ColorStrip reel to the LED Controller, be sure the arrows on opposing ends match.
- Plugin the AC Adapter into the round end of the LED Controller then into the power supply/plug.
- Once everything is connected, remove the protective plastic strip from the remote control to activate the battery.
- Press the ON button to turn on the ColorStrip.
- Refer to the color combinations settings on the remote to customize your ColorStrip.
ASSEMBLY
- Connect each of the LED reels to the LED controller, make sure the arrows on both ends match
- Connect the AC adapter to the other end of the LED controller
- Plug in the AC adapter into a wall outlet
WIRELESS REMOTE CONTROLS
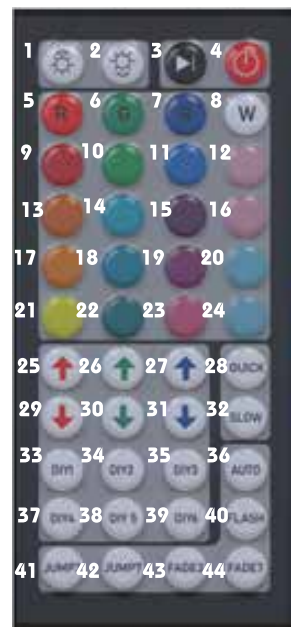
| 1. light Up (8 levels)2. Light Down (8 levels)3. Pause/Run4. On/Off5. Static Red6. Static Green7. Static Blue8. Static White9. Static Orange10. Static Light Green.11. Static Deep Blue12. Milk White13. Static Deep Yellow14. Static Cyan15. Static Blue-Purple.16. Pink White17. Static Yellow18. Static Light Blue19 Static Purple20. Green White21. Static Light Yellow22. Static Sky Blue | 23. Static Brown24. Blue White25. Increase Red26. Increase Green27. Increase Blue28. Faster29. Reduce Red30. Reduce Green31. Reduce Blue32. Slower33. User-Defined 134. User-Defined 235. User-Defined 336. Auto Color Change37. User-Defined 438. User-Defined 539. User-Defined 640. Flash41. 3 Color Change42. 7 Color Change43. 3 Color Gradual Change44. 7 Color Gradual Change |
Custom Colors: To program your own colors, press the DIY key you wish to set, and then use the increase and reduce color buttons to create the color you require. When the DIY button is pressed again the current color will be saved ready for use.
COLORSTRIP SPECS:
Input: AC 12V/0.5A-2ALED chip: 5050 ROB |Color: 20 colors with 6 mood light settingsBeam Angle: 120 degreesLED Strip: 300 led lights/ 32.75 Feet each roll, total 2 rollsBack Adhesive: Self-adhesiveLife Span: 25000 hours
REMOTE SPECS:
Power: 1 CR2025 BatteryRemote: Infrared 44 keys
POWER ADAPTER SPECS:
Input: 100-240v, 50/60HzOutput: 12V-4ACertification: FCC, ETL
IMPORTANT SAFEGUARDS
- Keep LED strip away from flammable objects.
- Always make sure that all parts have been connected properly to avoid short circuits.
- Do not connect the LED strip to the power source until all of the installations have been completed.
- Do not cut any part of the LED strip or its connectors.
- Always make sure that the Remote Receiver is not covered or This will ensure proper operation using the remote control.
- If this product malfunctions, please do not try to repair it yourself, take it to a qualified electrician.
If you have any other questions or issues with this product use and/or care, please contact tzumi Technical Support at: [email protected].

tzumi® Inc. Distributed by tzumi Inc. NY, NY 10016.©Copyright 2020 tzumi Inc.All Rights Reserved. Made in China.Other trademarks and trade names are those of their respective owners. Subject to change without prior notice.
[xyz-ips snippet=”download-snippet”]