Axcient x360Recover Recovery Center
Recovery Center is our next generation utility for recovering data from protected systems running x360Recover (formerly Replibit) and Direct-to-Cloud (D2C).Recovery Center is a stand-alone application that allows you to recover data directly from the Axcient Cloud or a private cloud, with or without a local cache device. Recovery Center works by directly mounting a protected system’s disk volumes from any recovery point hosted on a vault and may be installed to any 64-bit Windows operating system. 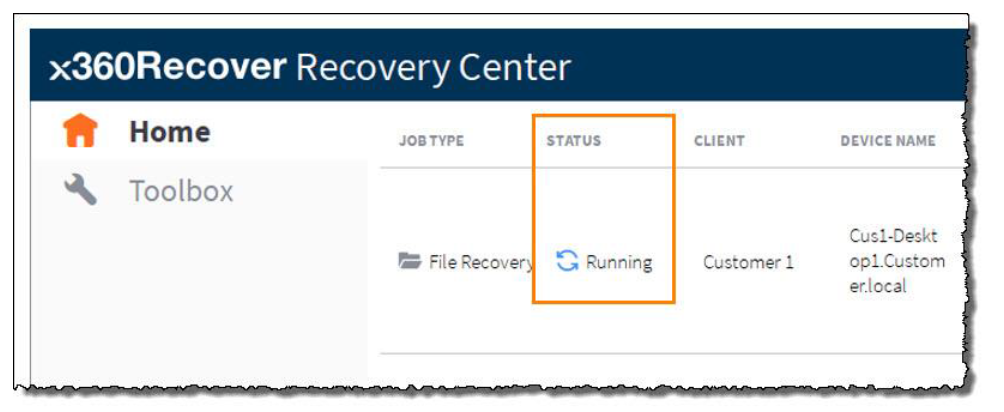
Release 1.x supports file and folder recovery and Bare Metal Recovery (BMR) (Note: BMR from local cache is supported within the x360Recover Recovery Toolkit ISO.) Release 2.x will add support for direct virtualization of a protected systems on a Hyper-V host.With Recovery Center, any protected system present on your x360Recover vaults may be quickly accessed for rapid recovery of data, whether Axcient-hosted or self-hosted, including Direct-to-Cloud systems. Recovery Center is optimized to function best with D2C protected systems employing a local cache repository, which accelerates data recovery.Note: You may use Recovery Center to perform file and folder recovery for any protected system resident on a vault, with or without local cache, although performance without local cache will be subject to download bandwidth performance and, therefore, performance may be potentially much slower.
Recovery Center Components 
Recovery Center consists of multiple components making it possible recover data from the Cloud.
- Two background services and a frontend UI application are installed on the target system. These communicate with the vault: performing authentication, browsing protected systems and metadata, and retrieving data.
- An optional local cache repository, if available, can be used to greatly accelerate data recovery. For details on configuring your Direct-to-Cloud backup agent to generate a local cache, see this knowledgebase article.
Recovery Center Jobs Service
The xCloud Recovery Center Service runs in the background on the system to manage recovery jobs.A recovery job defines:
- type of recovery to be performed (currently limited to file and folder recovery)
- client
- protected system
- backup snapshot to recover data for
- authentication information
- how the selected protected system disk volumes will be presented to the local machine.
This service is responsible for creating, managing, and deleting recovery jobs constructed via the User Interface on demand, as well as providing for persistence of job states through reboots and system shutdowns.
Recovery Center Virtual Disk Service
The xCloud Virtual Disk Service is the core of the recovery engine, providing the means to transform remote recovery points into locally mounted block storage devices for data retrieval.Jobs defined in the User Interface and managed by the xCloud Recovery Center Service are executed by the xCloud Virtual Disk Service.Cloud metadata is used to define the physical disks and volumes. Data is retrieved first from the local cache repository (if present) then over the WAN from the vault. The local machine is then presented with virtual block storage devices matching the selected protected system recovery point. The disk volumes from the selected protected system can be mounted to the local machine, either as new drive letters or as sub-folders within a selected folder.
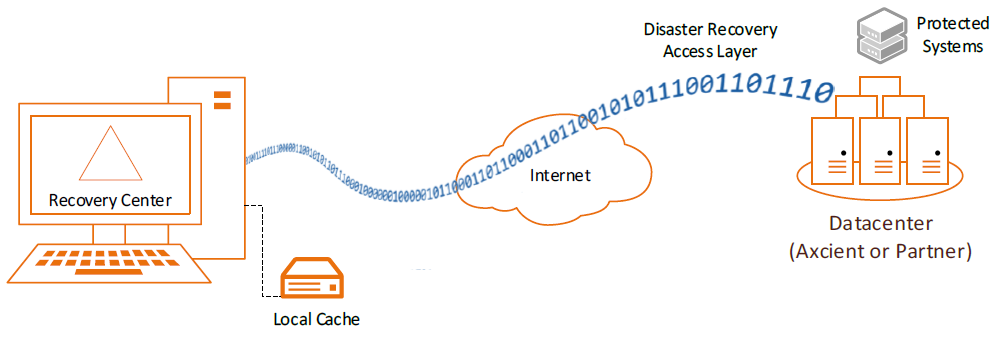
Disaster Recovery Access Layer (DRAL)
The Disaster Recovery Access Layer (DRAL) is a service running on the vault, providing a secure data transport layer, authentication system, and metadata retrieval service.Recovery Center connects to DRAL in order to authenticate and browse protected systems and recovery points available on the vault. DRAL also transports any data not present within the optional local cache repository.DRAL services are available on both Axcient-hosted vaults and self-hosted private vaults. Data for both appliance-based systems and D2C protected systems can be recovered with DRAL services.
How does Recovery Center Work?
Metadata about the protected system is retrieved from the cloud (including available disk volumes, physical disks, and partition sizes.)This metadata is used to build a locally attached block storage device, within which to present protected system disk volumes and data.
- If a local cache repository is available for the selected protected system, Recovery Center retrieves any requested data blocks locally from the cache first, greatly accelerating data access.
- If a local cache is not available (or if select blocks of data are missing or not present within the cache), the blocks are instead read over the WAN from the vault. If the job is configured to leverage a local cache, any data forced to be retrieved from the cloud will then be stored in the cache so that future requests for the retrieved block(s) will be found locally.
Please note: Although it is possible to perform general file and folder recovery for any protected system present on a vault, Recovery Center has been optimized primarily for use with a local cache repository to accelerate data access.
Using Recovery Center
You can install Recovery Center onto any 64-bit Windows system from which you wish to recover data. This may involve the original system where you are recovering data, or this may involve another location (such as an admin workstation from which to perform centralized recoveries.)In a future release (version 2.x,) Recovery Center will provide No-Hardware BDR by running directly on a Hyper-V host, allowing you to natively stage and manage virtual machines.Launch Recovery Center
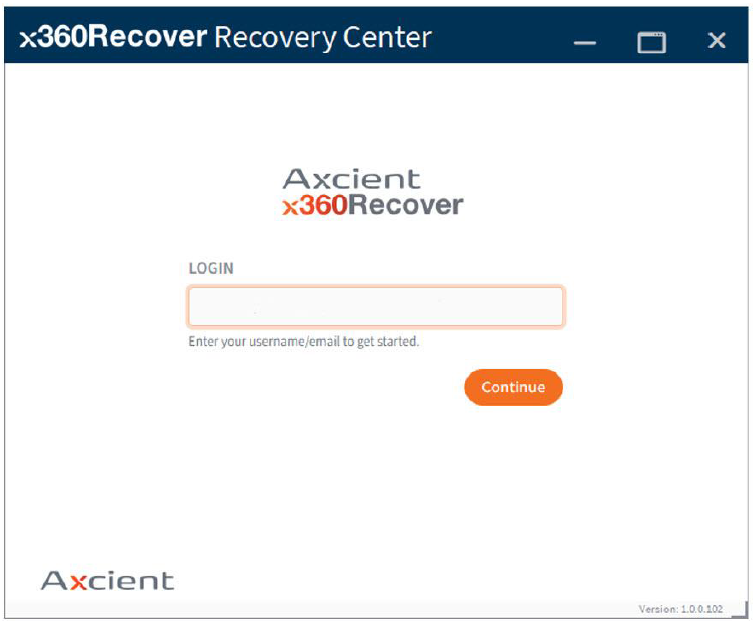
- To launch Recovery Center, enter your Axcient x360Portal username and click Continue.Note: Only x360Portal user accounts and legacy RMC user logins are supported at this time. Legacy Recover Manager logins are not supported.
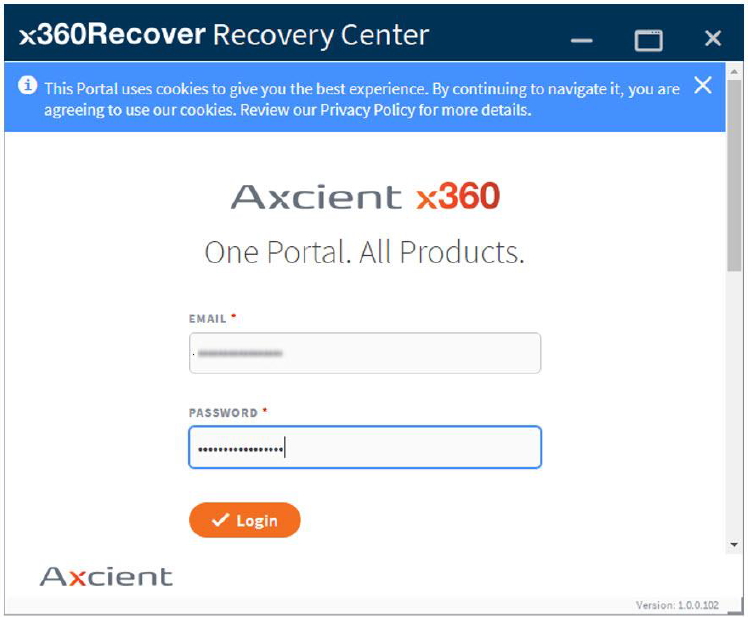
- Enter your Password and click Login.
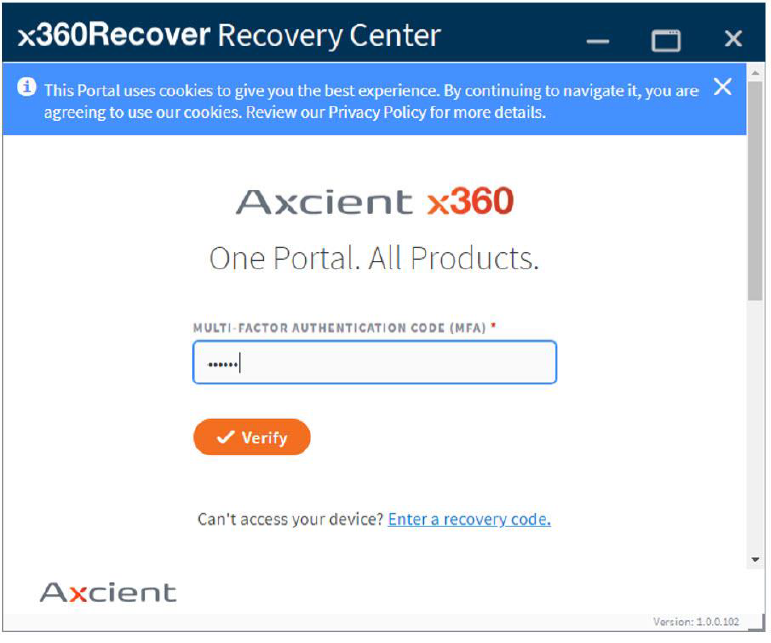
- Enter your six-digit MFA (Multi-Factor Authentication) code and click Verify to complete the login process.
Create a recovery job
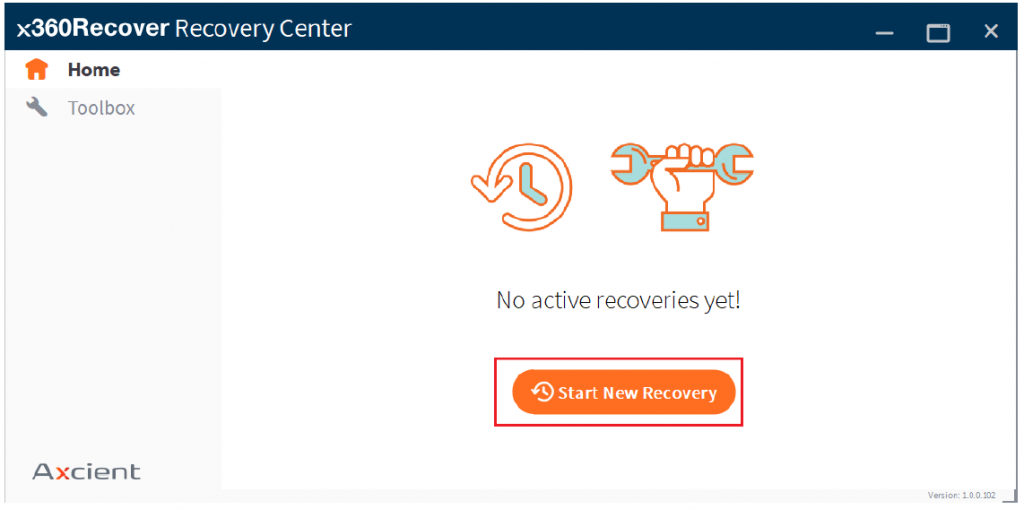
Once logged in, you are ready to create a recovery job and to begin retrieving data.
- Click Start New Recovery.
- The Local Recovery selection wizard will appear. Wait until the list of available clients is downloaded, and then select a client.
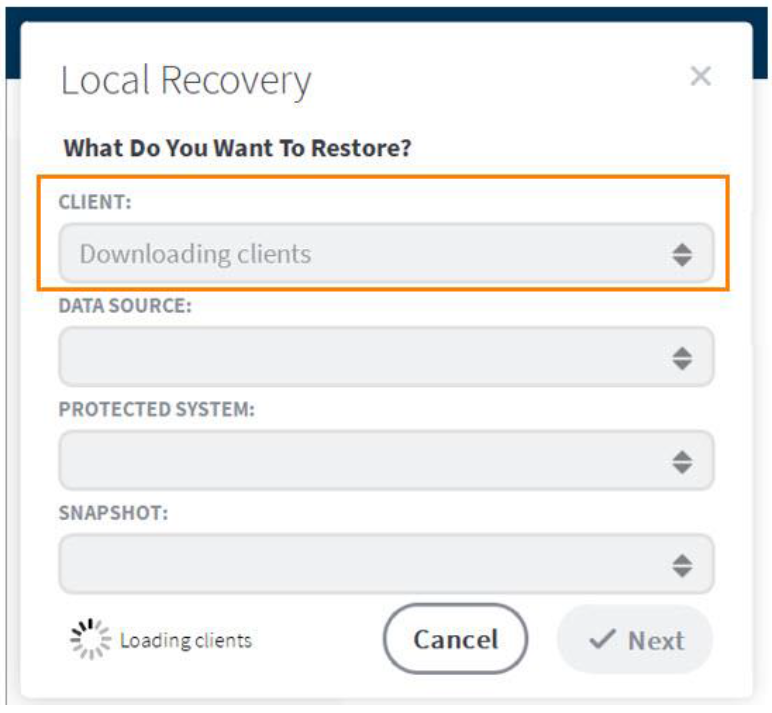
Tips on locating and selecting a client:
- Click inside the Client field and begin typing to search directly for a client.Note: Use <Tab> or click the next box to complete your selection. (Do not press <Enter>)
- Click the dropdown arrow for a list of available clients, then browse to select a client.
- Once you have selected a client, the remaining fields populate with default values.
- Hint: You do not need to wait for all boxes to populate before making selections. Once each level is populated, you may immediately click or type to search for valid selections at that context level. The dependent selections will refresh.
- The Data Source field indicates the vault where the protected systems are stored for this client. Multiple Data Source items may be present if this client has protected systems on multiple vaults or data centers.
- The Protected System field indicates the client system where you wish to recover data. All protected systems belonging to this specified client on the selected Data Source (i.e. vault) will be displayed. If you do not see the protected system you are looking for, check to see if there are additional Data Source options to choose from.
- The Snapshot field indicates the desired recovery point where you wish to recover data.
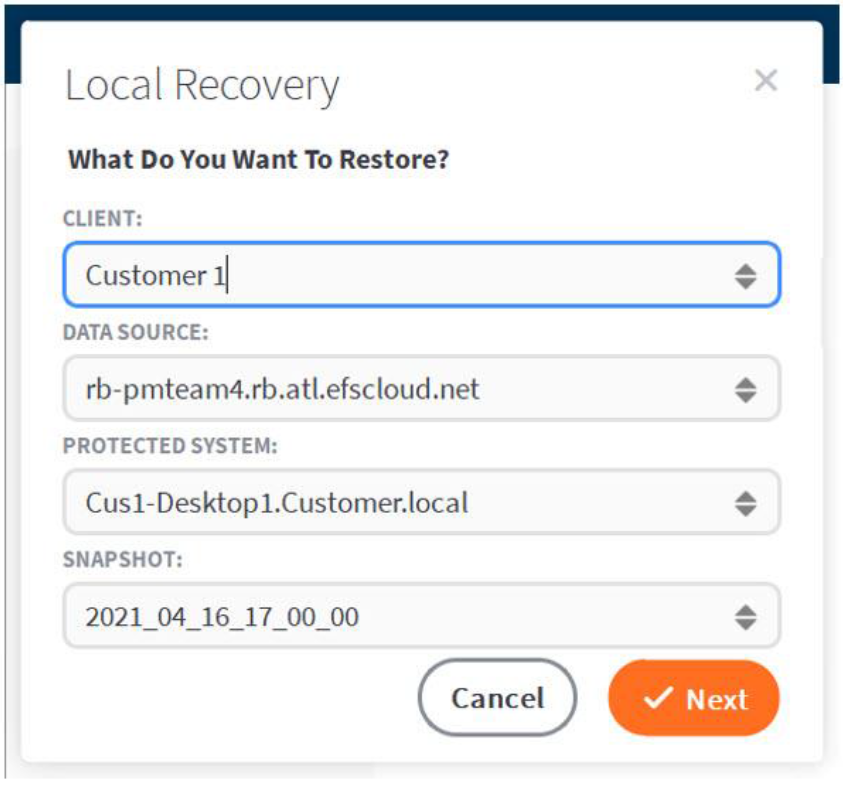
Once you have made selections for each field, click Next to continue.
Restore directly from the cloud
You may choose to restore data directly from the Cloud. This option is for directly recovering data from the vault for an appliance-based protected system (instead of recovering from a local appliance or recovering from Direct-to-Cloud endpoints that have not been configured for local cache.)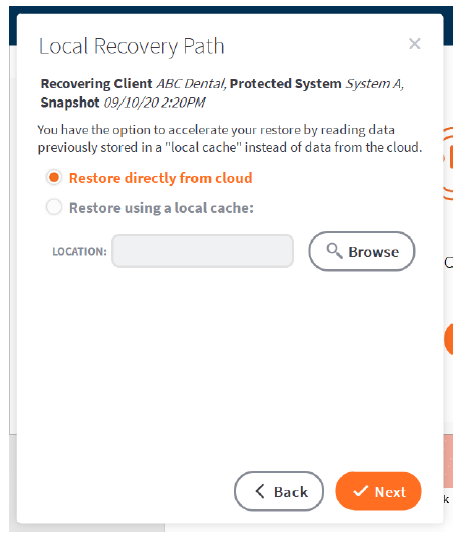
Note: Direct from Cloud recovery has not yet been optimized in this release. This means recovery performance might be slow (in this release.) You will NOT achieve full internet download bandwidth using this method in this release.
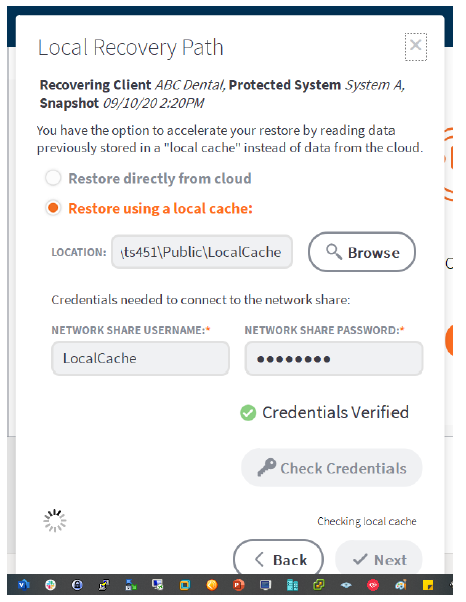
Restore using local cache: for Direct-to-Cloud
The local cache restoration mode is designed for Direct-to-Cloud protected systems which are configured to maintain a local cache repository.Using local cache is optional, but please be aware that local cache is not a stand-alone recovery target. This means you can recover from either type of vault – with or without a local cache – but you cannot recovery anything from the cache alone.See this KB Article for more details on enabling and configuring local cache settings.
- Browse to the root level of the folder containing the local cache data. This data may be located either on a locally attached device, such as a USB hard drive, or a network share location.For local devices, leave the credentials fields blank and click Next to continue.
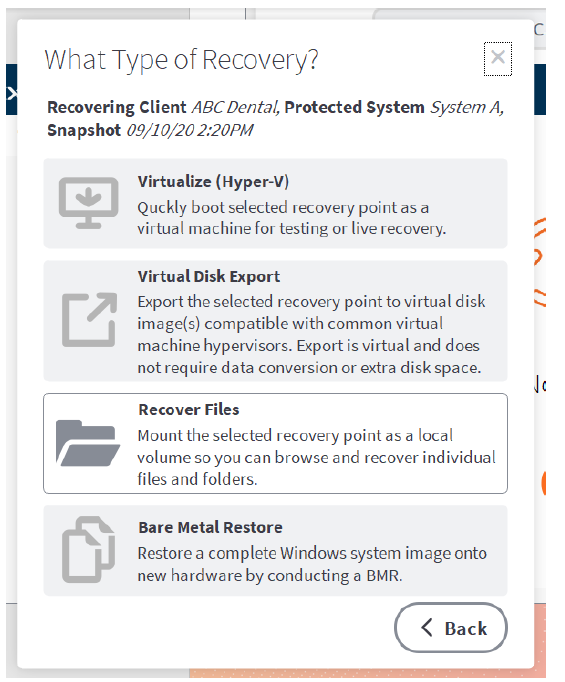
- Once credentials and local cache data have been validated, it is time to select the recovery type option. (As of Q3 2021, Recover Files is the only option available in the Recovery Center wizard. Additional options will become available in future releases.)
- Click Recover Files to continue.
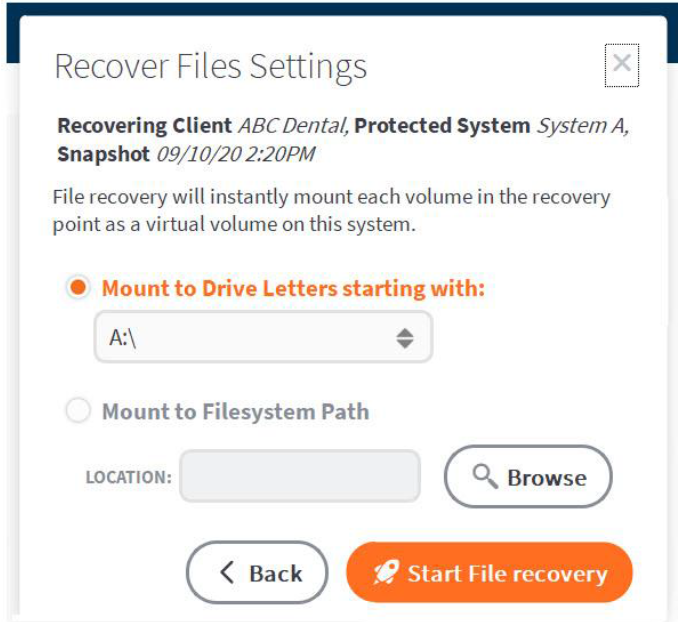
- Choose how to mount the protected system disk volumes for recovery.
- You may choose to have each volume mounted to individual drive letters, starting with the first letter selected. For example, if your protected system had C, E, and F drives, you might choose to have them mounted beginning with drive G. This would provide G, H, and I drives for the three volumes.
- Alternatively, you may choose to mount all volumes to a single folder path. Sub-folders will be created to which each protected system volume will be mounted. For example, if you select C:\Recovery for the mount location, subfolders for C, E, and F volumes will be created and each volume will be mounted to the designated folder.
- Click Start File Recovery to finish creating the job and start it.
Run the recovery process
File recovery will begin building and mounting block devices for the selected protected system volumes. Staging the recovery may take some time for large volumes.
Note: Hash data for each volume must first be downloaded from the cloud, and this can take some time for larger disk volumes.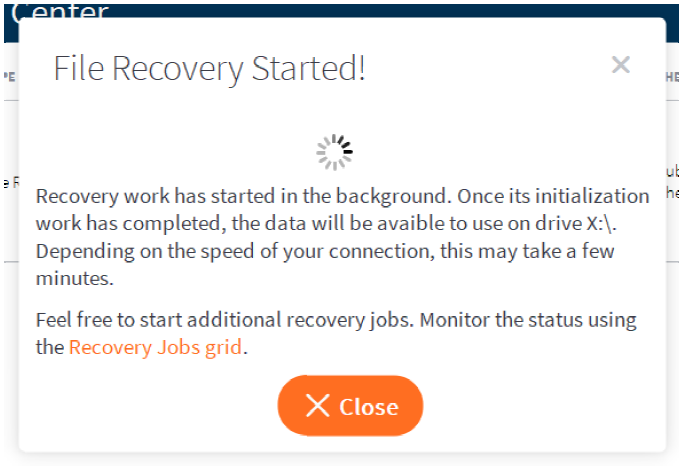
- You may close this File Recovery Started dialog and the recovery job progress will continue to run as a background service. (You may also close the Recovery Center user interface, if you wish.) Active jobs will be restarted automatically on a reboot of the system.
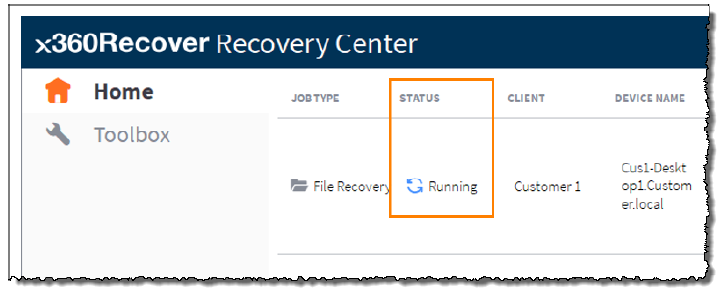
You can monitor the progress of this running job on the Toolbox page of Recovery Center. (Details of all configured jobs can be seen within the Recovery Center user interface.)
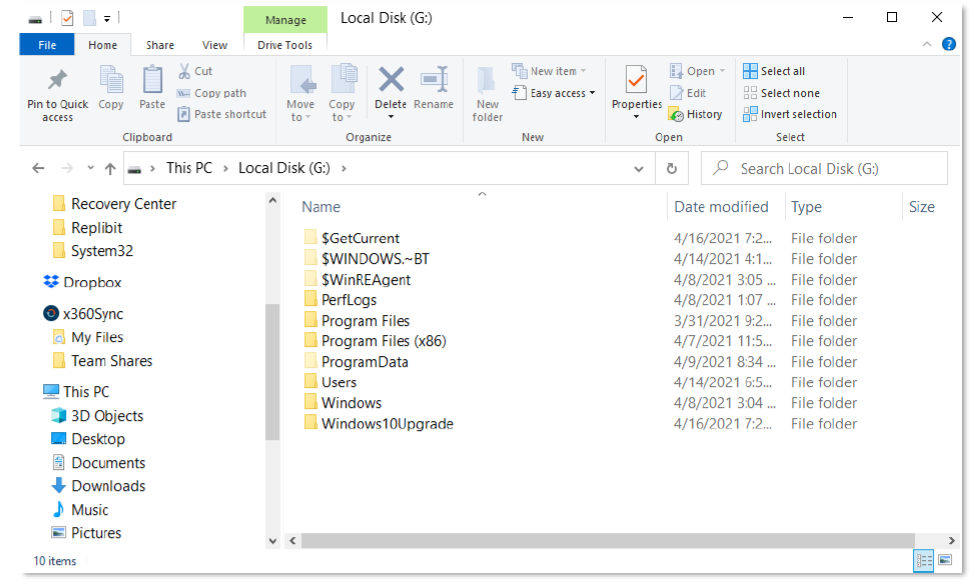
- Once the Status indicates Running, all disk volumes should be mounted and present on the local machine.
- Use Windows File Explorer to browse, search, copy, and paste files and folders you wish to recover.
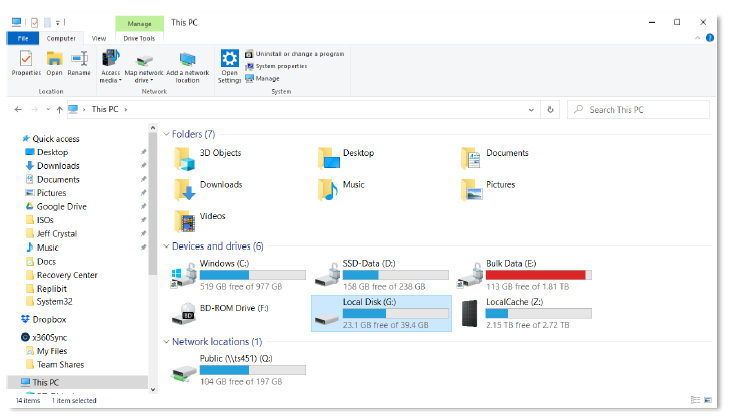
Depending on your mount point selections, volumes should be
- listed as individual mounted drive letters or
- mounted within the folder path you specified during job creation
- Note: Since recovery volumes are mounted as locally attached block devices, the original file and folder permissions from the protected system will be maintained.
Note: In release 1.0, all disk volumes will be combined into a single virtual disk and mounted as a local block device on the recovery system. This disk is read-only and can be seen in Windows Disk Manager for reference.

Monitor all configured jobs
Details of all configured jobs can be seen within the Recovery Center user interface.
- Jobs remain active until stopped or deleted.
- Active jobs remain persistent and automatically restart after a reboot of the local machine.
- One or more jobs may be configured and running simultaneously.
When finished performing recovery, Stop and then Delete the configured jobs (to remove them from the backend Jobs service.) 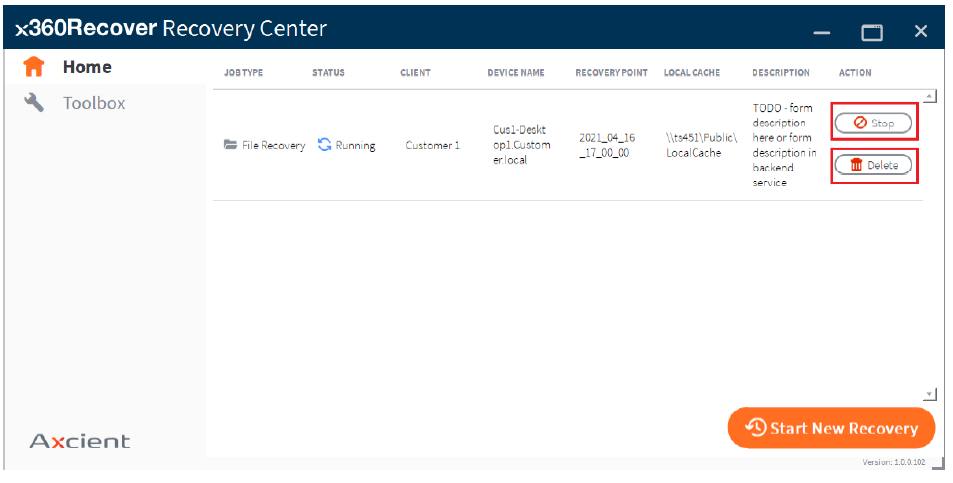
Other Recovery Alternatives
In addition to Recovery Center, Axcient offers other options for recovering your backup data including:
| Virtual Office |
| Virtual Office can be used to virtualize one or many protected systems in the Axcient Cloud. Virtual Office is fully self-managed and can be used by MSPs for true disaster recoveries or disaster recovery testing / client validation. |
| Bare Metal Recovery |
| Our x360Recover Recovery Toolkit hosts our Bare Metal Recovery wizard. With Bare Metal Recovery, simply boot a new-deployed or recently repaired system from ISO image and recover complete system images directly to the hardware. Bare Metal Recovery can operate directly from the appliance or vault, leverage previously downloaded Virtual Disk images, or perform recovery directly from the vault, with or without a local cache repository – just like Recovery Center. |
| File Browser |
| Mount a snapshot on any appliance or vault and use the web-based File Browser to quickly download individual files for recovery. |
| FTPS |
| For larger file and folder recovery operations, use our FTPS service to quickly download your bulk file and folder items using any standard FTPS client. FTPS offers faster, multi- threaded downloads, automatic retries, and resuming interrupted large file downloads. |
| Virtual Disk Export |
| Perform an instant disk export from any appliance or vault. Then download a virtual disk image in any standard Hypervisor format, including VHD, VHDX, VMDK, VDI, and RAW |
- Contact Axcient Support at https://partner.axcient.com/login or call 800-352-0248
- Free certification courses are available in the Axcient x360Portal under Training
- Sign up for free one-on-one training
- Subscribe to the Axcient Status page for a list of status updates.
![]()
References
[xyz-ips snippet=”download-snippet”]