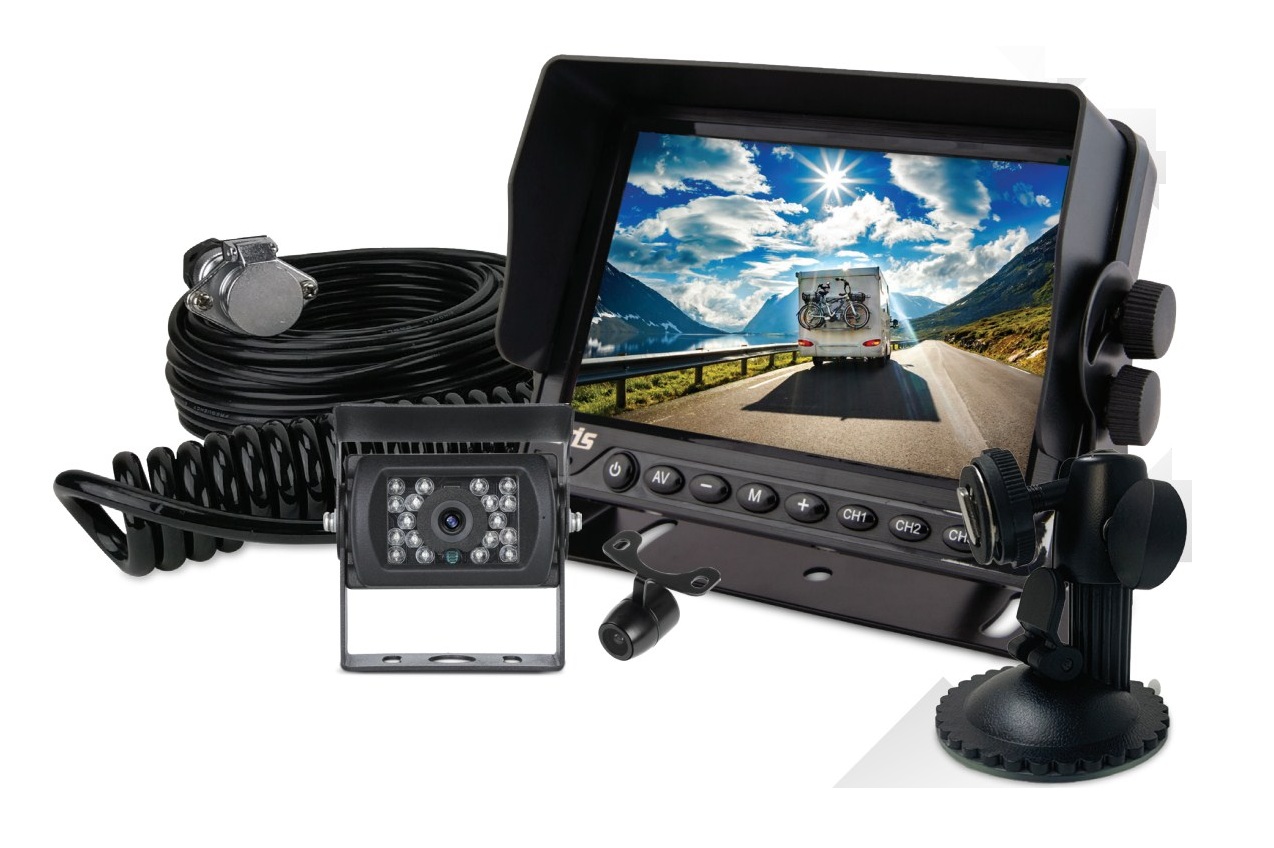
axis JS5020CK 5” Caravan Camera Kit Instruction Manual
IMPORTANT NOTES
- Do not try to open the covers.
- Please disconnect the power if anomolies occur.
- Do not use organic solvents on the surfaces to avoid damage to the coating.
- Do not apply force to the wiring leads to avoid internal damage.
- Keep the product away from high dirt/dust enviroments, direct high temperature sun light and high humidity conditions.
- Install the product so that it does not fall down.
- Follow wiring diagram strictly or warranty will be voided and can result in damage to the vehicle’s electrical system.
- Do not change functions while driving.
- Comply with the operating temperature of this unit.
KEYSTROKE INSTRUCTION
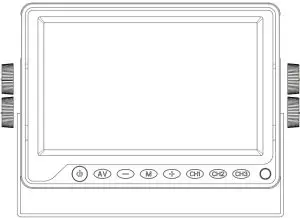
- (
 )Power
 - (AV): Input Select
- (-) Volume & Menu DOWN Function
- (M) MENU
- (+) Volume + Menu UP Function
- (CH1) Camera Input 1
- (CH2) Camera Input 2
- (CH3) Camera Input 3
- Power On
- Mute
- Horizontal Mirror/Normal Image
- Vertical Flip/Normal Image
- Volume Down
- Volume Up
- Menu
- Analog Increase
- Analog Decrease
- Mode
- Guide Lines
- 16:9/4:3
- Timer (0-240mins)
- AV Switchover
- Reset

- Press “MENU”, the screen will show “PICTURE”
- Press “- +” to select other feature. Press “- +” to adjust parameter.
- Press “MENU” over and over again, the screen will show pictures below.
PICTURE
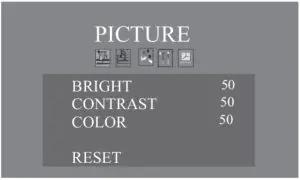
- Brightness: 0~100
- Contrast: 0~100
- Colour: 0~100
- Reset
VOLUME
- Volume: 0~100
OPTION
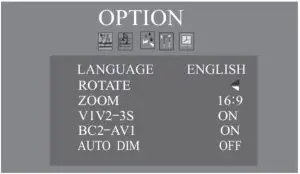
- Language: Optional
- Rotate: Normal/Flip/Mirror/Mirror Flip
- Zoom: 4:3/16:9
- VIV2 – 3s: Playback
- BC2 – AV1: Optional
- Auto Dim: Optional
SYSTEM
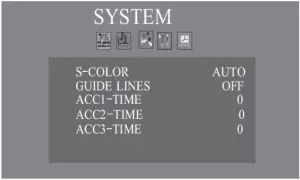
- S – Color: PAL/NTSC/AUTO
- Guidleines: Optional
- ACC1 -Time: Image Delay 0~15S
- ACC2 – Time: Image Delay 0~15S
- ACC3 – Time: Image Delay 0~15S
CLOCK

- Sleep: 0~240mins
WIRING DIAGRAM

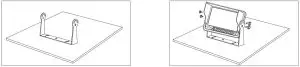
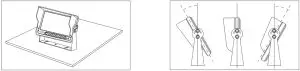
BRACKET INSTALLATION (Included)
- U-Bracket InstallationFix the U-bracket into position. Insert and lock the monitor into the bracket using the mounting gymbal knobs.
- Adjust the angle as required.
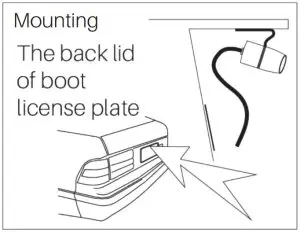
CAMERA INSTALLATION
- Hanging Installation: Please fix the camera on the top of boot back lid or the license plate. The offered screws are needed to fix the camera direction.
- Insert Installation: Please drill hole on the car. The hole size must be as same as the size of the camera.


Remind: To prevent the leak of water, please pay attention to the airproof when camera is installed on the top of the car.
SPECIFICATIONS
MONITOR
- TFT Panel: New Grade A LCD
- LCD Size: 5-Inch Diagonal
- Display Format: 16:9
- Resolution: 800 x 480
- Brightness: < 450 CD/M2
- Viewing Angles: 70° Left/Right/Up/Down
- Video System: Auto PAL/NTSC Select
- Video Connect: 3 x 4-Pin (Female)
- Reverse Trigger: Yes, Each Input
- Monitor View: Normal/Mirror Image Select
- Buttons: Illuminated
- Guidelines: Selectable On/Off (Camera 2 Only)
- Audio: On Board Speaker
- Menu: OSD
- Operating Temp: -20°C to +70°C
- Power Input: 12-32V DC (Negative Ground)
- Brackets: U-Mount, Glass Mount
- Dimensions: 132W x 95H x 26D mm (excluding bracket)
- Finish: Matt Black Rubber
HEAVY DUTY CAMERA
- Image Sensor: 1/3” Sony CCD
- Auto Lens: f2.9mm
- Electronic Shutter: Auto
- Vertical Viewing Angle: 120°
- Horizontal Viewing Angle: 90°
- Signal System: PAL
- Resolution: 700 TV Lines
- Sync System: Internal
- Orientation: Mirror Image
- Night Vision: Yes, 18 LED
- Illumination: 0 Lux with IR on
- Ingress Protection: IP69K
- Operating Temperature: -20°C ~ 70°C
- Dimensions: 70W x 45H x 60D mm (Excl Bracket)
- Connection: Terminated 4-Pin Male
- Power Supply: 12V DC (From Monitor)
INCLUDES
- U-Shape Mount
- Power Cable Assembly
- Sunshade
- Remote Control
- Glass Mount Bracket
HEAVY DUTY CAMERA (White)
- 15m 4-Pin (Male) to 4-Pin (Female) Extension Cable
- Mounting Bracket
- Sunvisor
DUAL MOUNT CAMERA
- 15m 4-Pin (Male) to 4-Pin (Female) Extension Cable
- Installation Hardware
- Metal Hole Saw for Bumper Fit Installation
- 6m Video Cable (RCA M to RCA M)
DUAL MOUNT CAMERA
- Image Device: 1/3” CMOS
- Diagonal Viewing Angle: 165°
- Horizontal Viewing Angle: 120°
- Signal System: PAL
- Effective Pixels: 640 x 480
- Resolution: 480 TV Lines
- Compatibility: All Monitors with RCA Input
- Lens: Full Glass
- Orientation: Mirror Image
- Guidelines: Selectable On/Off
- Night Vision: 0.2 Lux
- Ingress Protection: IP67
- Integrated Microphone: No
- Operating Temp: -20 to 70°
- Power Consumption: 90-300mA
- Connection: Mini 4 Pin Terminated RCA (F), RCA (M) to 4 Pin Adaptor
- Lead: 6M Mini 4 Pin to RCA (M)
- Dimensions: 16.5W x 16.5H x 23D mm (Excluding Bracket)
- Power Supply: 12V DC
TRAILER QUICK CONNECT
- Curly Cable (0.5m – Original State & 4.0m – Elongated)
- 2 x Metal Plug Mounting Brackets
- 10m Terminated to 4-pin male connector(to plug into monitor)
- 0.3m Terminated to 4-pin female connector(to plug into camera)
- RCA(M) to 4-pin(M) Adaptor cable
TRAILER QUICK CONNECT
- Curly Cable Length: 0.5m (Original State) 4.0m (Elongated)
- Mounting Plate: 5-Pin (Male) Metal Plug with Weather Cover
- Brackets: 2 x Metal Plug Mounting Brackets
- Cable (Monitor Side): 10m Terminated to 4-Pin (Male) (Trailer Plug to Monitor)
- Cable (Camera Side): 15m Terminated to 4-Pin (Female) (Camera to Trailer Plug)
WARRANTY
Congratulations on your purchase of a quality axis Mobile Safety System! You’re joining thousands of satisfied customers who enjoy & experience the benefits of the products we distribute. In the unlikely event that some technical difficulty arises with your purchase, be assured that we are most anxious to see that the problem is quickly rectified to your satisfaction. Please familiarise yourself with the following simple conditions of our warranty.This warranty covers faults through component failure or failure of the product to operate in accordance with published specifications. Product failure as a result of unreasonable environmental conditions, accident, misuse, improper installation, unauthorised repair, vehicle electrical or wiring faults or neglect etc, will not be covered by this warranty. Removal and installation costs, if any, would be paid by the owner as well as any freight or postage costs of transporting the product to AudioXtra. AudioXtra shall not be liable or responsible for any loss of use of this product or any form of consequential loss.
CONSUMER WARRANTYThis product is warranted by AudioXtra Pty Ltd to be free from defects in materials and workmanship under NORMAL USE for a period of TWENTY FOUR MONTHS from the date of purchase.
WITHIN 30 DAYS OF PURCHASE DATE:Please return the unit for replacement to our National Service Centre or the Retailer from where you made the purchase. All accessories must be included. Proof of purchase date must accompany the products.
AFTER 30 DAYS OF PURCHASE DATE:Warranty repair and service is carried out by our National Service Centre. Repair and service will be carried out at no cost to the owner if proof of ownership and the date of purchase can be verified to the satisfaction of the authorised centre concerned with this repair. This proof should take the form of either:
- The warranty card accompanying this product, stamped and dated by the dealer.
- A Tax Invoice or Receipt showing full details of original vendor, purchaser, model number and serial number.
COMMERCIAL WARRANTYA product used in or associated with a commercial application will carry a limited SIX MONTH warranty. An abnormal commercial application is one where usage, dust, vibration, heat/cold and other environmental conditions exist at an extreme level.
Our goods come with guarantees that cannot be excluded under the Australian Consumer Law. You are entitled to a replacement or refund for a major failure and for compensation for any other reasonably foreseeable loss or damage.You are also entitled to have the goods repaired or replaced if the goods fail to be of acceptable quality and the failure does not amount to a major failure.
Please complete details below in the event of warranty service being required.
Purchaser’s Name:__________________________________________Purchaser’s Address:______________________________________________________Model Number: JS5020CKSerial Number: ___________________Dealer Name: ___________________Date of Purchase:_____ / _____ / _____Dealer Address:___________________________________________Invoice/Sales Docket no:___________________________________General Hints: To expedite service and prompt return of the equipment, please:
- Clearly describe the fault in detail
- Safely and securely pack the unit for transport
- Include your return address
- Provide proof of purchase date as outlined above
Customer Support
National Service Centre
10 STODDART ROAD, PROSPECT, SYDNEY NSW 2148 AustraliaTelephone: (02) 8841 9000Fax: (02) 9636 1204email: [email protected]Web: audioxtra.com.au
References
[xyz-ips snippet=”download-snippet”]