AXXESS AXBT-TY1 Toyota Camry 2018-Up Data Interface
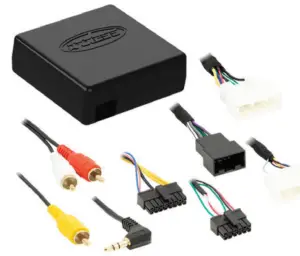
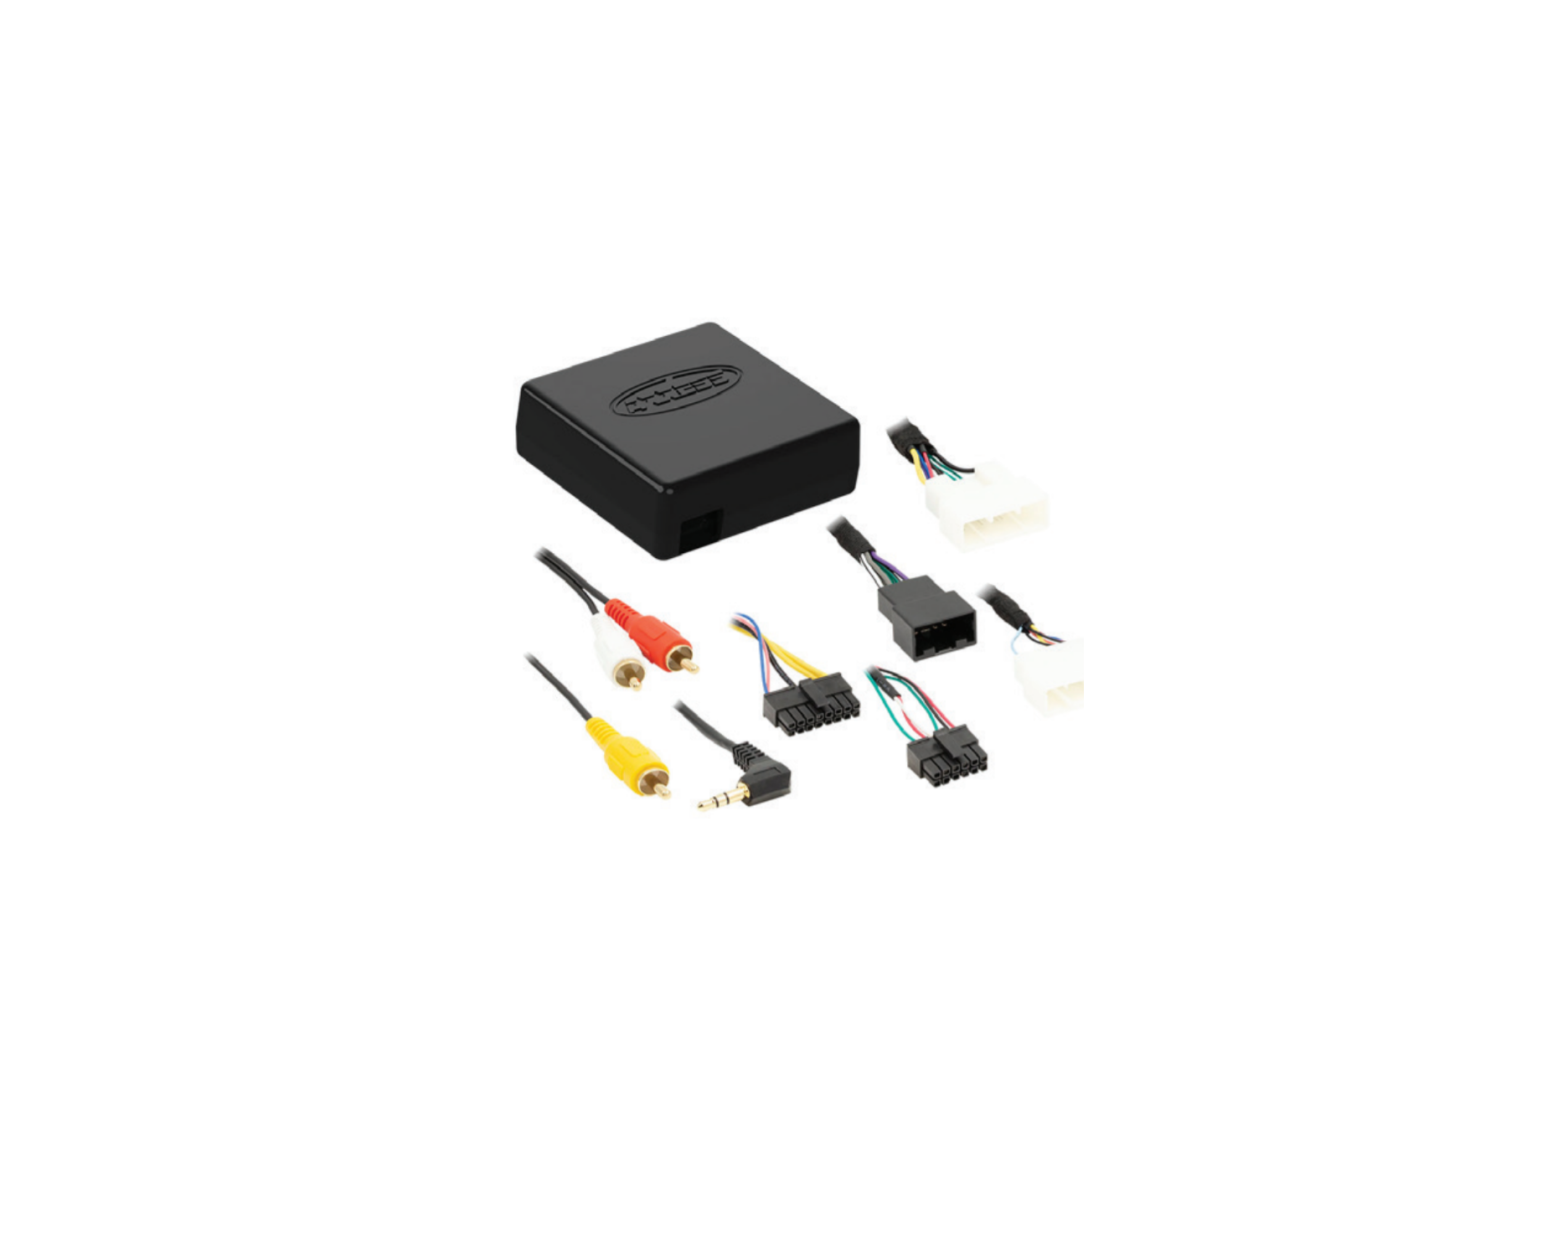
INTERFACE COMPONENTS
- AXBT-TY1 harness:• 10-pin harness• 28-pin harness• 30-pin harness• 12-pin AXSWC harness• 16-pin AXBT harness
- AXCSD-6V
- AXBT interface
APPLICATIONS
ToyotaCamry 2018-Up RAV4 2019-Up
INTERFACEFEATURES
- Wiring harness for installing an aftermarket radio
- Provides power and four speakers
- Retains balance and fade
- Designed for non-amplified models
- Provides NAV outputs (parking brake, reverse, speed sense)
- Retains the factory backup camera
- Pre-wired AXSWC harness (AXSWC sold separately)
- Includes an AXCSD-6V 12-to-6V stepdown for the factory camera
- Allows retention and adjustment of the * Personalization Options
- Adjust * Personalization Options through a Bluetooth application
- Smartphone application offering full control from either Android or Apple mobile devices
Actual options available vary per vehicle and per trim.(Refer to owner’s manual for options available in vehicle.)
OPTIONALACCESSORIES (sold separately)
Steering Wheel Control Interface: AXSWC
TOOLSREQUIRED
- Crimping tool and connectors, or solder gun, solder, and heat shrink
- Tape
- Wire cutter
- Zip ties
| Attention! Let the vehicle sit with the key out of the ignition for a few minutes before removing the factory radio. When testing the aftermarket equipment, ensure that all factory equipment is connected before cycling the key to ignition. |
CONNECTIONS
From the AXBT-TY1 harness to the aftermarket radio:
- Connect the Black wire, the Black wire labeled “CAMERA GROUND”, and also the Black wire from the AXCSD-6V, to the ground wire.
- Connect the Yellow wire to the battery wire.
- Connect the Red wire to the accessory wire.
- Connect the Red wire labeled “CAMERA POWER 6V”, to the Blue/Red wire from the AXCSD-6V.
- Connect the reverse wire from the aftermarket radio to the Green/Purple wire, and also to the Blue/White wire from the AXCSD-6V.
The following (2) wires are only for a multimedia/navigation radio that requires these wires.
- Connect the Blue/Pink wire to the VSS/speed sense wire
- Connect the Light Green wire to the parking brake wire
- If retaining the factory AUX-IN jack, connect the Red and White RCA jacks to the audio AUX-IN jacks from the aftermarket radio.
- Connect the Yellow RCA jack to the backup camera input.
10-pin harness:
- Connect the Gray wire to the front right positive speaker output.
- Connect the Gray/Black wire to the front right negative speaker output.
- Connect the White wire to the front left positive speaker output.
- Connect the White/Black wire to the front left negative speaker output.
- Connect the Green wire to the rear left positive speaker output.
- Connect the Green/Black wire to the rear left negative speaker output.
- Connect the Purple wire to the rear right positive speaker output.
- Connect the Purple/Black to the rear right negative speaker output
12-pin AXSWC harness &
3.5mm jack: This 12-pin AXSWC harness & 3.5mm jack are to be used with an AXSWC (sold separately) to retain steering wheel audio controls. If the AXSWC is not being used, disregard this harness and 3.5mm jack. If it is to be used, please refer to the AXSWC instructions for radio connections and programming. Disregard the harness that comes with the AXSWC.
INSTALLATION
With the key in the off position:
- Connect the AXBT-TY1 harness to the AXBT interface.
- Connect the AXBT-TY1 harness to the wiring harness in the vehicle.
- If an AXSWC (sold separately) will be used, do not connect it until after the AXBT is fully functional.
APP INSTRUCTIONS
- Download and install the AXBT app from the mobile devices app store.
- Start the vehicle.
- Open the app and wait for the Customization Settings menu to appear. If Not Connected appears instead, press the right button in the top right corner of the screen, then press the left button in the top right corner of the screen to go back to Customization Settings. The pairing process will begin at this point.
- Once paired, Settings will be displayed in the screen. From this point on you can make changes to the vehicle as desired, as the long as the vehicle is on.

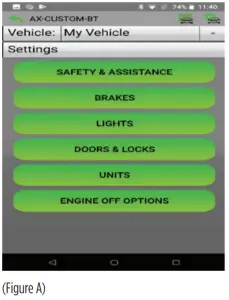
Note: Screenshot shown for illustration only. Actual options available vary per vehicle and per trim.Note: The app must be paired with the interface at least once for the initial setup. Failure to do so will prevent the interface from functioning.
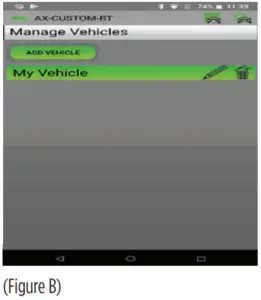
Other Options
Manage Vehicles (Figure B)
- Select Manage Vehicles by pressing the button in the top right of the screen.
- Pressing either the Add Vehicle or Edit (pencil icon) button will open the Configure Vehicle menu.
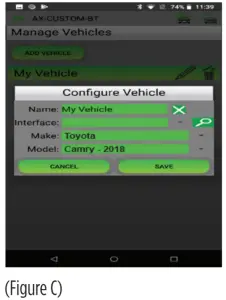
Configure Vehicle (Figure C)
- The name of the vehicle can be changed by pressing the text field.
- The app can automatically detect the interface installed in the vehicle by pressing the Search button (magnifying glass).
- The Make and Model fields will open a drop down list for the user to select the make and model of the vehicle that the interface is installed in.
- Press the Save button to store the changes.
Having difficulties? We’re here to help.
![]() Contact our Tech Support line at: 386-257-1187
Contact our Tech Support line at: 386-257-1187
![]() Or via email at: [email protected]
Or via email at: [email protected]
Tech Support Hours (Eastern Standard Time)Monday – Friday: 9:00 AM – 7:00 PM Saturday: 10:00 AM – 7:00 PM Sunday: 10:00 AM – 4:00 PM
 ® KNOWLEDGE IS POWEREnhance your installation and fabrication skills by enrolling in the most recognized and respected mobile electronics school in our industry. Log onto www.installerinstitute.com or call 800-354-6782 for more information and take steps toward a better tomorrow.
 Metra recommends MECP certified technicians
 report this ad
References
[xyz-ips snippet=”download-snippet”]