AZATOM Digital RadioUser Manual
SONANCE T1 Digital RadioDAB+/DAB/FM Radio Alarm Clock
Thank you for shopping with AZATOM® Please read this manual carefully before using your new device and keep it safe for future reference.
AZATOM® is a British company specialising in advanced audio products. All our products are developed by our In-house Team of British Designers.
We are experts in sound engineering and great care and attention goes into the design and manufacture of every Azatom product to ensure class-leading performance and quality.
Please read the manual thoroughly before operating the device.
Choose a suitable location for the device. Suitable locations are dry, even and anti-slip surfaces on which you may operate the device easily.
Make sure there is proper ventilation for the device.
Remove, if necessary, the protection sheet from the display.
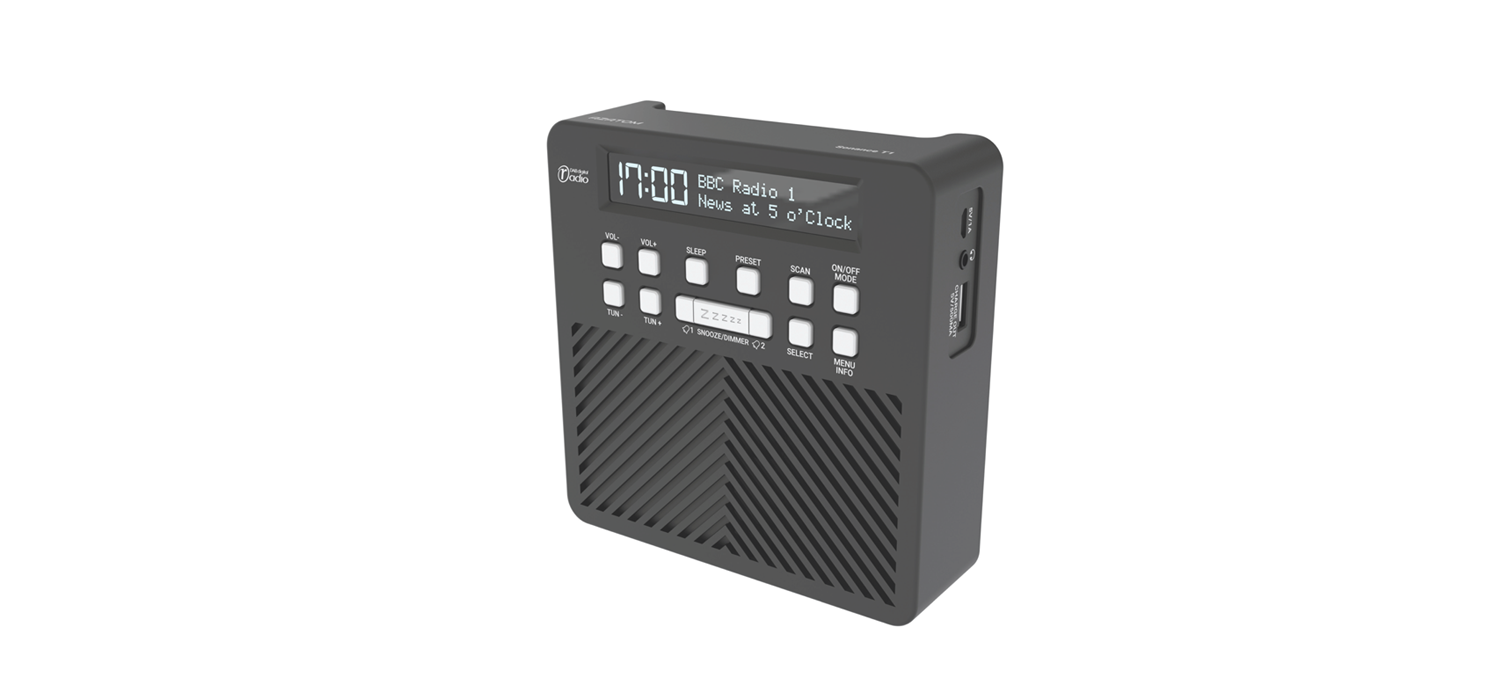
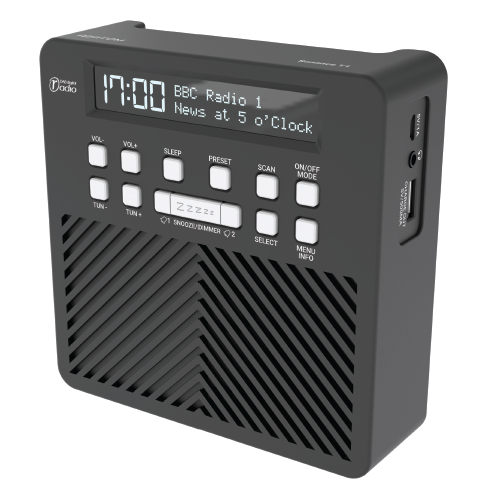
This DAB Radio was designed to travel and come with you on your adventures, all while delivering high quality audio.
Controls & Interface
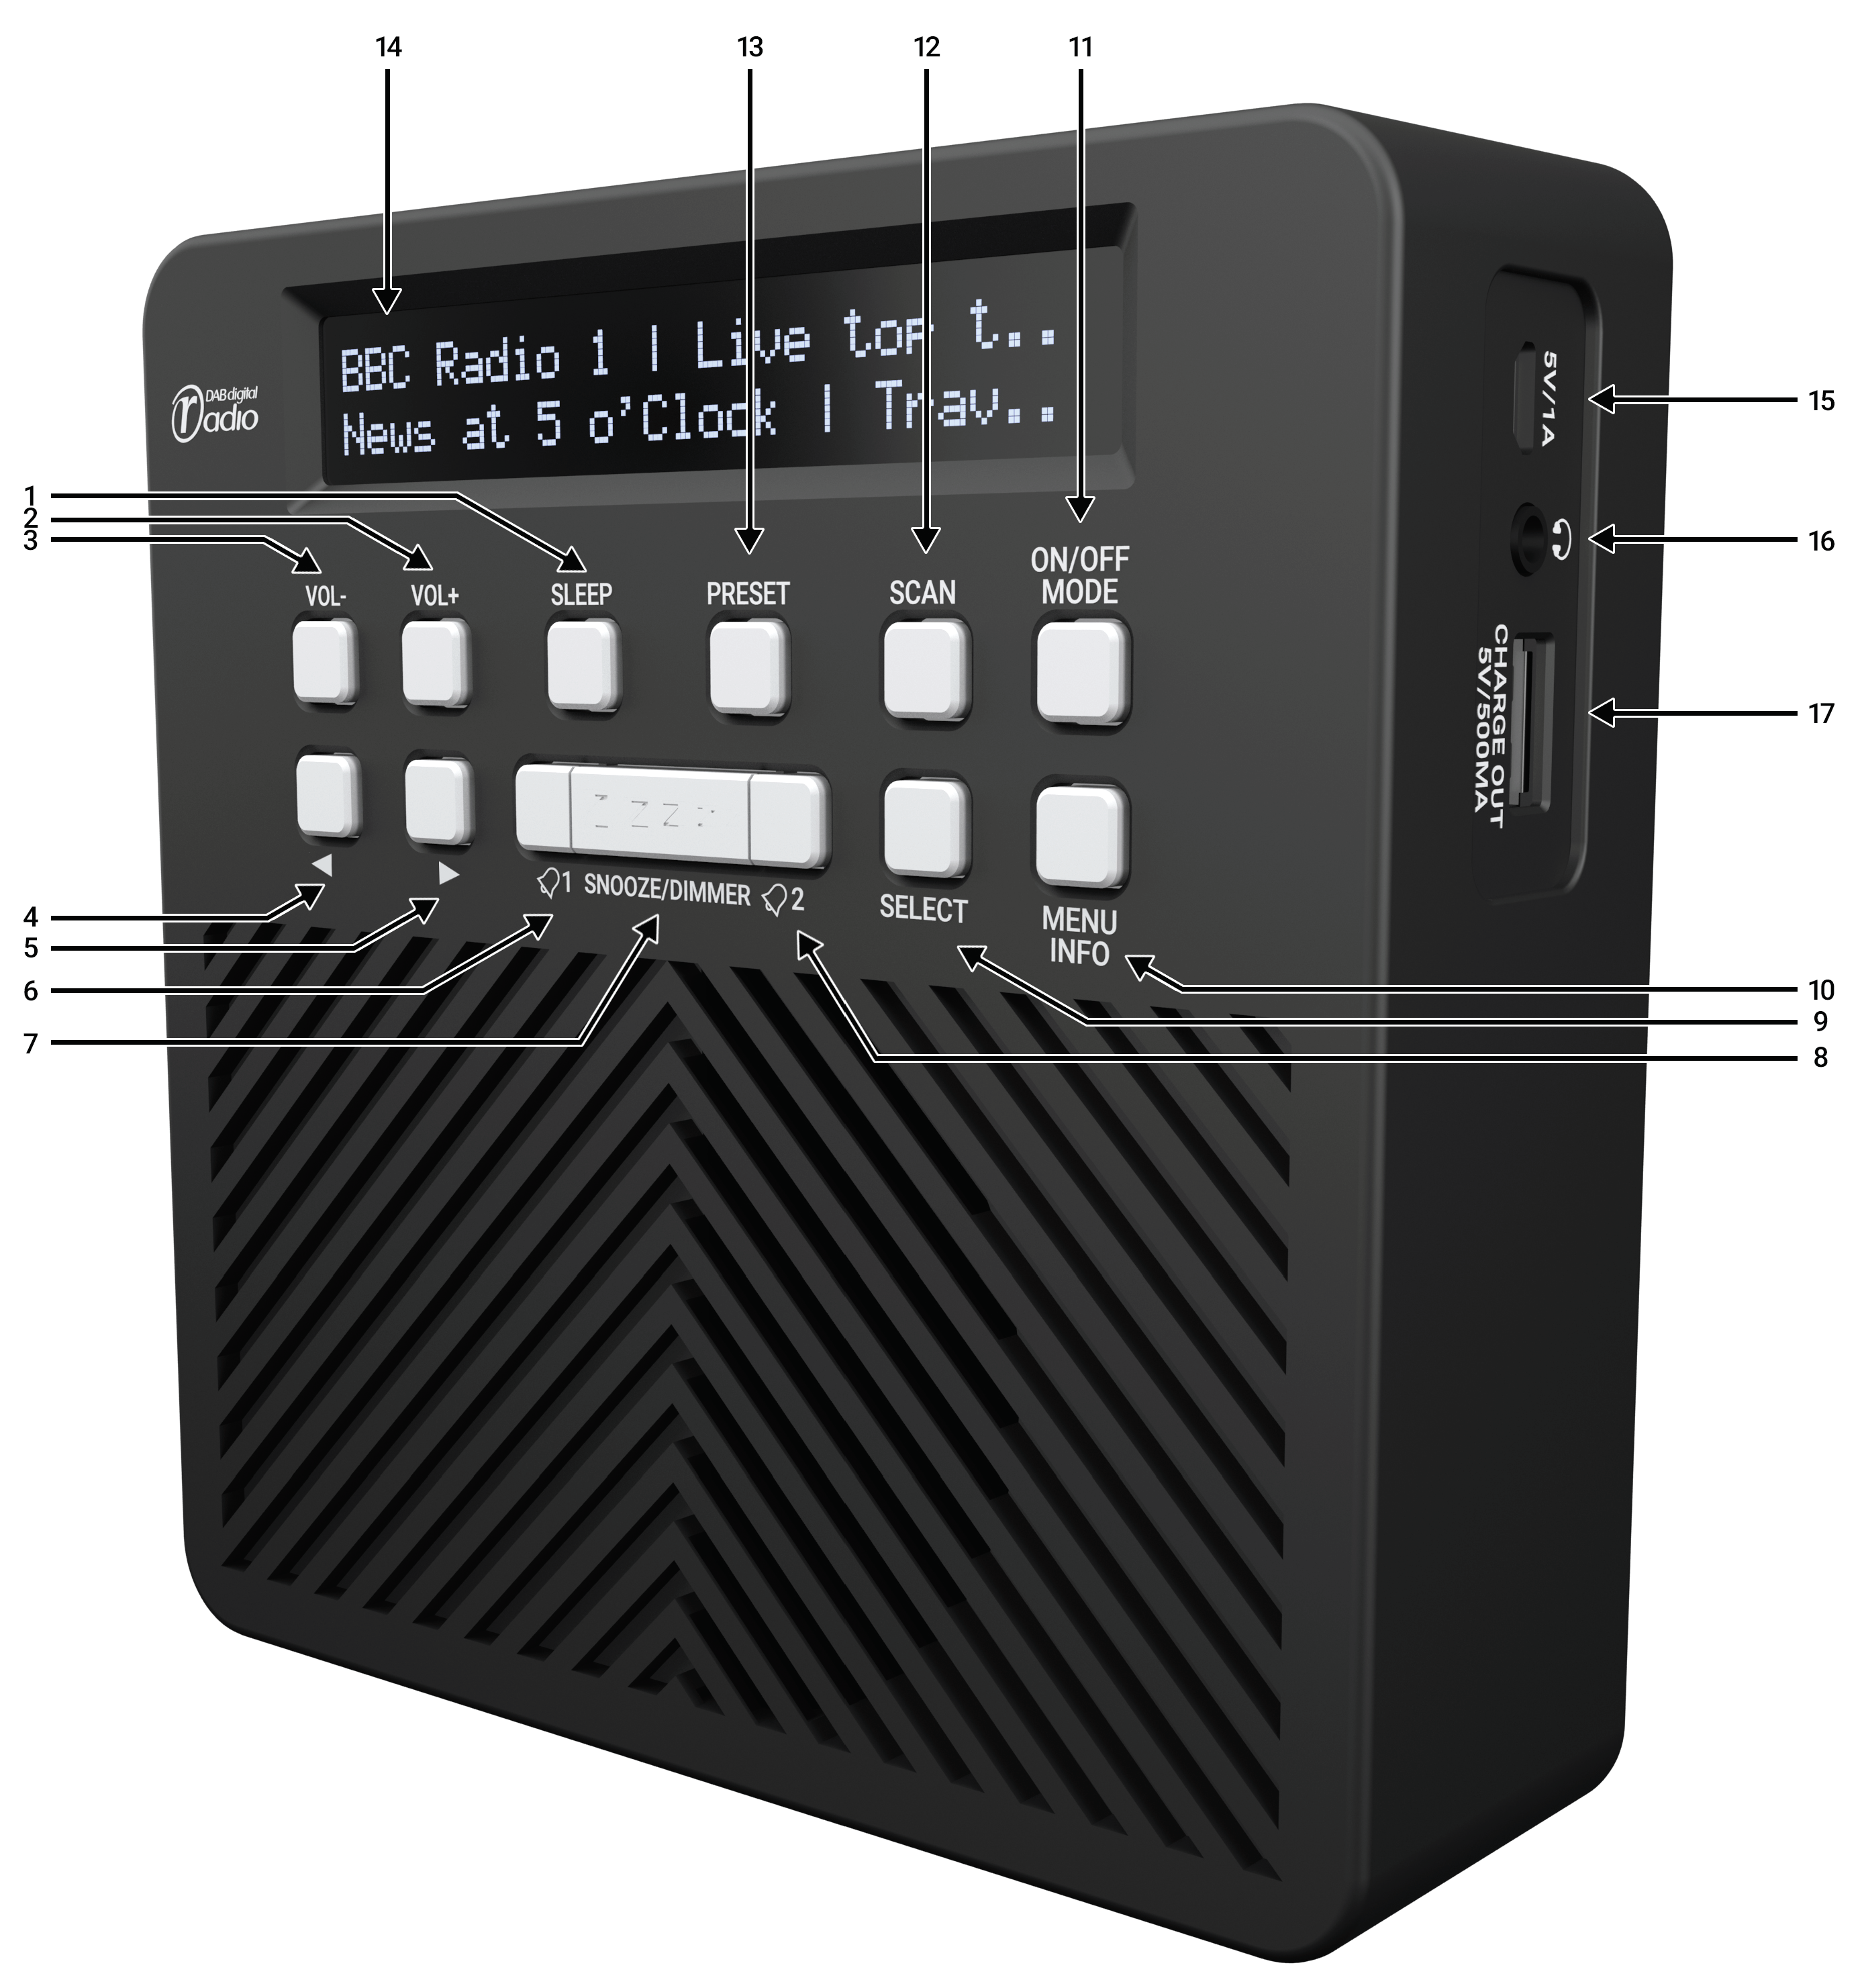
1. SLEEP2. VOLUME+3. VOLUME-4.◄ / TUN-5.► / TUN+6. ALARM 17. Snooze/Dimmer (Dimmer for brightness setting)8. ALARM 29. SELECT10. MENU/INFO11. POWER/MODE12. SCAN13. PRE-SET14. LCD Display15. DC-IN socket (5V, 500MA)16. Headphone socket (3.5mm) / Reset17. USB charge port (5v, 500MA for mobile phone)
What’s in the box?
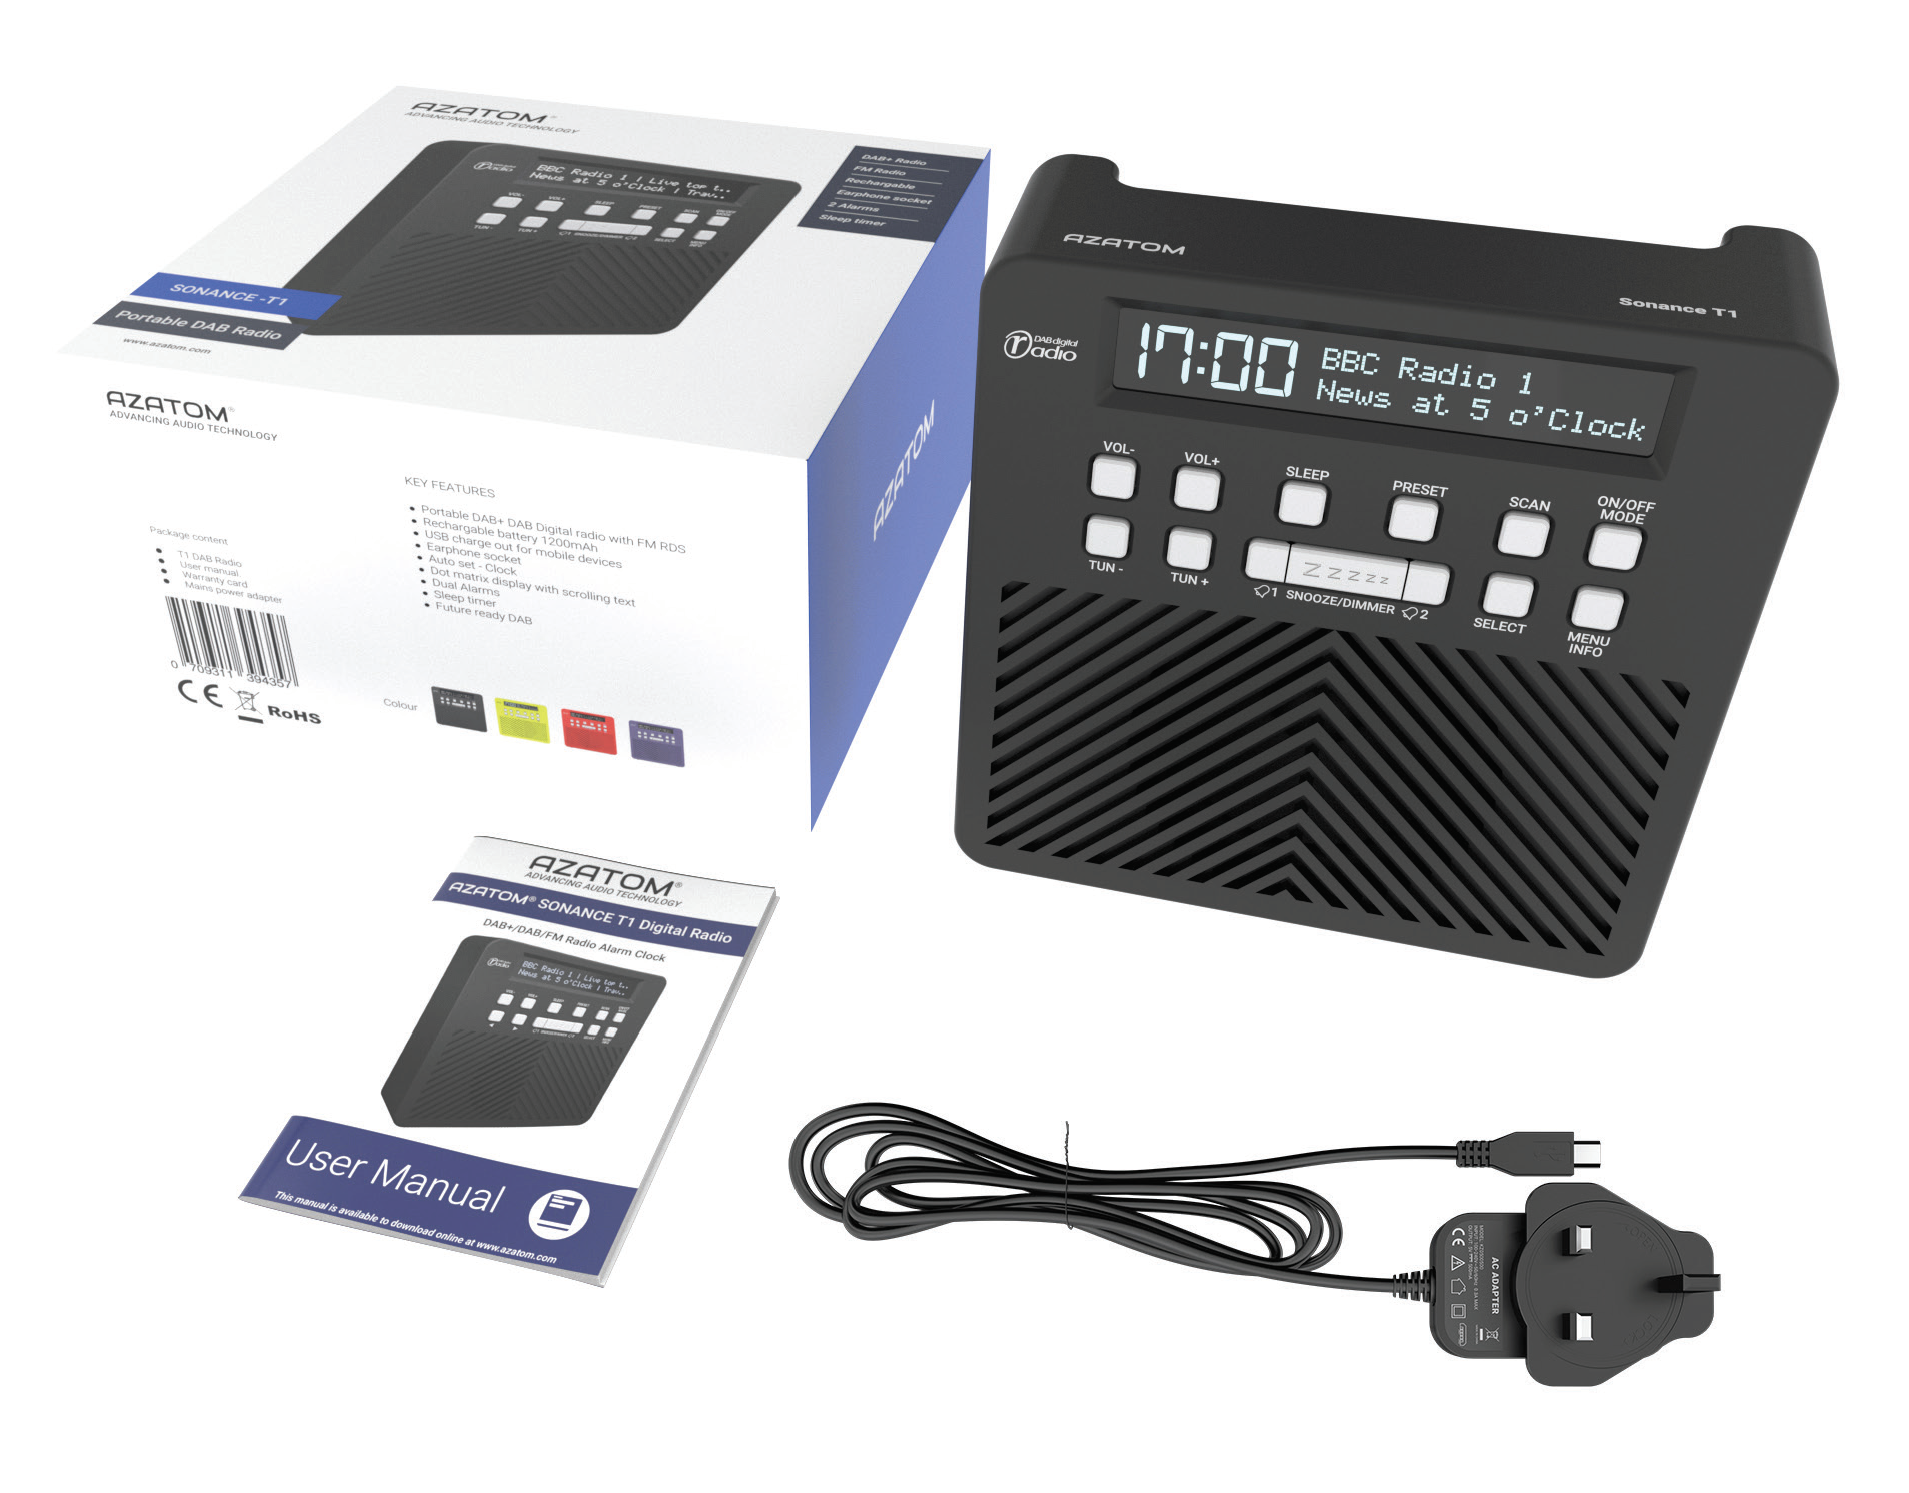
- AZATOM® SONANCE T1 Digital Radio
- User Manual
- Power Adapter
- AZATOM® Warranty Card
Using the SONANCE T1
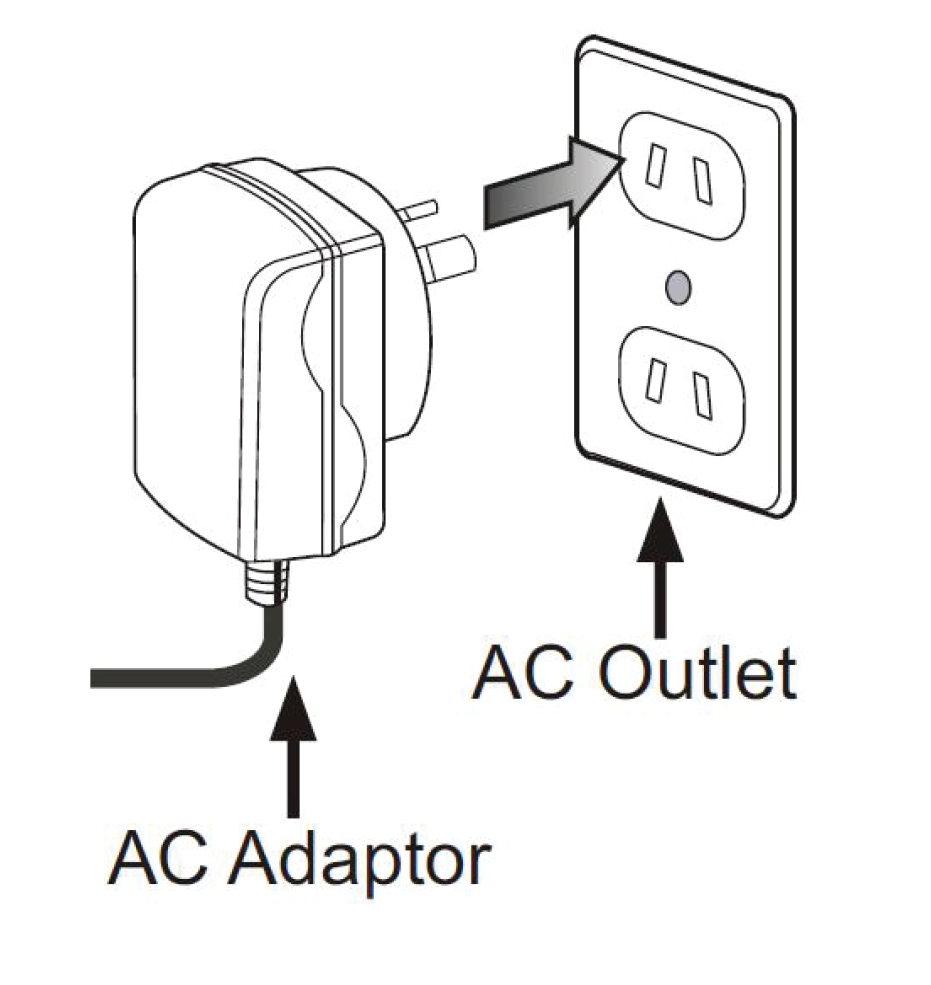
Power supply (Adapter):
Insert the mains adapter into a properly installed power socket.Connect the device with the plug connector by inserting its plug into the 5V DC charging port of the device.Make sure the grid voltage corresponds to the figures on the rating plate.Using the SONANCE T1
CAUTION:
Only use the supplied power adapter for this device.Do not use the included power adapter for other devices.This adapter has been specially designed with an anti-magnetic module in the power cord to prevent interference.NOTE: Disconnect from mains power supply during longer periods of non-use.
Battery use:
To check the battery level of the unit, while the unit is powered on insert the power adapter into the side of the unit with the mains power turned on. The display with show the current battery level for 5 seconds and then revert back to the current station information.
When the charger is removed the display will also show the current charge level,For example Example : BATTERY LEVEL 75%
The battery level can then be checked by inserting and removing the charger (while mains power is on) at any time.

Operating your radio – DAB:
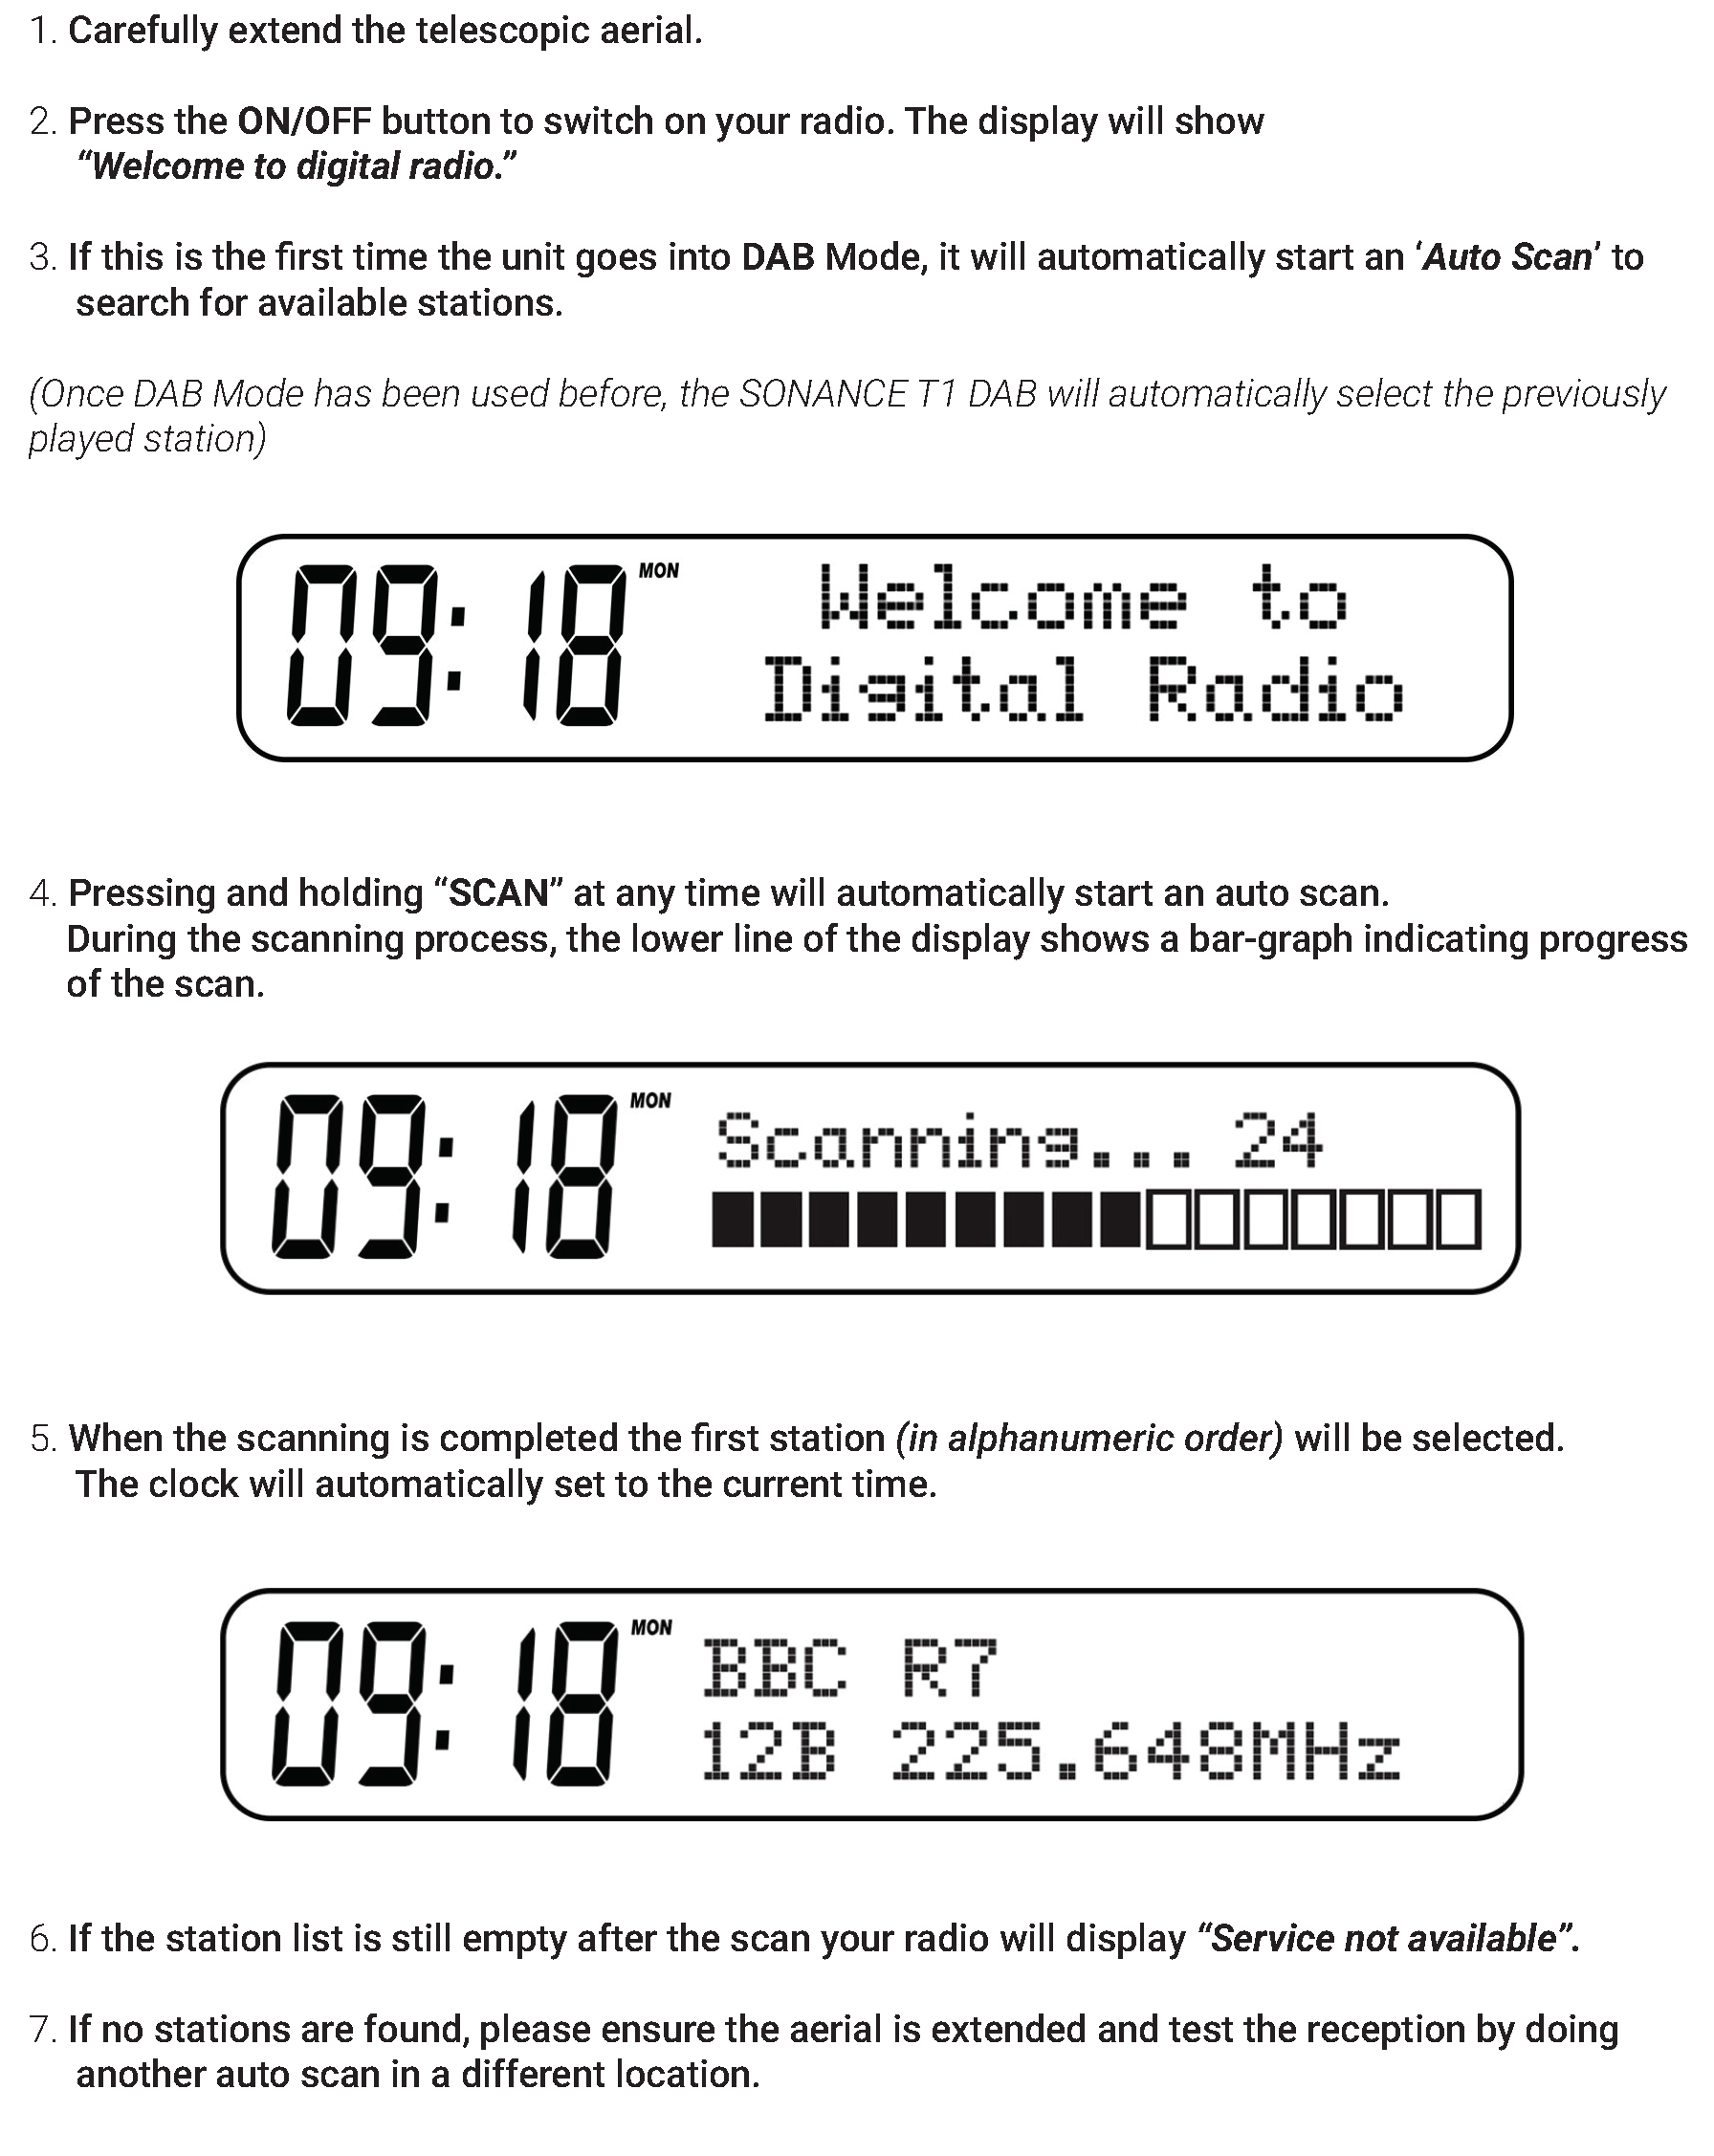
Selecting a station – DAB:
Auto Scan – DAB:
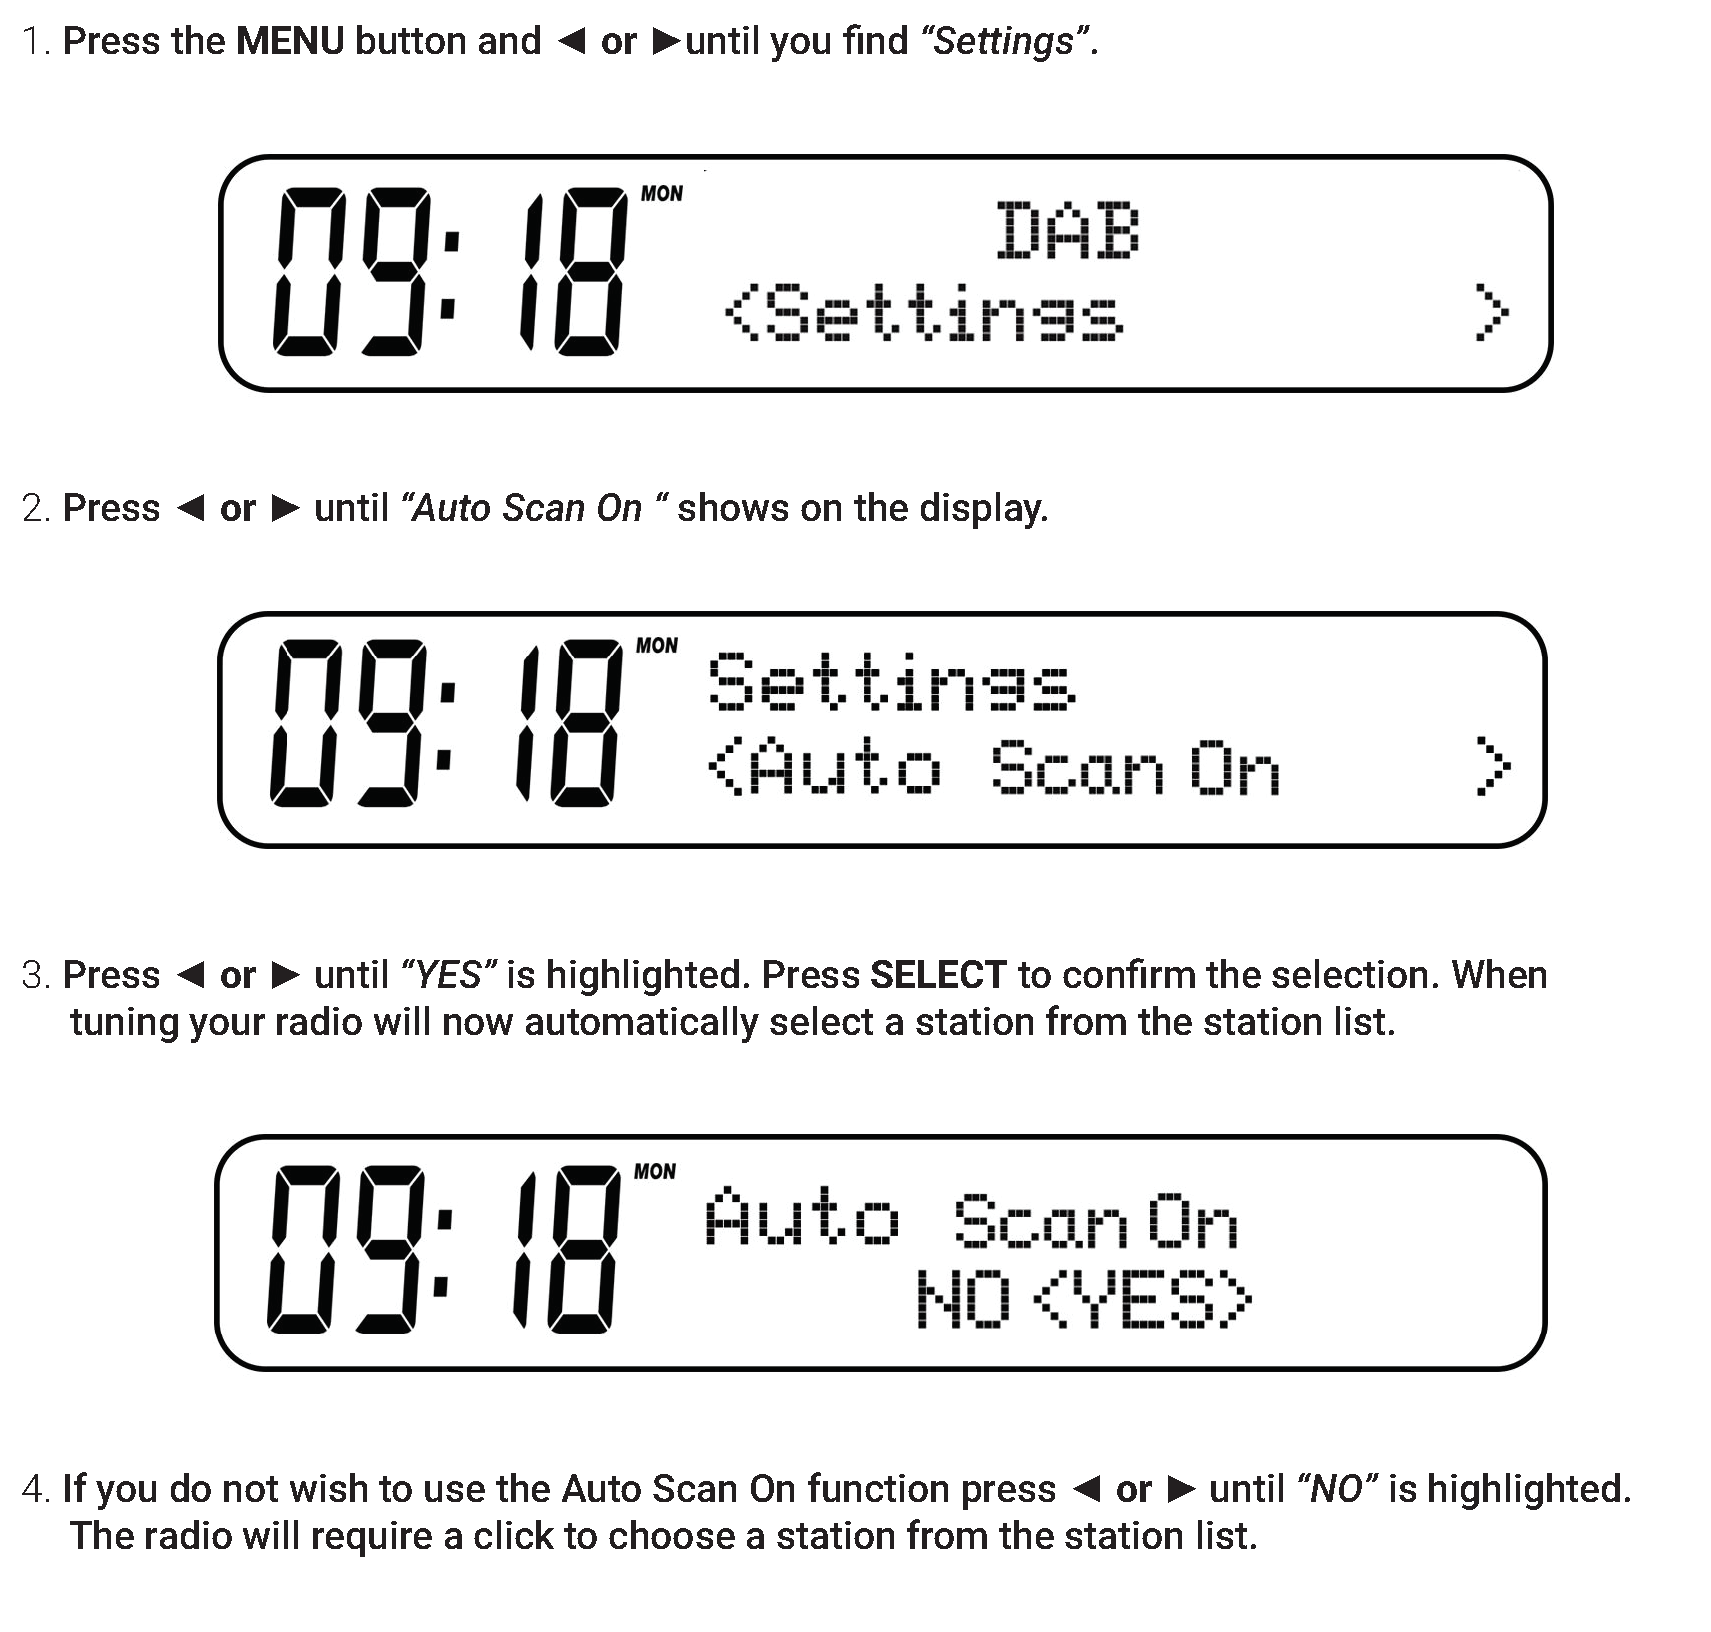
As an alternative to clicking the menu to select a station your radio can be set to automatically select a station.
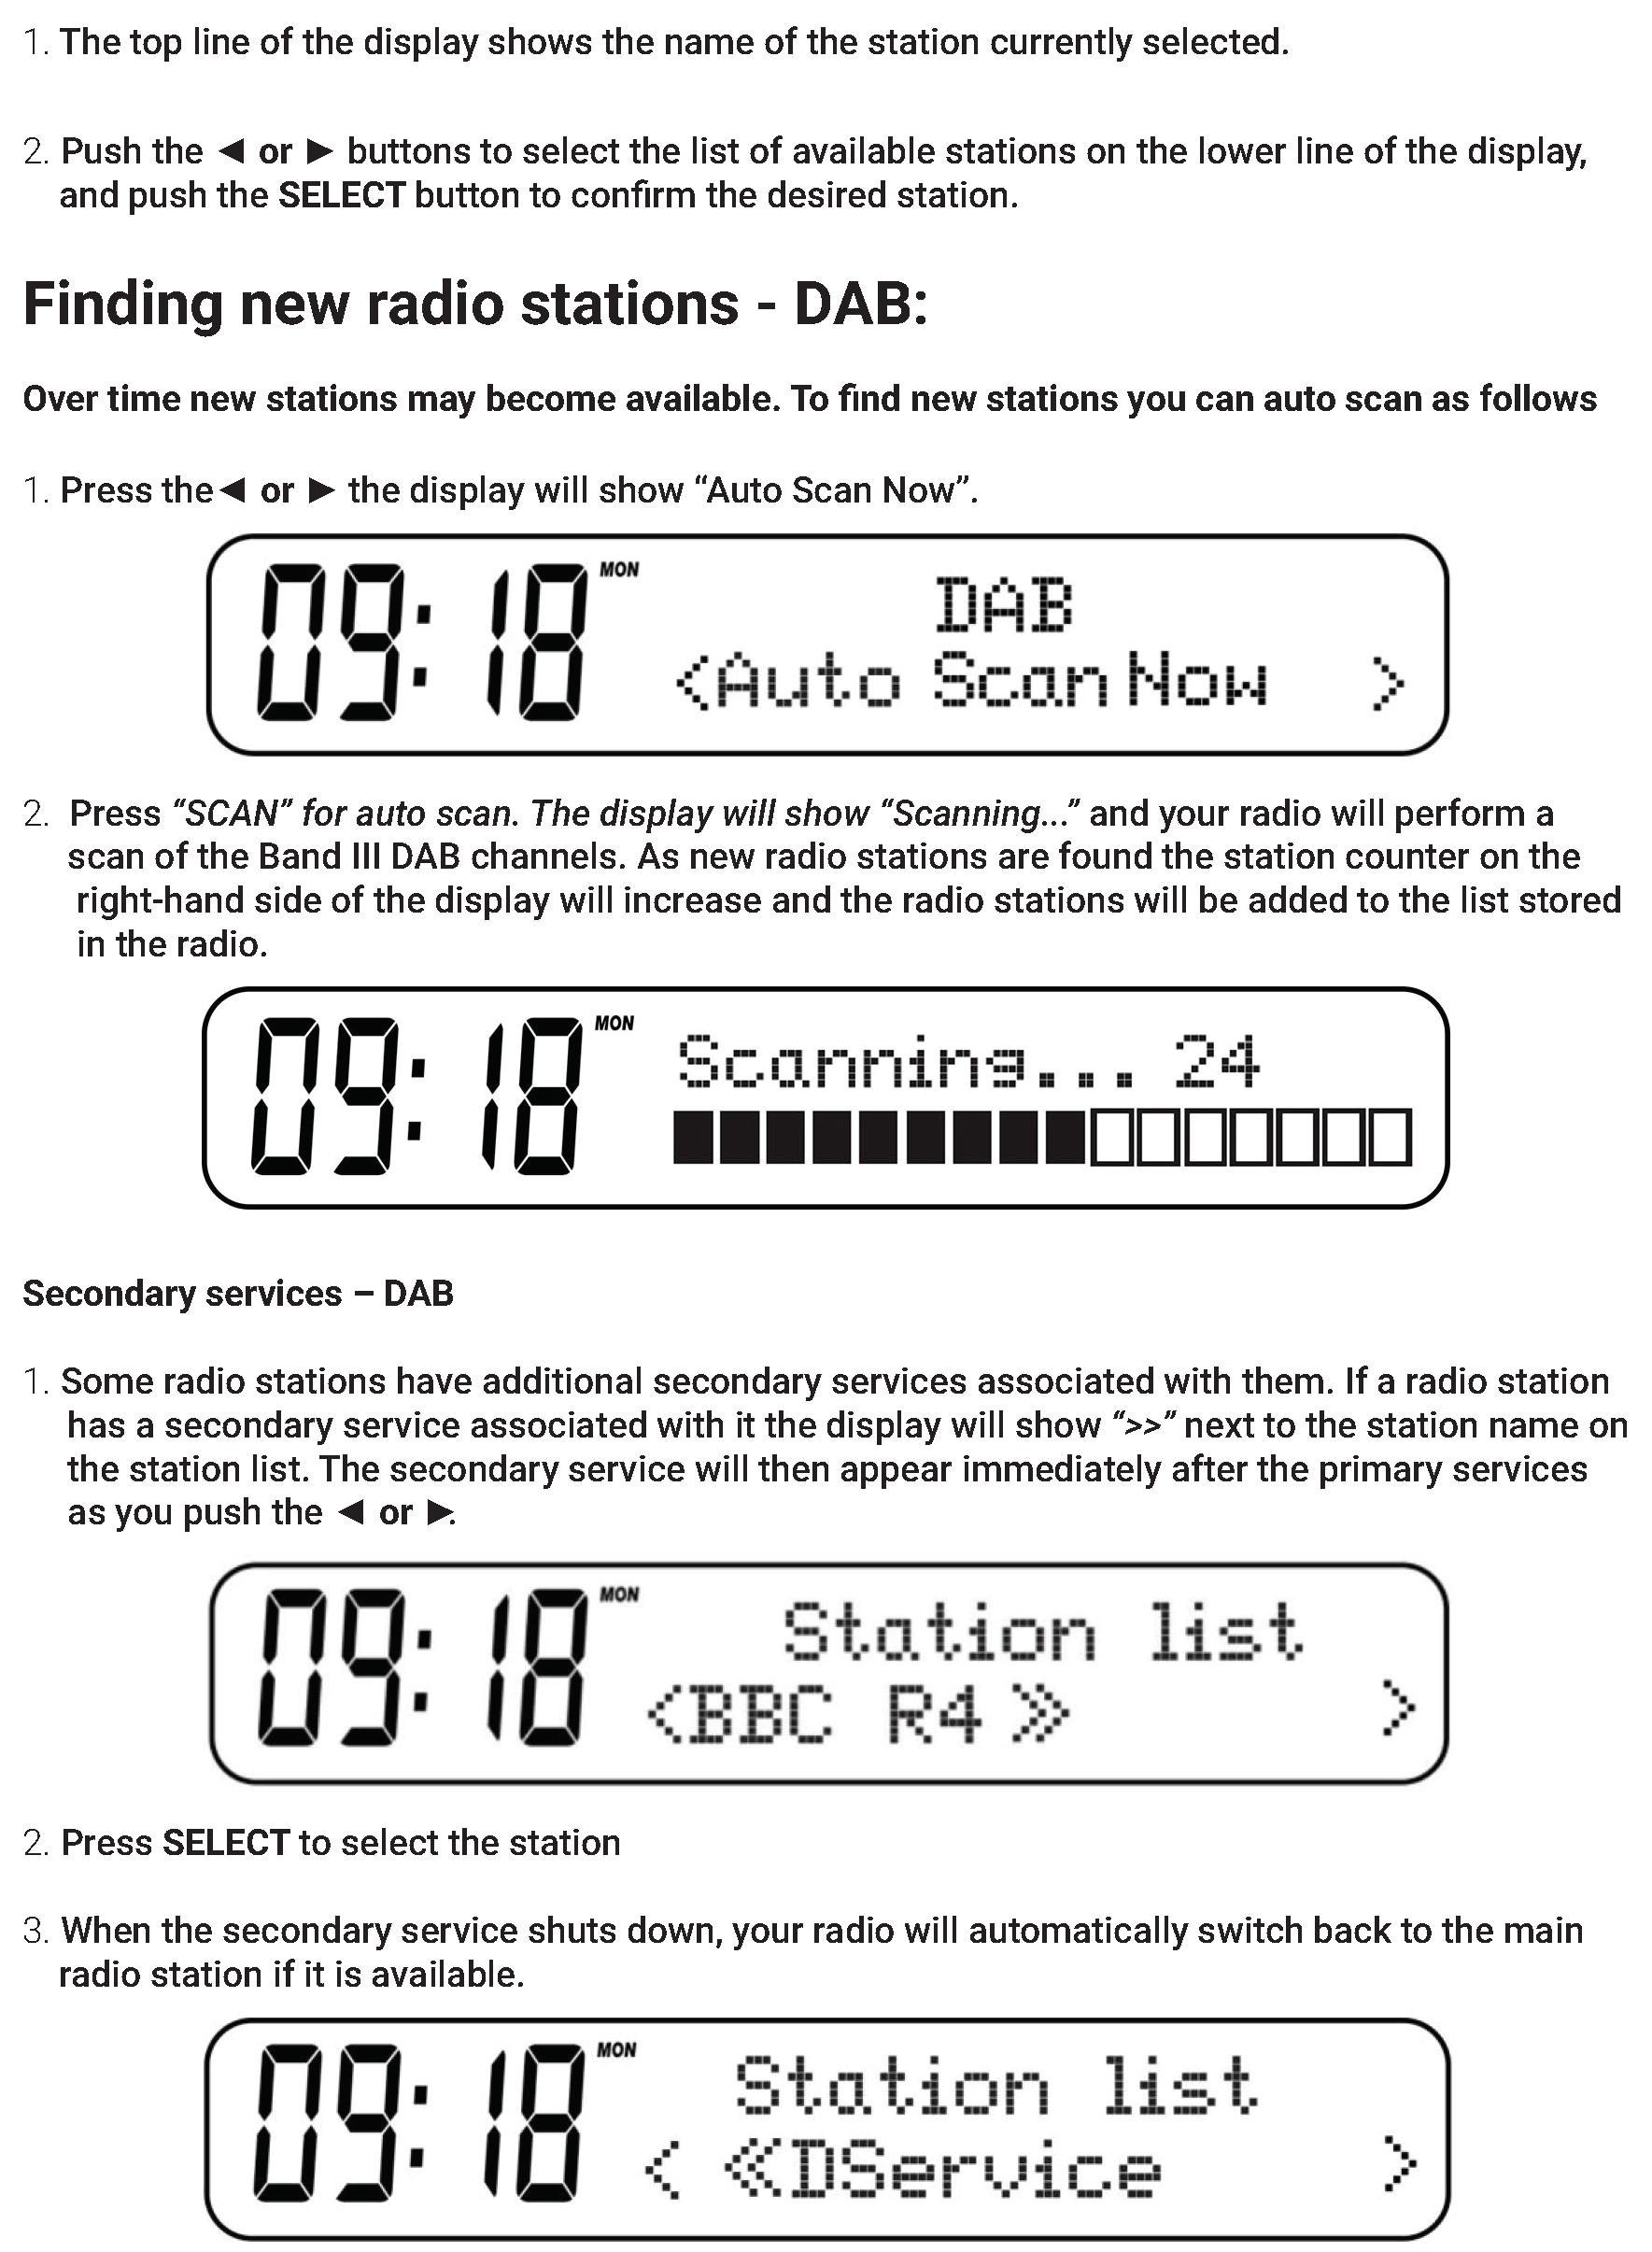
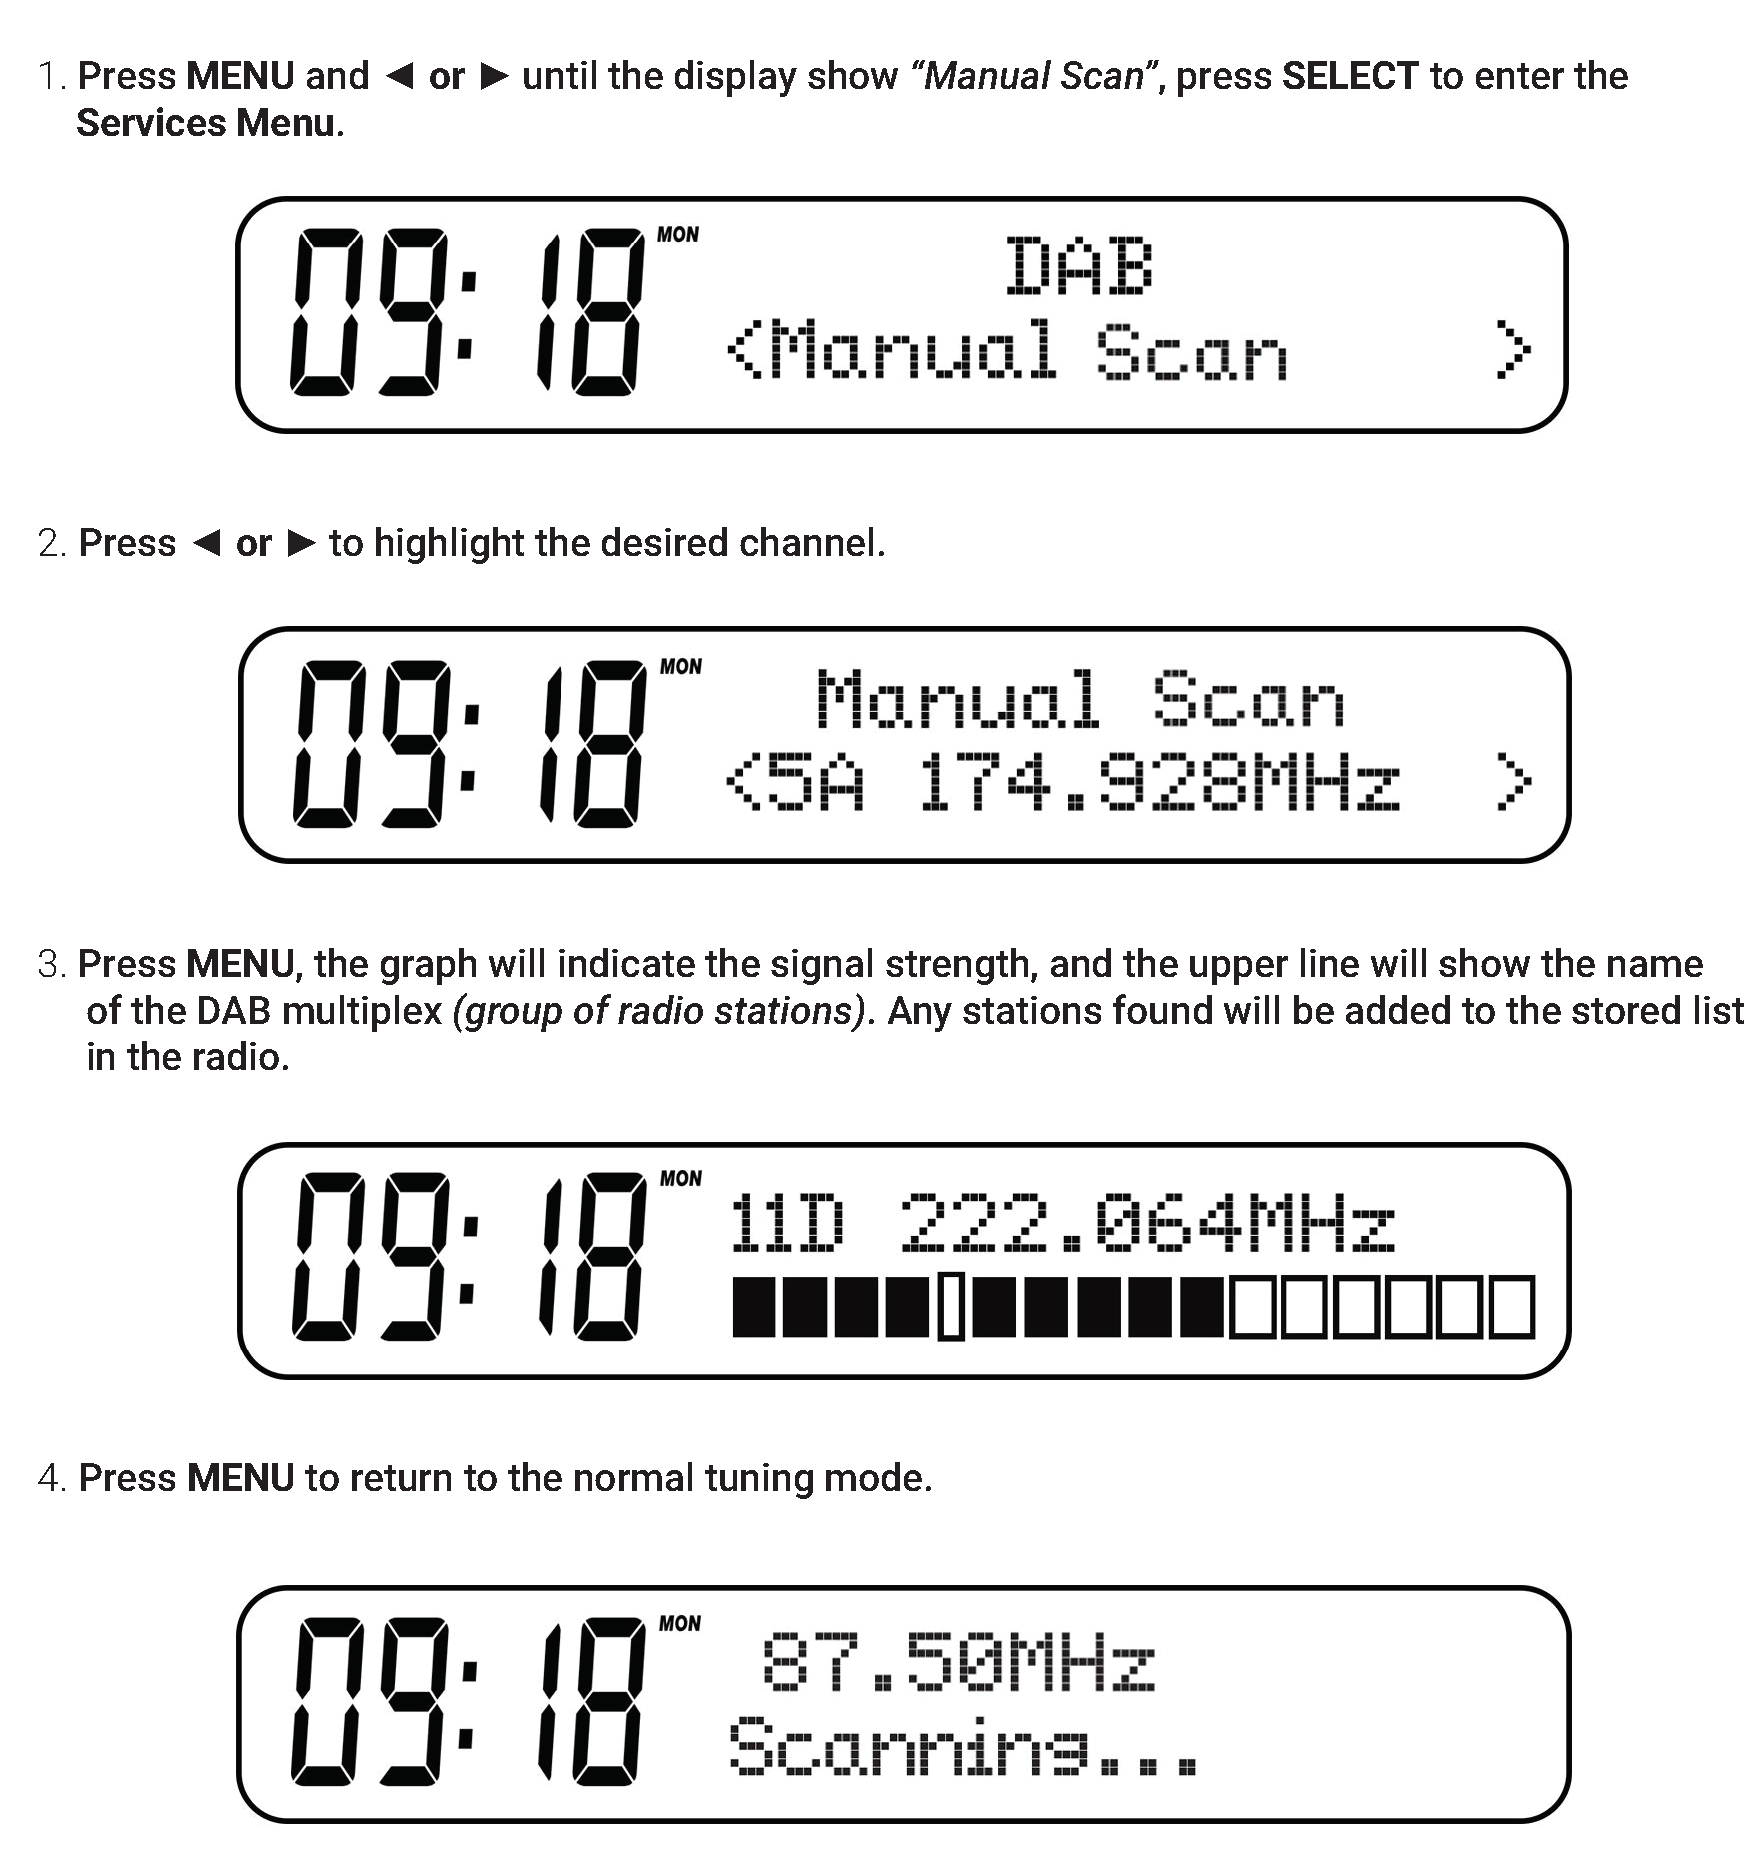
Manual Tuning – DAB:
Manual tuning allows you to tune display to the various DAB Band III channels.
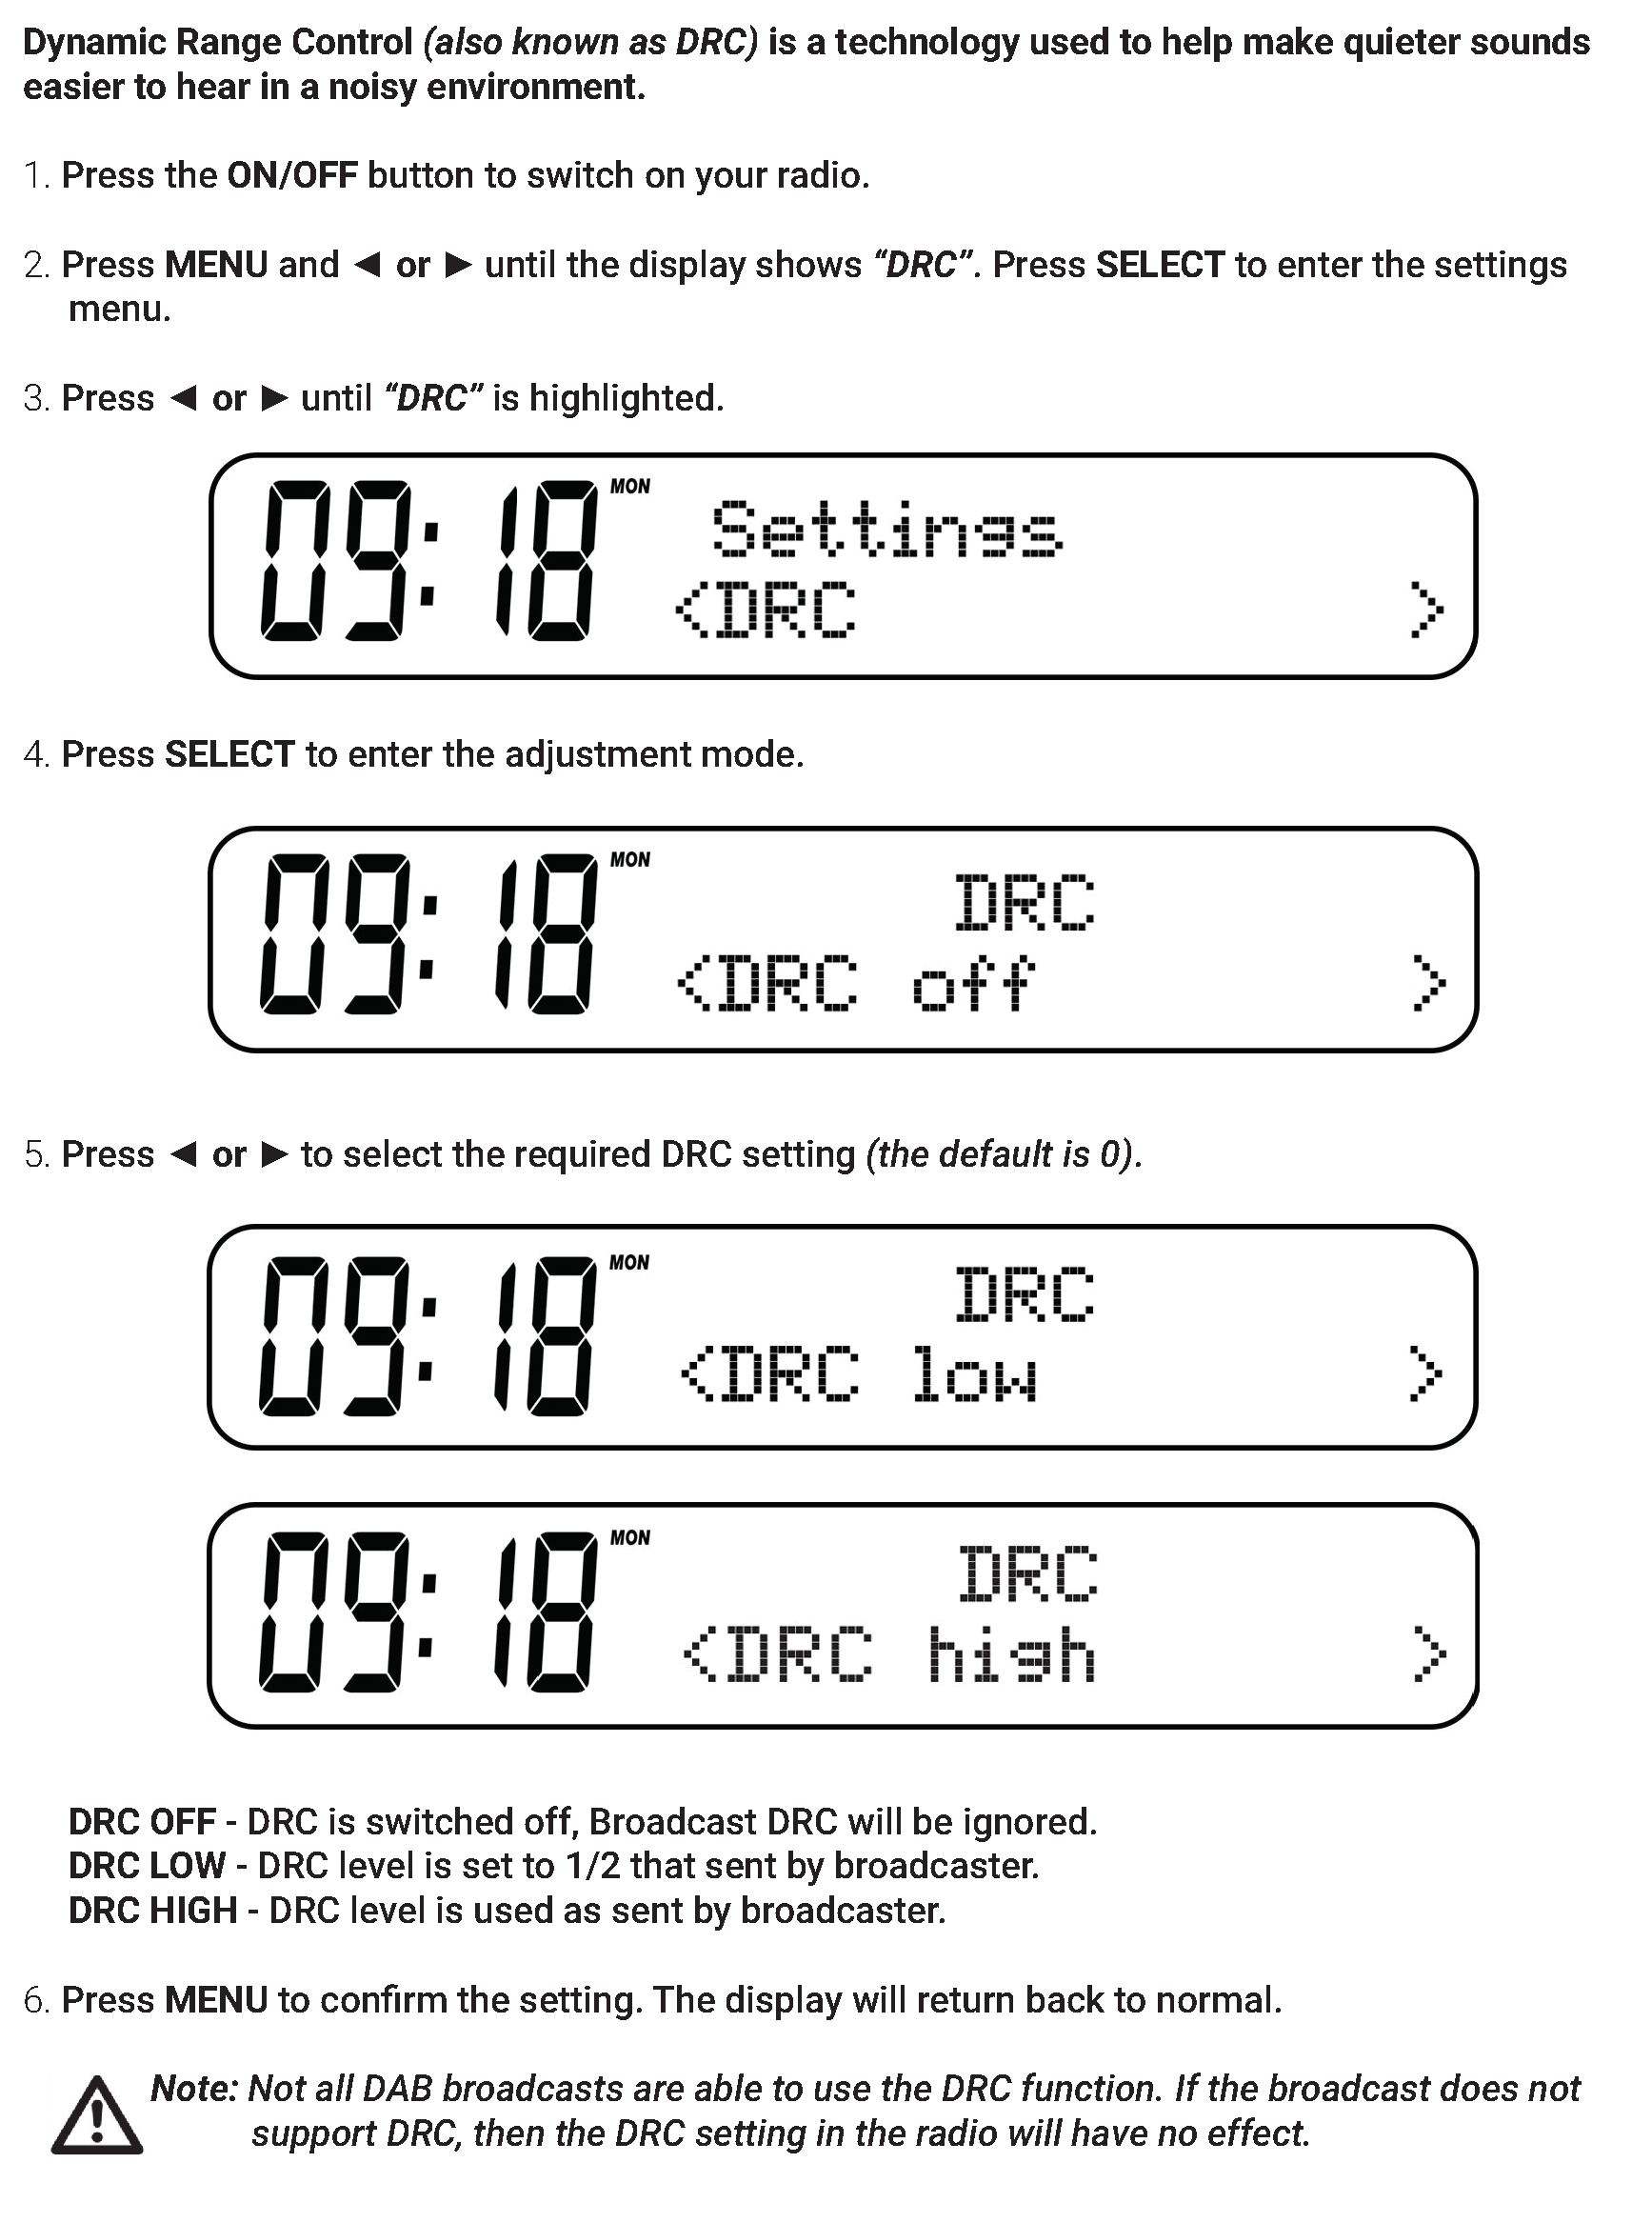
Dynamic Range Control Settings – DAB:
Auto Search Tuning – FM:

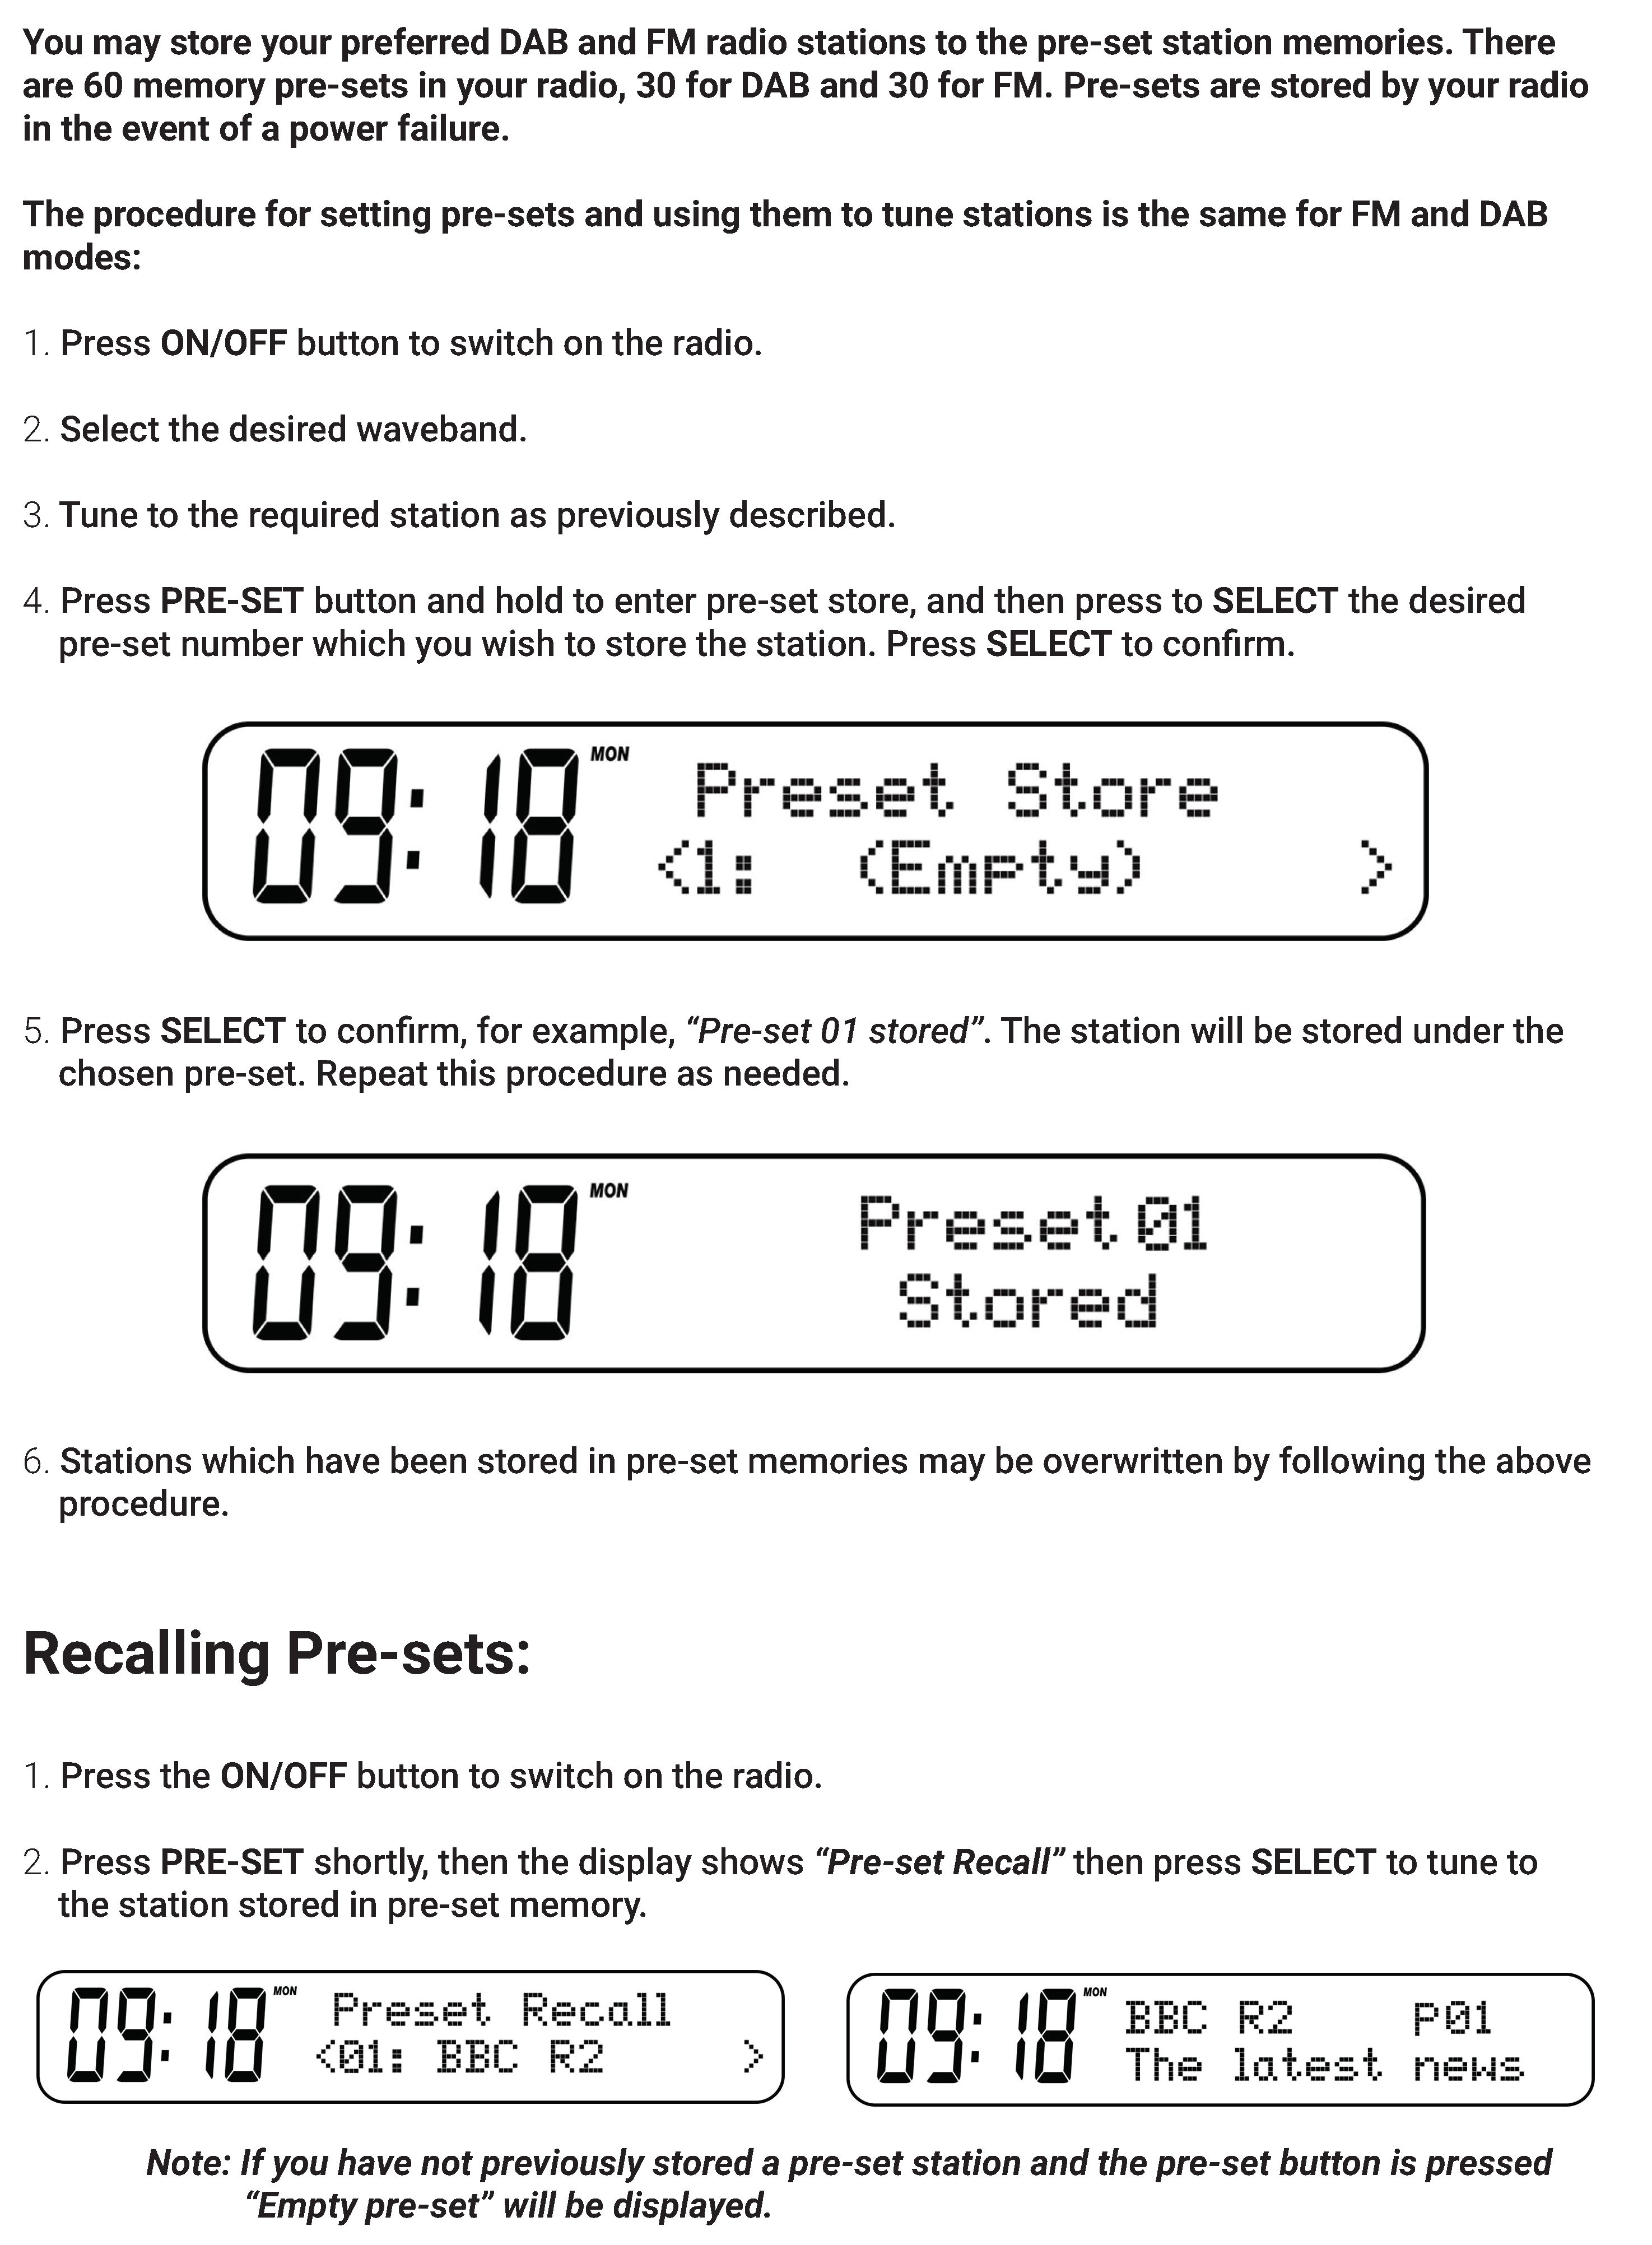
Preset Stations – FM and DAB:
Brightness settings:
Press the Dimmer/Snooze button for four levels of brightness: High, Medium, Low and Sleep low.
Sleep function:
Your radio can be set to turn off after a pre-set time has elapsed.The sleep setting can be adjusted between 15 and 90 minutes. Ensure your radio is switched on.

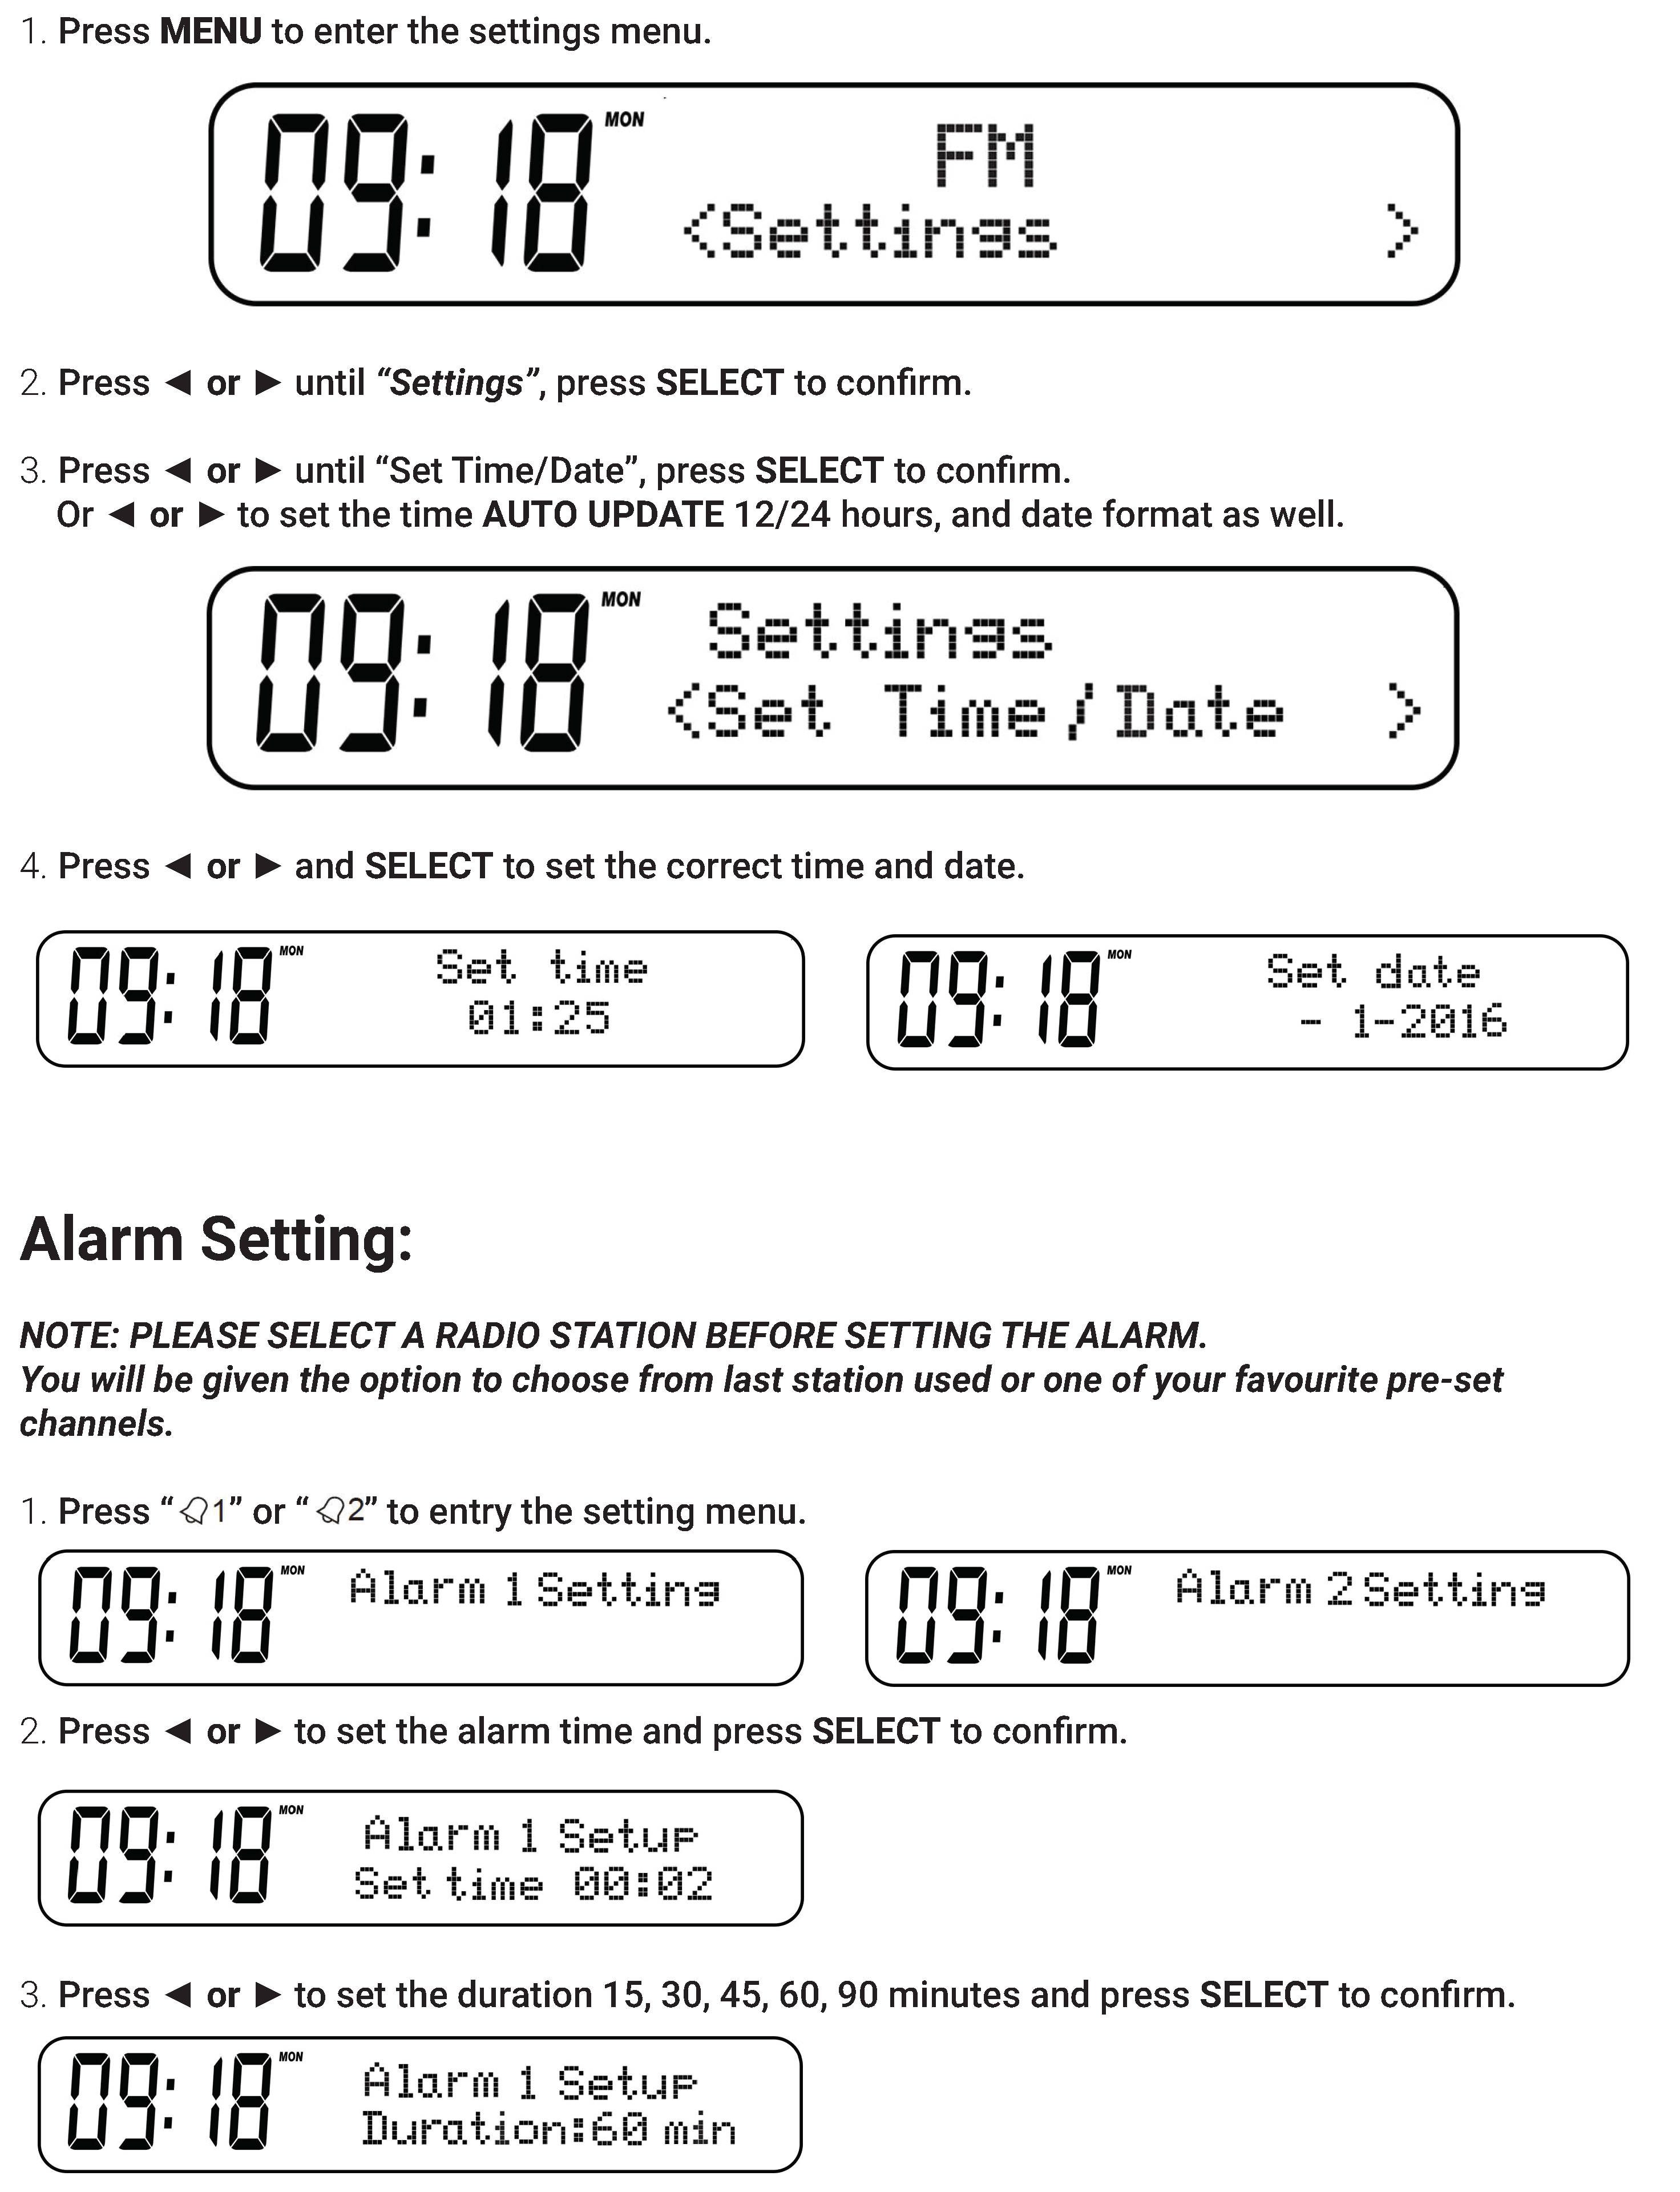
Time/Date Setting:
When no DAB/FM signal, you need to set the TIME and DATE manually.

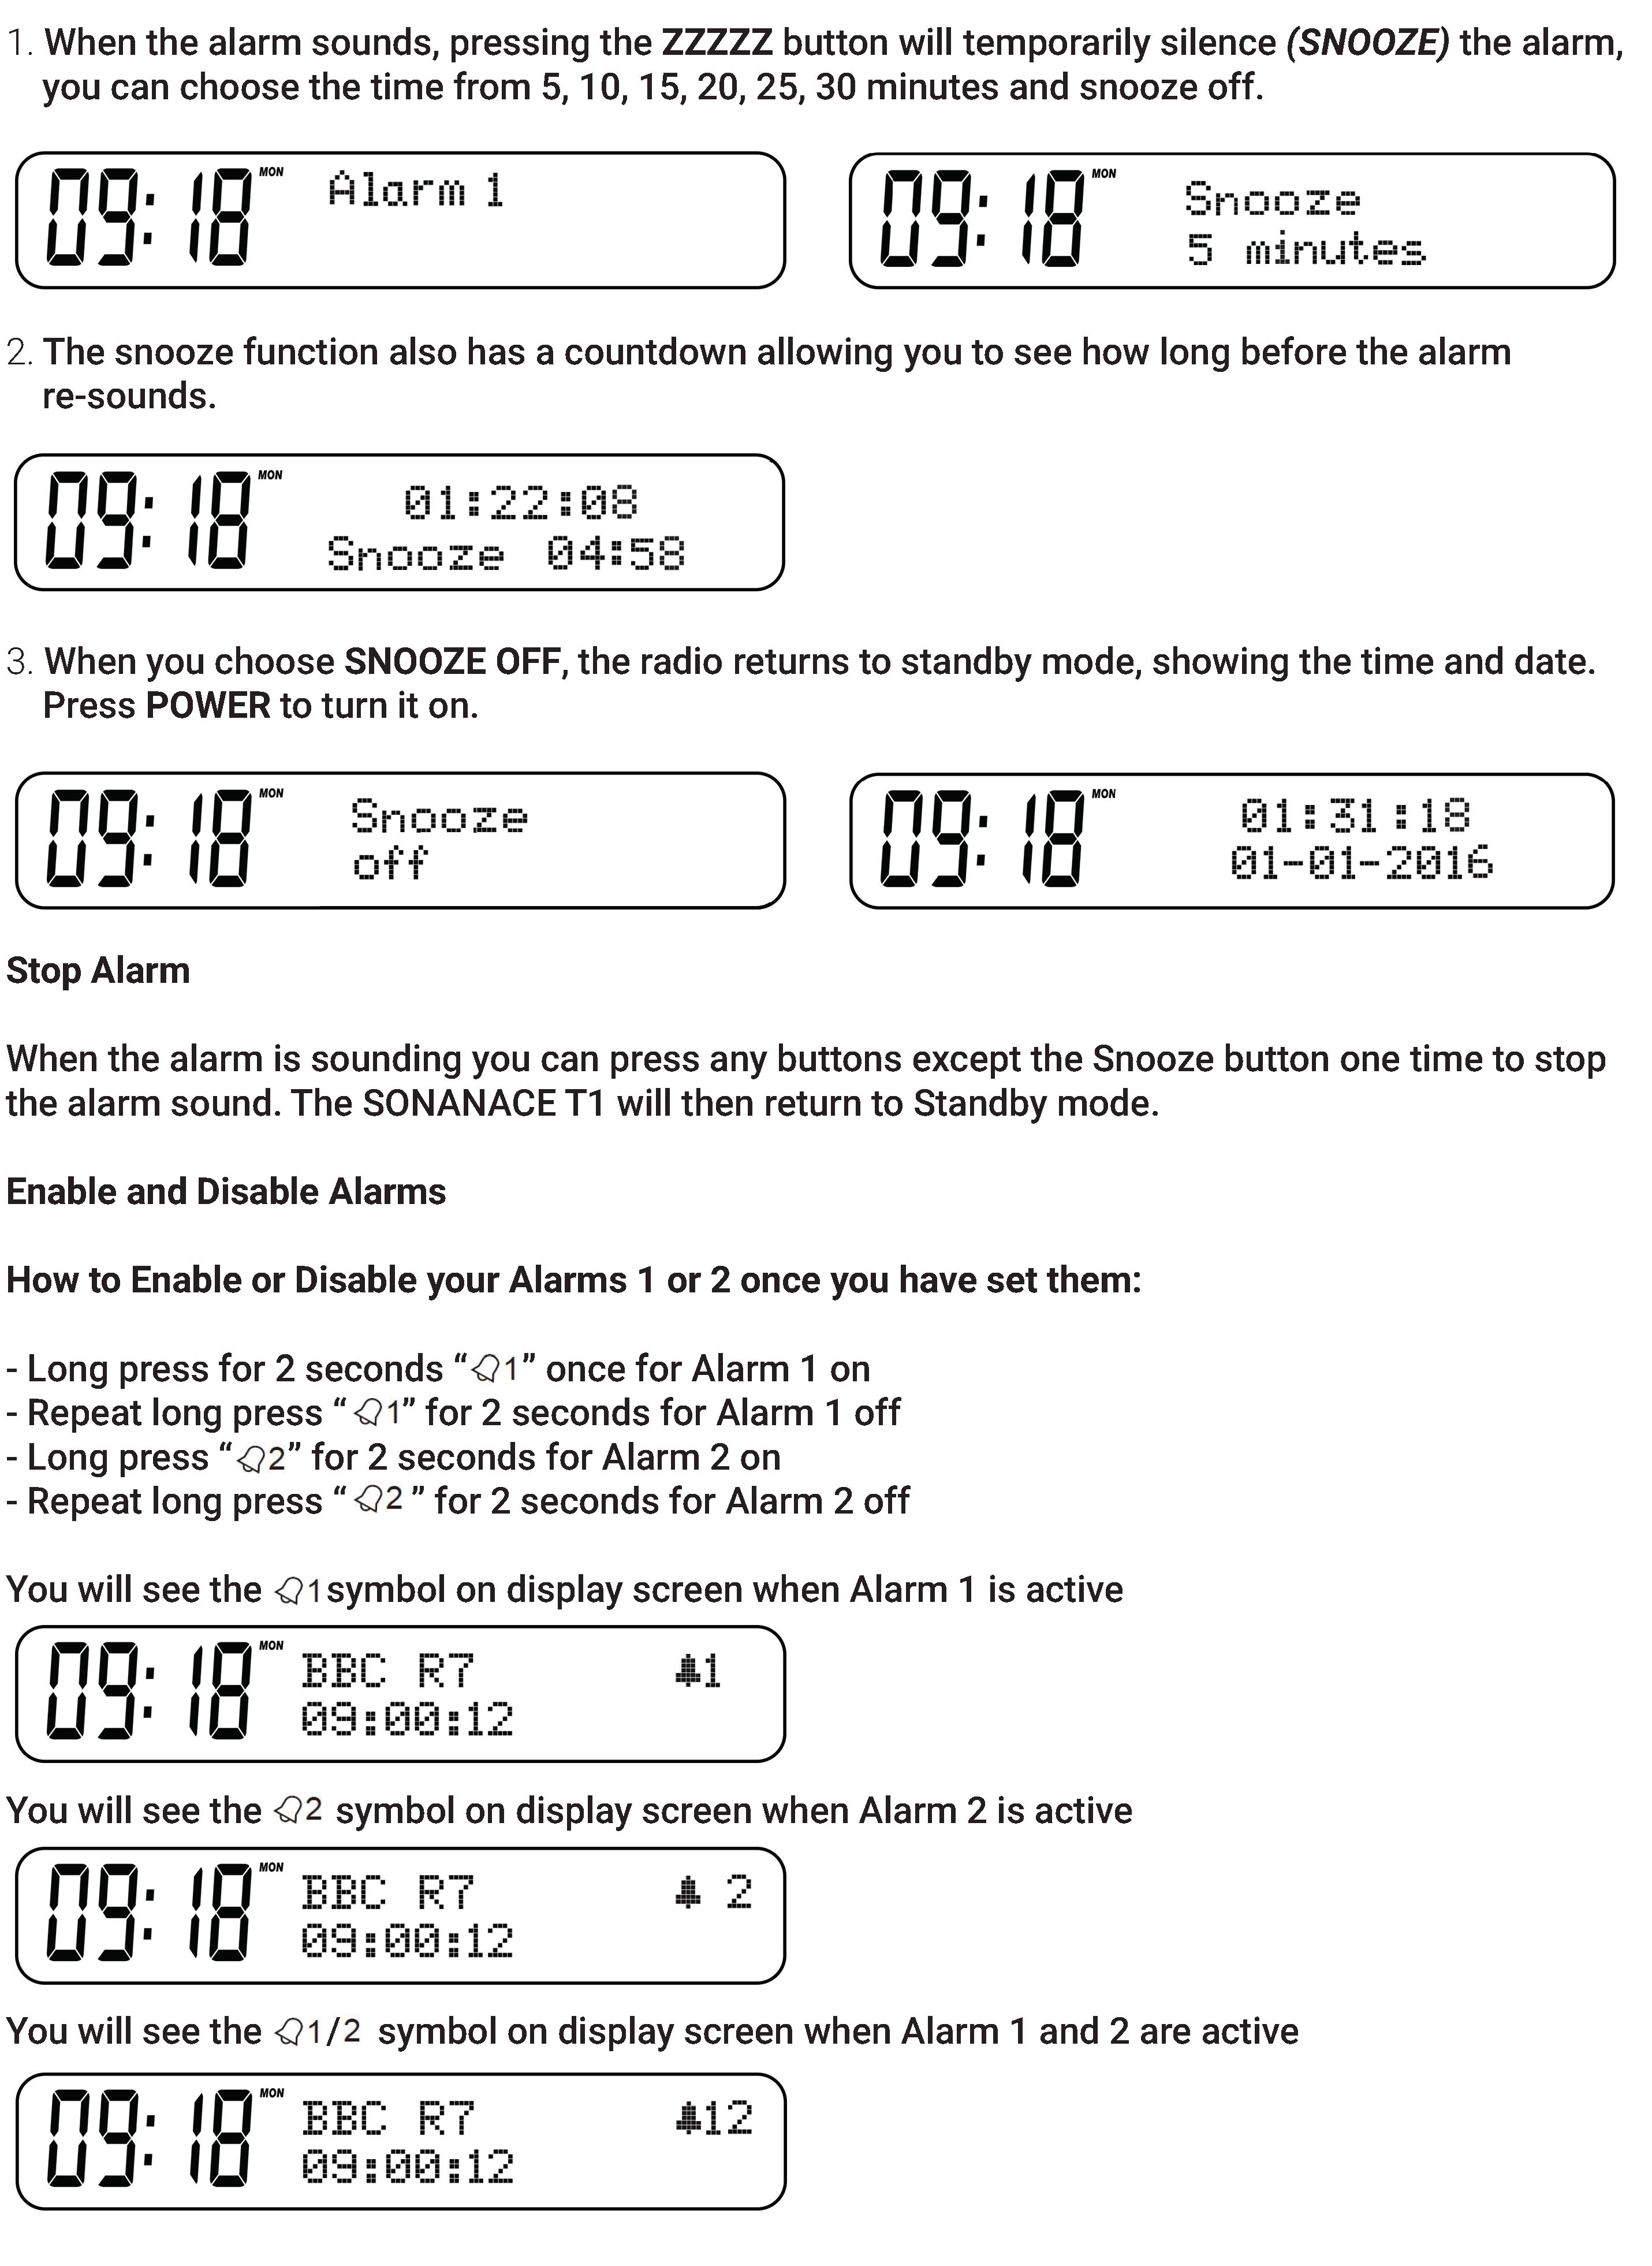
Snooze – Stop Alarm – Disable Alarms:
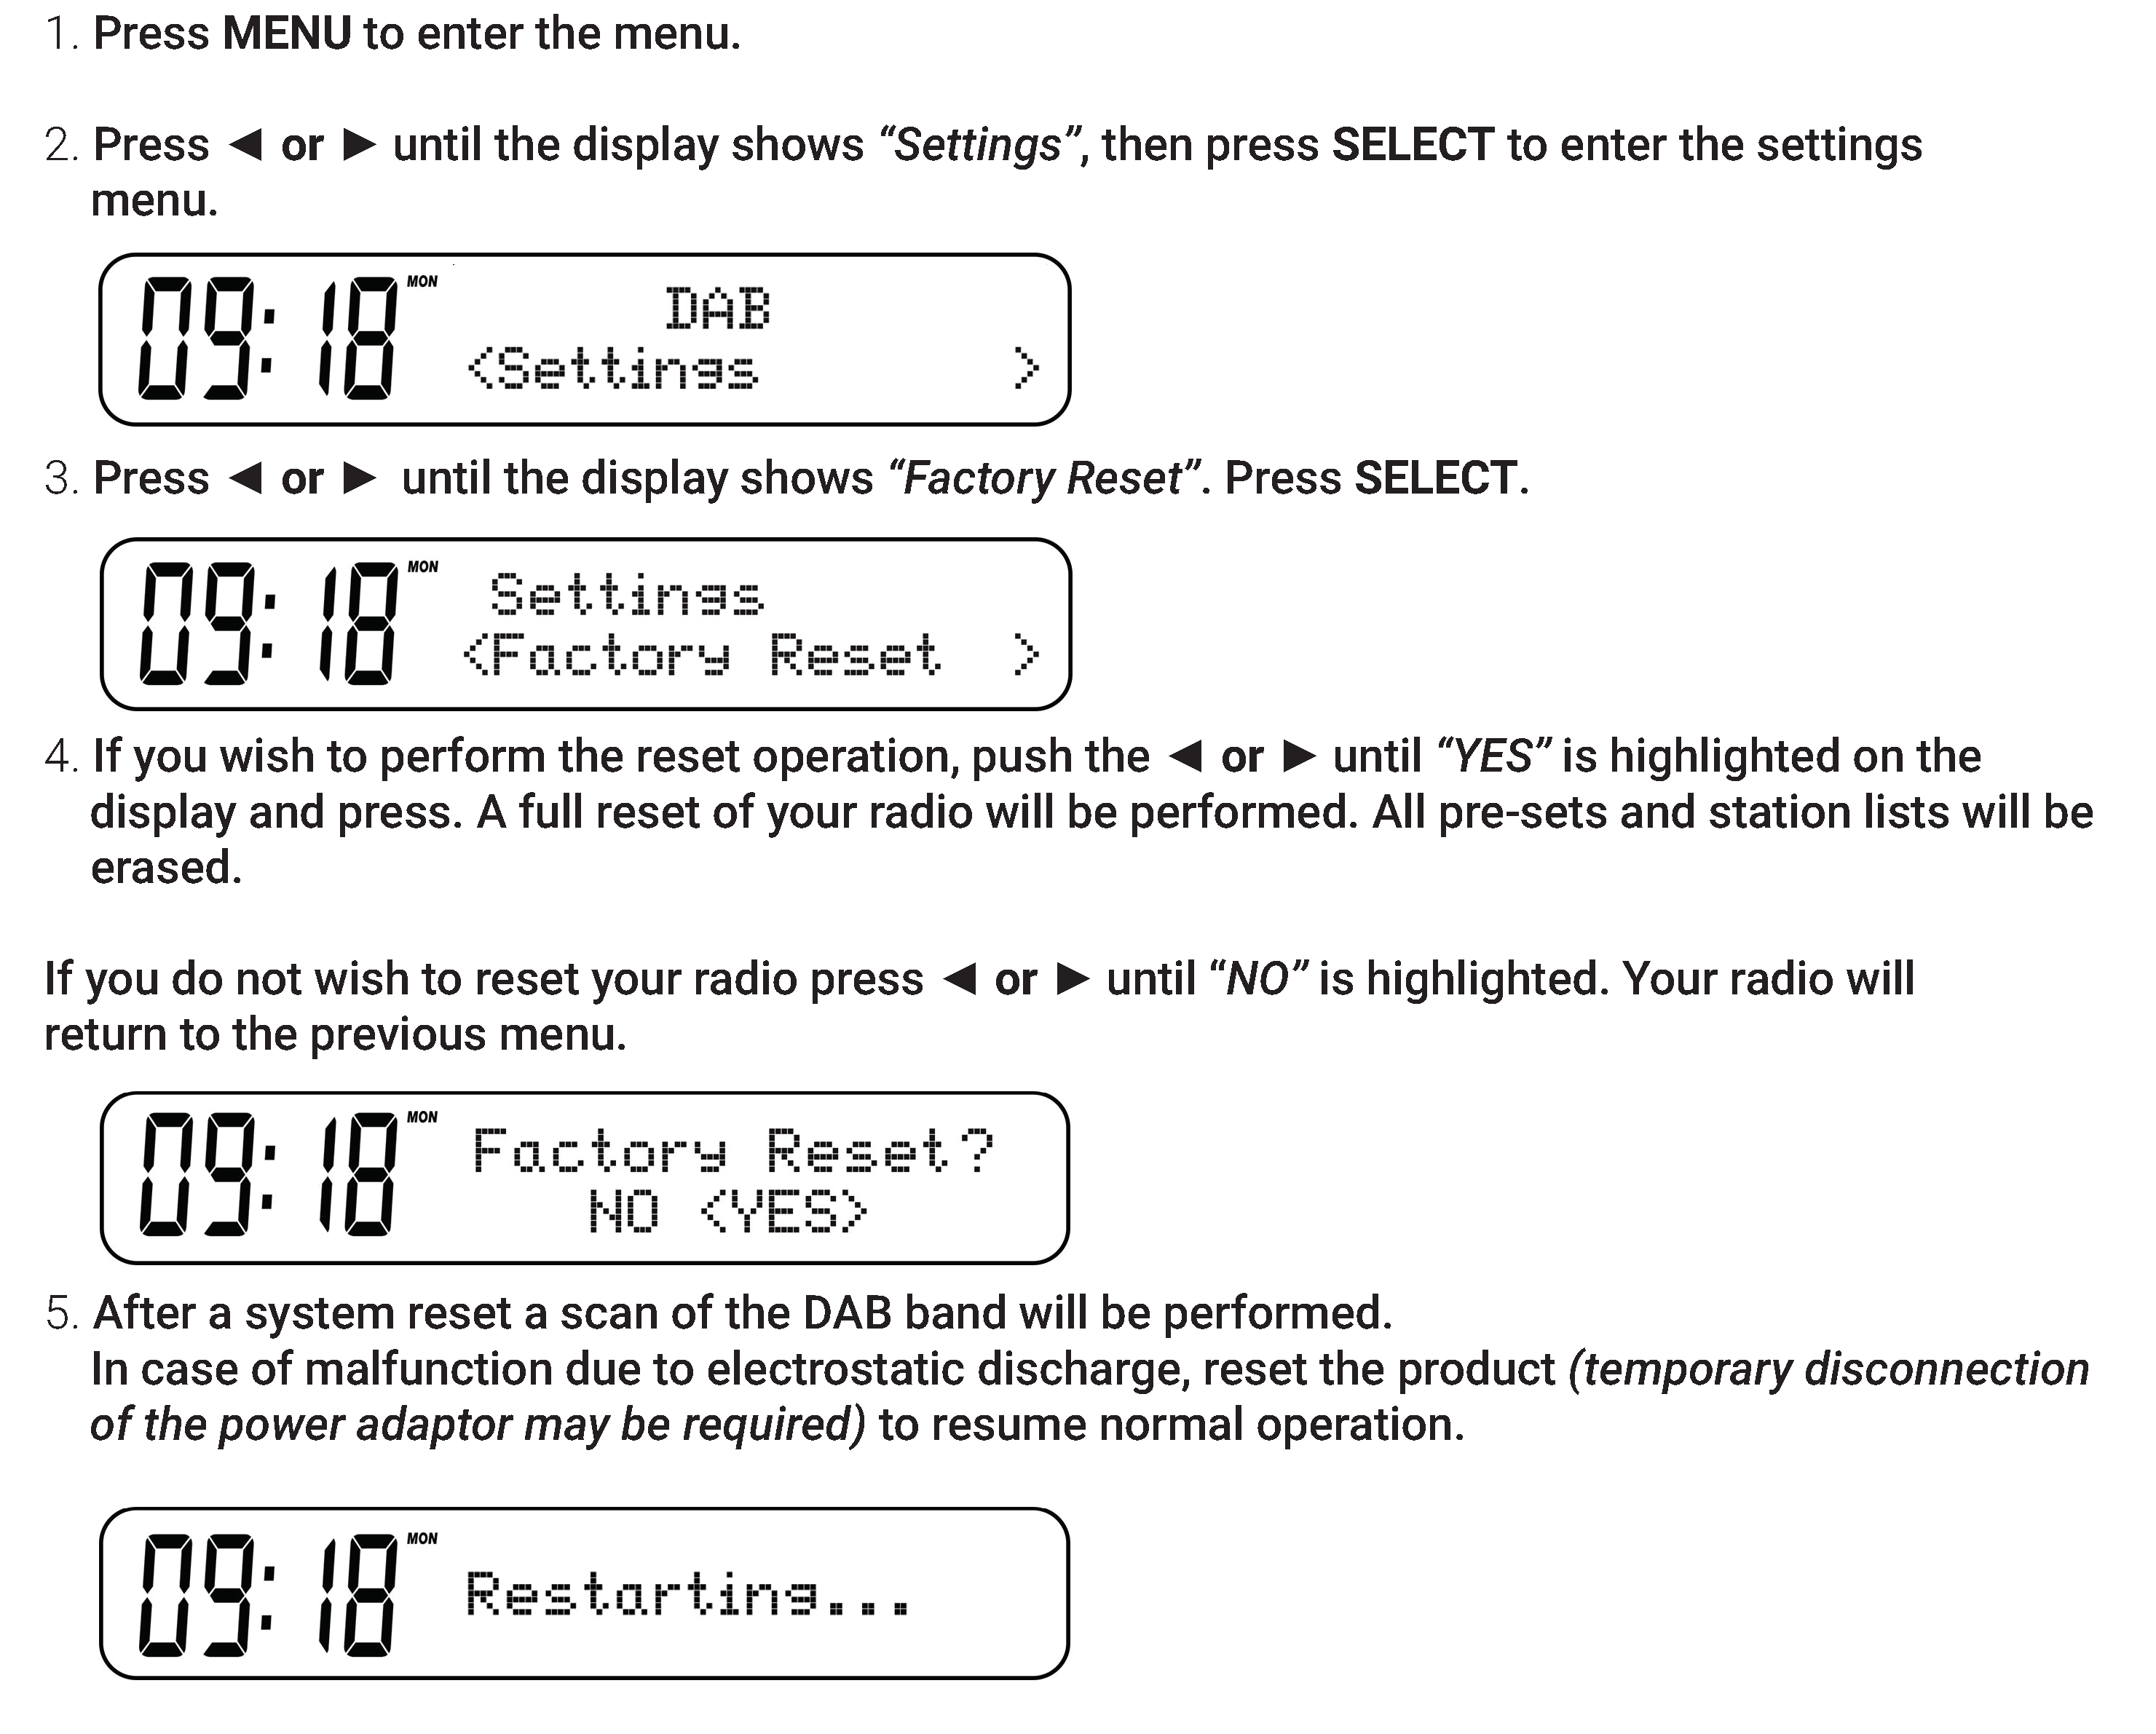
Factory reset:
If your radio fails to operate correctly, or some digits on the display are missing or incomplete, it may be possible to restore normal operation by carrying out a system reset on your radio. This will restore the radio’s settings to the factory default. No pre-sets will be stored, and the list of DAB radio stations will be empty.
If you have moved to a different part of the country and you wish to erase local DAB radio stations that are no longer available from the stored list, then you may choose to carry out this procedure.
Your radio will automatically re-scan for the DAB stations available at your current location when it restarts.
Earphones (NOT INCLUDED):
The lead connecting the earphones to your radio acts as an aerial when plugged into the Earphone socket.
- Plug the earphones into the Earphone socket on the back of your radio.
- Check that the Volume level is not too loud before listening through the earphones.
IMPORTANT: Do not switch on the radio with the earphones connected and inserted in your ears. Excessive sound pressure from earphones can cause hearing loss.
Technical Specifications
- Power requirement mains (via adaptor): AC 100-240V, 50/60Hz; DC 5V 1A
- Battery: 3.7V /1200mAh battery.
- Frequency Coverage:FM: 87.5-108MHzDAB: 174.928 – 239.200MHz
- Circuit Features:Loudspeaker: 3.0 inchOutput power: 3W RMS (speaker)Earphone socket: 3.5mm dia. stereoAerial system: FM: Telescopic AerialDAB: Telescopic Aerial
IMPORTANT SAFETY INFORMATION
- Read these instructions.
- Keep these instructions. Instructions are also available for download at www.azatom.com
- Heed all Warnings.
- Follow all instructions.
- Do not clean the apparatus near or with water.
- Clean only with a dry cloth.
- Do not block any ventilation openings.Install in accordance with the manufacturer’s instructions.
- Do not install near any heat sources such as radiators, heat registers, stoves, or other apparatus (including amplifiers) that produce heat.
- Protect the power cord from being walked on or pinched particularly at plugs, convenience receptacles, and the point where they exit from the apparatus.10. Only use attachments/accessories specified bythe manufacturer.
- Unplug this apparatus during light storms or when unused for long periods of time.
- Refer all servicing to qualified service personnel.Servicing is required when the apparatus has been damaged in any way, such as powersupply cord or plug is damaged, liquid has been spilled or objects have fallen into the apparatus, the apparatus has been exposed to rain or moisture, does not operate normally or has been dropped.
- No naked flame sources, such as lit candles, should be placed on the apparatus.
- Dispose of used electrical products and batteries safely according to your local authority and regulations.
ADDITIONAL WARNINGS
The apparatus shall not be exposed to dripping or splashing and no objects filled with liquid, such as vases, shall be placed on apparatus.Main plug is used to disconnect device and it should remain readily operable during intended use. In order to disconnect the apparatus from the main mains completely, the mains plug should be disconnected from the main socket outlet completely.Battery shall not be exposed to excessive heat such as sunshine, fire or the like.
RECYCLING ELECTRICAL PRODUCTSYou should now recycle your waste electrical goods and in doing so help the environment .
 This symbol means an electrical product should not be disposed of with normal household waste. Please ensure it is taken to a suitable facility for disposal when finished with.
IMPORTANT: Please read all instructions carefully before use and keep for future reference
- Risk of electric shock.Do not open
- Read all instructions carefully before use and keep for future reference.
- When servicing, use only identical replacement parts.
References
[xyz-ips snippet=”download-snippet”]