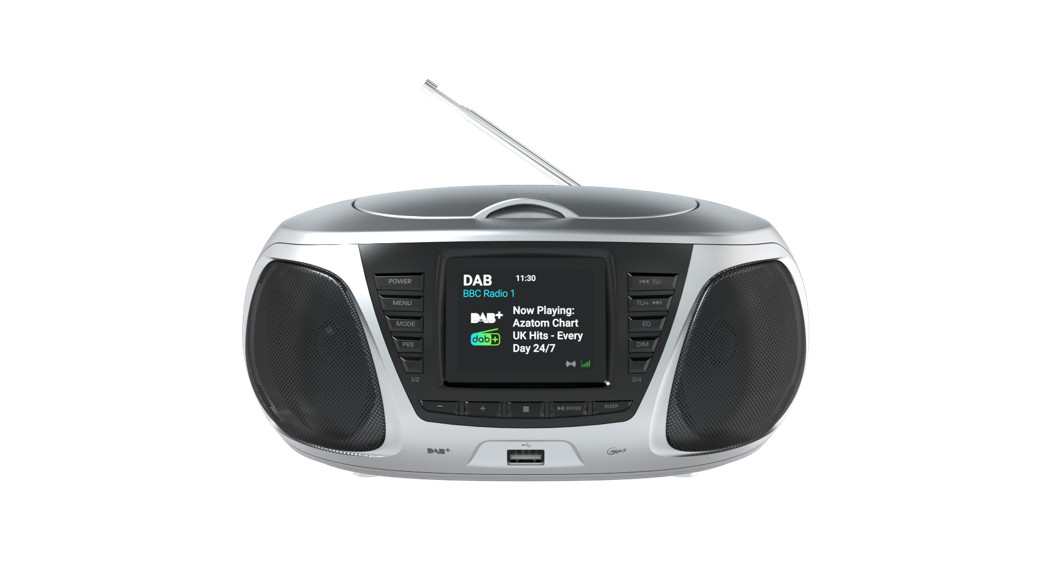
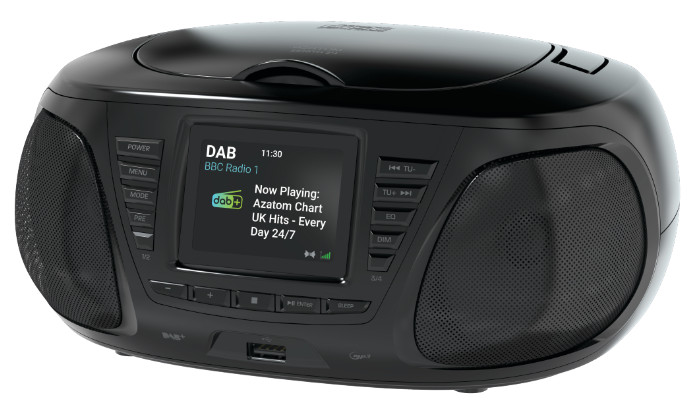
AZATOM®Zenith Z4DAB, DAB+, FM Radio with BT Wireless Audio & CD Player
User Manual
![]()
![]()
This manual is available to download online at www.azatom.com
Controls & Interface
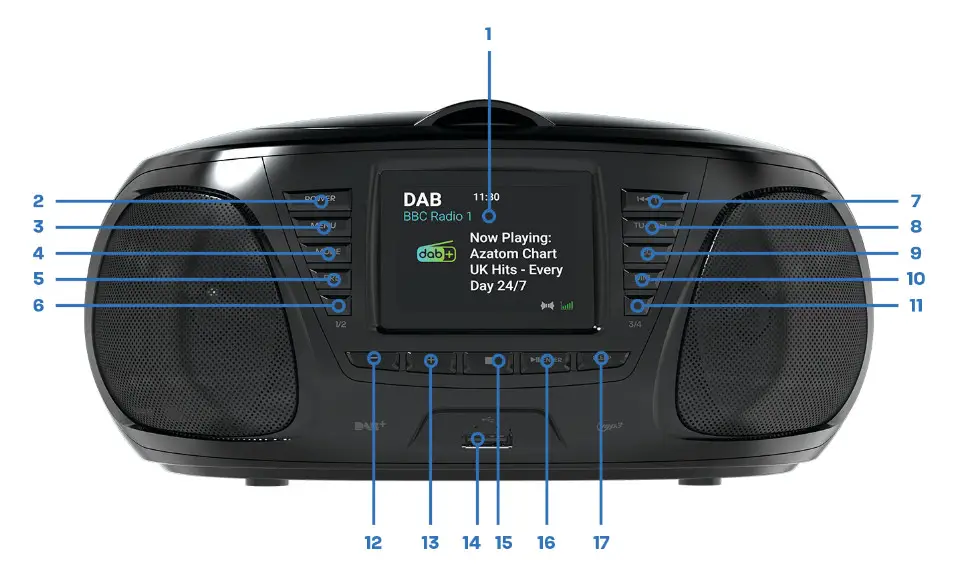 |
|
 |
18. CARRY HANDLE19. CD DOOR |
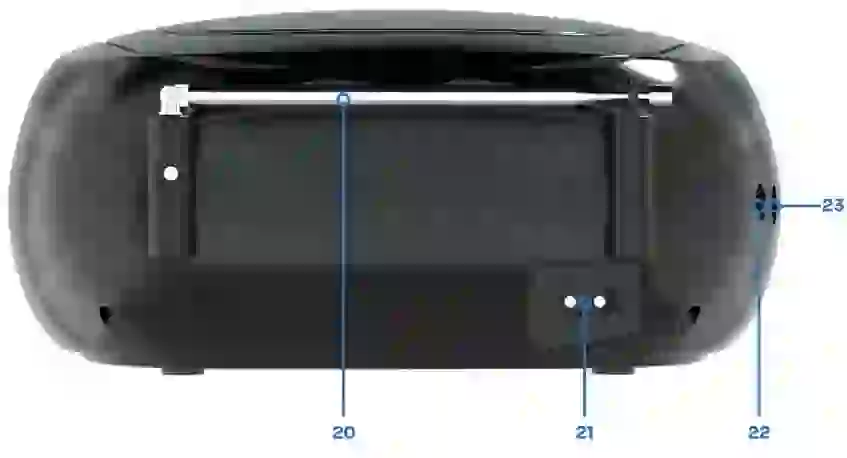 |
20. TELESCOPIC ANTENNA21. AC POWER PORT22. AUX-IN PORT23. PHONES PORT |
What’s In The Box
- Zenith Z4
- User Manual
- Power Adapter
- Warranty Card
Battery Operation
- Remove the battery cover on the bottom of the unit.
- Install 6 x DC1.5V “C” (UM-2) batteries (not included) according to the polarity diagram inside the battery compartment.
- Replace the battery cover.
IMPORTANT:Be sure that the batteries are installed correctly.Wrong polarity may damage the unit and void the warranty. For best performance and longer operating time, we recommend theuse of good quality alkaline-type batteries.
CAUTION
- Do not mix old and new batteries.
- Do not mix alkaline, standard (carbon-zinc), or rechargeable (nickel-cadmium) batteries.
- If the unit is not to be used for an extended period of time, remove the battery. Old or leaking batteries can cause damage to the unit and may void the warranty.
- Do not dispose of batteries in fire, batteries may explode or leak. BATTERY REPLACEMENT When the output sound of this unit becomes distorted or the CD player operation appears unstable, the batteries are weak. You need to replace all the exhausted batteries at the same time as soon as possible to avoid battery leakage.
BATTERY REPLACEMENT
When the output sound of this unit becomes distorted or the CD player operation appears unstable, the batteries are weak. You need to replace all the exhausted batteries at the same time as soon as possible to avoid battery leakage.
DAB+/DAB/FM Radio
- Carefully extend the telescopic aerial.
- Press POWER button to switch on your radio. The display will show “Welcome to AZATOM.”
- Press and hold the PLAY/PAUSE button to perform an auto scan. During the scanning process, the lower line of the display shows a bar graph indicating progress of the scan.
- When the scanning is completed the first station (in alphanumeric order 0 to 9 then A to Z) will be selected. Your radio will automatically set to the current time and date.
- If the station list is still empty after the scan, your radio will display “No DAB station”.
- If no signals are found it may be necessary to relocate your radio to a position giving better reception.
Selecting a station – DAB
The top line of the display shows the name of the station currentlyselected.2. Push TUN– or TUN+ to select the list of available stations on the lowerline of the display.3. Adjust the Volume control to the required setting.Note: If after selecting a station the display shows “Service N/A” , it may be necessary to relocate your radio to a position giving better reception.
Finding new radio stations – DAB
Your radio has a range of display modes: Press MENU to enter “Station Info” while listening to a radio station and cycle through each modeScrolling text: Displays scrolling text messages such as artist/track name, phone number, etc.Program Type: Displays the type of station being listened to, e.g. Pop, Classic, News, etc.Multiplex Name: Displays the name of DAB multiplex to which the current station belongs.Date: Displays the current date.Frequency: Displays the frequency of the DAB multiplex for the station listened to.Bit rate & audio type: Displays the digital bit rate & audio type for the station being listened to.Signal strength: Displays a graph showing the signal strength for the station being received.
Manual Tuning – DAB
- Press MENU until the display shows “Manual Tune”, press ENTER to select the Services Menu.
- Highlight the desired channel and press ENTER, the graph will indicate the signal strength and the upper line will show the name of the DAB multiplex (group of radio stations). Any stations found will be added to the stored list in the radio.
- Press MENU to return to the normal tuning mode.
Using FM Radio
- Carefully extend the telescopic aerial fully and press the POWER button to switch on your radio.
- Press MODE to enter FM mode.
- Press the PLAY/PAUSE button for 3 seconds for an auto scan, which will automatically store the stations. Press either the TUN+ or TUN– buttons to choose between the stored stations. Press and hold TUN– button, your radio will scan in an upwards.
- After a few seconds, the display will update. The display will show the frequency of the signal found. If the signal is strong enough and there is RDS data present then the radio will display the station name.
- To find other stations, press the TUN– button and hold for 3 seconds as before.
- To scan the FM band in a downwards direction (high frequency to low frequency) press and hold the TUN+ button.
- When the waveband end is reached your radio will recommence tuning from the opposite waveband end. Adjust the Volume control to the required setting.
Preset Stations – DAB & FM
You may store your preferred DAB and FM radio stations to the preset station memories. There are 60 memory presets in your radio, 30 for DAB and 30 for FM. Presets are remembered by your radio in the event of a power failure.The procedure for setting presets and using them to tune stations is the same for FM and DAB modes, and is described below.
- Press the POWER button to switch on the radio.
- Select the desired waveband.
- Tune to the required station as previously described.
- Press the PRESET button and hold to enter a preset store, and then press to ENTER the desired preset number which you wish to store the station. Press ENTER to confirm.
- Press ENTER to confirm, for example, “Preset 01 stored”. The station will be stored under the chosen preset. Repeat thisprocedure as needed.
- Stations which have been stored in preset memories may be overwritten by following the above steps. Recalling a preset:1. Press the POWER button to switch on the radio.2. A short press on the PRESET button, then the display shows “PresetRecall”, then press ENTER to tune to the station stored in preset memory.
Note: If you have not previously stored a preset station and the preset button is pressed, “Empty preset” will be displayed.
Prune
(To remove stations that are listed but unavailable)
- Under DAB mode, press the MENU button until the display shows thesub-menu, press ENTER button to enter the Prune option.
- Select “Yes” and press ENTER button to confirm to prune.
Note: this removes all the invalid stations indicated in the station list with a “?” in front of the station name.
USB Operation
- Insert the USB drive into the USB port.
- Press MODE button to change the mode to USB. You will see “USB-READING” on the display
- Press PLAY button to play.
Time & Date Settings
- While in standby mode, press and hold MENU to open the System and select Time.
- Using the TUN– & TUN+ buttons as left and right, scroll through to choose either 24H or 12H time format – Press ENTER again to confirm format choice and move on to setting the time.
- Using the TUN– & TUN+ buttons as left and right, scroll through to choose the hour, pressing ENTER to confirm and repeat this again to set the minutes of the clock.
- Next, you will be presented with the Set Date menu, again using the TUN- & TUN+ buttons as left and right, scroll through to first set the date, then a month, and finally, the year pressing ENTER to confirm your final choice.
This will return the Zenith Z4 back to standby mode with the clock set to the time and date you have chosen.
Using AUX In
This player features an AUX-IN jack for connecting your smartphone, MP3 player, or another digital music player.
- Connect the Aux-in cable (not included) from your external device to theAUX-IN jack is located on the left side of this CD player.
- Press MODE button to enter AUX-IN mode once an external device is plugged into the AUX-IN jack.
- Start to play your music from the external audio device.
- Adjust both volumes controls on your CD player and on the external device to your desired level.
BT Wireless Audio
Bluetooth allows you to stream your music wirelessly from any Bluetooth-enabled media player, including smartphones, tablets, laptops, and other MP3 Players. To pair your device via Bluetooth for the 1st time:
- Press MODE button to select Bluetooth mode
- After a few seconds, the screen will then say “BT SEARCHING” and the speaker automatically goes into pairing mode.
- On your Bluetooth Device do a search and once available please select “Azatom Zenith Z4”.
- After 5-20 seconds the screen will say “BT connected”.
- You are ready to start streaming via Bluetooth. Play any sound on your Bluetooth device and listen on the speaker.
Whenever the Bluetooth Mode is selected, the radio will automatically go into pairing mode and either pair with the last paired device (if in range) or be available for pairing to a new device.
CD Player
NOTE: This unit not only plays commercial compact discs but also self-complied CD-RW discs. Because of the non-standardized format definition/production of CD-R/RW, playback quality & performance is not guaranteed. The Manufacturer is not responsible for the playability of CD-R/RW due to recording conditions such as PC performance, writing software, mediaproperties, etc. Do not attach a label or seal to either side of the CD-R/RW disc. It may cause a malfunction.
When using CD player mode: The TUN- buttons acts as REWIND / SKIP BACKWARD The TUN+ button acts as FAST-FORWARD / SKIP FORWARD
Play Mode:
- Press MODE button to enter CD mode.
- Open the CD door, load a CD with the label side facing upward and then close the CD door.
- Disc information (total number of tracks) will appear on the LCD display.
- Press PLAY/PAUSE button to start playing the CD.
- While playing music, press the PLAY/PAUSE button to pause playback, pressPLAY/PAUSE button again to resume playing.
- Press VOLUME– or VOLUME+ adjust to the desired volume level.
- Press STOP button to stop playing music.
- To turn off the CD player, press POWER button.
NOTE: If skipping occurs during CD playback, try turning the volume down. Check the CD to ensure it is not scratched or damaged.Do not open the CD DOOR when a CD is playing.Repeat Mode:Repeat 1:Press MODE button once, you will see REP_ONE on the LCD display. The current track will be repeated. Repeat All Tracks:
Press MODE button twice, you will see REP_ALL on the LCD display. The whole disc will be played continuously.Press MODE button three times, you will see RANDOM on the LCD display. The whole disc will be played randomly.To Cancel Repeat Function:Press MODE button again to cancel the repeat function.Skip and Search Mode:
- During Play or Pause mode, tap the TUN– or TUN+ buttons to go tothe next track or go back to the beginning of the current track.
- During playback, press and hold the TUN– or TUN+ buttons to search within the current track with audible high-speed playback.
Program Play Mode:
This function allows music tracks to be played in a programmed sequence.NOTE: Program can only be set in STOP mode.
- Press the PRESET button once, you would see “P01” blink on the LCD display.
- Press the TUN– or TUN+ buttons to select the track to be programmed.
- Press the PRESET button again to store the selection. The LCD display will advance to “02” and flash to prompt for the next track.
- You may repeat steps 2 to 3 to program up to 20 tracks. As soon as you have entered the 20th track, the LCD display will automatically show the programmed tracks one by one in their correct sequence starting from the first programmedtrack. If you wish to program less than 20 tracks, press the Program button twice after confirming your last track. At the end of the sequence, “01” will blink on the LCD display, ready to play your first programmed track.
- Press PLAY button to start the programmed playback. Press the STOP button to stop playback.
- Programmed tracks will be played through once and then stop. However, you may use the REPEAT function to repeatedly play a certain track (Repeat 1) or all tracks in the program (Repeat All).You may also press the TUN– button to go directly to other tracks ahead or use TUN+ button to go back to previous track(s) during program playback.
- To cancel program play, press the STOP button twice during program playback.
Factory reset
If your radio fails to operate correctly, or some digits on the display are missing or incomplete, it may be possible to restore normal operation by carrying out a system reset on your radio. This will restore the radio’s settings to the factory default. No presets will be stored, and the list of DAB radio stations will be empty.If you have moved to a different part of the country and you wish to erase local DAB radio stations that are no longer available from the stored list, then you may choose to carry out this procedure.Your radio will automatically re-scan for the DAB stations available at your current location when it restarts.
- Press MENU to enter the menu.
- Press the TUN– or TUN+ buttons until the display showsSettings, then press ENTER to enter the settings menu.
- Press the TUN– or TU N+buttons until the display shows Factory Reset. Press ENTER.
- If you wish to perform the reset operation, push the buttons until “YES” is highlighted on the display and press. A full reset of your radio will be performed. All presets and station lists will be erased.
If you do not wish to reset your radio press the TUN– or TUN+ buttons until “NO” is highlighted. Your radio will return to the previous menu.5- After a system reset a scan of the DAB band will be performed. In case of malfunction due to electrostatic discharge, reset the product (temporary disconnection of the power adaptor may be required) toresume normal operation.
Language
Press and hold MENU button and then the display shows the submenu“System”.Press ENTER button and select Language to enter language options:-English-French-German-Italian-Spanish
Software Version
The software display cannot be altered and it is just for your reference.
- To view the software version press and hold the MENU to enter the menu and then press TUN+/TUN– buttons until “System” is highlighted on the display.
- Press TUN+/TUN– until “SW version” shows on the display.
- Press the ENTER button, the software version will appear on the display.
Earphones (NOT INCLUDED)
The lead connecting the earphones to your radio acts as an aerial when plugged into the Earphone socket.
- Plug the earphones into the earphone socket on the top of your radio.
- Check that the volume level is not too loud before placing the earpieces into your ears.
IMPORTANT: Do not switch on the radio with the earphones connected and inserted in your ear. Excessive sound pressure from earphones can cause hearing loss.
Sleep Function
Your radio can be set to turn off after a preset time has elapsed. The sleep setting can be adjusted between 15 and 90 minutes. Ensure your radio is switched on.Press the SLEEP button to set the desired sleep time between 15, 30,45, 60, and 90 minutes or Sleep Off which will cancel the sleep function.
Safety Guidance
When used in a directed manner, this unit has been designed and manufactured to ensure your personal safety. However, improper use can result in potential electrical shock or fire hazards. Please read all safety and operating instructions carefullybefore installation and use, and keep these instructions handy for future reference. Take special note of all warnings listed in these instructions and on the unit.Water and Moisture:The unit should not be used near water. For example: near a bathtub, washbowl, kitchen sink, laundry tub or near a swimming pool.Ventilation:The unit should be situated so that its location or position does not interfere with its proper ventilation. For example, it should not be situated on a bed, sofa, rug or similar surface that may block the ventilation openings. Also, do not have the unit in anenclosed space, such as a bookcase or cabinet, which may impede the flow of air through the ventilation openings.Heat:The unit should be kept away from heat sources such as radiators, heat registers, stoves or other appliances (including amplifiers) which may be hot.Power Source:The unit should be connected to a power supply only of the type described in the operating instructions or as marked on the appliance.Cleaning:The unit should only be cleaned with a dry cloth. Care should be taken so that liquids are not spilled into any openings or ventslocated on the product.Lightning and Power Surge Protection:Unplug the unit from the wall outlet. This will prevent damage to the product due to lightning and power-line surges.Overloading:Do not overload wall outlets or extension cords as this can result in a risk of fire or electric shock.Periods of Non-use: If the unit is to be left unused for an intended period of time, such as a week or longer, the power cord should be unplugged from the unit to prevent damage or corrosion.Servicing:The user should not attempt to service the unit beyond those methods described in the user’s operating instructions. Service methods not covered in the operating instructions should be referred to qualified service personnel.
WARNING:The AC adaptor should be disconnected from the mains supply and the radio when not in use. To reduce the risk of fire or electric shock, do not expose this apparatus to rain or moisture. The apparatus shall not be exposed to dripping or splashing and that objects filled with liquids, such as vases, shall not be placed on apparatus.
RECYCLING:This product bears the selective sorting symbol for waste electrical and electronic equipment (WEEE). This means that this product must be handled pursuant to European directive 2012/19/EU in order to be recycled or dismantled to minimize its impact on the environment.User has the choice to give his product to a competent recycling organization or to the retailer when he buys new electrical or electronic equipment.Use only power supplies listed in the user instructions, Indoor use only
NOTES:
- It is best to leave a CD inside the unit even when it is not in use. This prevents dust accumulation on the optical lens.
- Dirty or scratched CD may cause the music to skip. Clean or replace the CD if this happens.
- BEFORE OPERATION:
NOTES-CONCERNING COMPACT DISCS.Dirty, damaged or warped discs may damage the unit, care should be taken of thefollowing items:1. a. Use compact discs only with the mark shown on the disc.b. CD: compact disc only with digital audio signals.
2.a. NOTES ON HANDLING DISCSRemoving the disc from its storage case and loading it.PRESS THE CLIPS AT THE CENTRE OF THE DISC CASE.INSERT WITH THE LABEL/DULL SIDE FACING UP.LIFT OUT WITHOUT TOUCHING THE RECORDED SURFACEPRESS THE DISC GENTLY TO INSERT IT.Do not touch the reflective recorded surfaceDo not stick anything to or write anything on the surface.Do not bend compact discs.

Specifications
Power requirement mains (via adaptor):AC 100-240V 50/60HzFrequency CoverageFM: 87.5-108MHzDAB: 174.928 – 239.200MHzLoudspeaker: 2x 3” Inch DriversOutput power: 20W MAX (speakers)Earphone socket: 3.5mmm dia. stereoFM & DAB Radio: telescopic aerialBattery Requirements:C X6 batteries (1.5V X6) (UM-2).(not included)
 report this ad
REGISTER YOUR PRODUCT ONLINE. TO LEARN MORE & REGISTER FOR OUR AZATOM WARRANTY *PLEASEVISIT: WWW.AZATOM.COM/WARRANTYAZATOM © 2020 ALL RIGHTS RESERVED. AZATOM®IS PART OF AZATOM GROUP LIMITED.SEE SITE FOR SAFETY INFORMATION. AZATOM®RESERVE THE RIGHT TO WITHDRAW ANY AND ALLPROMOTIONS WITHOUT NOTICE. FOR FULL WARRANTY, EXTENDED WARRANTY, AND PROMOTIONALOFFER TERMS & CONDITIONS PLEASE VISIT WWW.AZATOM.COM/TERMS-CONDITIONS *REGISTRATION REQUIRED
References
[xyz-ips snippet=”download-snippet”]