AZDOME AR08 9.66 inch Mirror Dash Cam

First use
Checking contents
Before using the dashcam, please check the box for completeness. The following items should be in the box:
- Dashcam
- Rearcam
- Rubber(2 sets)
- Dual USB power plug
- Mini USB cable
- Cable clips (5 pieces)
- Cable trim tool
- Wiping cloth
- Manual
|
|
|
|
|
|
|
|
|
|
|
|
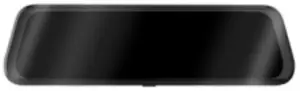 Dashami
 Rearcam
 Rubber(2 sets)
 Dual USB power plug
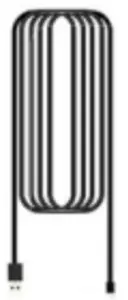 Mini USB cable
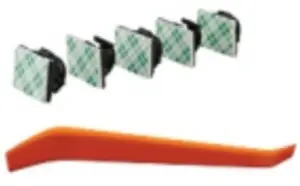 Cable trim tool & Cable clips (5 pieces)
 Wiping cloth
 Manual
 Thanks Card
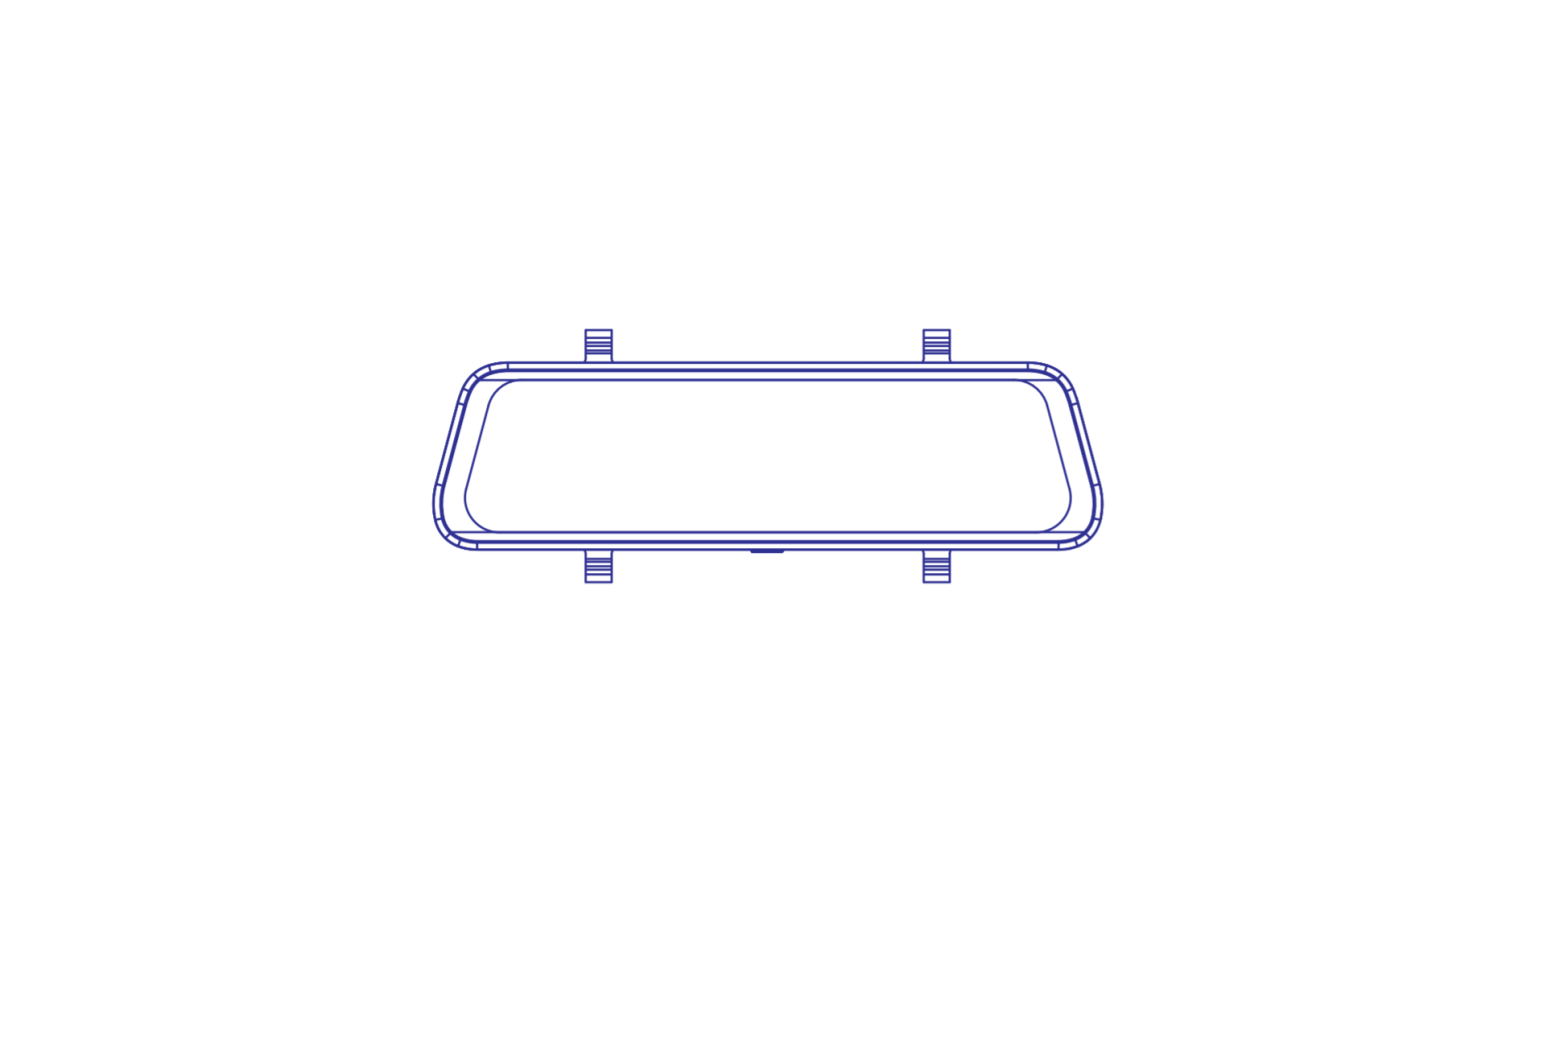
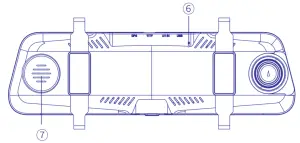
Product Diagram
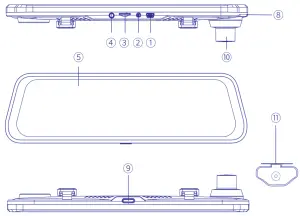
- Mini US
- AVIN (Rearcam Port
- Micro SD Card Port
- GP
- LCD Scree
- Reset
- Speaker
- Mic
- Power
- Front Camera
- Rear Camera
About Micro SD Card
Placing and removing the SD card
The dashcam support Micro SD cards up to 128gb. The Micro SD card is placed on the top of the dashcam. With the LCD screen facing you, putthe Micro SD card in the dashcam with the smallest side first, the notch on right and the contacts facing you. After about 2/3rds you’ II feel some resistance from a spring after which you keep pressing until you hear a click sound. The SD card is now secured. Remove the SD card easily by pressing it again until you hear the same click sound. The SD card will be pushed out of the dashcam.
Formatting the SD card
The Micro SD card must be formatted in the dashcam before the first use. Do so by simply going to ‘Format’ in the system menu. Note that all data will be removed from the card.
Installation
Front camera installation
- Turn off the car’s engine.
- Insert the Micro SD card into the Micro SD slot of the dashcam.
- Fix the Dashcam to the original mirror with the rubber
- Connect the Mini USB cable to the dashcam.
- flyout use the cigarette power cable, plug it into the car’s power supply.
- Turn on the car’s ignition. The dashcam will power on automatically (or has already if you used the Hardwire cable).
- Format the Micro SD card in the dashcam’ s menu.
Note: Please use an A-Brand high-speed Micro SD card (Class 10 UHS-1 orabove)
Rear camera installation
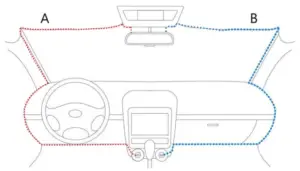
The rear camera comes with a 6-meter cable that is connected to the front camera. The cable provides power and transfers the video data through this cable. Before installation, please first check if the provided cable is long enough to reach the rear camera in your car. Follow these steps for installation:
- Connect the DC jack to the AV IN port of the front dashcam. When connected properly, finger slide can exchange front and rear view display.
- Work your way to the rear of the car to the place where the rear camera is to come.
- Place the rear camera on the rear window or on the bumper using the adhesive stickers or screws provided.
- (Optional) Use the anti stick pad to before placing the mount on the rear window for easier removal of the camera later.
- (Optional) Connect the red wire of the extension cable to the power of the backup light and the black to the ground. Then the video of the rear camera will be shown in large on the screen once the car is put in reverse.
The front and rear camera will record simultaneously and both videos are stored separately on the Micro SD card.
Turning the Dashcam On and Off
Check if the camera turns On and Off properly. Do so simply by supplying power to the dashcam with the included cigarette power cable in your car.Alternatively, you can use a SV and minimum 2.SA USB phone charger and Mini USB cable to connected it to the power socket in your house.
Automatic Power On/OffThe dashcam will power on and start recording automatically when power to the USB port is supplied (when the ignition is turned on). It will stop recording and turn off automatically when the power is cut (when the ignition is turned off).
Manual Power On/OffThe dashcam can be turned on and off manually by pressing the Power button. Short press it to turn it on and press it for 3 seconds to turn it off.
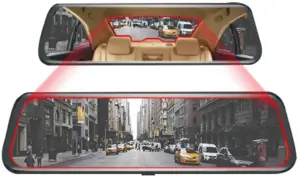
About Streaming Mirror Dashcam
Rear camera works default instead of front camera, Rear view media constantly received and presented to driver, which increases the field of vision by an estimated 300% over traditional rearview mirrors, and excellent performance against rain and fog by means of a waterproof rear camera.
|
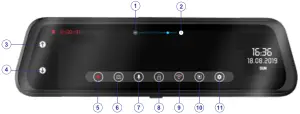
① ② |
adjust the image |
|
③ ④ |
adjust the brightness |
|
⑤ |
Video, short touch to start to recordshort touch again to stop recording |
|
⑥ |
Photo, short touch to snap a picture |
|
⑦ |
Audio Recording On & Off |
|
⑧ |
Lock, when the camera is recording, short touch to lock the file |
|
⑨ |
Wi-Fi On & Off |
|
⑩ |
Files, inside you can play back all of your recording videos and photos |
|
⑪ |
Settings |
Settings
ResolutionSelect the desired video resolution and fps (frames per second). Higher fps results in smoother videos but also more data usage.This video resolution is for FRONT camera recording.– FHD 30fps(Default)– HD 30fps
Loop RecordingThis Feature allows camera to continuously record, and cover the oldest video files automatically when the SD card is full.Here Select the length of the videos for the loop recording. When turned to Off, the dashcam will record one long video but will stop recording when the SD card is full.– Off– 1 min– 3 mins (Default)– 5 mins
G-SensorSensitivity of the G-sensor. The G-sensor is a built-in 3-axis impact gravitational accelerometer which is designed to detect impacts. When an impact is detected, the current video will be locked as an emergency file and cannot be removed by the loop recording.– Off– Low– Middle (Default)– High
Night ModeGive you a more clear view in the darking condition.– On– Off (Default)Parking ModeWhen you using Hardwire Kit as power supply, You can choose this function.when the ignition is turned off, the Dashcam will automatically enter intoTime lapse recording.– Off (Default)– ON
The dashcam will record a lfps video continuously when the car ignition is turned off and will stop and auto enter into normal recording video mode until the car ignition is turned on.When an impact is detected, an emergency (locked) video will still be recorded.
Time Lapse is a video mode in which the camera takes one picture per second and later plays this like a 30fps video. This will result in the videos having an extreme fast forward look and Each 1-minute Time lapse video covers a real-time period of 30 minutes. This mode allows to cover a period of more than 27 hours on a 16GB Micro SD card for a dual-cam recording at Full HD 1080P 30fps.Note: The parking mode will only work with the optional AZDOME 3-wire Hardwire kit installed. The parking mode cannot be turned on or off manually and will not work with any other (continuous) power supply like a battery pack.
Exposure-2/-1/0/1/2
WiFi– Off (Default)– ON
LanguageMultiple language, English Default.
Date/TimeDate/Time SettingsDefault Camera ViewHere you can choose Front and Rear cam display when the dashcam powered on– Front– Rear
ADASAR0B streaming mirror Dashcam ADAS includesLDWS(Lane Departure Warning System)FCW(Forward Collision Warning)– On– Off (Default)
ADAS ( LDWS )Calibration. Settings, Switch on “ADAS”2. Back to Display Interface, there will be a Icon ![]() on the left side between “
on the left side between “![]() ”3. Please press the icon and select “OK”4. The green line is the Dashcam System Calibration Line, The blue & red line is Road Lane line that Dashcam identifies.5. Match the real road line with the Blue & Red line.If calibrate successfully the line will coincide and disappear
”3. Please press the icon and select “OK”4. The green line is the Dashcam System Calibration Line, The blue & red line is Road Lane line that Dashcam identifies.5. Match the real road line with the Blue & Red line.If calibrate successfully the line will coincide and disappear
ScreensaverLCD screen will turn Off automatically after set time to not distract the driver too much. The dashcam will keep recording after the screensaver is activated. The screen can also be turned On and Off manually by short pressing the Power button.– Off (Default)– 1 min– 3 mins– 5 mins
VolumeBeep sound– Off– High– Middle (Default)– Low
FrequencySelect frequency. 50 Hz is mostly used in Europe and Asia and 60 Hz is mostly used in North America.– 50 Hz– 60 Hz (Default)
Storage SpacePage with the total capacity and residual space of the Micro SD card.
Format SDFormat the Micro SD card. All data will be erased.– Cancel– Confirm
Reset SystemRestore to factory settings.– Cancel– Confirm
VersionInstalled firmware on the camera.Check www.azdome.hk for recent firmware updates.
About Update the firmwareThe dashcam has the latest firmware installed in the factory. The firmware is updated regularly to introduce new functions and improve the general performance. When the camera is not responding and resetting doesn’t help, it is sometimes useful to update to the latest firmware. The latest version of the firmware is available from https://www.azdome.hk.To update the firmware please follow these steps:
- Put an empty Micro SD card in your PC and remove all files and folders.
- Download the latest firmware, make sure to select the right model.
- Put the downloaded file (All files) on the root of the Micro SD card.
- Turn off the dashcam and insert the Micro SD card in the dashcam.
- Turn on the dashcam, will notice you to update, confirm, the dashcam will update automatically.
The dashcam will update the firmware automatically, this may take a few minutes.
Speed(Once press” ![]() ” on the settings, you will see it, If connected with GPS module)Format of the speed when shown in the video.– KM/H (Default)– MPH
” on the settings, you will see it, If connected with GPS module)Format of the speed when shown in the video.– KM/H (Default)– MPH
Playback
Press ![]() , enter into Playback Mode
, enter into Playback Mode

① Back② Lock/Unlock Video③ Delete④ Front Video⑤ Rear Video⑥ Locked Rear Video⑦ Locked Front Video⑧ mage
Press Video Preview, you can Playback the video
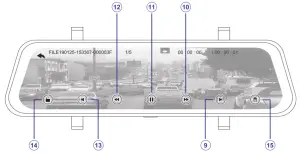
⑨ Next File⑩ Skip Forward⑪ Play/Pause⑫ Skip Backward⑬ Previous File⑭ Lock/Unlock Video⑮ Delete
Connecting with the App
This dashcam has the option to connect it to your Android or iPhone to instantly see and download recorded videos and to change settings. The dashcam can broadcast a WiFi network to which you can connect within a range of about 10 meters. Use the AZDome App to connect to the camera. It is available for free in the Appstore and Google Play store.


See below for detailed connection steps.
- Turn on WiFiThe WiFi is turned on automatically after the dashcam is turned on. If no connection is established within 30 seconds, the WiFi will automatically turned off. The WiFi can also be turned On and Off manually by Pressing the WiFi button
 .When the WiFi is On, the name and password of the WiFi network are visible on the screen.+
 - Establishing a connectionWhen connecting for the first time, open your phone’s WiFi settings and search for the network name (shown on the screen). If you’ve connected before, you can go straight to the AZDOME app and connect to the dashcam from there.
- Open the AppWhen you open the App you will see the live video from the dashcam.You can start and stop a recording by pressing the middle red record button.Press the left round button to see stored videos and press the right button to switch between Video and Photo mode. In the top right corner, you can change the settings of the dashcam.

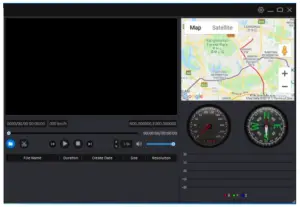
GPS Player (GPS module required, not included in the package)
This dashcam has a GPS receiver that stores the GPS data in every video file.Using the GPS receiver, the location of every video is recorded and the current speed is shown in the video. Using AZDOME’ s GPS player, the videos can be shown together with the GPS location in Google Maps. The G-sensor activity is also shown in the lower part of the player.AZDOME’ s GPS player is available for Mac and Windows, check www.azdome.hk for downloads.
 If Google maps doesn’t load properly, please try the following operations:
- Run GPS Player as Administrator on Windows (right click the App, then choose ‘Run as Administrator’).
- Upgrade the Internet Explorer to IE 10 or above.
- If it still doesn’t work, please contact us at [email protected]
Warranty & Customer Support
We provide 1 full year of limited warranty for your product from the date of purchase to be free from defects in materials and craftsmanship.For questions, support, or warranty claims, contact us at [email protected]
IMPORTANT: Proof of original purchase (Online order receipt is also accepted) is required for any warranty service. AZ DOME can only provide after sales service for products purchased directly from AZDOME. If you have purchased from a different seller, please contact them directly for service or warranty issues.
KAKA GROUP LTDwww.azdome.hk | [email protected]Address: 1801-1808, HaiYun Building, No. 468, Minzhi Avenue, Longhua New District, Shenzhen, China. 518000, CN
 report this ad
[xyz-ips snippet=”download-snippet”]