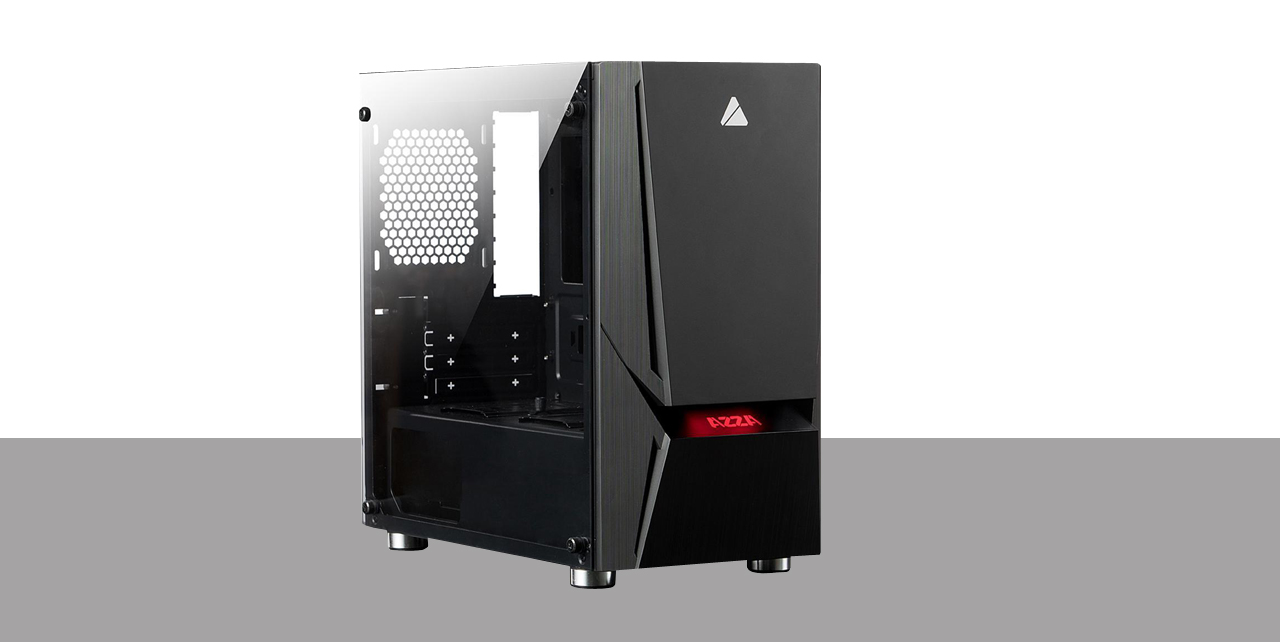
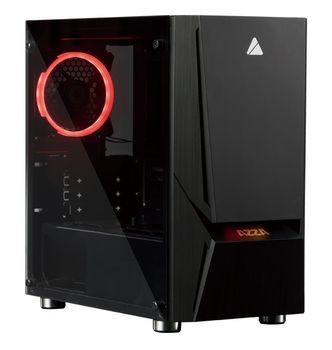
AZZA LUMINOUS 110 
INSTALLATION INSTRUCTION
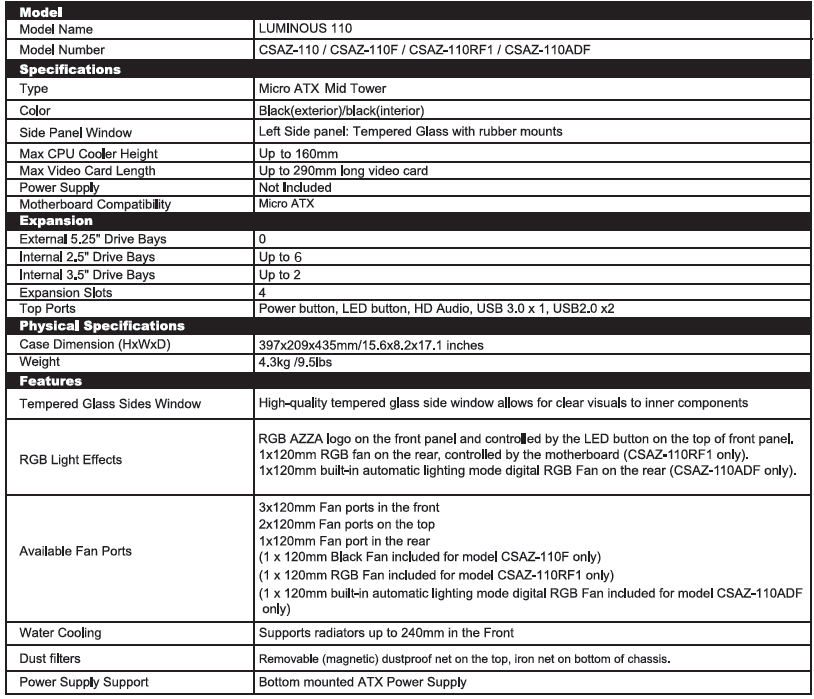
- Specification
- Chassis Parts
- Control Panel Function
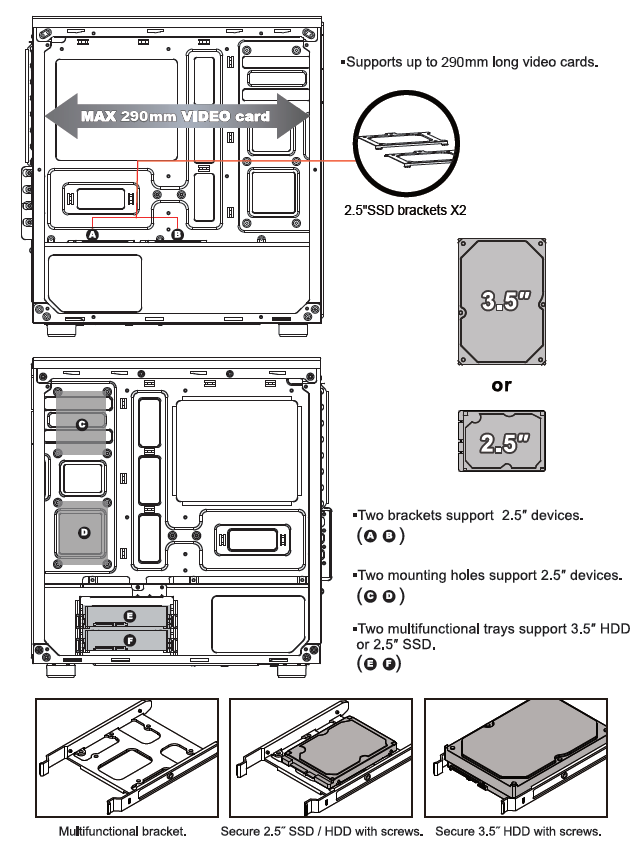
- 3.5″/2.5′ HD Installation
- Cooling system Installation
- RGB Lighting Switching
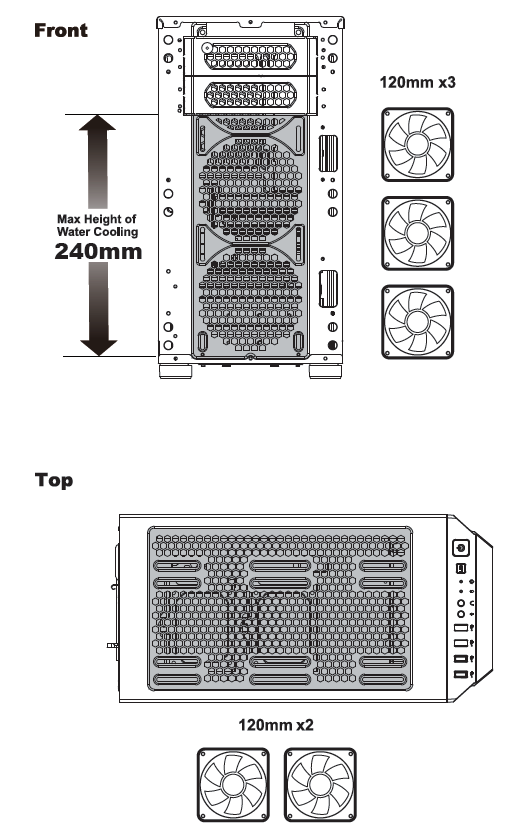
SPECIFICATION
Chasis Parts
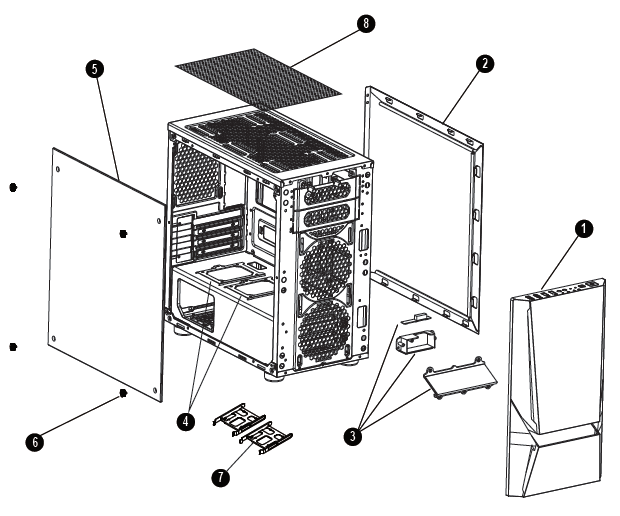
- Front Panel
- Side Panel
- RGB logo Plate
- 2.5″ SSD brackets X2
- Left Side Tempered Glass Panel
- Screws for Side glass panel
- 3.5″HDD brackets X2
- Removable (magnetic) dustproof net
Control Panel Function
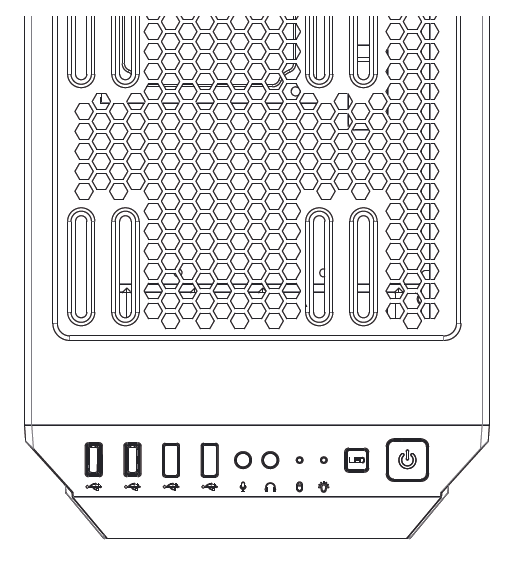
- Power button
- LED changes button
- Power Indicator
- Hard disk Indicator
- Mic
- Audio
- USB2.0
- USB3.0(Blue)
- Optional USB type C slot
3.5″/2.5″ HDD Installation
RGB Lightning Switching
Logo with RGB light effects on the front panelFront panel LED connector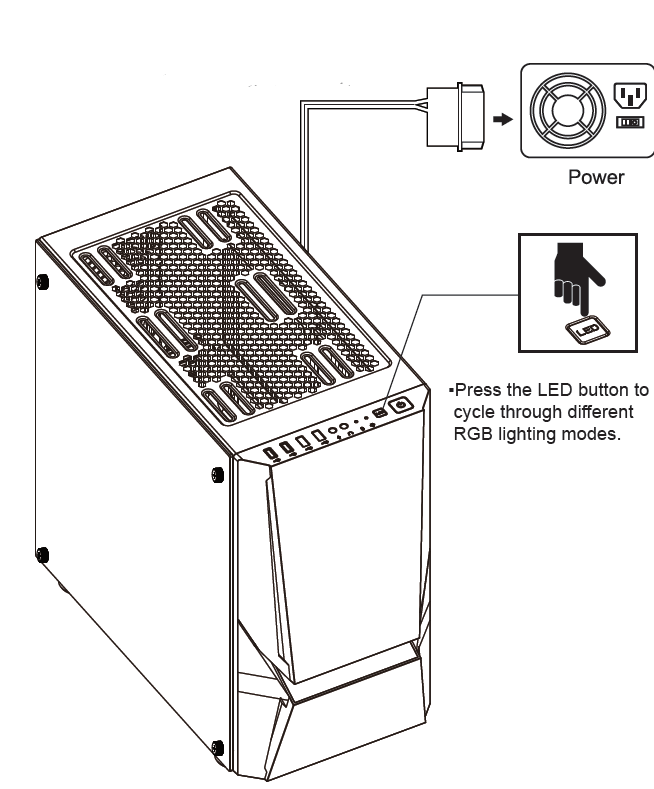 (Model: CSAZ-110RF1)The RGB fan connected to the compatible RGB motherboard with 4 pin header.
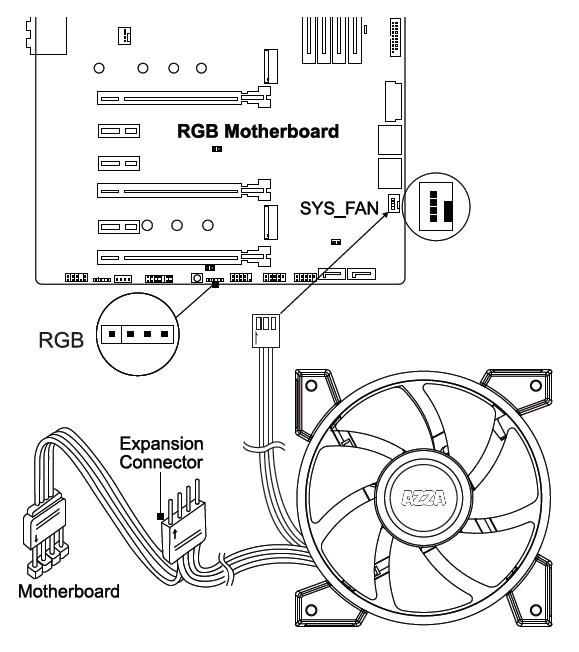 Plug the RGB fans 4pin connector into your motherboard RGB header. You can adjust fan light colors with your compatible RGB motherboard software.
(Model: CSAZ-110ADF) : Built-in automatic lighting mode Digital RGB Fan with Molex header connect to computer Power Supply.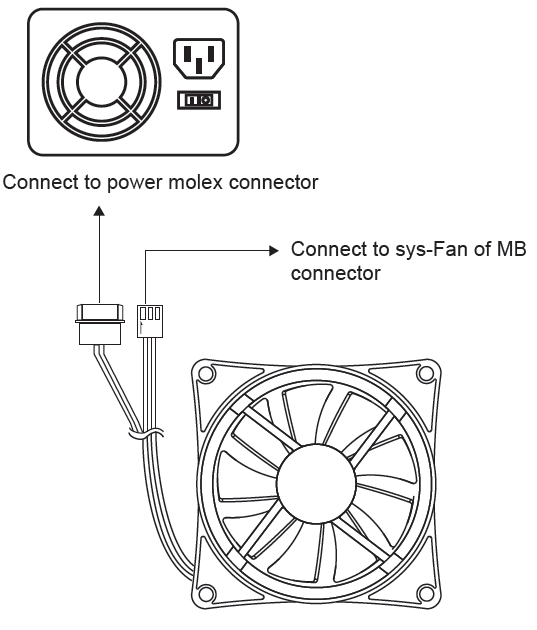
Cooling System Installation
Move HDD cage to install the fan on the front panelMove HDD cage to install the Radiator and fan on the front panel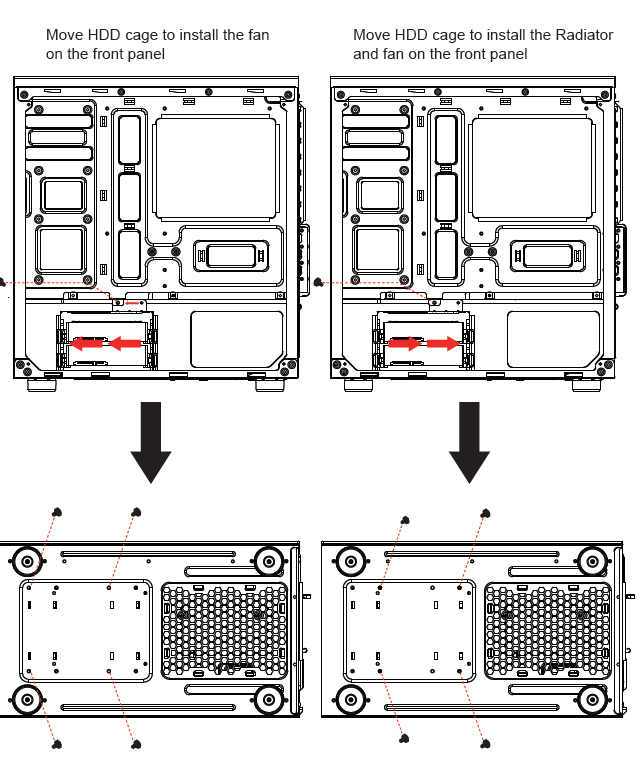
![]()
[xyz-ips snippet=”download-snippet”]