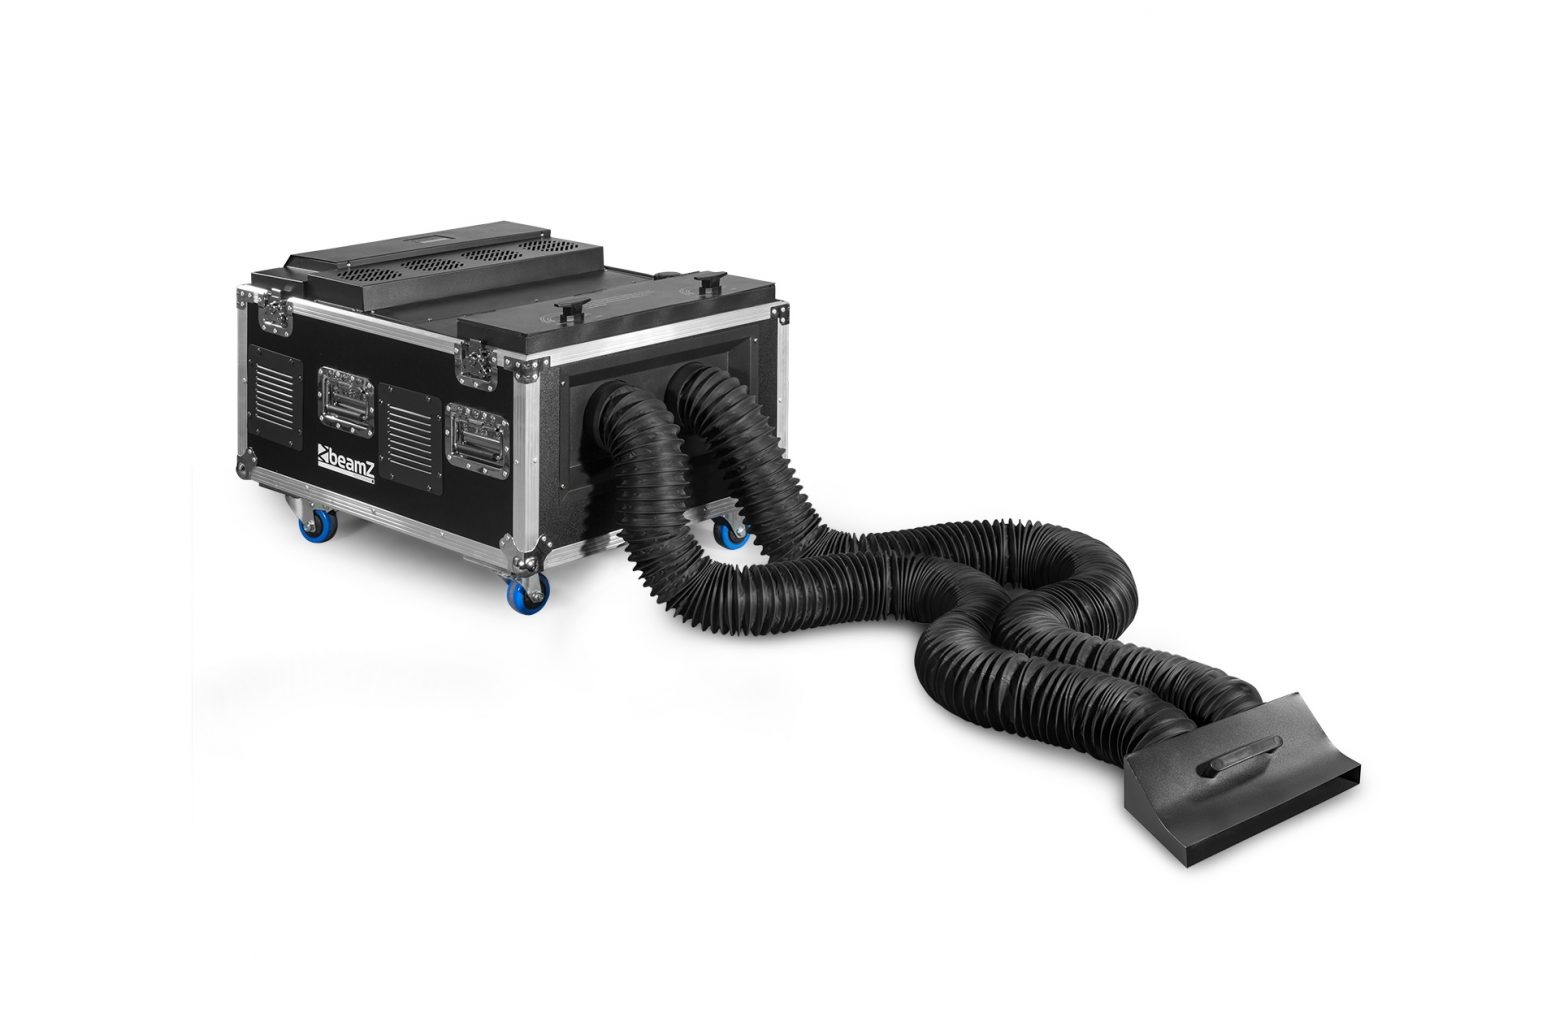
Beamz Pro Lf-Series Low Fog Machine User Manual
SAFETY INSTRUCTIONS
![]() WARNING! Before carrying out any operations with the unit, carefully read this instruction manual and keep it with care for future reference. It contains important information about the installation, usage and maintenance of the unit.
WARNING! Before carrying out any operations with the unit, carefully read this instruction manual and keep it with care for future reference. It contains important information about the installation, usage and maintenance of the unit.
- Unpack and check carefully that there is no transportation damage before using the unit.
- Please read these instructions carefully and follow the instructions. · Observe all safety warnings. Never remove safety warnings or other information from the equipment.
- Be sure that no ventilation slots are blocked; otherwise the unit will overheated.
![]() WARNING! Before connecting the equipment to the power outlet, first verify that the mains voltage and frequency match the values specified on the equipment. If the equipment has a voltage selection switch, connect the equipment to the power outlet only if the equipment values and the mains power values match. If the included power cord or power adapter does not fit in your wall outlet, contact your electrician.
WARNING! Before connecting the equipment to the power outlet, first verify that the mains voltage and frequency match the values specified on the equipment. If the equipment has a voltage selection switch, connect the equipment to the power outlet only if the equipment values and the mains power values match. If the included power cord or power adapter does not fit in your wall outlet, contact your electrician.
- After connecting the unit, check all cables in order to prevent damage or accidents, e.g., due to tripping hazards.
- Make sure that the power cord is never crimped or damaged. Check the unit and the power cord from time to time
- Always disconnect power from the mains, when unit is not used or before cleaning! Only handle the power cord by the plug. Never pull out the plug by tugging the power cord.
- Unplug the power cord and power adapter from the power outlet if there is a risk of a lightning strike or before extended periods of disuse.
- Do not switch the unit on and off in short intervals.
- Do not connect the unit to a dimmer pack.
- Always allow free air space of at least 50 cm around the unit for ventilation.
- This unit is not designed for permanent operation. Consistent operation breaks will ensure that the unit will serve you for a long time without defects.
![]() WARNING! The nozzle will be very hot, danger of burns and injury!
WARNING! The nozzle will be very hot, danger of burns and injury!
- Very hot steam escapes from the nozzle. Danger of getting burnt!
- Occasionally very hot droplets of fluid may escape when in operation. Thus never aim at persons or animals directly and keep a minimum distance of 3 m (9.8 ft) to the nozzle.
- Never touch the nozzle when in operation. Danger of getting burnt!
- The location for the unit must be non-flammable, non-combustible and not sensitive to heat.
- Keep a minimum distance of 1 meter (3.28 ft) to all flammable, combustible objects and objects sensitive to heat.
- Never point the fog at strong sources of ignition like fire or pyrotechnic effects.
- Do not swallow the fog fluid. In case of eye contact, rinse with a lot of water. Consult a doctor should you have accidentally swallowed some fluid.
- Spilled fluid or splashed fluid droplets can cause slip hazard. Mop up the fluid and dispose of it according to regulations.
- Fog may activate smoke detectors!
![]() WARNING! If the power cord of the unit is equipped with an earthing contact, then it must be connected to an outlet with a protective ground. Never deactivate the protective ground of a power cord.
WARNING! If the power cord of the unit is equipped with an earthing contact, then it must be connected to an outlet with a protective ground. Never deactivate the protective ground of a power cord.
- Make sure that the unit is not exposed to extreme heat, moisture or dust
- Clean the unit using a dry cloth.
- Do not touch the fixture bare-handed during its operation (housing becomes very hot). Allow the unit to cool for at least 10 minutes before handling
- This unit is designed exclusively for indoor use, do not use this equipment in the immediate vicinity of fluid (does not apply to special outdoor equipment – in this case, observe the special instructions noted below). Do not expose this unit to flammable materials, fluids or gases.
- If the unit has been exposed to drastic temperature fluctuation (e.g. after transportation), do not switch it on immediately. The arising condensation water might damage your unit. Leave the unit switched off until it has reached room temperature.
- Never attempt to bypass the thermostatic switch or fuses.
- Do not dismantle or modify the unit.
- For replacement use fuses/bulb of same type and rating only.
- Repairs, servicing and electric connection must be carried out by a qualified technician.
- The ambient temperature must always be between -5° C and +45° C. · If this unit is operated in any other way, than the one described in this manual, the product may suffer damages and the warranty becomes void.
- Plastic bags must be kept out of reach of children.
- Unit must be installed out of the reach of children. Never leave the unit running unattended when connected to a power supply.
![]() This symbol on the product or on its packaging indicates that this product shall not be treated as household waste. Instead i t shall be handed over to the applicable collection point for the recycling of electrical and electronic equipment.
This symbol on the product or on its packaging indicates that this product shall not be treated as household waste. Instead i t shall be handed over to the applicable collection point for the recycling of electrical and electronic equipment.
By ensuring this product is disposed of correctly, you will help prevent potential negative consequences for the environment and human health, which could otherwise be caused by inappropriate waste handling of this product. The recycling of materials will help to conserve natural resources. For more detailed information about recycling of this product, please contact your local Civic Office, your household waste disposal service or the shop where you purchased the product.
UNPACKING INSTRUCTION
CAUTION! Immediately upon receiving the product, carefully unpack the carton, check the contents to ensure that all parts are present, and have been received in good condition. Notify the shipper immediately and retain packing material for inspection if any parts appear damage from shipping or the package itself shows signs of mishandling. Save the package and all packing materials. In the event that the product must be returned to the factory, it is important that the product be returned in the original factory box and packing.
If the unit has been exposed to drastic temperature fluctuation (e.g. after transportation), do not switch it on immediately. The arising condensation water might damage your unit. Leave the unit switched off until it has reached room temperature.
POWER SUPPLY
On the label on the backside of the unit is indicated on this type of power supply must be connected. Check that the mains voltage corresponds to this, all other voltages than specified, the light effect can be irreparably damaged. The product must also be directly connected to the mains and may be used. No dimmer or adjustable power supply.
![]() WARNING! Always connect the unit to a protected circuit (circuit breaker or fuse). Make sure the unit has an appropriate electrical ground to avoid the risk of electrocution or fire.
WARNING! Always connect the unit to a protected circuit (circuit breaker or fuse). Make sure the unit has an appropriate electrical ground to avoid the risk of electrocution or fire.
INSTALLATION
- Place the unit on a flat surface and in a suitably large area with at least 50 cm of open space around the unit.
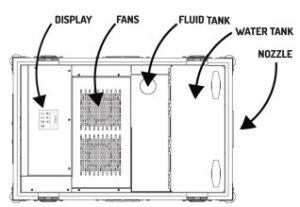
- Open the top lid of the water tank.
- Fill the water tank with distilled water.
- Fill the fluid tank with Beamz fog fluid.
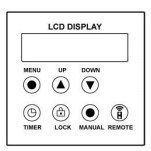
- Plug the power cord into the outlet and turn on the unit, put the power switch to the “ON” position. The LCD display will show “WARMING UP”. After few seconds the LCD display will shows “READY”.
- Using the LCD display panel, set the unit to the desired operating mode.
- Turn off the unit, put the power switch to the “OFF” position and pull out the power cord from the outlet.
- Before transporting the unit, empty water tank by connecting a tube to drainage valves.


![]() Use only original Beamz fog fluid. Warranty will be voided if any other type of liquid is used, improper use of liquid may lead to machine failure and malfunction.
Use only original Beamz fog fluid. Warranty will be voided if any other type of liquid is used, improper use of liquid may lead to machine failure and malfunction.
OPERATION
When display shows “READY”, you can start producing haze and adjust the settings via LCD display panel.
| MENU | DESCRIPTION |
| Man Vol Out xxx% | Adjust the manual volume output within the range of 0% to 100% by means of the Up/Down keys. |
| Interval Set xxxS | Adjust the interval between 1 to 100S by means of the Up-/Down keys. |
| Duration Set xxxS | Adjust the duration between 1 to 100S by means of the Up-/Down keys.. |
| Volume Out xxx% | Adjust the volume output within the range of 0- 100% by means of the Up-
/Down keys. |
| DMX 512 #xxx | Adjust the DMX address for DMX control by means of the Up-/Down keys. |
| Wind For Class xx | Adjust the wind output during the function within the range of 0- 100% by means of the Up-/Down keys. |
| Angel Set xx% | No function for this model. |
| Wireless | Turn on/off wireless remote |
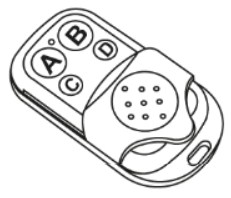
WIRELESS REMOTE
- ON / OFF
- ON / OFF
- Output volume up
- Output volume down
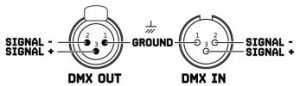
DMX512 CONTROL
If you are using a standard DMX controller, you can connect the DMX output of the controller directly to the DMX input of the first unit in a DMX chain. Always connect the output of one unit with the input of the next unit until all units are connected.
![]() CAUTION! At the last unit, you must close the DMX line with a terminating resistor. Take an XLR connector and solder a 120 Ohm resistor between signal (-) and signal (+) and connect it to the DMX output of the last unit in the line.
CAUTION! At the last unit, you must close the DMX line with a terminating resistor. Take an XLR connector and solder a 120 Ohm resistor between signal (-) and signal (+) and connect it to the DMX output of the last unit in the line.

DMX CHANNELS
| CHANNEL | FUNCTION | VALUE | DESCRIPTION |
| 1 | Fog | 000-002 | No function |
| 003-255 | Fog output, from low to high | ||
| 2 | Fan | 000-255 | Fan speed, from low to high |
CLEANING
We recommend a frequent cleaning of the unit, in particular the output nozzle.
CAUTION!There are no serviceable parts inside the unit except for the fuse. Repairs and service operations are only to be carried out by authorized dealers.
![]() WARNING! Disconnect from mains before starting maintenance operation!
WARNING! Disconnect from mains before starting maintenance operation!
- Ensure the fluid do not become contaminated.
- Ensure the air vents are not clogged by dust. If necessary remove the dust. · Ensure that the unit can not get overheated.
- Do not run the unit without any fluid, as the pump will run dry.
- Wipe up spilled Fluid immediately. Moisture and fluid can permanently damage the electrical components of the unit.
- If you install the unit make 100% sure that a permanent fog-free air supply for the unit is guaranteed. Cooling air with too high fog concentration (very often in Clubs and Discos) can condense inside the unit and cause moisture damage.
- For cleaning the surface of the unit use a suitable, solvent-free cleaner.
- It is recommended to run the unit on a monthly basis in order to achieve best performance and output condition.
- Before storing, run Beamz cleaner fluid through the system to help avoid condensing the pump or heater.
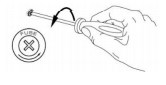
REPLACING THE FUSE
If the fuse is defective, replace the fuse with a fuse of the same type and value. Before replacing the fuse, unplug mains lead.
Procedure:
- Open the fuse holder on the rear panel with a fitting screwdriver.
- Remove the old fuse from the fuse holder.
- Install the new fuse in the fuse holder.
- Replace the fuse holder in the housing.
[xyz-ips snippet=”download-snippet”]