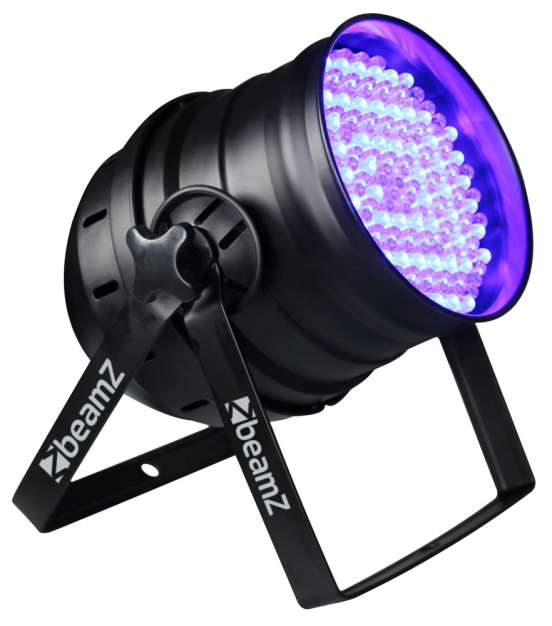

User Manual151.242 LED PAR 64-180x10mm RGB DMXwww.beamzlighting.com
Congratulations to the purchase of this Beamz light effect. Please read this manual thoroughly prior to using the unit in order to benefit fully from all features.
Read the manual prior to using the unit. Follow the instructions in order not to invalidate the warranty. Take all precautions to avoid fire and/or electrical shock. Repairs must only be carried out by a qualified technician in order to avoid electrical shock. Keep the manual for future reference.
- Prior to using the unit, please ask advice from a specialist. When the unit is switched on for the first time, some smell may occur. This is normal and will disappear after a while.
- The unit contains voltage carrying parts. Therefore do NOT open the housing.
- Do not place metal objects or pour liquids into the unit This may cause electrical shock and malfunction.
- Do not place the unit near heat sources such as radiators, etc. Do not place the unit on a vibrating surface. Do not cover the ventilation holes.
- The unit is not suitable for continuous use.
- Be careful with the mains lead and do not damage it. A faulty or damaged mains lead can cause electrical shock and malfunction.
- When unplugging the unit from a mains outlet, always pull the plug, never the lead.
- Do not plug or unplug the unit with wet hands.
- If the plug and/or the mains lead are damaged, they need to be replaced by a qualified technician.
- If the unit is damaged to such an extent that internal parts are visible, do NOT plug the unit into a mains outlet and DO NOT switch the unit on. Contact your dealer. Do NOT connect the unit to a rheostat or dimmer.
- To avoid fire and shock hazard, do not expose the unit to rain and moisture.
- All repairs should be carried out by a qualified technician only.
- Connect the unit to an earthed mains outlet (220-240Vac/50Hz) protected by a 10-16A fuse.
- During a thunderstorm or if the unit will not be used for a longer period of time, unplug it from the mains. The rule is: Unplug it from the mains when not in use.
- If the unit has not been used for a longer period of time, condensation may occur. Let the unit reach room temperature before you switch it on. Never use the unit in humid rooms or outdoors.
- During operation, the housing becomes very hot. Do not touch it during operation and immediately after.
- To prevent accidents in companies, you must follow the applicable guide lines and follow the instructions.
- Secure the unit with an extra safety chain if the unit is ceiling mount. Use a truss system with clamps. Make sure nobody stands in the mounting area. Mount the effect at least 50cm away from inflammable material and leave at least 1 meter space on every side to ensure sufficient cooling.
- This unit contains high intensity LEDs. Do not look into the LED light to prevent damage to your eyes.
- Do not repeatedly switch the fixture on and off. This shortens the life time.
- Keep the unit out of the reach of children. Do not leave the unit unattended.
- Do not use cleaning sprays to clean switches. The residues of these sprays cause deposits of dust and grease. In case of malfunction, always seek advice from a specialist.
- Only operate the unit with clean hands.
- Do not force the controls.
- If the unit has fallen, always have it checked by a qualified technician before you switch the unit on again.
- Do not use chemicals to clean the unit. They damage the varnish. Only clean the unit with a dry cloth.
- Keep away from electronic equipment that may cause interference.
- Only use original spares for repairs, otherwise serious damage and/or dangerous radiation may occur.
- Switch the unit off prior to unplugging it from the mains and/or other equipment. Unplug all leads and cables prior to moving the unit.
- Make sure that the mains lead cannot be damaged when people walk on it. Check the mains lead before every use for damages and faults!
- The mains voltage is 220-240Vac/50Hz. Check if power outlet match. If you travel, make sure that the mains voltage of the country is suitable for this unit.
- Keep the original packing material so that you can transport the unit in safe conditions
![]() This mark attracts the attention of the user to high voltages that are present inside the housing and that are of sufficient magnitude to cause a shock hazard.
This mark attracts the attention of the user to high voltages that are present inside the housing and that are of sufficient magnitude to cause a shock hazard.![]() This mark attracts the attention of the user to important instructions that are contained in the manual and that he should read and adhere to.
This mark attracts the attention of the user to important instructions that are contained in the manual and that he should read and adhere to.![]()
![]()
![]()
Safety Instruction
![]()
![]()
![]()
![]()
■Please keep this User Manual for future consultation. If you sell the unit to another user, be sure that they also receive this instruction booklet.■ Unpack and check carefully there is no transportation damage before using the unit.■ Before operating, ensure that the voltage and frequency of power supply match the power requirements of the unit.■ It’s important to ground the yellow/green conductor to earth in order to avoid electric shock.■ The unit is for indoor use only and use only in a dry location.■ The unit must be installed in a location with adequate ventilation, at least 50cm from adjacent surfaces. Be sure that no ventilation slots are blocked.■Disconnect mains power before fuse replacement or servicing.■ Replace fuse only with the same type.■ Make sure there are not flammable materials close to the unit while operating as it is fire hazard.■Use safety cable when fixes this unit.■ In the event of serious operating problem, stop using the unit immediately. Never try to repair the unit by yourself. Repair carried out by unskilled people can lead to damage or malfunction. Please contact the nearest authorized technical assistance center and always use the same type spare parts.■ Do not touch any wire during operation as high voltage might be causing electric shock.
Technical Specification
• It can be operated by DMX512 control or can be used as an individual unit without controller.• It can be linked together as many as required in master/slave mode, and perform the great built-in programmed lighting shows triggered by music.• Please use a 3 pin XLR cable/plug when connecting them together.• Fan cooled.Supply Voltage: AC110 ~240V 50/60HZ Power: 30WLED: 180×10mm LEDs RGB Red 61 LEDs, Green 60 LEDs, Blue 59 LEDs.Fuse: 3AControl Signal :DMX signalChannel: 6 ChannelsFunction: DMX, Master-Slave, Auto, Sound active.Dimensions per unit: 220 X 220 X325mmWeight (per unit): 2.8 kg
Installation
The unit should be mounted via its screw holes on the bracket. Always ensure that the unit is firmly fixed to avoid vibration and slipping while operating. Always ensure that the structure to which you are attaching the unit is secure and is able to support a weight of 10 times of the unit’s weight. Also always use a safety cable that can hold 12 times of the weight of the unit when installing the fixture.The equipment must be fixed by professionals. And it must be fixed at a place where is out of the touch of people and has no one pass by or under it.
How To Control The Unit


Four ways to operation:A. Master/Slave operationB. Easy sound active and Auto modeC. Universal DMX controllerMaster/Slave operationThe unit can be linked together in daisy chain as many as you need in master/slave mode to perform the great built-in pre-programmed lighting shows triggered by music.In Master/Slave mode refer to the DMX settings below:Master unit: when working at Auto or Sound Control mode operationSlave units: DMX start address MUST be set to d001.
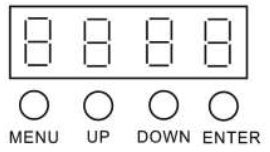
LED digital display Menu function as below:DMX code setting: d001~d512
| CH1 | 0~255 | Red |
| CH2 | 0~255 | Green |
| CH3 | 0~255 | Blue |
| CH4 | 11~255 | LED Strobe(From slow to fast) |
| CH5 | 11~50 | Auto1 DMX(Strobe) |
| 51~100 | Auto2 DMX(No Strobe) | |
| 101~150 | Auto3 DMX (smooth changing color) | |
| 151~200 | Sound1 DMX (Strobe) | |
| 201~250 | Sound2 DMX (No Strobe) | |
| 251~255 | Sound3 DMX (smooth changing color) | |
| CH6 | 0~255 | Auto DMX/ Sound DMX Speed (Slow–Fast) |
Manual setting mode:
| A1 Mode | Auto1 setting (Red) | Speed 0~9 |
| A2 Mode | Auto2 setting (Green) | Speed 0~9 |
| A3 Mode | Auto3 setting (Blue) | Speed 0~9 |
| A4 Mode | Auto4 setting (Strobe) | Speed 0~9 |
| A5 Mode | Auto5 setting (No Strobe) | Speed 0~9 |
| A6Mode | Auto6 setting (Smooth) | Speed 0~9 |
| A7Mode | Auto7 setting (Fade) | Speed 0~9 |
| A8Mode | Auto8 setting (combined effect) | Speed 0~9 |
| S1 Mode | Sound active1 setting (Red) | Speed 0~9 |
| S2 Mode | Sound active2 setting (Green) | Speed 0~9 |
| S3 Mode | Sound active3 setting (Blue) | Speed 0~9 |
| S4 Mode | Sound active4 setting (Strobe) | Speed 0~9 |
| S5 Mode | Sound active5 setting (No Strobe) | Speed 0~9 |
| S6 Mode | Sound active6 setting (Smooth) | Speed 0~9 |
| S7 Mode | Sound active7 setting (Fade) | Speed 0~9 |
| S8 Mode | Sound active8 setting (combined effect) | Speed 0~9 |
| d Mode | DMX setting. |
Fixture Cleaning
The cleaning of internal and external optical lenses and/or mirrors must be carried out periodically to optimize light output. Cleaning frequency depends on the environment in which the fixture operates: damp, smoky or particularly dirty surrounding can cause greater accumulation of dirt on the unit’s optics. Clean with soft cloth using normal glass cleaning fluid. Always dry the parts carefully. Clean the external optics at least every 20 days. Clean the internal optics at least every 30/60 days.
![]()
![]()
![]()
![]()
Do not attempt to make any repairs yourself. This would invalid your warranty. Do not make any changes to the unit. This would also invalid your warranty. The warranty is not applicable in case of accidents or damages caused by inappropriate use or disrespect of the warnings contained in this manual. Tronios cannot be held responsible for personal injuries caused by adisrespect of the safety recommendations and warnings. This is also applicable to all damages in whatever form.


CE Declaration of Conformity
Importer:TRONIOS BVBedrijvenpark Twente 4157602 KM – ALMELOTel :0031546589299Fax :0031546589298The NetherlandsProduct number: 151.242Product Description: Beamz, LED PAR 64 Can 180x 10mm RGB DMXRegulatory Requirement: EN 60598-1/-2EN 55015EN 61547EN 61000-3-2/-3-3
The product meets the requirements stated in the above mentioned Standards. This certificate does not cover the aspects that may be relevant such as performance and fitness for purpose.Almelo,26-02-2013Signature :


References
[xyz-ips snippet=”download-snippet”]

