
![]()
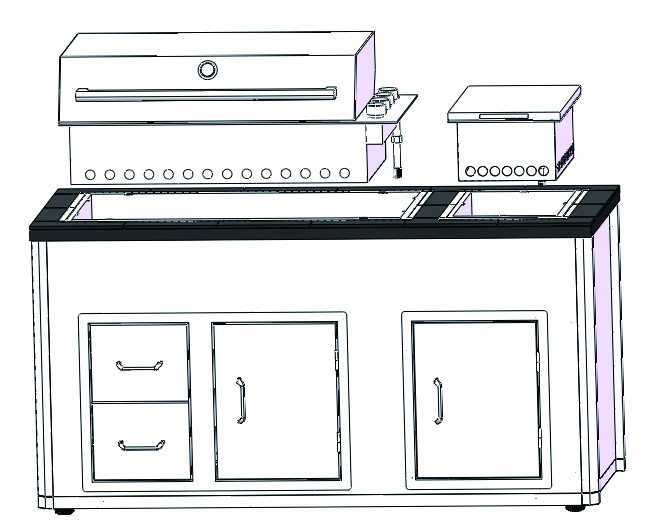
Proline Artisan ODKCabinets AssemblyProcedure
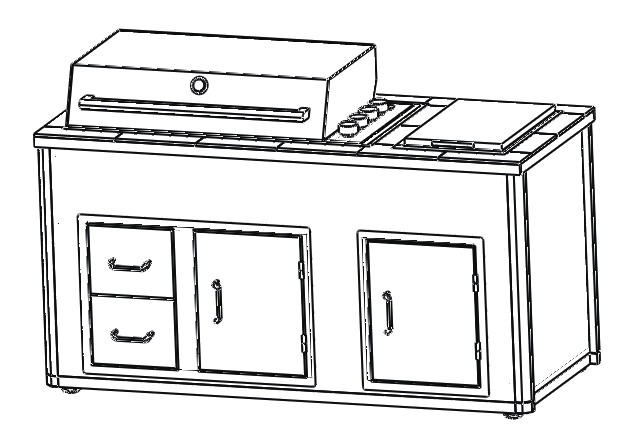
For outdoor use only
IMPORTANT INFORMATION
These instructions should be read in conjunction with the user manual. Adherence to the directions for use in the user manual is extremely important for health and safety. Failure to strictly adhere to the requirements in the user manual may result in personal injury, property damage and affect your ability to make a claim under the manufacturer’s warranty provided with your product. Products must be used, installed, and operated in accordance with the user manual.
PARTS
Contents of your cabinet pack:
| Description | QTY | Description | QTY | ||
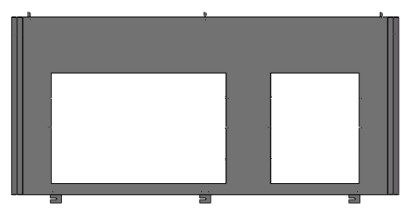 |
Front Panel | 1 | 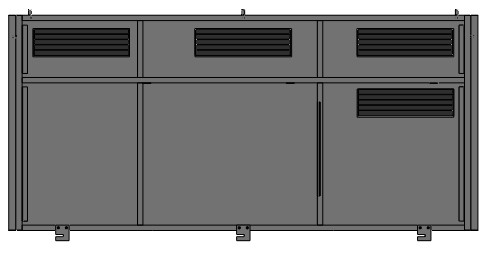 |
Rear Panel | 1 |
 |
Top & Heat Shields | 1 |  |
Side Panel | 2 |
 |
Base Panel | 1 |  |
Top Covering Panel | 1 |
 |
Divider Panel | 1 |  |
Bottom Panel | 1 |
 |
Top Panel Cover | 1 | 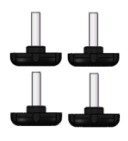 |
Adjustable Feet | 1 |
 |
M6x40 Screw
& M6 Washer |
4
4 |
 |
M4 Allen Key | 4 |
 |
M4x20 Screw
& M4 Washer |
12
12 |
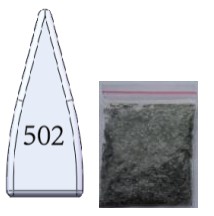 |
Repair Tools | 1 |
To assemble this cabinet, follow these steps:TIPS: it is best to assemble this cabinet as close as possible to where it will be used.
ASSEMBLY:
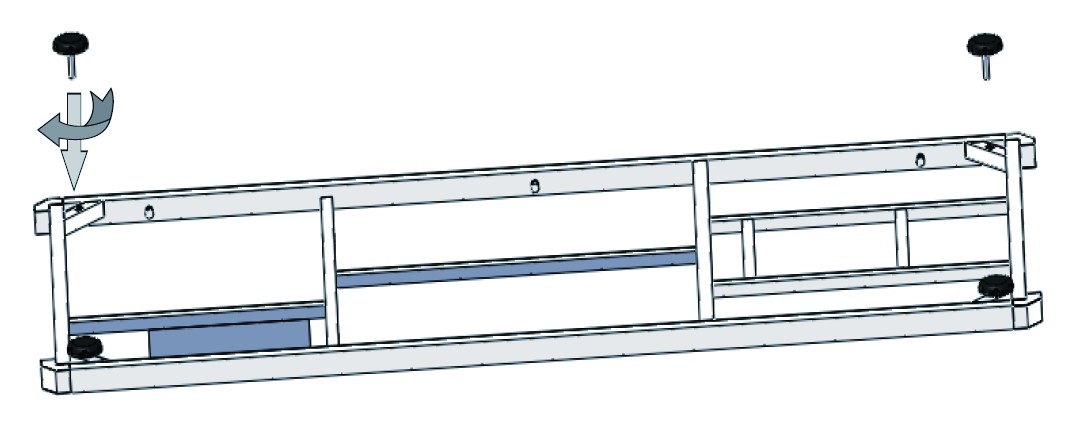
Step 1:Lay the base frame of the cabinet on the ground upside down, and screw the 4 legs in place.Screw each leg all the way in, then TURN base back to normal position with the legs down:
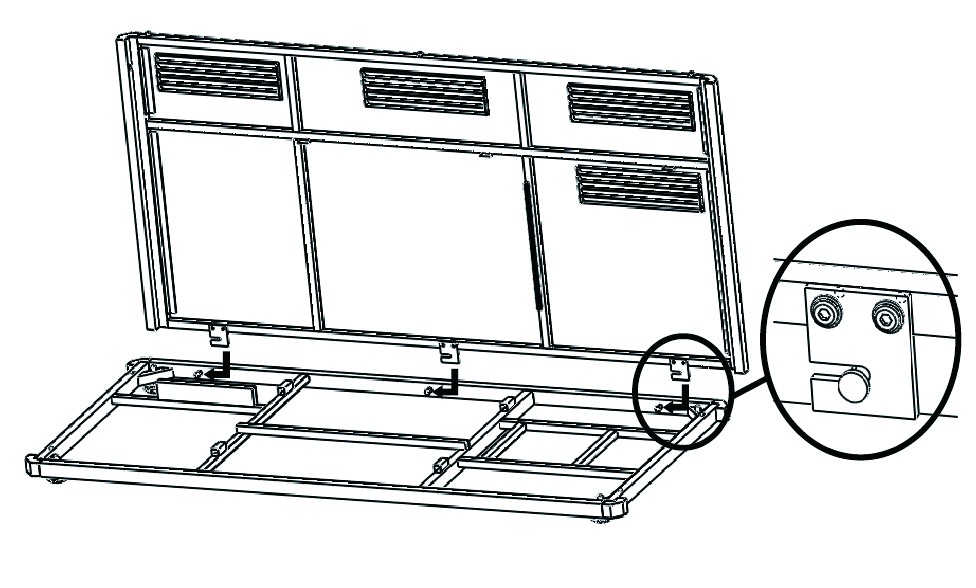
Step 2:Position the REAR panel over the BASE panel, and lock to place by engaging into the hookssideways:
Step 3:In a similar manner to Step 2, position the FRONT panel on the BASE, and lock to place:
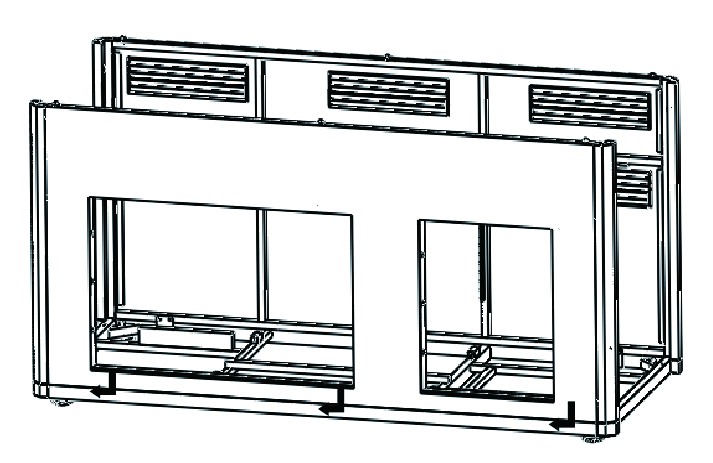
Step 4:Lower the 2 SIDE PANELS in between the FRONT and BACK panels on the inside. Engage the two pins on the bottom. And lock to place with 2 screws on the top for each panel
Step 5:Put the BOTTOM panel onto the base of the cabinet. (Front First).

Step 6:Insert the DIVIDER panel:

Step 7:Assemble SS Drawers. Please see separate instructions for SS Drawers installation.
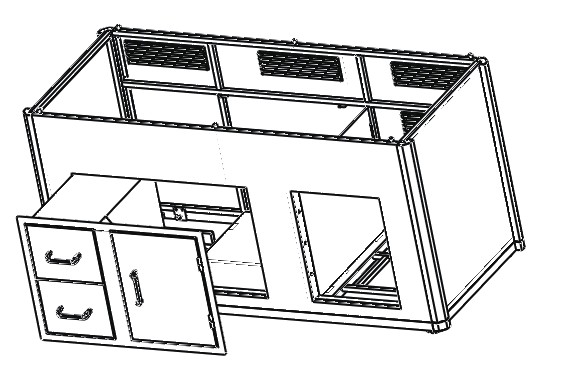
Step 8:Assemble Gas Tank Door frame. Please see separate instructions for installation.
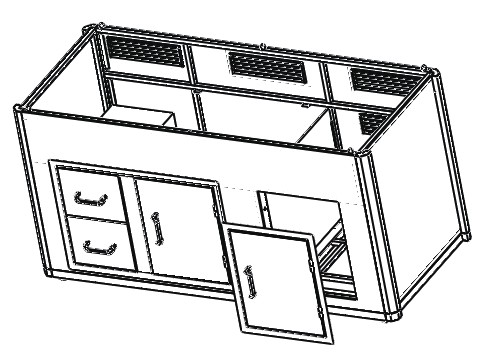
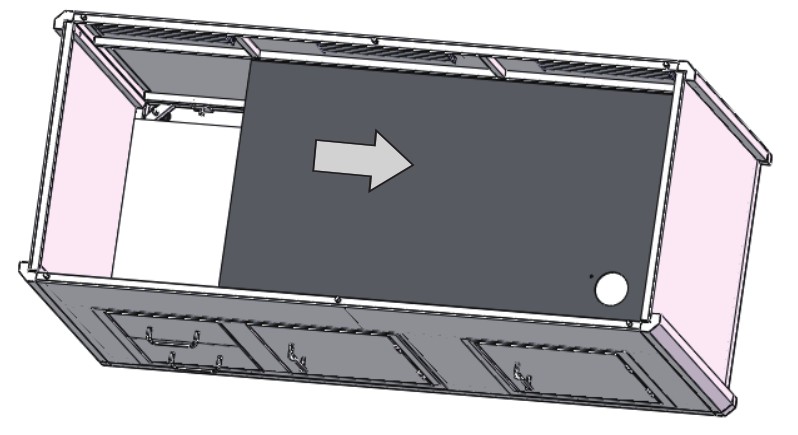
Step 9:Place the TOP covering panel over the divider. (note the position of the hole for the Hose):
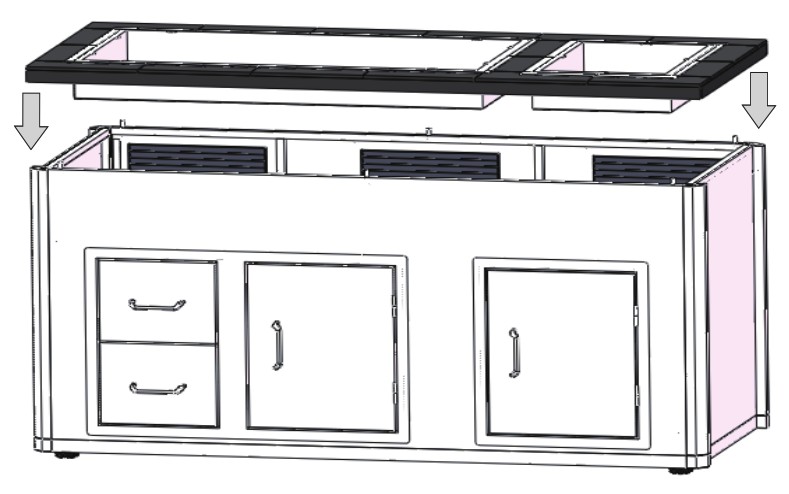
Step 10:Carefully place the BENCH TOP into position.
NOTE:The 6 pins at the corners of the cabinet sides need to engage with the holes at the benchtop’s underside.
 Step 11:For the installation of the Barbecue and the Side-Burner, please refer to the instruction books supplied with these appliances.
 NOTE: When considering the position of your Outdoor Kitchen, ensure that a Fridge (if installed) is never exposed to direct sunlight.
CARE AND MAINTENANCEThe BeefEater Outdoor Kitchen is made out of durable and sturdy materials and designed to withstand the wrath of time, however keeping it away from the elements, and only cleaning with mild detergents warm water, and a soft-bristle brush, will extend its life, and help in keeping it looking better for longer.The granite benchtop can be cleaned with warm soapy water, using mild detergent, and no caustic or abrasive materials.Side panels are only to be lightly sprayed with warm soapy water, and rinse with a gentle spray of clean water. Do not wipe, rub, scrape, or otherwise scratch the panels.
TECHNICAL INFORMATION
Note: Do not modify the BeefEater Outdoor Kitchen. Any deviation from factorythe structure could result in dangerous situations and cause the voiding your warranty.
| Dimensions[mm] | Width(Cabinet only) | Height (Cabinet only) | Depth(Cabinet only) | Weight[Cabinet only] |
| Barbecue Cabinet | 1750 | 910 | 742 | 95 kg |
SERVICE ASSISTANCE:To assist you when contacting your after-sales service agent and to arrange for service, please complete the following details and have them ready when you call. You do not need to register your warranty. However, you must retain your receipt or proof of purchase. When claiming a warranty for this product you must provide a copy of your proof of purchase receipt. No claims for warranty will be accepted without proof of purchase.
| Model: |
| Serial number: |
| Retailer purchased from: |
| Date of purchase: |

DisclaimerDue to the special, individual coating process of this OutDoor Kitchen unit, some small variations in color ay be apparent. This is perfectly normal and is part of this product’s unique appearance. Slight color variations are, thus, not covered
Images in this manual are for illustrative purposes only. Due to constant improvement, BeefEater advises that changes to the design, material, specifications, and product configuration may occur at any time without notice.
[xyz-ips snippet=”download-snippet”]