behringer MO240 Studio Monitoring Earphones with Dual Hybrid Drivers

Important Safety Information
- Read these instructions.
- Keep these instructions.
- Heed all warnings.
- Follow all instructions.
- Do not use this apparatus near water.
- Clean only with dry cloth.
- Disposal of a battery into fire or a hot oven, or mechanically crushing or cutting of a battery, can result in an explosion.
- Leaving a battery in an extremely high temperature surrounding environment can result in an explosion, or the leakage of flammable liquid or gas.
- A battery subjected to extremely low air pressure may result in an explosion or the leakage of flammable liquid or gas.
- Do not disassemble or modify this product.
- Do not replace a battery.It can defeat a safeguard.
- Please store this product in a clean and dry environment.
- Charge it once a month (minimum).
- Do not leave unattended while charging.
- WARNING! Choking and Swallowing Hazard. Keep the product safely out of reach of children and pets. The small size and the internal battery present a choking and swallowing hazard.Failure to follow instructions may lead to permanent damage or death.
- WARNING! To prevent possible hearing damage, do not listen at high volume levels for long periods.
LEGAL DISCLAIMER
Music Tribe accepts no liability for any loss which may be suffered by any person who relies either wholly or in part upon any description, photograph, or statement contained herein. Technical specifications, appearances and other information are subject to change without notice. All trademarks are the property of their respective owners. Midas, Klark Teknik, Lab Gruppen, Lake, Tannoy,Turbosound, TC Electronic, TC Helicon, Behringer, Bugera, Auratone and Coolaudio are trademarks or registered trademarks of Music Tribe Global Brands Ltd.© Music Tribe Global Brands Ltd. 2020 All rights reserved.
LIMITED WARRANTY
For the applicable warranty terms and conditions and additional information regarding Music Tribe’s Limited Warranty, please see complete details online at musictribe.com/warranty.
Accessories List
- MO240 earphones x 1 pair
- Zipper case
- Silicone sleeves in 3 sizes
- Cleaning tool
- 6.3 mm adapter (for 3.5 mm plug)
- This quick start guide
Features
- Professional studio-grade monitoring earphones
- Single dynamic and single balanced armature micro-drivers delivering full bass and detailed highs
- Ultra-linear frequency response from 20 Hz to 20 kHz
- Sound-isolating design blocks outside noise for detailed musical experience
- Secure over-the-ear cable design ensures in-ear stability and comfort
- Optimized performance with exceptional sound quality for use with a wide range of audio devices
- 59 inch (150 cm) detachable cable with 360-degree rotating gold-plated MMCX lock-snap connector for flexibility and versatile connectivity options
- Zipper case included to enjoy your music on-the-go
- Includes foam and silicone ear-plugs in 3 sizes to ensure a perfect fit
Getting Started
Wearing, inserting and removing the earphones
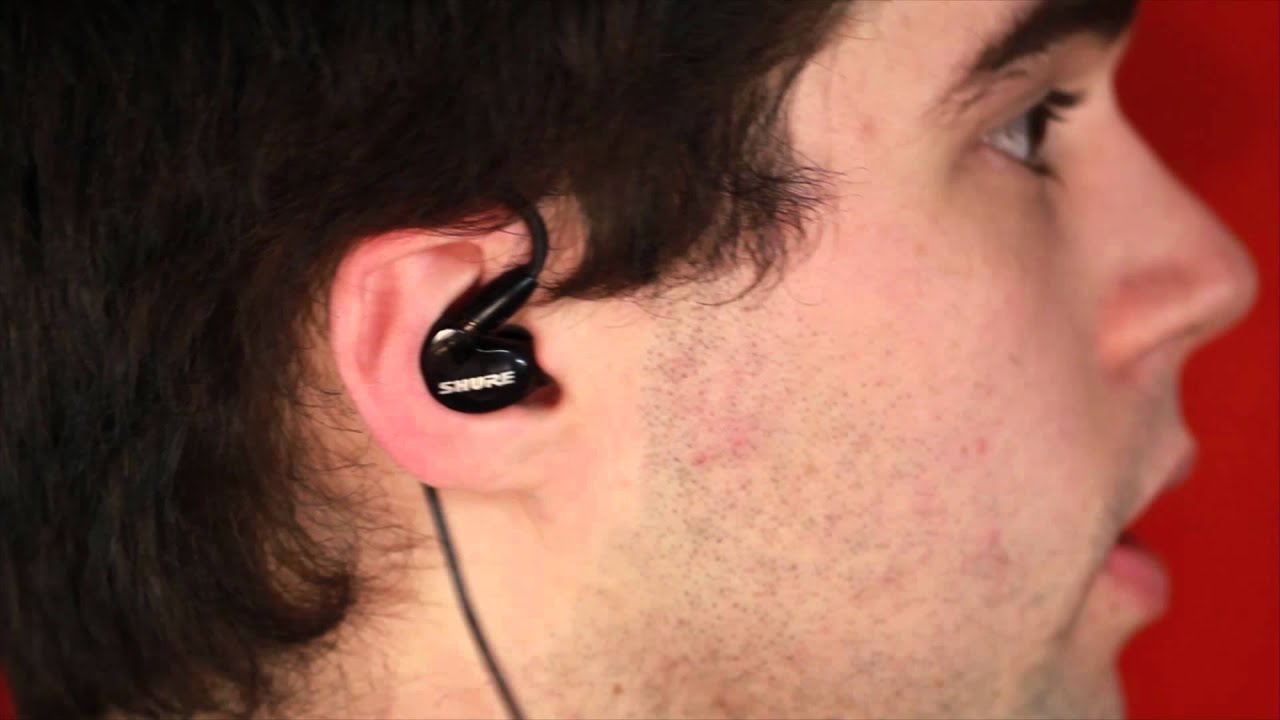
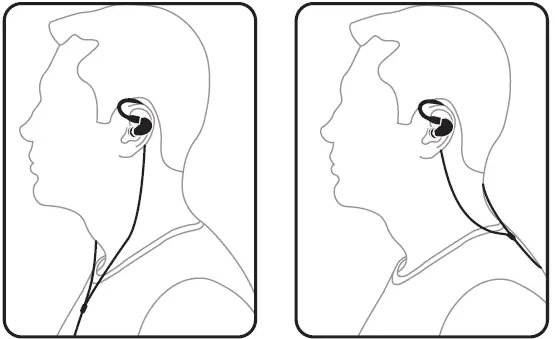
- These earphones should be worn with the cables routed over the ear. Then, the cables can be run to your monitoring system either in front or behind , similar to this illustration:

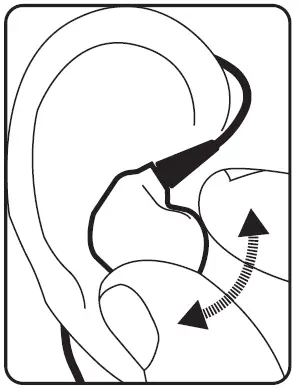
- Insert each earphone so makes a tight seal in the ear canal. A good seal with the ear canal is necessary for optimum sound quality, especially for bass frequencies.
- If you notice a loss of bass frequencies, gently push the earphone deeper into the ear canal to produce a better seal. If this adjustment does not improve the bass response, you can also switch to a different sleeve.WARNING: Avoid pushing the earphone in beyond the ear canal.
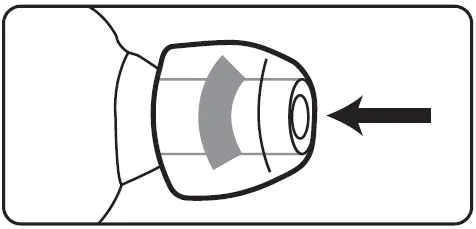
- To remove the earphones, firmly hold each earphone’s outer case between your finger and thumb and twist gently.
Choosing, installing and changing sleevesMO240 earphones come with a selection of soft sleeves in three sizes, from small to large.
WARNING: Always make sure to protect your ears by muting or lowering your monitoring systems volume down all the way before inserting the earphones.
- Choose an earphone sleeve with the best fit and the best seal to isolate your earphone mix from outside sounds.
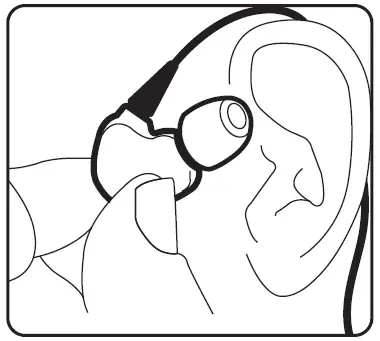
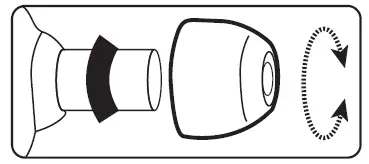
- Slide the sleeve onto each earphone’s sound nozzle. Apply light pressure, and if necessary rotate the sleeve as you go until secure.
- Make sure the sleeve completely covers the nozzle and the flared barb.
- Try inserting the earphone into your ear canal to test the fit..
- If the fit is too loose or tight, twist and pull to remove the sleeve from the nozzle and replace with a sleeve in the next appropriate size.
NOTE: If the barb or nozzle is exposed beneath the sleeve, the sleeve is not installed properly. Sleeves that do not fit securely over the nozzle and barb should be replaced.
Cleaning
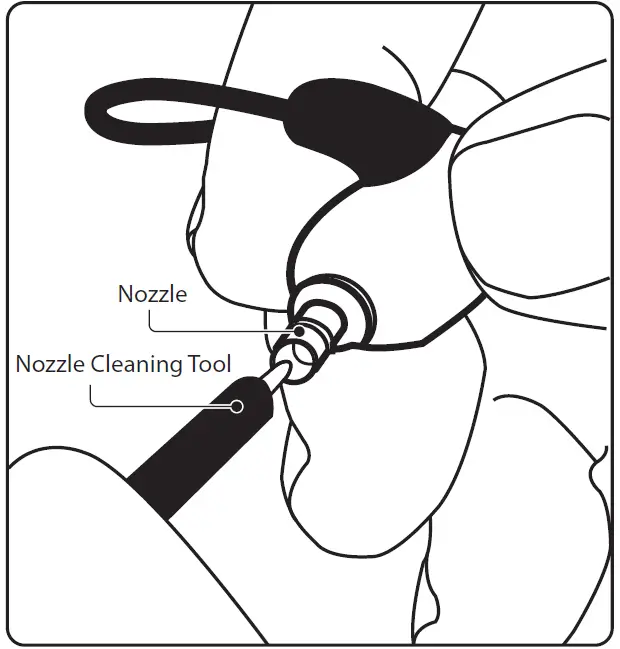
- If you notice problems with sound quality not related to the fit inside the ear canal, remove the sleeve and check the earphone nozzle for obstructions.
- If the nozzle is blocked, use the included cleaning tool to clear the block.
- Replace the sleeve onto the nozzle, and re-insert the earphones into your ear to test the sound.
Maintenance tips
- Keep the earphones and sleeves clean and dry.
- To clean, remove the sleeves from the earphone nozzle, gently rinse in warm water and allow to air dry. Sleeves should be completely dry before
- Inspect sleeves for damage and replace as necessary.
- Avoid exposing the sleeves to extreme temperatures.
- Replace sleeves that do not fit properly.
Specifications
| Driver | Dynamic and balanced armature |
| Crossover frequency | 500 Hz |
| Impedance | 32 Ω |
| Frequency response | 20 Hz to 20 kHz |
| Sound pressure level (SPL) | 93 dB @1kHz (102 dB peak) |
| Rated power | 3 mW |
| Peak power | 5 mW |
| Cable | Shielded, detachable |
| Connector | MMCX connector |
| Cable length | 1.5 m (59″) |
| Plug | 3.5 mm, stereo |
| Adapter | 6.3 mm, gold plated |
Other Important Information
Register online. Please register your new Music Tribe equipment right after you purchase it by visiting behringer.com. Registering your purchase using our simple online form helps us to process your repair claims more quickly and efficiently.Also, read the terms and conditions of our warranty, if applicable.
Malfunction. Should your Music Tribe Authorized Reseller not be located in your vicinity, you may contact the Music Tribe Authorized Fulfiller for your country listed under “Support” at behringer.com. Should your country not be listed, please check if your problem can be dealt with by our “Online Support” which may also be found under “Support” at behringer.com. Alternatively, please submit an online warranty claim at behringer.com BEFORE returning the product.
![]()
References
[xyz-ips snippet=”download-snippet”]