BELLMAN AUDIO DOMINO

PERSONAL HEARING SYSTEM
Appendix
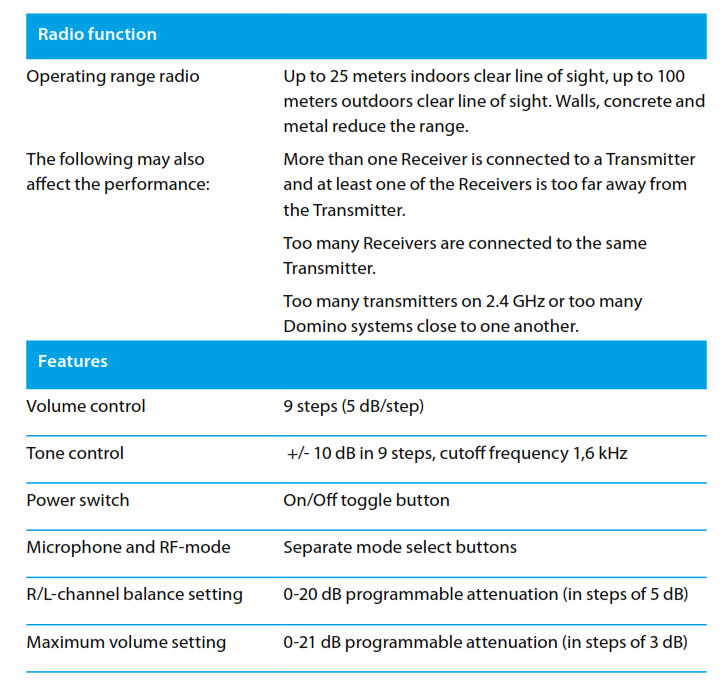
SettingsBellman Audio Domino has more settings than those you can access in user mode. By going into the Settings Menu you can adjust settings that you do not to be changed again.
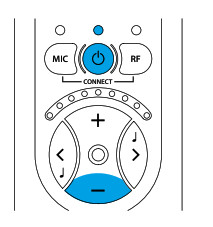
Settings menuStart the Receiver Unit with the On/O button (6) for about 3 seconds.Hold down the On/O button (6) and press the Volume Buttton (10) within 1 second for at least 3 seconds.
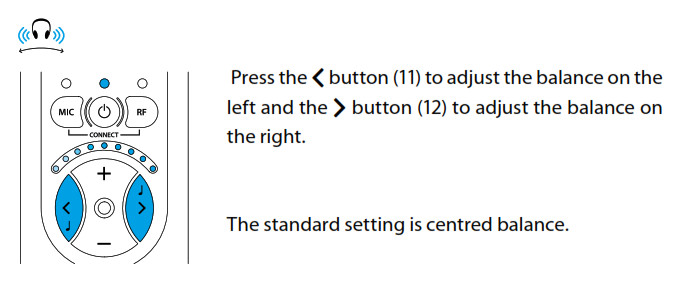
You are now in Balance Control mode.
Overview of the Settings Menu
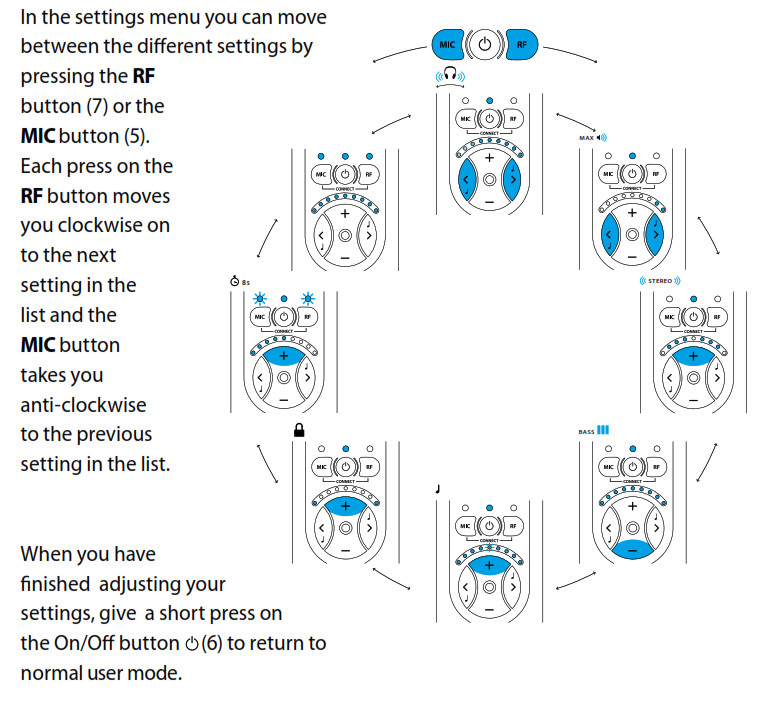
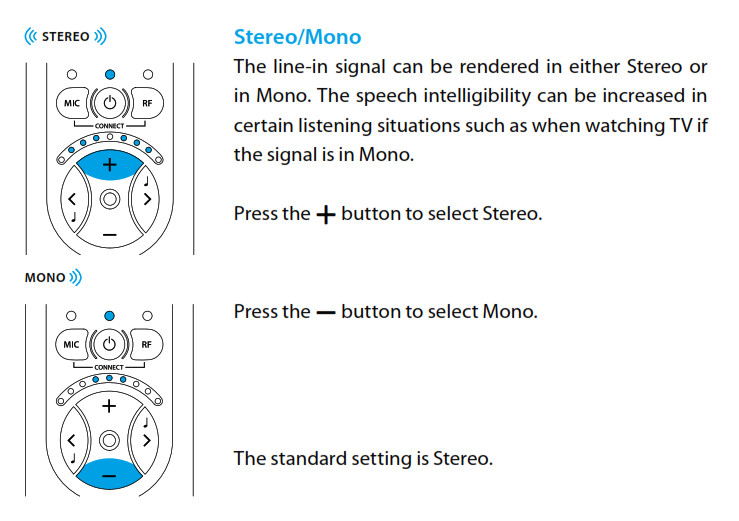
Balance controlThe balance between the right and left-hand channels can be set to compensate, for example, for a hearing loss in one ear.
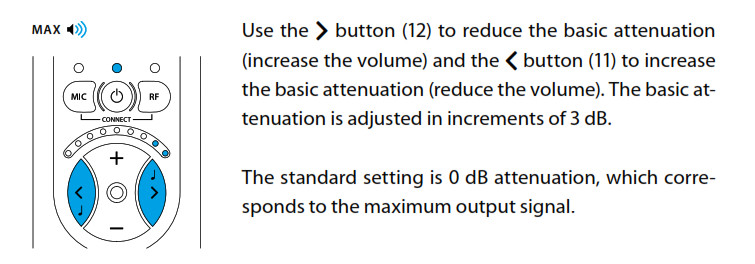
Basic attenuationDifferent headphones have different sensitivity levels and you can compensate for this with basic attenuation. What you actually set is the attenuation you require at the maximum power output you want to have (which is therefore 0dB attenuation). This setting is useful when you want to adjust the maximum volume in user mode for a pair of headphones or in-ear phones with a higher sensitivity than the BE9122 Bellman Stereo Headphones or, for example, if you want to limit the volume for a child.
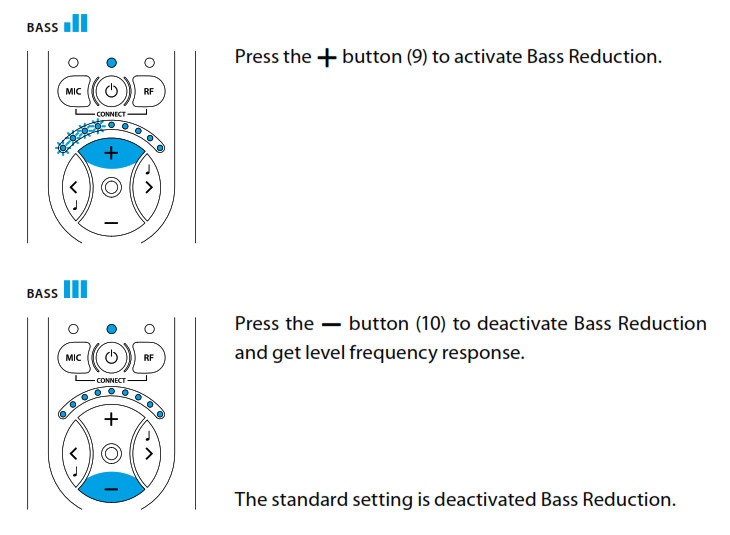
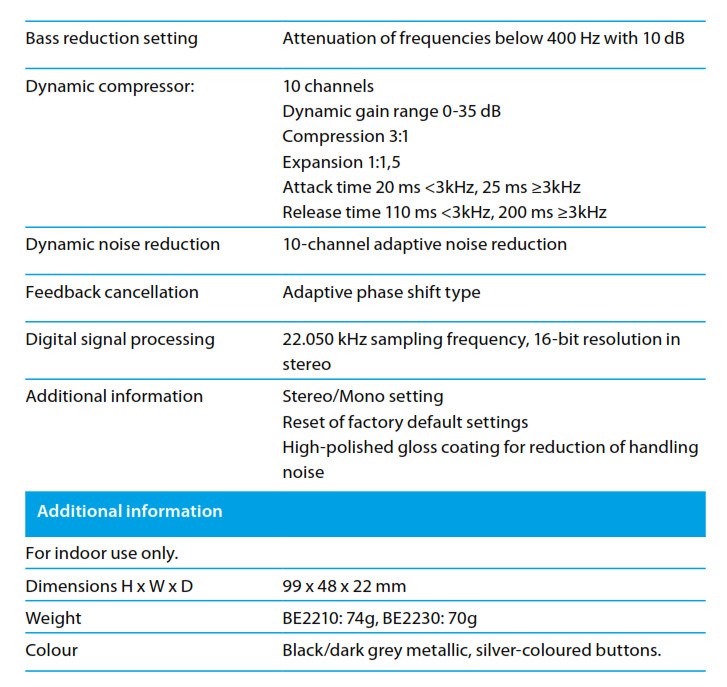
Bass reductionLow-frequency interference such as fans and road noise can be tiring if you are exposed to it for a long period. By activating bass reduction, low-frequency interference and sounds are reduced.
Adjusting the Tone ControlThe Tone Control Blocking function has been developed in case you want to make it easier for the user to use Bellman Audio Domino. This setting can be used to choose whether the user should be able to adjust the tone control or not. If you choose to switch off the tone control buttons, you can preset the tone control that will be used in user mode.
The standard setting is tone control activated.
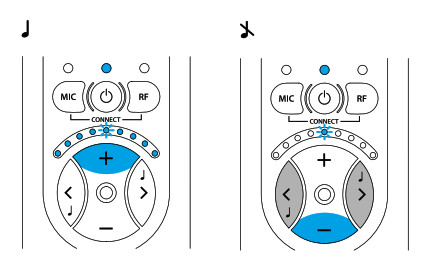
Activating and deactivating Tone Control in User ModePress the + button (9) to activate the tone control buttons and the – button (10) to deactivate them.
Presetting the Tone ControlPress the < button (11) and the > button (12) to preset the tone control to the level that will be used in user mode.The standard setting is Tone Control centred (level frequency response).
![]() Please note that if the tone control is on, the preset value will be changed as soon as the Tone Control is changed in user mode.
Please note that if the tone control is on, the preset value will be changed as soon as the Tone Control is changed in user mode.

Resetting to the factory settingYou can use this to reset all settings to the standard settings that the products were supplied with from the factory.
Press and hold down the + button (9) until all the LEDs on the display are lit. After resetting is completed, the display will blink for a short period.
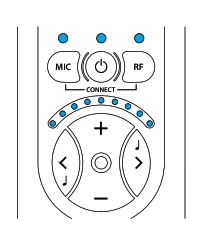
Version informationThe product version information is presented here via a pattern of lit and blinking LEDs. This internal information is only intended as an aid for servicing and support.
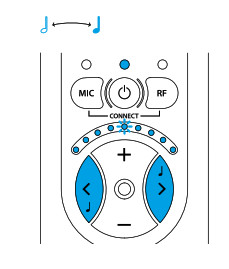
Pairing of unitsThe Transmitter and Receiver Units in the Bellman Audio Domino system must have the radio link established in order for radio communication to operate. To make it easier to get started, a Receiver Unit and a Transmitter Unit which are paired together are always supplied so that they will work together. Where you want to pair a Receiver Unit with a Transmitter Unit which is different from the Receiver Unit it was originally supplied with, you can do this in the Settings Menu. Proceed as follows to pair up the units:

- Start both the units with the On/Off buttons i (6, 18).
- Go into the Settings Menu.
- Hold down the CONNECT button (19) on the Transmitter Unit.
- Hold down both the M button (5) and the R but- ton (7) on the Receiver Unit.
A ”running light” on the Receiver Unit’s Volume and Tone LED Indicator (8) moving towards the centre indicates that the link has been established.
![]() Please note! If you pair up a Transmitter Unit and a Receiver Unit in the Settings Menu, this replaces the pairing carried out in the factory. This can be useful when changing a Transmitter Unit under guarantee or if you want to pair up several Receiver Units to a Transmitter Unit (e.g. in a conference room).
Please note! If you pair up a Transmitter Unit and a Receiver Unit in the Settings Menu, this replaces the pairing carried out in the factory. This can be useful when changing a Transmitter Unit under guarantee or if you want to pair up several Receiver Units to a Transmitter Unit (e.g. in a conference room).
Educational ModeThe Domino Pro has a mode especially developed for use in an educational setting.This mode sets the microphone in the transmitter to be active by default.The microphone in the receiver can be momentarily activated to allow conversation with peers and support staff around the user.
- By pressing and holding the MIC button, the sound from the local microphone will be mixed with the sound from the transmitter microphone
- When the MIC button is released, the receiver will go back to the transmitter microphone again

Turn On the Educational mode1) Enter the “Settings menu” (refer to Page 314)2) Use the MIC (5) button to move between settings until the LED’s over the MIC (5) and RF (7) buttons flash (this is the “Resetting to the factory setting” menu).3) Press and hold the Volume down button (10) for 20 seconds.4) The LED lightbar will flash to acknowledge the change of mode.5) Press the power button once shortly to set education mode and return to the normal menu.
Turn Off the Educational modeThe Educational mode is turned OFF by restoring Factory settings (refer to Page 320).Note: The factory default setting is Educational mode OFF.
Testing
It is easy to test the Bellman Audio Domino Personal Hearing System. If Bellman Audio Domino does not operate as described below, you can carry out further troubleshooting as instructed under Troubleshooting.
How to testThe testing of Bellman Audio Domino has been divided into three parts. One part for the Receiver Unit for which only the Receiver Unit is required, one part for the Transmitter Unit for which both units are required and finally one for charging the two units.
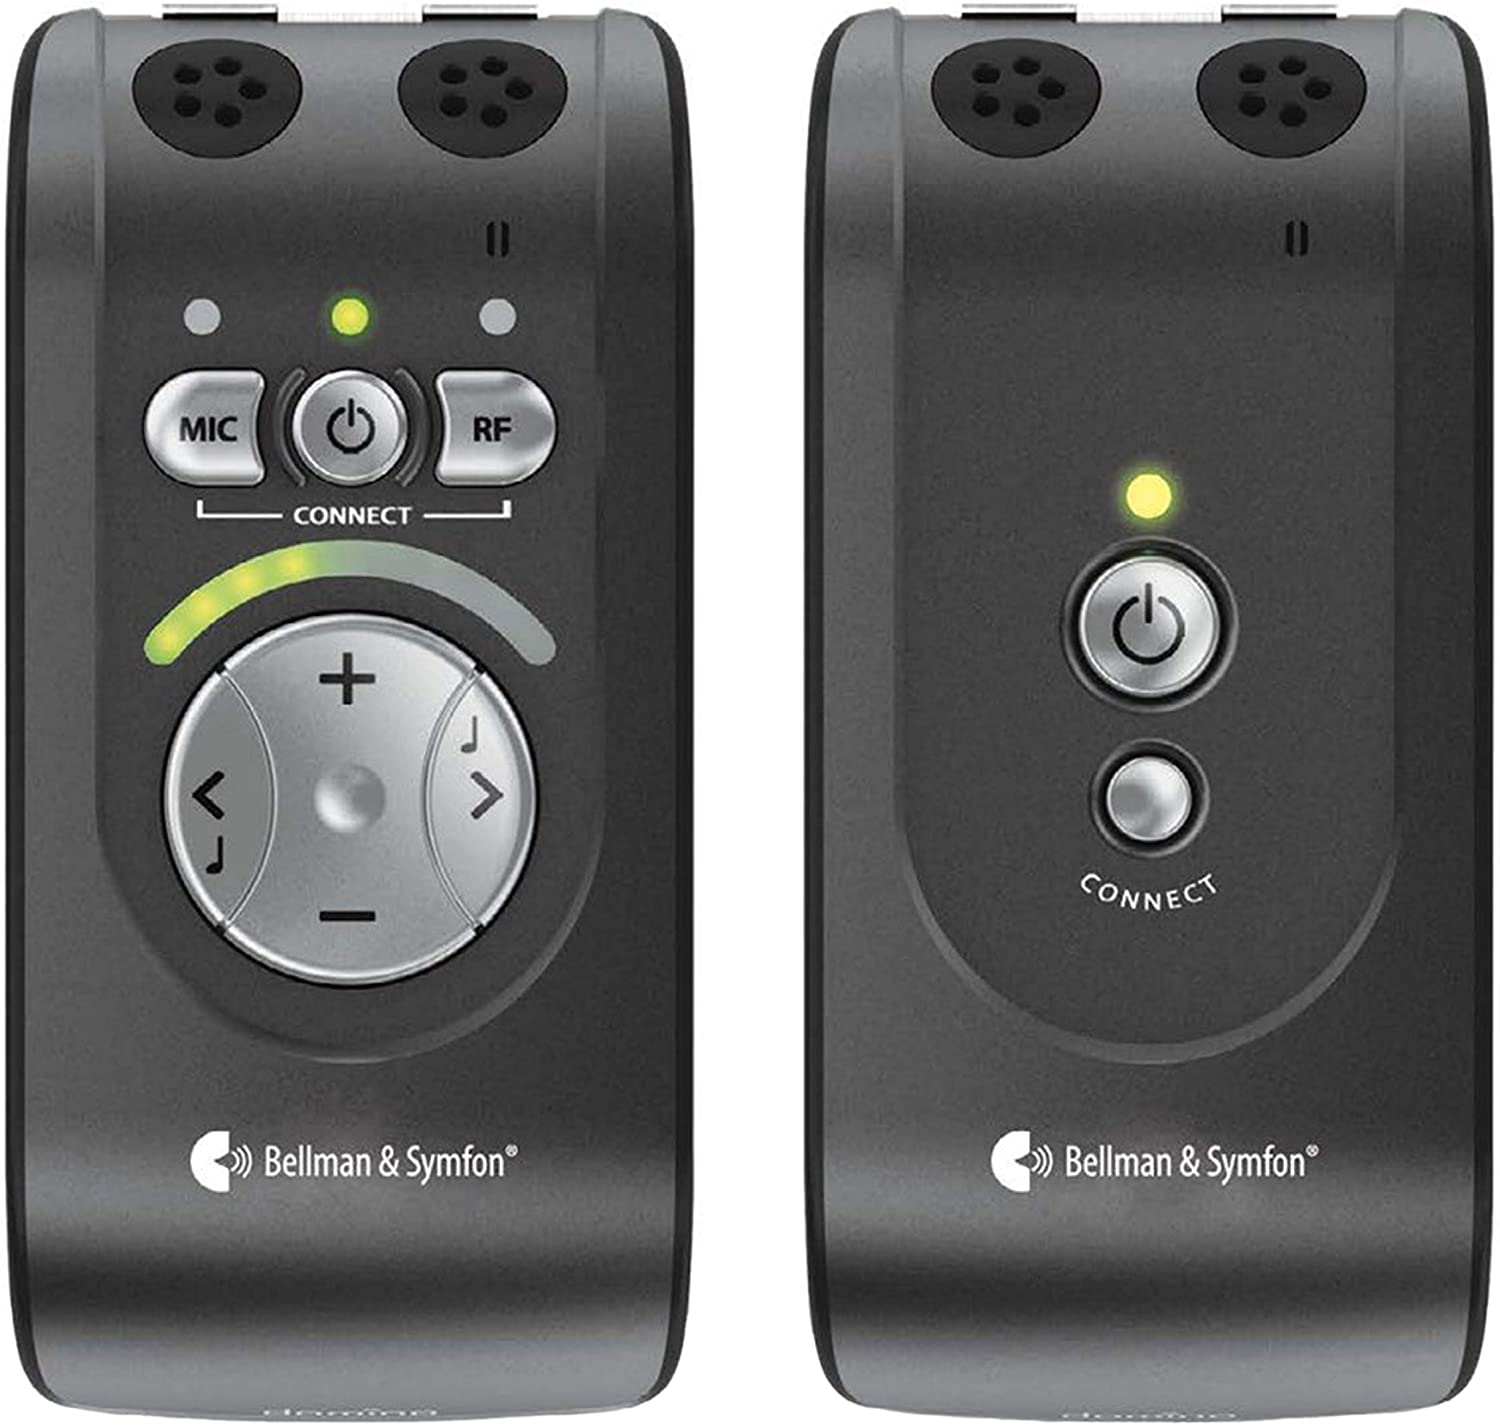
Receiver Unit
- Switch on the unit and make sure that the Battery Status LED (3) lights up green.
- Connect the headphones to the Headphone Socket (13) and scrape carefully on the round microphone (1) with your finger and check that there is a scraping sound in the headphones.
- Press the M button (5) and make sure that the Microphone LED (2) changes color and lights up orange.
- Scrape carefully on the small microphone hole on the top (1) and the round microphone (1) with your finger and check that there is a scraping sound in the headphones.
- Press the buttons (9, 10, 11, 12) and check that the Volume and Tone Indicator changes.
Transmitter Unit
- Switch on the unit and make sure that the Battery Status LED (17) lights up green.
- Press the R button (7) and make sure that the External Sound LED (4) lights up green.
- Carefully scrape on the round microphone hole (16) on the top of the Transmitter Unit with the finger and check that there is a scraping sound in the headphones.
- Press the R button (7) and make sure that the External Sound LED (4) changes colour and lights up orange.
- Carefully scrape on the round microphone (16) on the Transmitter Unit with the finger and check that there is a scraping sound in the headphones.
- Connect an external sound source to the External Sound Source Input (20) and check that the sound from the sound source is heard in the headphones. The external sound source input (20) can be tested, for example, by connecting a CD player or a radio to the input via the audio cable supplied. The transmitter unit automatically switches to an external sound source when a connector is connected to the External Sound Source Input (20).
Charging
- Connect the charger to the mains socket and check that the LED on the charger light up green.
- Connect the charging cables to both the charger and to the charging sockets on the Receiver Unit and the Transmitter Unit (14, 21), see the fold-out section of the manual.
- Check that the LED on the charger change from green to red.
- Check that the Battery Status LEDs on both the Transmitter Unit and Receiver Unit light up orange.
Troubleshooting


Technical information
FCC compliance statement
This device complies with Part 15 of the FCC Rules. Operation is subject to the following two conditions: (1) this device may not cause harmful interference, and (2) this device must accept any interference received, including interference that may cause undesired operation.
 Warning: Changes or modifications to this unit not expressly approved by the party responsible for compliance could void the user’s authority to operate the equipment.
![]() Note: This equipment has been tested and found to comply with the limits for a Class B digital device, pursuant to Part 15 of the FCC Rules. These limits are designed to provide reasonable protection against harmful interference in a residential installation. This equipment generates, uses and can radiate radio frequency energy and, if not installed and used in accordance with the instructions, may cause harmful interference to radio communications. However, there is no guarantee that interference will not occur in a particular installation. If this equipment does cause harmful interference to radio or television reception, which can be determined by turning the equipment off and on, the user is encouraged to try to correct the interference by one or more of the following measures:
Note: This equipment has been tested and found to comply with the limits for a Class B digital device, pursuant to Part 15 of the FCC Rules. These limits are designed to provide reasonable protection against harmful interference in a residential installation. This equipment generates, uses and can radiate radio frequency energy and, if not installed and used in accordance with the instructions, may cause harmful interference to radio communications. However, there is no guarantee that interference will not occur in a particular installation. If this equipment does cause harmful interference to radio or television reception, which can be determined by turning the equipment off and on, the user is encouraged to try to correct the interference by one or more of the following measures:
- Reorient or relocate the receiving antenna.
- Increase the separation between the equipment and receiver.
- Connect the equipment into an outlet on a circuit different from that to which the receiver is connected.
- Consult the dealer or an experienced radio/TV technician for help.
![]() Statement for Industry CanadaLe fonctionnement de cet équipement est soumis aux conditions suivantes:
Statement for Industry CanadaLe fonctionnement de cet équipement est soumis aux conditions suivantes:
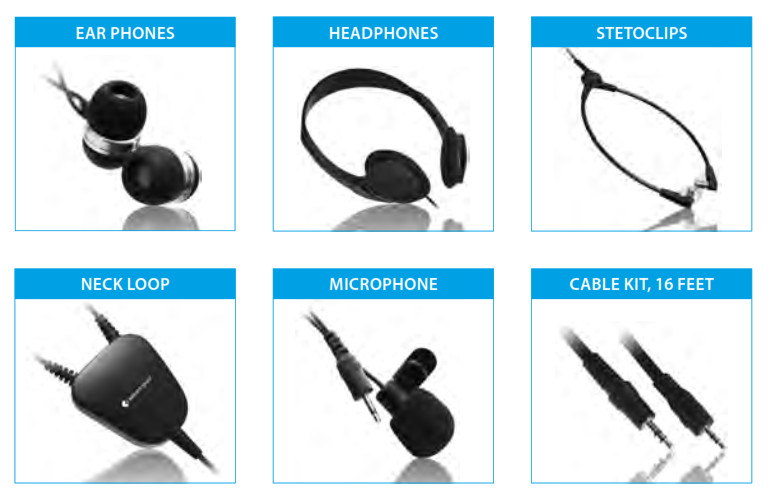
These original accessories are especially developed to maximize the performance of your Domino. Contact your nearest dealer or visit: www.bellman.com
Einsatzgebiete
 Indoors
 At work
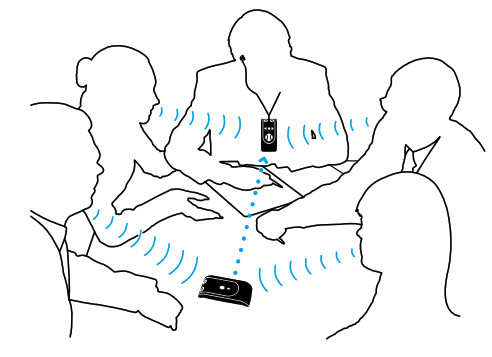
 At school
 In town
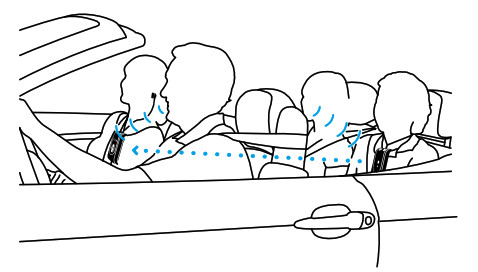 When traveling
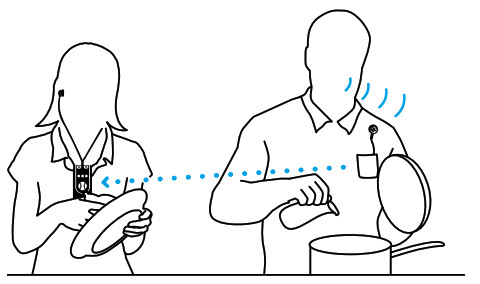
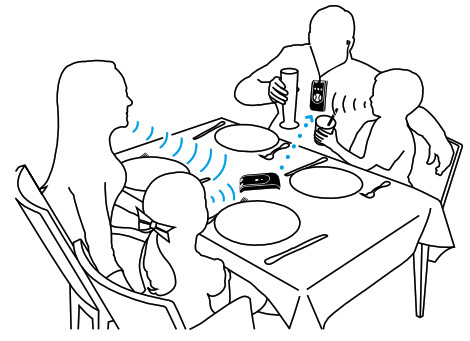 At dinner
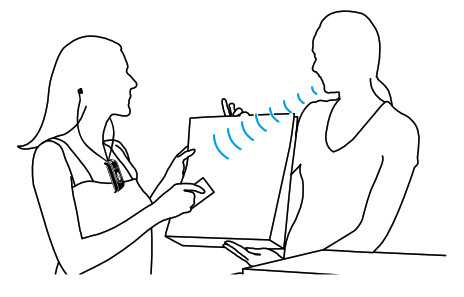
 With a hearing aid
 In front of the TV
Warranty conditions
Dear customer. Thank you for your purchase of this Bellman & Symfon® product. Our vision is to supply outstanding products that are of great value for our customers. For this reason, we have put all our best efforts into designing and manufacturing this product. However, if you should have any questions about the product or if you require repair, please contact us.
General warranty conditions. Your Bellman & Symfon® product is covered by a limited warranty. Please read the following conditions carefully and keep this information in a safe place. Please also save your receipt or other proof of purchase as you will need this for warranty claims.
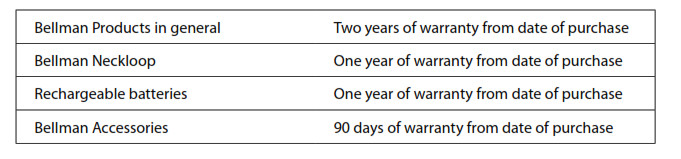
Warranty period. The warranty is depending on the type of product purchased and is valid from date of purchase. Bellman & Symfon offers warranty as per below:
Warranty conditions. Bellman & Symfon warrants that the Product that you have purchased is free from manufacturing defects in materials and workmanship when dispatched from our warehouse. Your sales receipt is your proof of the date of purchase and the warranty period commences as of that date. During the warranty period, Bellman & Symfon will have the option for the defective product to be repaired or replaced. The replacement product will be of equal or greater function and in good working and physical order. Such a replacement will be supplied from refurbished stock. The repaired or replaced product will be under warranty for the remainder of the original product’s warranty period.
Warranty limitations. This warranty automatically becomes void if the product has been physically damaged or rendered defective (a) as a result of accident, misuse, or abuse, or other circumstances beyond Bellman & Symfon’s control; (b) by the use of parts or peripherals not authorized by Bellman & Symfon; (c) as a result of normal wear and tear; (d) by use within an improper operating environment; (e) by modification of the product; (f ) by the serial number or product code sticker being removed or defaced; (g) as a result of service rendered by anyone other than a Bellman & Symfon Authorized Service Agent; (h) as a result of the product being operated other than in accordance with Bellman & Symfon rs manual. Neither does the warranty cover failure due to causes outside Bellman & Symfon’s control such as failure in your phone carrier’s line service (if applicable) or Acts of God. No warranty is offered for disposable batteries.
Return policies/warranty claim. Please see www.bellman.com/warranty
Bellman Audio Domino User Manual – Bellman Audio Domino User Manual –
[xyz-ips snippet=”download-snippet”]