User Manual
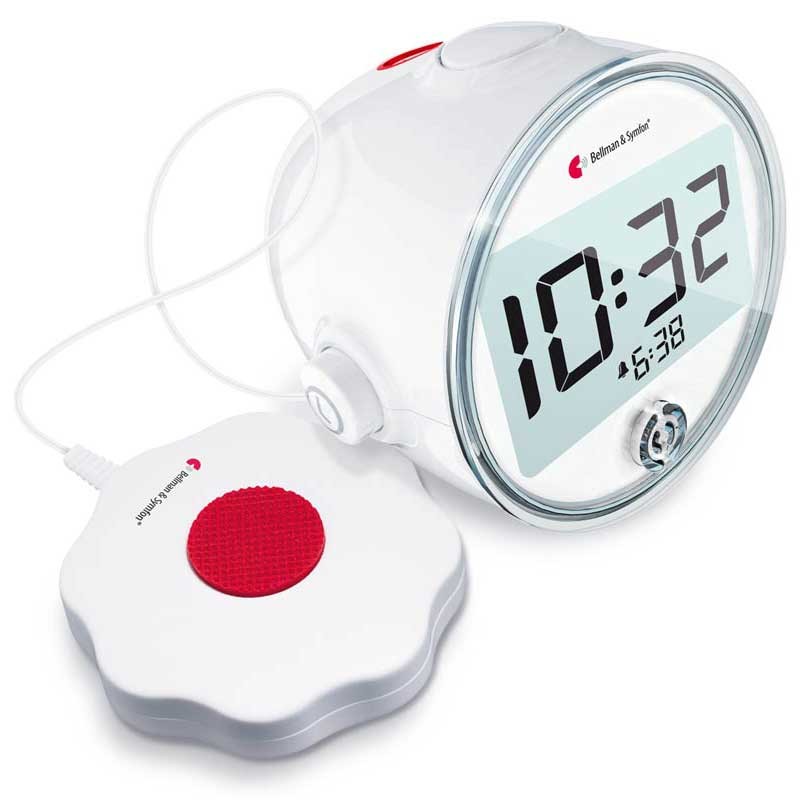
Bellman Classic Alarm Clock BE1350
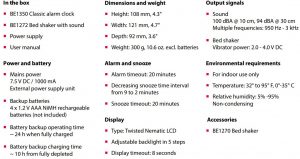
Technical Specifications
Getting Started
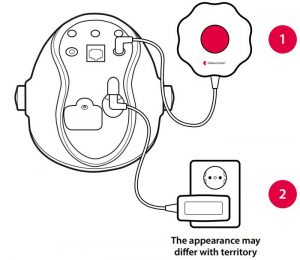
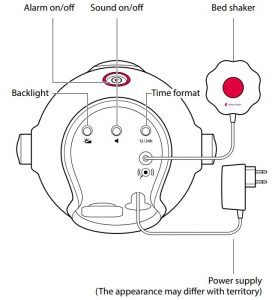
- Connect the bed shaker on the back of the alarm clock.
- Connect the power supply to the alarm clock and the mains outlet to turn it on.
- Tuck the bed shaker under the pillow or mattress and place the alarm clock on the bedside table. Setting
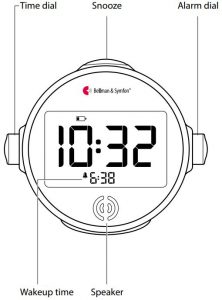
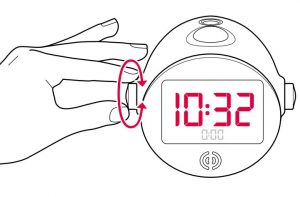
Setting the Time
- Press the left dial and turn it to set hours.
- To set minutes, press and turn the dial again.
- Press once again to save your settings.
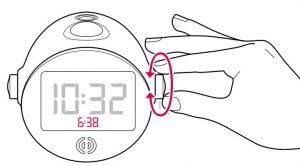
Setting the Alarm
- Press the right dial and turn it to set hours.
- To set minutes, press and turn the dial again.
- Press once again to save your settings.
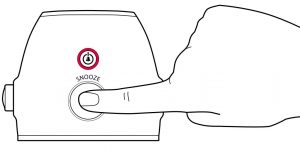
Activating the Alarm
- Press the alarm on/off button to activate the alarm.
- The alarm symbol
 appears on the clock face.
 - To turn off the alarm, press the button again.
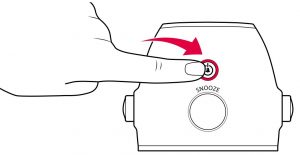
Using the Snooze
- Press the snooze button briefly to snooze the alarm.
- The snooze time interval will automatically decrease from 9 to 2 minutes in 2 minute steps.
Settings
Using Battery Backup
The alarm clock features a battery backup function that steps in when the power goes out. It keeps the alarm clock and bed shaker going for about 24 hours (when the batteries are fully charged).
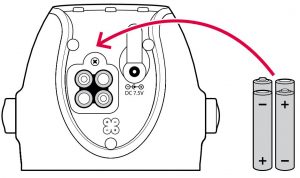
Here is how you install backup batteries:
- Remove the battery cover on the bottom of the alarm clock using a Philips screwdriver.
- Insert 4 x 1.2 V AAA NiMH rechargeable batteries and put the cover back on.
![]() Warning! ONLY USE RECHARGEABLE NiMH BATTERIES. Non-rechargeable batteries will start to leak and the battery acid will damage the electronics. The resulting damage is not covered by warranty.
Warning! ONLY USE RECHARGEABLE NiMH BATTERIES. Non-rechargeable batteries will start to leak and the battery acid will damage the electronics. The resulting damage is not covered by warranty.
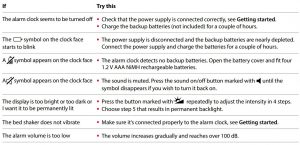
Troubleshooting
Most problems with the alarm clock can be solved quickly by following the advice below.
Bellman Classic Alarm Clock BE1350 User Manual – Bellman Classic Alarm Clock BE1350 User Manual –
Questions about your Manual? Post in the comments!
[xyz-ips snippet=”download-snippet”]