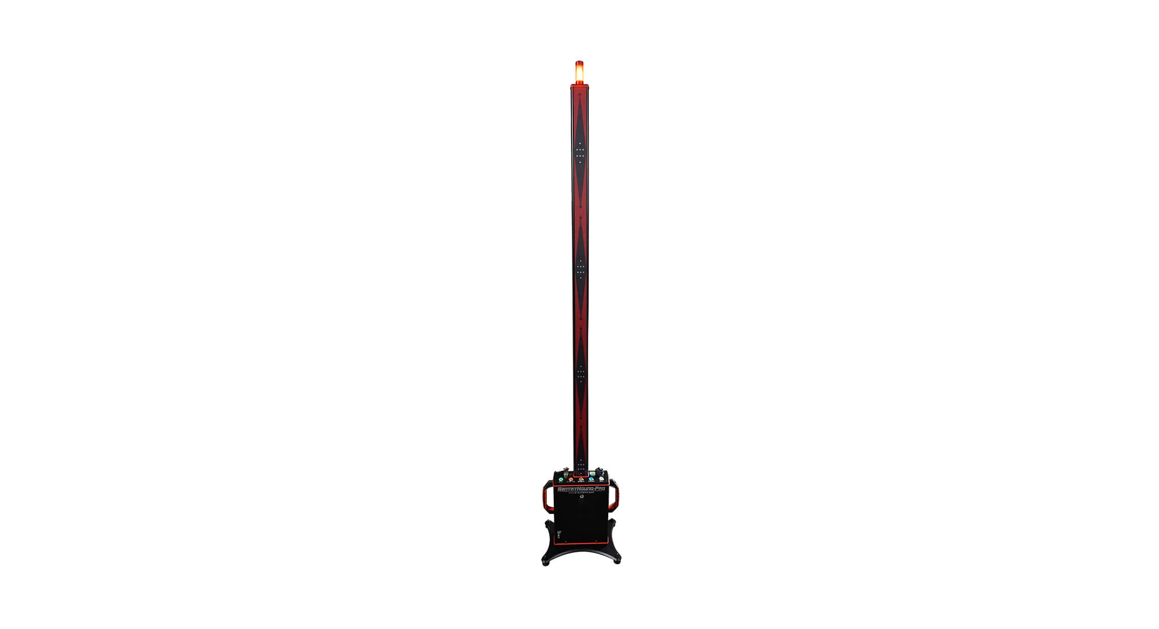
 SENTRY ENTRYHHOUND OUND–PPROQUICK START GUIDE+1 732-548-3737www.bvsystems.com[email protected]
FREE STANDING GATED TETHERED PORTAL
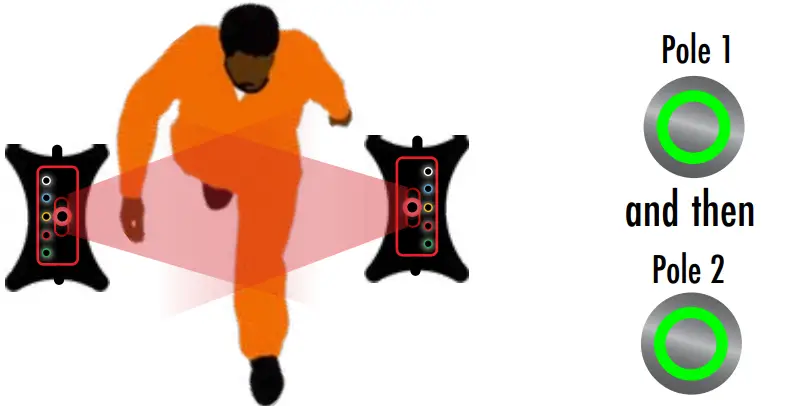 Default mode. Both IR sensors facing each other (IR sensors located on the opposite sides of etched ‘Sentryhound-Pro’. Turn on both poles within 4 seconds of each other. 1st pole on is master. 2nd pole becomes a slave. Master pole ALERT button blinks twice & slave pole ALERT button blinks three times once both are tethered.
FREESTANDING GATED UNTETHERED PORTAL
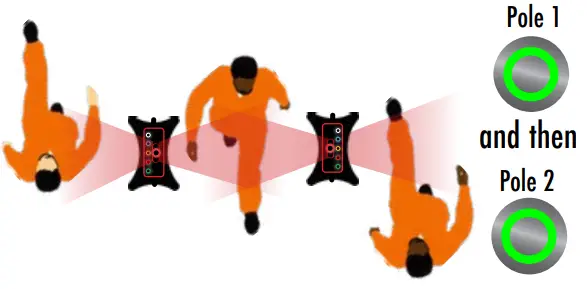 Default mode. Poles can face either direction. Turn on 1st pole and wait for the 1 ALERT button to blink. Then turn on 2nd pole and wait for the 1 ALERT button to blink. Poles are both bi-directional but not tethered.
WALL MOUNTED UNIDIRECTIONAL
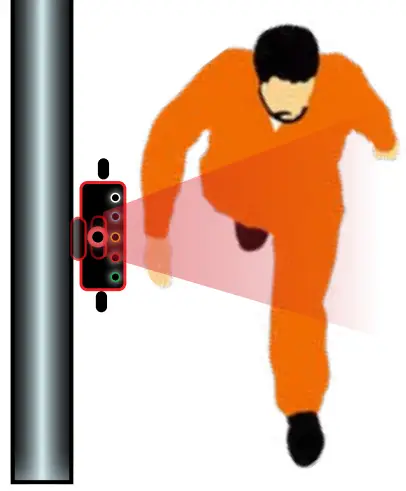 Default mode. The ALERT button blinks once to indicate mode. Requires optional wall mount
FREESTANDING UNIDIRECTIONAL
 Hold CALIBRATION + ALERT when powering up for freestanding unidirectional mode. The ALERT button blinks 5 times. Mode saved even after power off.
FREESTANDING OMNIDIRECTIONAL
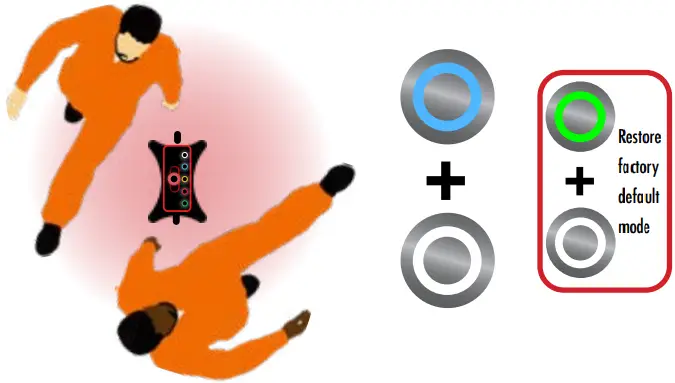
Hold SENSITIVITY + ALERT when powering up for omnidirectional mode. The ALERT button blinks 4 times. Mode saved even after power off.
FREESTANDING BIDIRECTIONAL
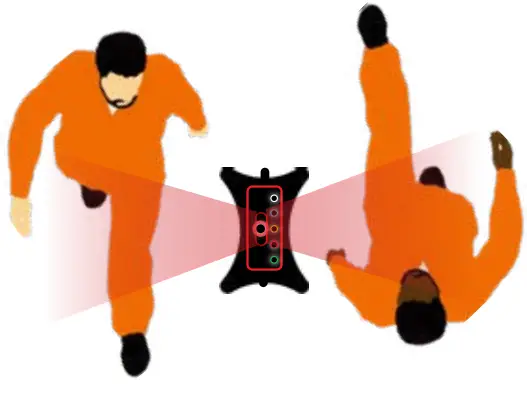 Default mode. The ALERT button blinks once to indicate mode.
BEFORE YOU BEGIN – Single pole and dual pole configurations ship to customers in their default modes respectively. If you are having difficulty entering into any of the modes illustrated above, be sure that you are in the appropriate default mode before proceeding. Consult with BVS support if you are unsure.
SETUP 1 – FREESTANDING GATED TETHERED PORTALThis is the most popular configuration for facilities with wide hallways or entryways. Poles may be placed as far as 60 inches apart and still detect minute traces of ferrous material passing through the center point. In this configuration, both poles are tethered via a wireless IR link and utilize a motion detector to isolate all detection only as someone passes through. Follow simple setup procedures to create a master pole and a slave pole working as a single gate.
SETUP 2 – FREESTANDING GATED UNTETHERED PORTALThis configuration allows 2 or more poles to be aligned allowing multiple lanes of foot traffic to pass through simultaneously. This approach allows much more foot traffic to flow through but does not isolate detection to a single person as clearly as a dedicated tethered portal since 2 people could pass by both sides at the same time. So another pass by each one at a different time or a stop and frisk of each would be required to truly pinpoint the source of ferrous material after the initial trigger alert.
SETUP 3 – WALL MOUNTED UNIDIRECTIONALThis setup requires a permanent, stable vertical wall surface and the optional SentryHound-Pro wall mount to ensure a stable mount. If the mount or wall is not stable and has any flex or travel whatsoever, the unit might falsely trigger as people walk by. This configuration is typically used as a permanent installation for certain hallways or doorways. Be sure to thoroughly test the area of intended installation for strong nearby ferromagnetic activity before drilling and installing. See the guide below for common sources of ferrous interference or activity to avoid.
SETUP 4 – FREESTANDING UNIDIRECTIONALThis popular configuration is ideal for controlled checkpoints with a narrow hallway or entryway. Since detection range is limited to no more than 32 inches away from sensors for most ferrous material, you must ensure that the far side of the pole does not allow contraband to pass by any further than 32″ away or contraband may not be detected as it passes through.
SETUP 5 – FREESTANDING OMNIDIRECTIONALThis setup creates a radius all around the pole and can be useful in centralized hallways and gathering areas where people pass by from a variety of directions with or without a stationed guard. Since the motion detectors will not necessarily be triggered, this configuration is not as reliable as a unidirectional configuration and is prone to false triggering from a variety of nearby sources.
SETUP 6 – FREESTANDING BIDIRECTIONALThis configuration is useful for hallways or doorways that receive heavy foot traffic flowing in both directions. By placing the pole in the center of an access way, foot traffic on both sides can be detected providing that ferrous material cannot pass by more than the recommended 18 to 32 inches from the sensors in the pole.
If you need to move a lot of foot traffic past SentryHound -Pro in a short amount of time, consider adjusting the alert time. Pressing the `ALERT’ button multiple times will toggle through all of these settings and back again. The first four pushes of the button cycle through the alarm duration. The more LEDs (white) on the pole you see, the longer the alarm duration will sound for. The next three pushes will light up LEDs (blue) according to how long the alarm lasts before resetting back to the ready position (green light on top of the pole). One LED indicates a single flash (red LED on top of the pole). Two LEDs indicate two flashes (red LED on top of the pole). Three LEDs indicate three flashes (red LED on top of the pole).
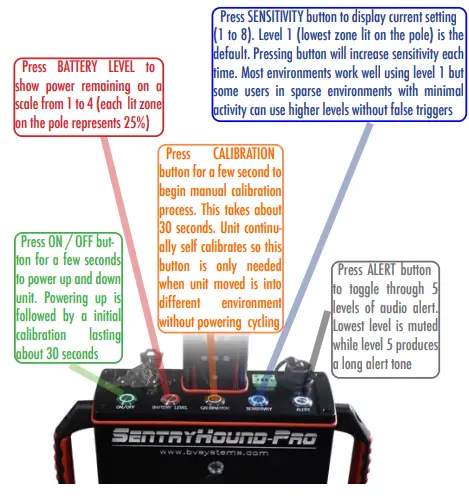
BEACON COLORS AND THEIR MEANINGS
| Blinking Blue (duration same as positive detection blinking) indicates the subject needs to be screened again once the beacon light goes back to green. This is due to the detection of high background noise. | Solid Yellow indicatescalibration in process. Allow unit to fully calibrate (about 30 seconds). Once the beacon turns Green, youmay start using the unit. | Blinking Red (adjustableduration using ALERTbutton) indicates positivedetection of ferrous material.Pole also blinks at the same rate. | Solid Green indicates the unit is ready for detection.Always wait for Greenbefore allowing subjectthrough pole(s) |
MORE ABOUT FERROUS DETECTION
Ferrous detectors are used to detect changes in the earth’s omnipresent magnetic field in space. The detector is initially conditioned to the earth’s magnetic field and its immediate surroundings. Many variables can change the magnetic field measured by a ferrous detector such as the introduction of ferrous material around the detector or the physical movement of the ferrous detector itself.Ferrous materials are materials that can be magnetized and are also known as ferromagnetic materials. They are mostly iron, but can also be nickel, cobalt, and some alloys of rare-earth metals, or common magnets. Some common non-ferrous metals are copper and aluminum. Depending upon the composition and purity of mate-rial, brass and stainless steel might have some trace of ferromagnetic material in them even if they do not appear to be magnetizable.The introduction of nearby ferrous material causes a perturbation in the earth’s magnetic field, and that change is picked up by the ferrous detector. Digital signal processing is applied to the detected change and a visual/audio alert is issued. There are four ferromagnetic sensors in each SentryHound-Pro pole, linearly arranged and equidistant apart from each other so that the sensor with the strongest signal will be visually indicated.Please note that the following items (not exhaustive list) might have enough ferrous material to trigger a ferrous detector: rolling office chairs, large trucks moving outside, metal eyeglass frames, belt buckle, shoes, wristwatches, metal zipper, metal buttons, or studs within the fabric. Another potential source of interference is power supplies in close proximity to the system. Keep power supplies for any electronics and power supply cables of any electronics away from the system. Awareness of these materials will help isolate contraband vs. false triggers which will accelerate screenings and security checkpoints.The physical stability of the SentryHound-Pro system is very important for proper operation. As noted above, any movement or vibration of the system during operation might disturb the magnetic field and potentially trigger the detector. SentryHound-Pro should NOT be used on any carpet or flooring that has the slightest give when someone walks nearby. If a system is moved at all, it should stabilize after 5 seconds or so to resume detection. However, in certain instances, the extreme movement of the system could trigger a full calibration procedure (as indicated by the yellow beacon light on top of the pole), and after about 30 seconds, the system will again be ready for detection. Users can, at any time, initiate this calibration manually by pressing the CALIBRATE button.
References
[xyz-ips snippet=”download-snippet”]

