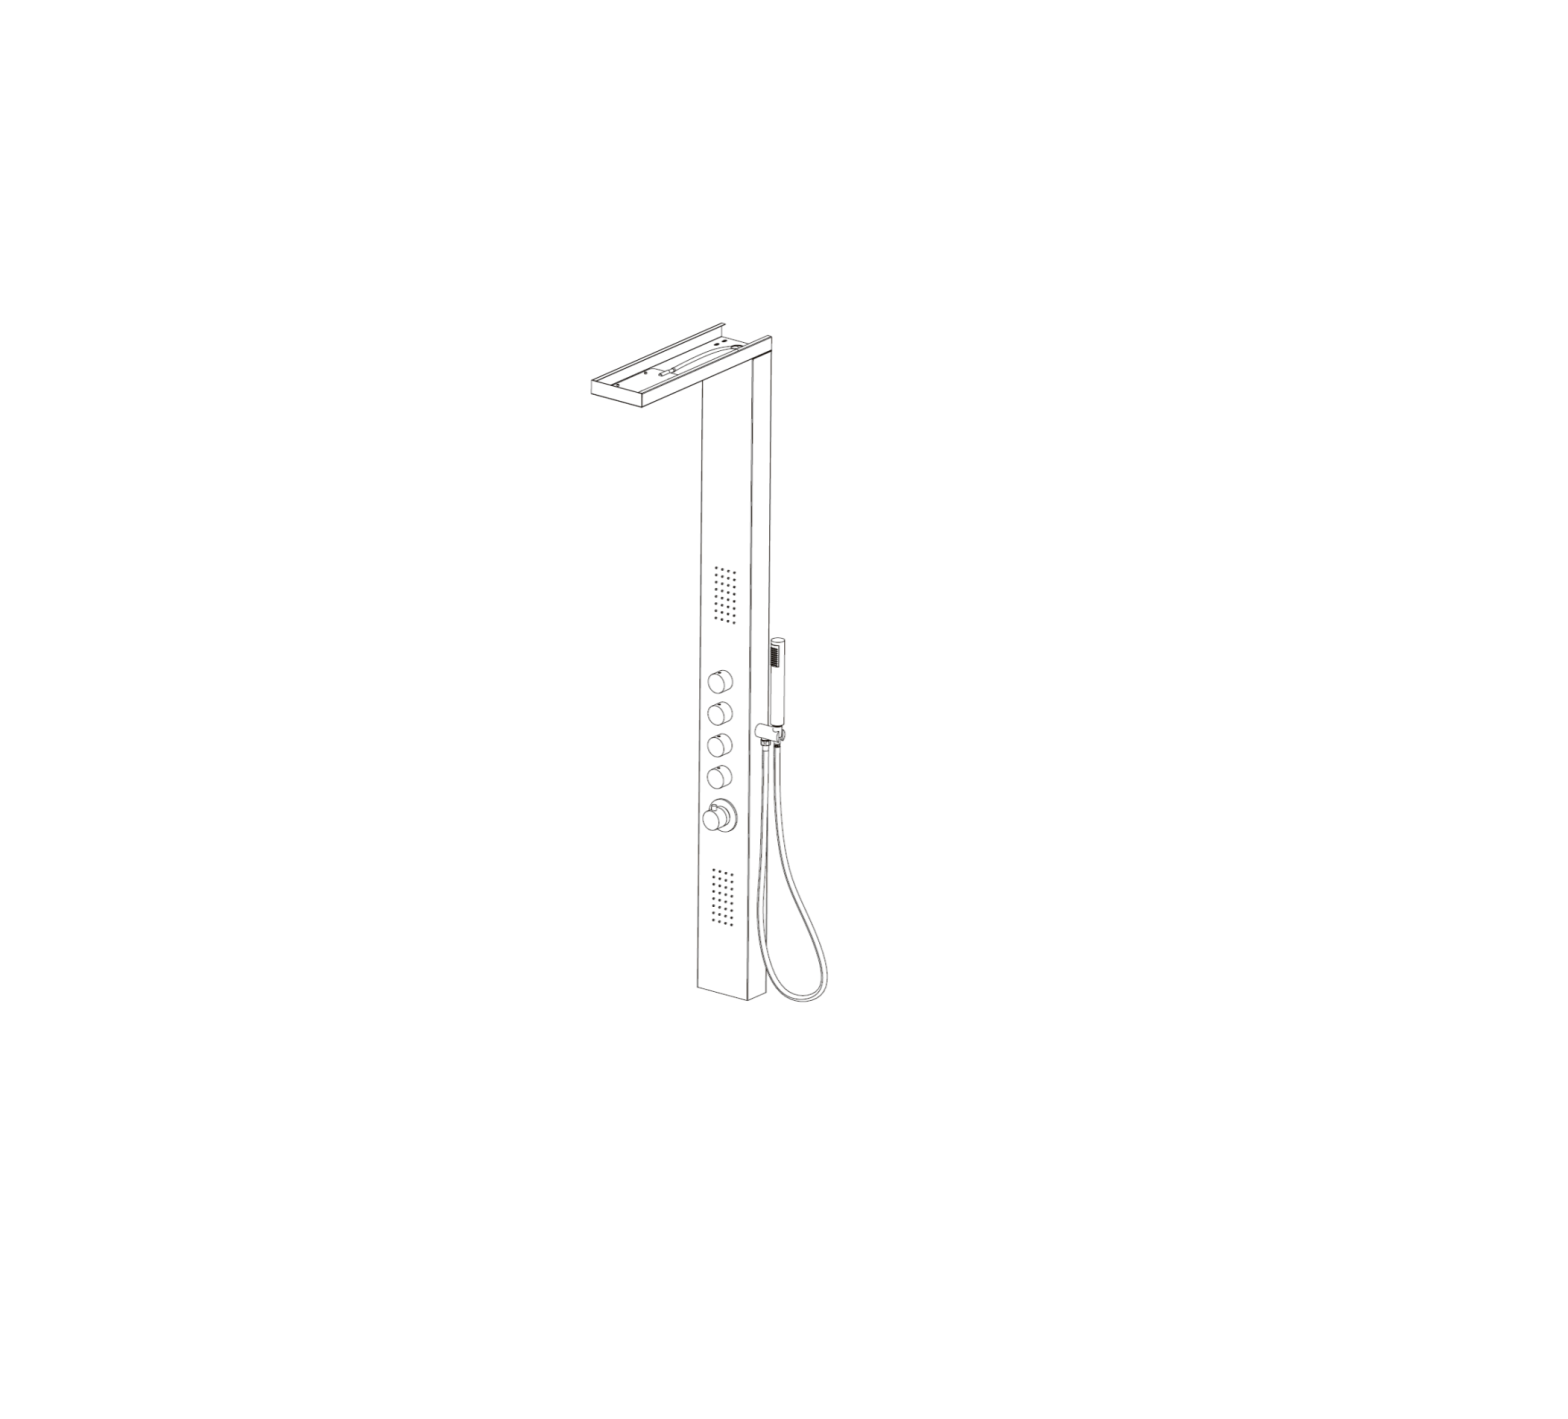
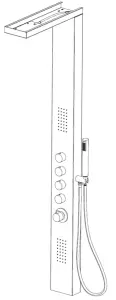
Better Bathrooms BeBa_26850 Provo Thermostatic Shower Tower
And welcome to our growing gang of savvy shoppers
We’re on a mission to bring you extraordinary bathroom products, for less. From modern to traditional style ceramics, plus the gorgeous fixtures, fittings and furniture to match. So, you can fall in love with your space every single day.
As one of the UK’s largest independent bathroom stores, we’ve received countless awards; including the National Business Awards UK, the Digital Entrepreneur Awards and being placed on The Sunday Times Fast Track 100.
We hope your new product exceeds your highest expectations. However, if you experience any problems, please:
- call our friendly UK call centre on 0871 244 0935 (9am-7pm Monday to Friday, or 10am-4pm Saturday and Sunday), or
- send us a message via [email protected]
Important information
- Please read these instructions thoroughly and retain for future reference
- Minimum Working Pressure 1 bar
- Maximum Working Pressure 3 bar
- Fitted with 38c Temperature Stop
- Pressure MUST be balanced
- A temperature differential of 10c min must be maintained between the hot supply to the mixer and the mixed water temperature from the unit to allow correct operation of the thermostat shut off function
- Hot supply MUST be connected to the left-hand inlet of the mixer
- All installation work must be carried out to comply with:The Water Supply (Water Fittings) Regulations and Water Supply (Water Fittings) (Scotland) Byelaws
- The system must be thoroughly flushed prior to installation
- Product must be checked for damage prior to installation
- Always check the installation area before drilling for pipes and cables
Parts
- Overhead Shower
- Shower Panel
- Flow Control Handle x 4
- Temperature Control Handle
- Temperature Dial
- Flow Control Valve x 4
- Thermostat inc Stop Ring
- Handset Holder and Fittings
- Wall Plugs x 4
- Wall Screws x 4
- Flexi-pipes x 2
- Wall Hanging Bracket x 2
- Hand Shower
- Hose Seals x 2
- . Shower Hose
- Overhead Bolt x 4
- Washers x 8
- Nut x 4
Please note that Parts are for illustrative purposes only and may differ slightly to the actual product
Tools required
- Spanner
- Silicone
- Drill and drill bit
- Spirit Level
- Pencil
- Tape Measure
- Hammer
- Screwdriver
Installation
Prepare the water supply pipes to feed the shower with hot on the left and cold on the right, set approximately at the height and width shown below.The supply pipes should have a ½” male end to connect to the 1.2″ female nut on the flexi pipes
Before commencing installation and with the tray or bath installed to accept the water, turn on the water supply to the water pipes and flush the system for a minimum of 15 seconds, to remove any debris in the system.
Using the measurements provided below, mark the position of the wall hanging brackets, using a spirit level to ensure this are aligned on the wall
If drilling into tile, it is recommended to tape the wall to prevent the drill from slipping.Drill the wall 35mm deep using a 6mm drill bit.Insert the wall plugs and tap flush to the finished wall surface.Hold the wall hanging bracket to the wall over the drilled holes and secure using the wall plugs provided.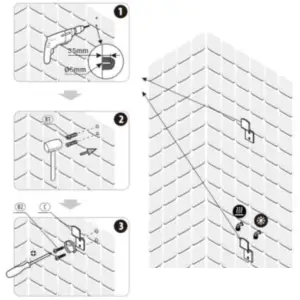
Fit the hand shower holder and outlet to the main panel.Push the threaded tail section of the holder through the hole in the side of the panel.Fit the washers over the tail inside the panel and connect the nut.Ensuring that the holder is aligned and the wider opening in the holder for the hand shower Is facing upwards, tighten the nut. Ensuring the seal is fitted connect the pipe which runs from the mixer and which will connect to the holder and tighten the nut.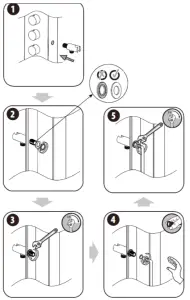
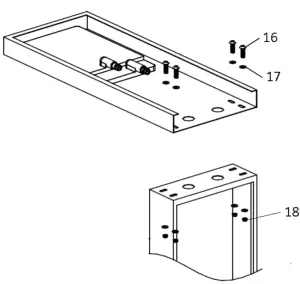
Connect the overhead shower to the panel.Position the shower head onto the panel and align the holes.Place a washer onto the bolt and push the bolt through the hole.From inside the panel fit the second washer and nut, then tighten.After the head is secured, connect the water pipe from the mixer to the shower head outlet elbows and secure using the jubilee and tighten onto the outlet using a screwdriver.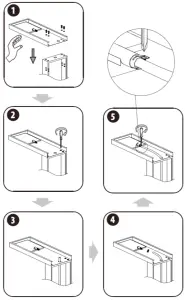
Connect the water supply pipes to the flexi-pipes on the rear of the panel, ensuring hot is on the left and that the seals are fitted, then tighten the nut.
Ensure that flexi-pipes cannot become kinked or flattened.
Once connected lift and hang the assembly onto the hanging brackets.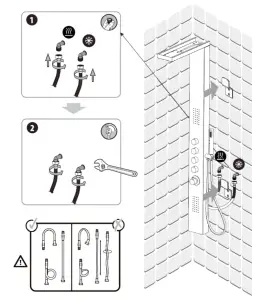
Fit the seal into the nut end of the shower hose and connect the nut to the outlet on the hand shower holder and tighten, if using a spanner, place a cloth around the nut to prevent damage.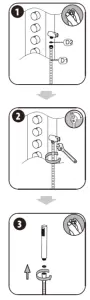 Place the second seal into the cone end of the shower hose and connect this to the hand shower and tighten.Place the cone of the hose into the holder.Installation is then complete, the product should then be commissioned, by turning on the water supply and checking for leaks.
Operation
To control the flow of water from the required function, turn the handle with the relevant symbol next to it, opening multiple controls at once will allow water to flow them at the same time but will reduce the volume of water to each.
To control the temperature, turn the temperature control handle until the desired temperature is reached.
The handle will turn until it reaches as top position, which will be approximately 38c, to increase the temperature, press the button on the handle and while holding this down turn the handle.
Troubleshooting
Poor flow from shower head/ shower handset / body jets
- This can be caused by poor water flow to the shower tower, check the flow to the shower tower is sufficient and the minimum pressure requirements are met.
- There may be a blockage to the shower tower or within the hand shower, overhead or body jets
Thermostat not allowing in hot water
- The water is only cold/warm, will not go to hot, this can be due to unbalanced water pressure, water pressures need to be balanced for correct function
- Limescale build up or debris in the thermostat, this will require cleaning.
- Faulty thermostat
- Product requires re-calibration
Water temperature either very cold or very hot, no gradual mix
- This is due to the water supplies being connected to the wrong inlet on the tower, these need to be switched so that the correct water supply connects to the correct inlet. (Hot on the left)
Water dripping after being turned off
- Does the water stop dripping after a period of time, if so this is normal as the water within the unit needs to drain away, so some dripping may occur
- Does the dripping continue, if so the flow control valve for the function that is dripping, will need to be replaced.
Maintenance
Poor Flow Maintenance:
- Remove the shower tower flexi-connectors from the tower and turn on the water supply to ensure sufficient water is reaching the unit, if it is poor flow, this is not a product fault Remove the flexi-pipe connected to the overhead and turn on the water to check water flow is sufficient, if the above is good and this test has poor flow a blockage may be present in the flexi-pipe, try to clear by bending and stretching the pipe to dis-lodge any blockage, if this does not work replace the pipe Carry out the same with the hand shower and body jets
- If the flow is sufficient through the pipes, then using your finger or a soft brush rub the rubber nozzles to remove any blockage
- If none of these resolve the problem contact your retailer for further advice.
Thermostat Not Allowing Hot Water Maintenance
- If the pressures are not balanced you will need to consult a plumber to either reduce the cold pressure, but ensuring the pressure do not fall below the minimum or a pump may need to be installed to balance the pressures
- To remove the thermostat for cleaning or replacement, first turn the shower on, then turn off the water supply to the tower by the isolation valves, doing this releases the pressure inside the unit before removal of the component.
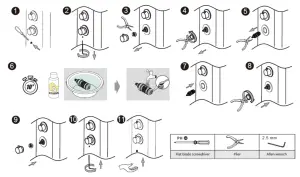
Turn the temperature dial to the stop positionThen remove the screw cap from the handle using a screwdriver or blade, taking care not to damage the surfaceThen using an allen key remove the handle screw.Pull the handle from the thermostat.Pull the stop ring from the thermostat, take note of the position for re-fitting.Using long nose pliers, unscrew the retaining nut on the thermostat.Pull the thermostat from the panel housing.To clean, run under warm water and brush the filters and thermostat or soak in a very mild vinegar solution.Before re-using the shower allow the shower to run for 1-2 minutes to flush through.
Thermostat Removal
Water dripping after being turned off Maintenance
- Loosen the grub screw inside the flow control handle
- Pull the handle from the valve
- Using a spanner and taking care not to damage the panel surface remove the retaining nut
- Once this is removed pull the valve from the panel, either clean the valve or replace as necessary
- Re-fit the components and fully tighten the retaining nut to prevent any leaks.
Cleaning
To maintain the surface of your product, wipe with a clean damp cloth and wipe dry, do not use any abrasive cleaning agents or materials. It is recommended to wipe and dry on a regular basis.
report this adFor more information
- visit betterbathrooms.com
- email [email protected]
- call 0871 244 0935
- write to Trident Business Park, Neptune Way, Huddersfield, HD21UA
[xyz-ips snippet=”download-snippet”]