![]() Close Coupled Pan and Cistern
Close Coupled Pan and Cistern
Installation and Maintenance
PLEASE READ THIS INSTRUCTION GUIDE FULLY PRIOR TO COMMENCING ANY PART OF THE INSTALLATION.Please fully check the product for damage and that all parts are present prior to installation.
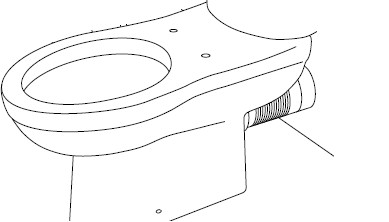
- Push the pan into the required position ensuring full connection to the soil pipe, so this will give the finished pan position.

- Mark the outside edge of the pan in line with the holes in the side of the pan, for the fixing position.
- Lift away pan and measure the base thickness, mark this dimension in from the previous mark.Ensure the floor is level before commencing the installation.
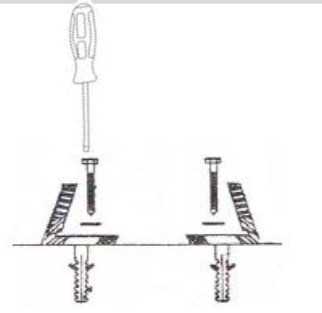
- Place the L shaped brackets (If supplied) over the marks.
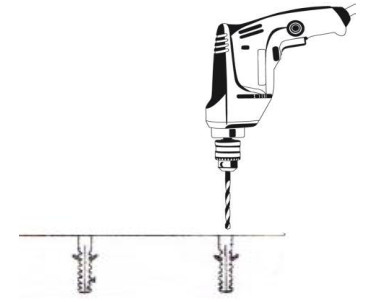
- Dependant on floor type, drill on the marks for the fixture position Check for pipes and wires prior to drilling.
- Insert screw plugs if required for your floor type, place washers over the screw and secure bracket into position. Please note the design of the inlet and syphon are for illustration purposes only and may vary depending on the product.
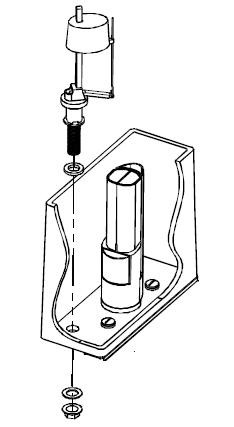
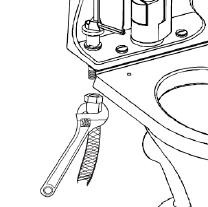
- Place syphon with rubber washer into the cistern tank, underneath fit the plastic washer and nut and tighten (do not use grips).
- Place the inlet valve with rubber washer into the cistern tank, underneath fit washer and nut and tighten (ensure valve does not touch the wall of the tank).
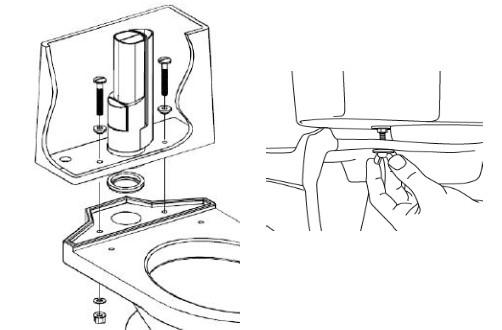
- Fit cistern bolts and rubber washers into the then place large doughnut washer onto the bottom of the syphon thread, between the cistern base and pan, place onto the pan and fit nuts to secure. Check the wall for wires and pipes.
- Some cisterns have fixing holes. If your model allows for this, push the toilet into position, mark the holes on the wall, drill the wall, and fit wall plugs (not supplied) if required.
- Push to pan into the final position ensuring full connection with the soil pipe.
- Secure the cistern to the wall using screws and washers (not supplied.
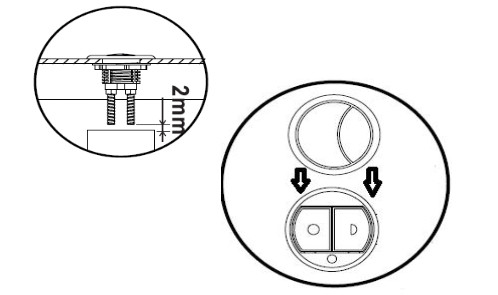
- When fitting the cistern push button, ensure a 2mm gap between the flush rods and the syphon buttons.Also, ensure that the large flush button on the syphon aligns with the large button on the flush.
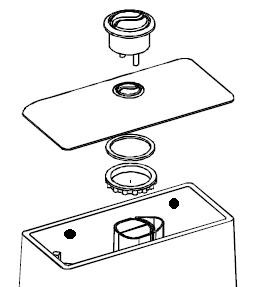
- Fit the flush button to the cistern lid, secure using the washer and nut, do not overtighten.
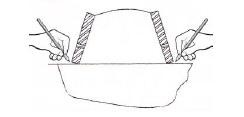
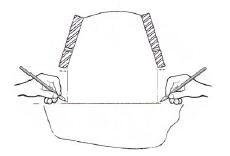
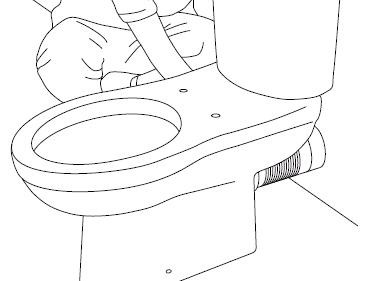
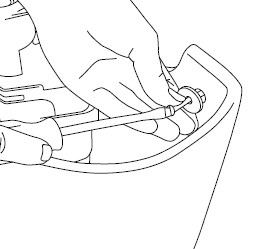
- With the toilet in its final position, through the holes in the side of the pan, fit the plastic cup, then fit the screw to connect with the L shaped bracket under the toilet.Once secured push on the screw cover cap.
- Following installation and connection of the water supply, turn on the water and check all joints for leaks.Test the function of the flush button. Finally, once checks have been carried out, fit the toilet seat.
- With the toilet in its final position, through the holes in the side of the pan, fit the plastic cup, then fit the screw to connect with the L shaped bracket under the toilet. Once secured push on the screw cover cap.
 Ensure the floor is level before commencing the installation.
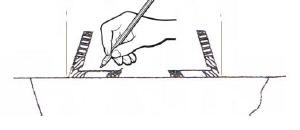
 Please note the design of the inlet and syphon are for illustration purposes only and may vary depending on the product.
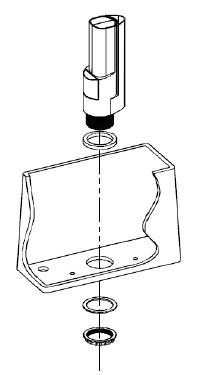
 Check the wall for wires and pipes.
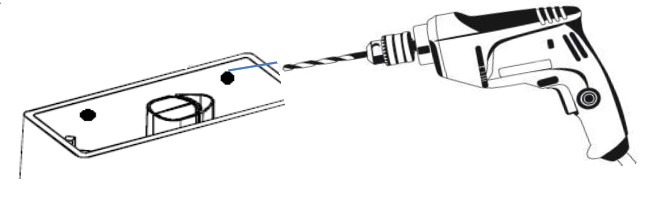

To maintain the surface finish of your product, wipe clean after every use, using a clean damp cloth, a mild detergent mixture can be used.Do not use abrasive cleaning agents/materials which can strip and scratch the surface, use of these agents/materials can invalidate your guarantee CCPC1 – V1 – MAY 19
![]()
![]()
[xyz-ips snippet=”download-snippet”]