
BirdDog Eyes P200 User Guide
FULL NDI®. NO COMPROMISES.


PART 2: NDI® INSTRUCTIONS & ADVANCED CONTROLS


WELCOME TO THE FUTURE.
About BirdDog Eyes P200BirdDog Eyes P200 is a remotely controllable PTZ (Pan-Tilt-Zoom) camera based on BirdDog’s unique Full-bandwidth NDI A/V transfer protocol. It is equipped with many features to ensure the quality of images and control is kept to the highest standards as well as being fully compatible with industry standards.
Key features of this productBirdDog P200 has the most complete feature set for a HD production PTZ camera, including some advanced control functions to ensure the camera excels even in the most challenging conditions:
- Sony 30x Image module
- BirdDog NDI Processing
- Simultaneous HDMI, SDI and NDI outputs
- Video resolutions up to 1080p60 including non-integer rates such as 59.94 and 29.97fps
- Native VISCA-IP and NDI Protocol support for 3rd Party control applications and interfaces
- Stereo Audio input/output with Mic and Line level
- BirdDog Comms audio communications software compatible
- Excellent image properties for low light and challenging lighting conditions
- NEW! Advanced Color Matrix colour controls
- NEW! Advanced Gamma/Exposure controls
- NEW! Unified communications platform for all camera settings.
About NDINetwork Device Interface (NDI) is a high performance standard that allows anyone to use real time, ultra low latency video on existing IP video networks.
NDI® harnesses the power of Software, Computers, and Networks to make video creation and sharing accessible and fun for millions, helping fuel the software defined visual storytelling revolution. NDI makes video a standard part of every computer network, from common IT implementations to mobile environments and has changed the picture- giving everyone access to easy-to-use, high-quality video using the equipment they have today.
NDI® moves live digital media around with your existing software applications, computing devices, and networks using what you already have.
NDI® empowers even small teams of creatives to achieve big show results, as there are no limitations from specialized upgrades, networks, or hardware.
For more infromation about NDI please visit: bird-dog.tv/ndi
Getting to know your P200
Thanks for purchasing BirdDog Eyes P200. Please take some time to read this document to allow you to get the most out of your purchase and familiarize yourself with the features available in the unit.
Physical connectors


Powering Eyes P200P200 is equipped with a sophisticated system allowing power from various sources:
PoE+ (Power over Ethernet)PoE+ is a convenient way to power P200 as it allows both data and power to be sent through the same standard Ethernet cable. To take advantage of PoE+, the network switch that P200 is directly plugged into must support PoE+ (802.3at).
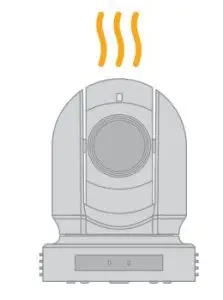
Thermal managementEyes P200 has been engineered to be passively cooled, no fans are required. In order to achieve this the entire enclosure of P200 is designed to dissipate heat. The main processor is capable of operating up to 100º C / 212º F.
Some factors affect how much heat BirdDog will produce, and it is normal for it to feel warm to the touch.
In extreme circumstances (a hot day/direct hot sun) it is advised to power P200 via DC as this produces less heat than PoE.
Different network switches are capable of providing differing amounts of total power to all connected devices. P200 uses approximately 14 watts in PoE mode.
DCLocated at the rear of the P200 is a DC connection port. This power input socket is capable of accepting 12vDC power. P200 should only be powered by the included AC adaptor.
BirdDog has been tested in extreme environments.

Booting up your BirdDog Eyes P200
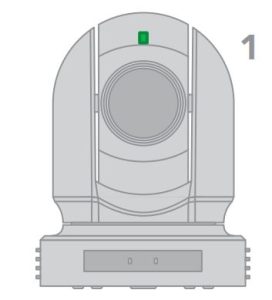
Indication of system boot processAs soon as BirdDog P200 detects a power input signal the left hand ‘power/fault’ light will light up green.1
On the ethernet/NDI connector on the rear.

After initial boot up is complete your P200 unit will be visible as a source on any NDI compatible devices on the SAME ethernet subnet.
For further networking architecture instructions including routing please consult either your system administrator or the support page at bird-dog.tv
Operating EYES P200
Web configuration panelIn this release, the web configuration panel allows you to alter key settings of P200, specifically A/V settings, and video frame rates, restarting the video processing engine, changing networking parameters, recalling PTZ presets and applying firmware updates.
Access via web browser (URL)To access the web configuration panel please point your computer web browser to: http://birddog-xxxxx.local/


“xxxxx” is the serial number of the P200, the serial number is printed on the box and on the main unit. Note the web address is case sensitive and should be all lower case. Your computer will need to have ‘Bonjour’ services loaded in order to access the unit via it’s ‘friendly’ name described above. Apple devices come pre-installed with Bonjour, while Windows devices need a small plugin available here:
support.apple.com/kb/dl999?locale=en_AU
Accessing P200 via an IP addressP200 is configured to automatically receive a network (IP) address from the computer network via DHCP (Dynamic Host Configuration Protocol). Most corporate, education and home networks have a DHCP server present on the network to allow this to occur. Usually your Internet Router provides this.
If P200 receives an IP address automatically from this server (DHCP) the IP address can be discovered in several ways, including BirdDog Central Lite available from: http://www.bird-dog.tv/
Accessing P200 on a network without a DHCP server Some standalone or private networks may not have a DHCP server. After 30 seconds of searching for an automatically assigned IP address P200 will fall back to a default address which is: 192.168.100.100
In order to access the web configuration panel on a network which is configured to a different subnet, change your computers IP address to match the BirdDog unit. Once you gain access to the BirdDog web configuration panel choose your IP address to match the rest of the devices on your network.
For instructions on setting your computers IP address please consult your computer operating system manual or IT support resources.
Password management
Once you direct your web browser to the web configuration panel you will need to log in to change any settings.


Default passwordThe web configuration panel is secured by a user-selectable password. The default password is:birddog (one word, lower case).
To change the password simply login using the default password, navigate to the network tab in the web interface, and select change password.
It is recommended to change this password in a network environment where P200 is shared with other users (e.g. not private). By entering this password, the user is granted full access to the P200 configuration settings and could interrupt a live program.
A/V


Bitrate ManagementBirddog Devices allow you to set your target NDI output bitrate. This allows you to select a compression ratio that is more efficient on your networking infrastructure (lower bandwidth) or higher image quality for critical footage. The scale allows you to select anywhere from 60mbps to 360mbps.
By setting Bitrate Management to NDI MANAGED, the BirdDog device will manage the target bitrate in accordance with the NDI® standard. By selecting MANUAL you are able to manually select a target bitrate.
NDI Video selectionEyes P200 is capable of outputting independent video formats for both NDI and SDI/HDMI. This setting affects only the NDI video output. Please note that the video rate you select here must be of the same family as the SDI/HDMI video output set in Part 1 of the P200 Manual.
ie. 720p50 aligns with 1080i50/1080p50 but will not co-exist with any 29.97/30fps based camera setting.
NDI Group EnableNDI v 4.5x supports NDI groups. This allows you to set the BirdDog Eyes P200 camera to only announce it’s availability to other devices that belong to the same NDI group. By default this setting is DISABLED. When enabled the receiver device needs to also be set to the same identical group name. Commonly this is done using the NDI Access Manager application provided by NewTek free of charge.
NDI Groups can be very useful in larger environments to control visibility and access amongst various groups.
NDI Audio SelectionBirdDog Eyes P200 has the ability to route the incoming audio from the 3.5mm audio input socket to either be embedded in the main NDI® stream, or to behave as an audio comms end-point. If you operate the BirdDog Comms application you can then use the P200 as an output for IFB communications.
Failover SourceBirdDog Eyes P200 can inform any receiving device of a failover scheme. This means if their BirdDog NDI stream is interrupted for any reason the receiver can automatically switch to a pre-determined alternative NDI stream. This is particularly useful for live ‘on air’ productions where there can be no risk of still frames or black being broadcast should any source no longer be available. Select an available NDI source for the failover function from the dropdown list in ‘Available NDI sources’. You can update this list by pressing Refresh source list in either Chrome or Firefox web browsers.
Network settings and device naming
Device naming
When P200 is first powered on it defaults to the naming convention as described in the web configuration panel section of this manual. http://birddog-xxxxx.local/
It is possible to change the name along with the network settings to better suit your environment.
In the web configuration panel, navigate to the network section.


IP configuration methodYou can configure P200 to operate on the network with a dynamic (DHCP) IP address or a fixed address.
For smaller networks DHCP networking is generally suitable, however larger networks with managed operations will often determine each device needs to have a dedicated and static IP address.
DHCP IP addressDHCP is set as the network configuration by default for Mini.
Static IP addressTo enable a static IP address, change configuration method to static and fill in the details required in Address, Mask and Gateway. Particular attention should be paid to the Address and Mask fields as incorrect information entered will result in P200 not being visible on the network and a factory reset will be required in order to recover the unit.
IP address recoveryIn the event that the P200 is not visible on the network, the network has changed, or the static IP address details have been lost, reset the BirdDog back to its default settings by following the factory reset procedure.
BirdDog nameYou can name each P200 with a friendly name that makes sense for each production (Camera 1, Camera 2, etc). This name will appear on any NDI receiver when it looks for video coming from Mini over the network. The name must not include any special characters and can be any combination of ‘a-z, 1-0, and –‘.
Note: no uppercase characters are valid. On NDI receiving devices, P200 will present as a source as follows:
birddog-name [CAM]when the unit is set to automatic input.
Tally support
Onboard TallyP200 supports Tally within the NDI protocol. Tally is a method of identifying which source is being used ‘on air’ at any particular time.
Whenever a P200 source is being used on the program output of an NDI compatible receiver that supports Tally metadata, the LED will light up red on the front of the P200 unit.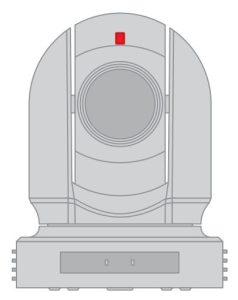

PTZ
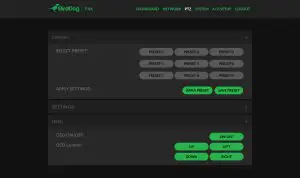

ControlYou are able to save and recall presets from the Web Dashboard using the Select Preset option. To operate this, simply press the Preset number you wish to recall or save followed by APPLY PRESET or SAVE PRESET
SettingsThe P4K communicates with the camera head via a serial interface, these settings should remain as per default:VISCA ADDRESS: 1VISCA BAUDRATE: 9600
PT Max SpeedWhen controlling the P4K over NDI you can limit the maximum speed of PTZ movements by affecting this option, the higher the number (18) the faster and more sensitive the movements will be on theP4K.
OSDIn the initial release of P4K the OSD is very important for adjusting the camera image settings since this is the primary control mechanism. To adjust all cameras settings please press the OSD ON/OFF button to illuminate the OSD. The OSD is visible on both the NDI output and SDI/HDMI and can equally be accessed via the included remote control.
Please take note that the PTZ will not operate normally (control of movement) until the OSD menu is closed again.
NDI NETWORK SETTINGS


BirdDog Eyes P200 operates with the latest NDI Libraries. There are several options to configure the P200’s behaviour in an NDI network. Each configuration has its benefits, however it is recommended to utilise the default TCP transmit method unless you have reason to change. Transmit Preferred Method
TCPTCP is the default transmission method for NDI, it operates well within local networks with predictable latency and limited jitter. BirdDog recommends that TCP be used for typical applications, and only using alternative transports for specific reasons.
UDPUDP is recommended for networks where there is extended latency from one end to the other. The nature of UDP means that it does not need to receive a confirmation of each packet being received successfully – vastly improving performance on distance WANs. UDP can have some consequences f there are other issues on the network such as jitter or lost packets as it will not inherently re-sent a lost packet.
MulticastMulticast is especially useful for use-cases that require a single source to be received on multiple receivers simultaneously. Utilising Muliticast offloads the distribution of the NDI A/V packets from the BirdDog Flex 4K to the network infrastructure. You should take care to ensure your network is specifically configured to support Multicast as using it on an ill-prepared network can create unintended network problems.
MultiTCPMultiTCP is a new NDI transport method that allows users to send NDI video over poor network topography such as WAN (Wide Area Networks) without experiencing issues such as packet loss and lost frames. In the past in order to send NDI video over a WAN the UDP transport was the only option available. UDP solved some issues of WAN applications by allowing the NDI video to travel without dropping masses of frames but results in dropped packets being missed which could cause unstable video. UDP also places more performance demands on devices sending and receiving the signal.
MultiTCP employs a new method of sending TCP packets whereby it opens a mass of TCP connections over the WAN and uses them in a ‘round robin’ manner, this allows each individual TCP connection enough time to acknowledge the receiving packet, confirm nothing is lost andprepare for the next one before it’s sent the next TCP packet in the round robin. This is similar to a RAID setup in traditional storage.
Advanced Controls
BirdDog Eyes P200 now supports some advanced controls to enable greater fine-tuning of image properties for either matching images with other cameras in your production or pushing the overall dynamic performance of the camera for more true to life and sharper images.
These advanced controls are placed into three distinct setting sections: Colour Matrix, ColourEnhancement and Image Enhancement.
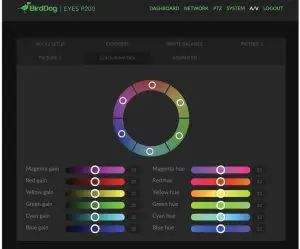

Colour MatrixThe Colour matrix section allow you to fine-tune the cameras performance for individual colours across the spectrum.


You can see in this figure that the color spectrum is divided into six sections, theses being Red, Green, Blue, Cyan, Magenta and Yellow.
The Colour Matrix control allows individual fine-tuning of each of these colour sections without affecting the response of other colour components. The controls allow for adjustment of Gain (Intensity) and Hue (offset) of each colour.
Colour GainThe Gain control of each colour component defines how intense that colour is represented in the image that is produced by the camera. The default level (32) is a moderate gain which shows an even bias between all pixels that contain the colour. I.e. a dark red with have the red component shown as vividly as a bright red, this generally gives a balanced look to your colour representation.


By increasing the gain value, the camera will add additional intensity to all parts of the image pertaining to this colour. For example, if you increase the Red gain value to 64 all pixels that are red in the image will have a boost of colour compared to other colours in the image resulting in a more vivid representation of this colour.
Conversely reducing the colour gain will take some intensity out of the target colour. This can be useful in some lighting conditions where certain colours appear over saturated to the camera.
Colour HueThe Colour Hue option adjusts the temperature or phase in which any colour is represented. When looking at the colour spectrum, beyond the true colour points for each of the main colour adjustments in the camera (Red, Green, Blue, Cyan, Magenta and Yellow there are areas where the colours transition to their neighbouring colour point.


In P200 Colour Matrix controls you can adjust the colour offset in a negative (counter clockwise) or positive (clockwise) direction, effectively moving the cameras response to any colour towards its neighbouring colour transition point.


Adjusting individual colour Hue can assist dramatically in matching colour representation from the camera to true-to like colours or matching the P200 to other cameras in your production.
Recommended practice for using Colour Matrix controlsIt is recommended to utilise a colour chart or colour chip chart when adjusting the Colour Matrix controls. These charts are available readily and have colour chips for each of the colours that the camera can adjust. By utilising a colour chip chart you are more easily able to see the impact of any adjustment you are making.


Using a colour chip chart such as the Datacolor SpyderCheckr can be beneficial to fine-tuning adjustments in the P200 Colour Matrix.
Image EnhancementThe image enhancement properties allow for adjustments and fine control of several aspects of the cameras performance including video enhancement, detail enhancement and exposure enhancement.
Video Enhancement


By enabling video enhancement the camera will attempt to adjust the amount of detail and gain for both the shadows (darker areas of the image) and highlights (brighter areas of the image). This can result in a dramatically more balanced image. However when pushed can result in video noise being present in darker areas of the image.
BrightnessAdjusts the level of enhancement provided by the Video Enhancement function. A higher amount will result in more vivid images and more sensitivity in the shadows but can increase video noise produced by the camera
Brightness CompensationThis setting informs the camera where your desired level of enhancement should be focused. If your image has large amounts of dark areas that need to be enhanced then set Brightness Compensation to Dark. If your image appears over exposed, set Brightness Compensation to Light.
Compensation LevelAdjusts the mask area for the camera to apply the Video Enhancement effect. By increasing the value from low to high, the camera will attempt to adjust a greater amount of the shadow or highlight area of the image.
Detail EnhancementThe Detail Enhancement section adjusts the handling of edges and overall image sharpness. Adjusting items in the Detail Enhancement section can result in much more legible images when shooting digital displays like computer screens of LED display walls


Exposure EnhancementThis section allows fine tuning of the overall exposure or dynamic rage of the camera. It allows for adjustment of the handling of shadows (darker areas of the image) and highlights (brighter areas of the image). By adjusting these settings to suit your shooting environment the camera can respond more naturally to high-demand environments such as stage areas with extreme highlights and areas with less lighting.


Gamma OffsetGamma offset adjusts the way the camera will handle the relationship of dark to light across the overall image. This can be represented as a positive or negative number. A negative or lower number will place more bias towards the shadows of your image giving more detail to the darker areas of the image resulting in much more detail in the shadows. Moving Gamma offset towards positive will increase the bias towards brighter areas.
Challenging shooting environments typically centre around lack of detail in the shadows so adjusting the Gamma offset accordingly negative will result in a more balanced image in many cases.
Exposure CompensationExposure compensation offsets the reference exposure level of the camera, this is effectively the ‘balance’ point the camera attempts to achieve between the brightest and darkest parts of the image. By moving Exposure compensation towards a negative value, the camera will reduce the overall exposure or darkness of the image. By moving exposure towards a positive value the camera will increase the overall exposure or brightness of the image.
Exposure CompensationIf you have areas of your image that are particularly bright in comparison to the overall image being captured by the P200 they can appear over exposed and lose detail in the highlights. There are several ways to combat this optically – by reducing exposure, increasing shutter speed or adjusting the iris. However, when adjusting for over-exposed highlights this can often lead to under exposed shadows.
Exposure compensation is a digital processing function of the P200 camera that will detect areas that are over exposed and process these pixels to reproduce significant amount of detail and reduce the overall amount of exposure for the area.
The strength can be adjusted from OFF through HIGH to specify the amount of exposure compensation desired.
Additionally, the Exposure mask can be adjusted to control how sensitive the area selection is for offsetting the exposure. A higher mask value will result in a larger amount of the image being compensated with the exposure compensation process.
Firmware update
P200 is updateable via the web interface. Please check the below address regularly to ensure you have the latest firmware available for your device.
Having the latest firmware ensures you have all the latest features and performance updates to get the most out of P200: bird-dog.tv/firmware-updates
After downloading the latest firmware release, navigate to the settings tab on the P200 web configuration console click on Choose file… select the firmware update file and press the update button.


The screen will update the status of the update procedure, once complete it will reboot the main processor.
Please wait for 30 seconds and refresh your browser to access the unit again.


Receiving NDI streams
There are many applications that support receiving the NDI signal that P200 produces. Each application will vary slightly on how you choose your source.
NewTek Studio MonitorNewTek provide a free Studio Monitor application that allows you to monitor many NDI sources on a standard Windows computer. Once Studio Monitor is launched on your computer, simply right click anywhere in the interface and select your Mini from the drop-down list.
Once connected to the P200 you will notice a configuration cog appears on the bottom right-hand side of the video display, this is a shortcut to access the P200 web configuration panel.
NewTek TriCaster SeriesNewTek TriCaster series devices allow several NDI sources to be received simultaneously, the amount of simultaneous connections varies by what model TriCaster you have. Consult your TriCaster user manual to determine how many connections are available on your device.
To select P200 as a source on your TriCaster, simply click on the configuration cog below your desired source location, this will bring up the Input Setting dialog, select from the drop-down list your P200 source.
Once connected to the P200 you will notice a configuration cog appears next to the source drop down window, this is a shortcut to access the P200 web configuration panel.
References
[xyz-ips snippet=”download-snippet”]

