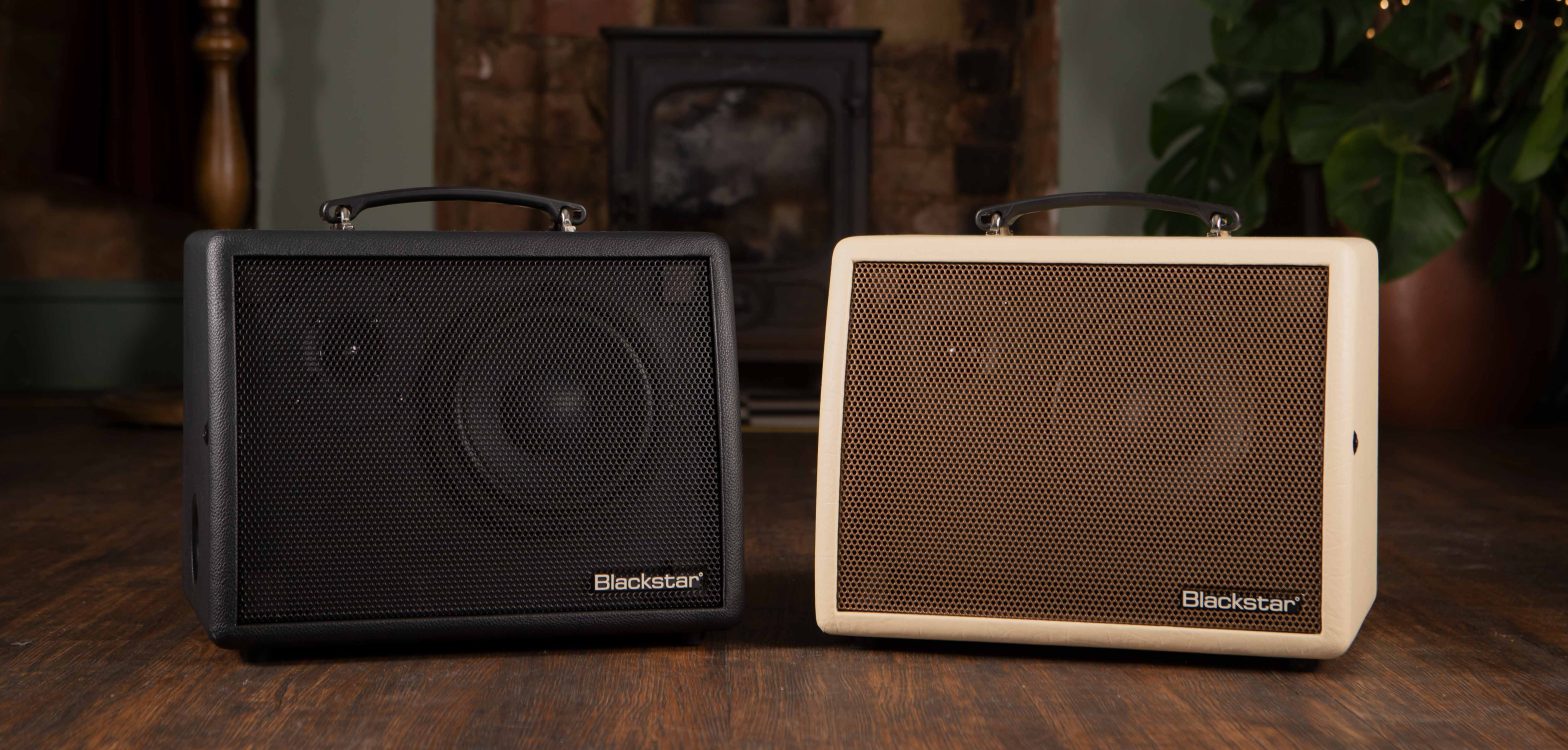

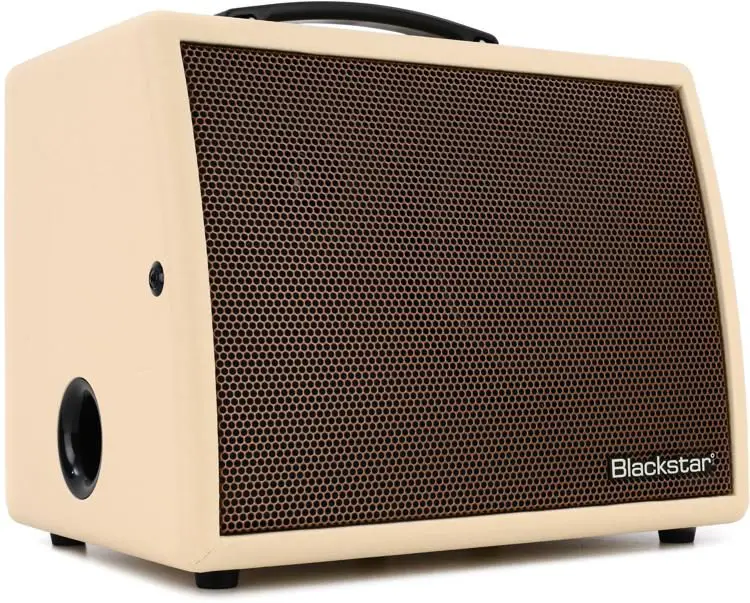
Blackstar Sonnet 60 60-Watt 1x 6.5″ Combo Amp
IMPORTANT SAFETY INSTRUCTIONS
- Read these instructions.
- Keep these instructions.
- Heed all warnings.
- Follow all instructions.
- Do not use this apparatus near water.
- Clean only with dry cloth.
- Do not block any ventilation openings.
- Install in accordance with the manufacturer’s instructions.
- Do not install near any heat sources such as radiators, heat registers, stoves, or other apparatus (including amplifiers) that produce heat.
- Do not defeat the safety purpose of the polarized or grounding-type plug. A polarized plug has two blades with one wider than the other. A grounding type plug has two blades and a third grounding prong. The wide blade or the third prong are provided for your safety. If the provided plug does not fit into your outlet, consult an electrician for replacement of the obsolete outlet.
- Protect the power cord from being walked on or pinched particularly at plugs, convenience receptacles, and the point where they exit from the apparatus.
- Only use attachments/accessories specified by the manufacturer.
- Unplug this apparatus during lightning storms or when unused for long periods of time.
- Refer all servicing to qualified service personnel. Servicing is required when the apparatus has been damaged in any way, such as power-supply cord or plug is damaged, liquid has been spilled or objects have fallen into the apparatus, the apparatus has been exposed to rain or moisture, does not operate normally, or has been dropped.
“TO COMPLETELY DISCONNECT THIS APPARATUS FROM THE AC MAINS, DISCONNECT THE POWER SUPPLY CORD PLUG FROM THE AC RECEPTACLE”.“WARNING: TO REDUCE THE RISK OF FIRE OR ELECTRIC SHOCK, DO NOT EXPOSE THIS APPARATUS TO RAIN OR MOISTURE AND OBJECTS FILLED WITH LIQUIDS, SUCH AS VASES, SHOULD NOT BE PLACED ON THIS APPARATUS”.
This symbol is intended to alert the user to the presence of important operation and maintenance (servicing) instructions in the literature accompanying the appliance.This symbol is intended to alert the user to the presence of uninsulated “dangerous voltage” within the product’s enclosure that may be of sufficient magnitude to constitute a risk of electric shock to persons.
Important safety information!
READ THE FOLLOWING INFORMATION CAREFULLY. SAVE ALL INSTRUCTIONS FOR FUTURE REFERENCE!Follow all warnings and instructions marked on the product!
- Danger! High internal operating voltages.
- Do not open the equipment case. There are no user serviceable parts in this equipment. Refer all servicing to qualified service personnel.
- Clean only with a dry cloth.
- Condensation can form on the inside of an amplifier if it is moved from a cold environment to a warmer location. Before switching the unit on, it is recommended that the unit be allowed to reach room temperature.
- Unauthorized modification of this equipment is expressly forbidden by Blackstar Amplification Ltd.
- Never push objects of any kind into ventilation slots on the equipment casing.
- Do not expose this apparatus to rain, liquids or moisture of any type.
- Do not place this product on an unstable trolley, stand or table. The product may fall, causing serious damage to the product or to persons!
- Do not cover or block ventilation slots or openings. This unit must only be used in a well ventilated area and never switched on when it is within a poorly ventilated space, such as a bookcase.
- This product should not be placed near a source of heat such as a stove, radiator, or another heat producing amplifier.
- Use only the supplied power cord which is compatible with the mains voltage supply in your area.
- Power supply cords should always be handled carefully and should be replaced if damaged in any way.
- Never break off the earth (ground) pin on the power supply cord.
- The power supply cord should be unplugged when the unit is to be unused for long periods of time.
- An apparatus with Class I construction should be connected to a mains socket outlet with a protective earthing connection.
- The mains plug of the power supply cord should remain readily accessible.
- Before the unit is switched on, the loudspeaker should be connected as described in the handbook using the lead recommended by the manufacturer.
- Always replace damaged fuses with the correct rating and type.
- Never disconnect the protective mains earth connection.
- High loudspeaker levels can cause permanent hearing damage. You should therefore avoid the direct vicinity of loudspeakers operating at high levels. Wear hearing protection if continuously exposed to high levels.
- If the product does not operate normally when the operating instructions are followed, then refer the product to a qualified service engineer.
The U.S. Government’s Occupational Safety and Health Administration (OSHA) has specified the following permissible noise level exposures:
Duration Per Day In Hours Sound Level dBA, Slow Response 8 90
6 92
4 95
3 97
2 100
1½ 102
1 105
½ 110
According to OSHA, any exposure in excess of the above permissible limits could result in some hearing loss.Ear plug protectors in the ear canals or over the ears must be worn when operating this amplification system in order to prevent a permanent hearing loss if exposure is in excess of the limits as set forth above. To ensure against potentially dangerous exposure to high sound pressure levels, it is recommended that all persons exposed to equipment capable of producing high sound pressure levels such as this amplification system be protected by hearing protectors while this unit is in operation.
Introduction
Thank you for purchasing this Blackstar Sonnet acoustic amplifier. Like all our products, this amp is the result of countless hours of painstaking Research and Development by our world-class design team. Based in Northampton (UK), the Blackstar team are all experienced musicians themselves and the sole aim of the development process is to provide guitarists with products which are the ultimate tools for self-expression.All Blackstar products are subjected to extensive laboratory and road testing to ensure that they are truly uncompromising in terms of reliability, quality and above all TONE.The Sonnet 60 two channel design features a simple yet intuitive control set to ensure you have the ultimate flexibility in shaping your acoustic tone. Please read through this handbook carefully to ensure you get the maximum benefit from your new Blackstar product.If you like what you hear and want to find out more about the Blackstar range of products please visit our website at www.blackstaramps.com.Thanks!The Blackstar Team
Features
The Sonnet 60 acoustic amplifier brings a simple control set with intuitive design to give you the pinnacle of acoustic tone.Each channel of the Sonnet 60 has been designed with your performance in mind. Channel 1 combines a 3 band EQ, REVERB level control and a PHASE switch to control unwanted feedback. Channel 1 also has a SHAPE feature, offering two different preamp voicings for your acoustic guitar.Channel 2 features a combination XLR/jack input – perfect for a microphone or another instrument – with LOW and HIGH EQ controls, independent REVERB level control and SHAPE feature.The Sonnet 60 also features a natural sounding digital reverb, with two reverb types and the ability to adjust the reverb tail via the REVERB TIME control on the front panel.H.P. FILTER (High Pass filter) and BRILLIANCE controls provide further control over your tone, allowing you to sculpt how your acoustic guitar is amplified.A USB connector allows for sending a processed output into a computer for recording purposes and a balanced XLR D.I. OUTPUT also allows the signal to be connected to external devices for practicing, recording or live use.The MP3 / LINE IN jack allows you to connect your Sonnet 60 to a music device or drum machine to play along to, or use the Bluetooth capability of the amp to make connecting to an external device even easier.
Front Panel
Channel 1

- Input 1 – 1/4″ JackPlug your instrument in here. This channel features a very high impedance input circuit (hi-Z). This is ideal for direct connection to instruments with piezo pickups. Always use a good quality screened instrument lead.
- PhaseThis will reverse the phase of the signal within the preamp. Use this to help to suppress acoustic feedback.
- GainThis controls the input gain of Channel 1. Turning it clockwise increases the input gain. The Sonnet preamps each include specially designed ‘dynamics control processing’. At low signal levels and GAIN settings this is not applied and is therefore transparent. The higher the signal level and higher the GAIN is set, then the more the dynamics control will come into operation. This has two advantages: Firstly it smooths out the peaks that can sound harsh on electronically amplified acoustic instruments. The result is more like a nice studio recording. Secondly it allows much higher headroom with the preamp and therefore less likely to clip. This is like having an in-built sound engineer helping you sound your best at all times.
- ShapeThis switches between two basic EQ shapes. In the ‘out’ position, the EQ is relatively flat which will be a good natural sounding starting point for most instruments. The ‘in’ position applies a mid cut as well as some low and high boost for an alternative sound that can help create definition and space within a mix of instruments and/or vocals. In both settings the normal channel EQ controls can be used to further fine tune the tone.
- LowThe LOW control adjusts the amount of low-end frequencies in your tone. This amp has active tone shaping circuits which allow the low frequencies to be precisely controlled for both the desired sound and also to help control instrument resonances.
- MidThe MID control adjusts the amount of middle frequencies in your tone. The middle frequencies are particularly important in setting the amount of ‘body’ your tone has.
- HighThe HIGH control allows exact adjustment of the treble frequencies within the sound. At low settings (counter clockwise) the sound will be warm and darker in character. As the control is increased (clockwise) the sound will become brighter and more lively.
- ReverbThe Reverb control sets the overall level of the reverb effect. With the control fully counter clockwise there will be no reverb. Turning the control clockwise will increase the amount of reverb.Channel 2
- Input 2 – Combination XLR / JackPlug your microphone or another instrument in here. Always use good quality screened XLR or instrument leads.
- GainThis controls the input gain of Channel 2. Turning it clockwise increases the input gain. As with Channel 1, this channel also has in-built ‘dynamics control’ and operates in the same way.
- ShapeThis switches between two basic EQ shapes, operating in the same way as Channel 1.
- LowThe LOW control adjusts the amount of low-end frequencies in your tone. This amp has active tone shaping circuits which allow the low frequencies to be precisely controlled for both the desired sound and also to help control instrument resonances.
- HighThe HIGH control allows exact adjustment of the treble frequencies within the sound. At low settings (counter clockwise) the sound will be warm and darker in character. As the control is increased (clockwise) the sound will become brighter and more lively.
- ReverbThe Reverb control sets the overall level of the reverb effect. With the control fully counter clockwise there will be no reverb. Turning the control clockwise will increase the amount of reverb.
- Reverb TypeThe switch enables you to select between two reverb types;Hall – This simulates the lush natural reverb of a large hallPlate – This simulates the shine and density of a vingate studio plate reverbThis will apply to both Channel 1 and Channel 2 reverb controls.
- Reverb TimeThis control adjusts the length of the reverb tail. At minimum settings the reverb tail will be short and at maximum settings the reverb tail will be long. We recommend trying different Reverb levels and Reverb times to achieve the effect desired.
- H.P. FilterThis controls a High Pass Filter. Adjust this trim pot to roll off low-end frequencies from your amplifier’s output. At the minimum setting the frequencies filtered will be below 25Hz, and at the maximum setting, the frequencies filtered will be below 180Hz. Rolling off low frequencies can help with definition in a mix with other instruments.
- BrillianceAdjust this trim pot to apply an increase or decrease to the higher frequencies of your amplifier’s output. At maximum settings this will result in a brighter, sharper response from your tone. At lower settings, the tone is warm and mellow.
- MasterThis controls the overall volume of your amplifier. Turning it clockwise increases the volume.
- Power Indicator LightThe Power Indicator will light when the amplifier is switched on.
- BluetoothYour SONNET 60 Bluetooth amplifier is equipped with Bluetooth connectivity for wirelessly streaming your favourite music and backing tracks. Press this switch to pair a Bluetooth device to your SONNET 60 Bluetooth amplifier and toggle between the modes of operation (see below).Discoverable Mode (slow LED flash)
To connect a Bluetooth device to your SONNET 60 Bluetooth amplifier for the first time you must make a ‘pairing’ between the two devices. To pair, simply press and hold the Bluetooth switch on your SONNET 60 Bluetooth amplifier until the Bluetooth LED displays a slow flash. In this state other Bluetooth devices are able to ‘see’ your SONNET 60 Bluetooth amplifier (hence the term ‘Discoverable’) and can make a request to pair.
Whilst the Bluetooth LED is flashing slowly, go to the Bluetooth Settings page of your Bluetooth device and look for your SONNET 60 Bluetooth amplifier in the list of available devices. Your amplifier will be identified as ‘SONNET BT’. When ‘SONNET BT’ appears, simply select this device and wait a few moments for the pairing to be made. You will hear an audible tone from the amplifier to indicate that a device has been successfully connected.If a pairing has not been made within the Discoverable Mode timeout window, the Bluetooth connectivity will switch off and will wait for user input in order to attempt a new pairing. Simply press and hold the Bluetooth switch again to enter Discoverable Mode and restart the pairing process.Pressing the Bluetooth switch while in Discoverable Mode will put your SONNET 60 Bluetooth amplifier into Scanning Mode.Scanning Mode (fast LED flash)
Scanning Mode is used to reconnect any previously paired Bluetooth devices to your SONNET 60 Bluetooth if they have travelled out of range or have been disconnected. Ensure your previously paired Bluetooth device has Bluetooth connectivity switched on. Press the Bluetooth switch once to put the SONNET 60 Bluetooth into Scanning Mode; your amplifier will ‘scan’ for previously paired devices within range and attempt to reconnect, starting with the device that was most recently connected. You will hear an audible tone from the amplifier to indicate that a device has been successfully reconnected.If you have previously paired any Bluetooth Devices to your SONNET 60 Bluetooth amplifier it will power on in Scanning Mode. If your Bluetooth device is within range and has Bluetooth connectivity switched on, your amplifier will automatically reconnect to your device, allowing you to start streaming your music straight away. Pressing the Bluetooth switch from Scanning Mode will set your amplifier to Discoverable Mode in order to begin pairing a new device. At any time, you may disconnect your Bluetooth device from your amplifier by either pressing and holding the Bluetooth switch on the amplifier front panel for 3 seconds or switching off the Bluetooth functionality of your device. You will hear an audible tone from the amplifier to indicate that a device has been disconnected.
- Bluetooth LEDThe Bluetooth LED indicates which mode the Bluetooth is in (Discoverable/Scanning). When the Bluetooth LED is unlit the Bluetooth connectivity is not active.Rear Panel

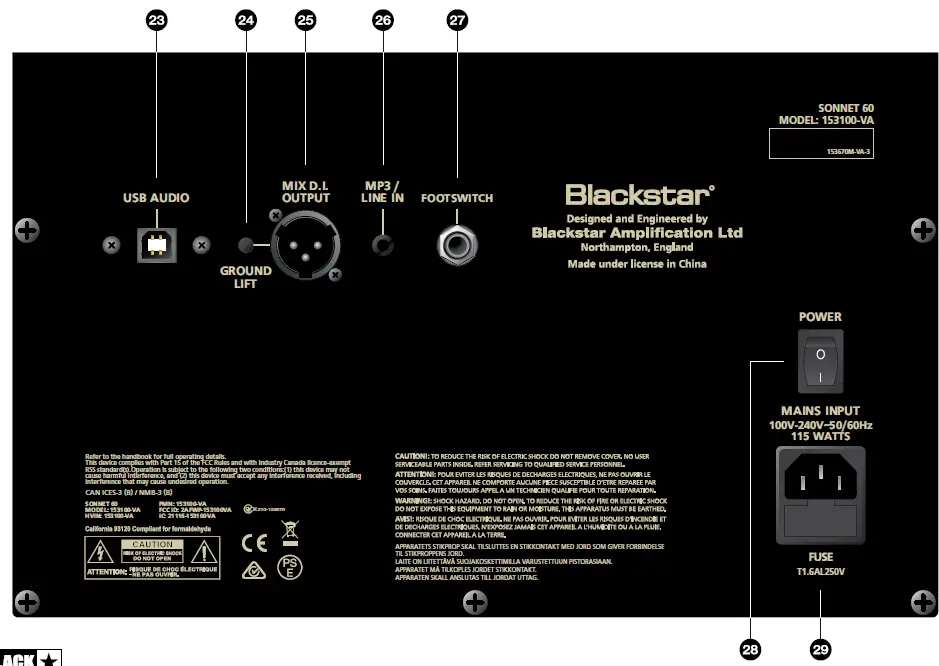
- USB Audio SocketThis Type B USB socket is for connection to a computer via a suitable lead (not supplied). Standard audio drivers are used to connect the amplifier to a PC, Mac or other applicable recording device. No specific drivers are required.For a guide on low latency USB recording visit: www.blackstaramps.com/usbrecordingNOTE: Always connect the amplifier via a main USB port, often found on the rear of the computer. The amplifier will appear as an audio capture device within recording software.
- Ground LiftThis switch can be used to remove the circuit-to-chassis ground connection of the XLR output, which can help if experiencing hum or noise upon connecting to an external device. If you do experience a hum when connecting the XLR Output (25) to an external device, engage the Ground Lift by depressing the button to lift the ground on the circuit.
- Mix D.I. XLR OutputThis output is a low impedance, balanced XLR output for connecting directly to a mixer or stage box. This will send a strong low noise signal, including all front panel processing (with the exception of the master control), to be used externally. Use a good quality screened/balanced microphone type cable.
- MP3 / Line InThis is a stereo mini jack input. Connect the output of your audio device here and adjust the player’s volume to match that of your instrument or voice to enable you to play and/or sing along.NOTE: This connection is stereo, but will mix the incoming stereo signal and output a mono version.
- Footswitch (Optional Purchase)The optional FS-17 footswitch, or any 2-way latching footswitch can be connected here. The first switch labelled ‘Mute’ will mute the whole amplifier, and the second switch labelled ‘Reverb’ will defeat the reverb on both channels.
- Power SwitchThis switch is used to turn the amplifier on and off.
- Mains InputThe supplied detachable mains power cable is connected here. Always ensure the Power Switch (28) is in the OFF position before applying mains power. The cable should only be connected to a power outlet that is compatible with the voltage, power and frequency requirements stated on the rear panel. Never break off the earth (ground) pin on the mains cable. If in doubt seek advice from a qualified technician.
Tilt-Back and SA-2 Stand Adaptor
30. Tilt-back StandOn the base of the Sonnet 60, there is a threaded stand socket with an adjustable tilt-back stand. Rotate the tilt-back stand anti-clockwise to adjust the desired angle of tilt. Rotate the tilt-back stand clockwise to lower the angle of tilt, or continue rotating to return the tilt-back stand into the base of the amplifier.
31. SA-2 Stand Adaptor (Optional Purchase)The optional SA-2 Stand Adaptor can also be mounted on the Sonnet 60, enabling the amplifier to be placed on a speaker stand. Firstly, remove the tilt-back stand from the threaded socket then mount the SA-2. Rotate the SA-2 clockwise until it is flush against the bottom of the amplifier. To remove, rotate the SA-2 anti-clockwise.
WARNING! Ensure the SA-2 is securely mounted to the base of the Sonnet 60 before placing on a speaker stand. Failure to do so may result in unnecessary stress being placed on the threaded socket and may cause damage to the structure of the amplifier.
Technical Specification
- Sonnet 60
- Power: 60 Watts
- Weight (kg): 7.7
- Dimensions (mm): 345mm (W) x 310mm (H) x 250mm (D)
- Footswitch (not supplied): FS-17 latching footswitch
- Speakers: 1 x Custom Designed Tweeter, 1 x Custom Designed 6.5″ Speaker (Natural 60 – 4ohms)
Specification
Channel
1/4″ Input Impedance: >10MΩ
Shape: +3dB @ 120Hz
-7dB @ 1kHz
+3dB @ 10kHz
Low: +/-10dB @ 80Hz
Mid: +/-10dB @ 700Hz
High: +/-10dB @ 10kHz
Channel 2
1/4″ Input Impedance: 1MΩ
XLR Input Impedance: 1.4kΩ (Balanced)
Shape: +3dB @ 120Hz
-7dB @ 1kHz
+3dB @ 10kHz
Low: +/-10dB @ 80Hz
High: +/-10dB @ 10kHz
High Pass Filter: -6dB @ 27Hz (Min) to 175Hz (Max)
Global
Brilliance: +/-12dB @ 16kHz
Line In Impedance: 100kΩ
 report this ad
D.I. Output Impedance: >1kΩ
References
[xyz-ips snippet=”download-snippet”]