
BLAUPUNKT BLUEBOT XBOOST USER MANUAL
Safety Regulations
Before using this product, please read carefully the following safety instructions and follow all routine safety precautions. Keep these instructions in a safe place.
Any operation inconsistent with this instructions manual may cause damage to this product.
![]() Note !
Note !
- Only authorized technicians can disassemble this product. It is not recommended to disassemble this product by yourselves.
- This product can only be used with the power adapter provided. If other adapters are used, the product may cause damage.
- Do not touch wires, sockets or power adapters when your hands are wet.
- Prevent contact of fabric or body parts with the product’s drive wheels.
- Do not place this product near cigarette(butts), lighters or other smoldering objects.
- Please clean the product after charging.
- Do not bend wires excessively or place heavy objects and sharp objects on the machine.
- This product is an indoor household product and not to be used outdoors.
- Do not sit on the product.
- Do not use this product in a wet environment (e.g. bathroom).
- Before using this product, please remove all vulnerable items (e.g. glasses, lamps, etc.) from the ground as well as items (e.g. wires, paper sheets, curtains) that may get stuck in the side brushes and air suction passages.
- Do not put this product in a place where it is easy to fall (e.g. on desks and chairs).
- Please carefully check whether the power adapter is connected to the socket before use, otherwise it may cause battery damage.
- To prevent tripping, please inform other people in the house when the product is working.
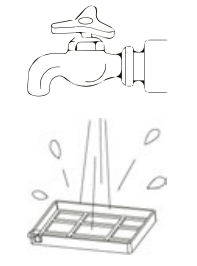
- Please empty the dust container before every use especially when the dust container is full.
- The product can be used in a temperature between 0 to 40 degrees Celsius.
- Do not use this product in high temperature environment.
- Please remove the battery from the machine before disposing.
- Please switch off power before removing the battery.
- Please recycle the discarded batteries safely.
![]() Warning:
Warning:
- Only authorized technicians can disassemble this product. It is not recommended to disassemble this product by yourselves.
- This product can only be used with the power adapter provided by the factory. If other adapters are used, the product may cause damage.
- Do not touch wires, sockets or power adapters when your hands are wet.
- Prevent contact of fabric or body parts with the product’s drive wheels.
- Do not place this product near cigarette(butts), lighters or other smoldering objects.
- Please clean the product after charging.
- Do not bend wires excessively or place heavy objects and sharp objects on the machine.
- This product is an indoor household product and not to be used outdoors.
- Do not sit on the product.
- Do not use this product in a wet environment (e.g. bathroom).
- Before using this product, please remove all vulnerable items (e.g. glasses, lamps, etc.) from the ground as well as items (e.g. wires, paper sheets, curtains) that may get stuck in the side brushes and air suction passages.
- Do not put this product in a place where it is easy to fall (e.g. on desks and chairs).
- Please carefully check whether the power adapter is connected to the socket before use, otherwise it may cause battery damage.
- To prevent tripping, please inform other people in the house when the product is working.
- Please empty the dust container before every use especially when the dust container is full.
- The product can be used in a temperature between 0 to 40 degrees Celsius.
- Do not use this product in high temperature environment.
- Please remove the battery from the machine before disposing.
- Please switch off power before removing the battery.
- Please recycle the discarded batteries safely.
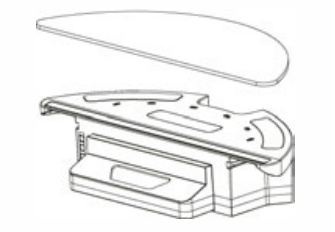
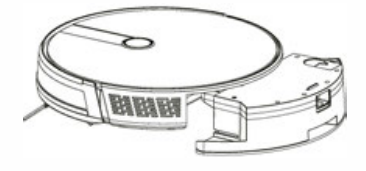
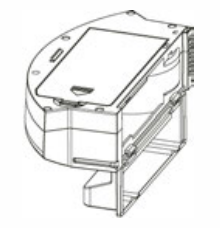
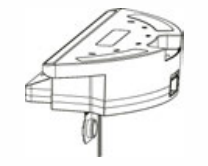
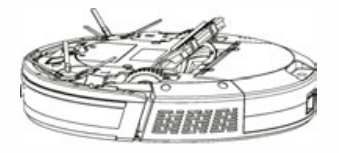
Product Composition / Package Contents
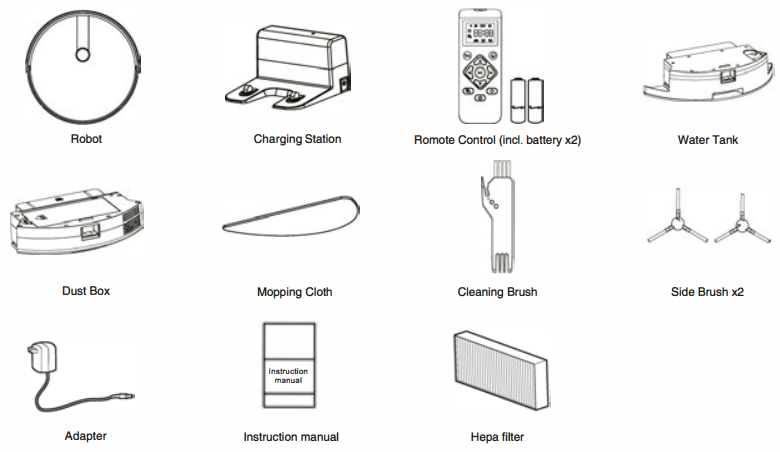
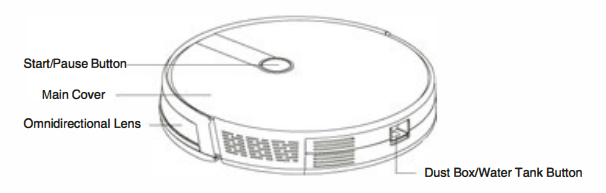
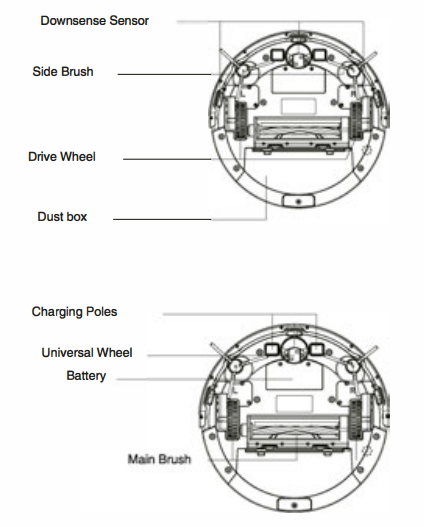
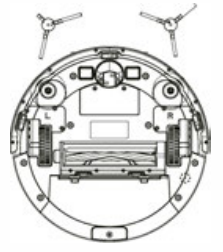
Product Composition / Part Name
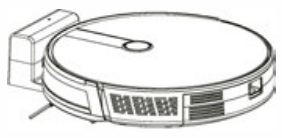
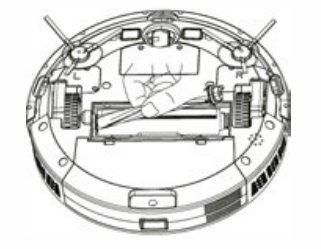
Front Robot
Back Robot
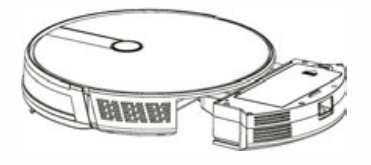
Dust Container
Water Tank and Mopping Cloth
Charging Station

Remote Control
Product Usage / Preparation
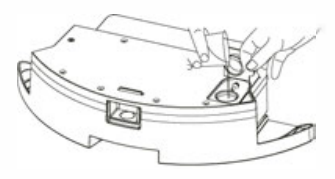
Remove Protection
Before using the Robot, remove the protective strip on the Robot and remove the protective film on the charging station.
Direction Control

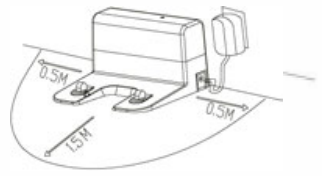
Product Use / Robot Charging
- Placing and charging :Place charging station against the wall and on a flat ground. Do not place items within the range of 0.5m left and right and 1.5m in front.

- Connect the power supply.
- Installing side brush: Install the side brush according to the left and right (UR).
- Charging: Place the Robot on the charging station for charging During charging, the indicator light flashes. When the charging is over, the light remains on. The charging time is about 5 hours.During the cleaning process, the Robot will automatically switch to “Recharging” mode when the battery is low and automatically finds the charging station to charge. You can also command the Robot to switch to “Recharging” mode through the “Recharging” button on the remote control.
 During the cleaning process, the Robot will automatically switch to “Recharging” mode when the battery is low and automatically finds the charging station to charge. You can also command the Robot to switch to “Recharging” mode through the “Recharging” button on the remote control.
 ![]() Charging attention:
Charging attention:
- The charging station cannot be used in environments with strong reflection such as direct sunlight and nearby mirrors. If there is any object with strong reflection, please cover it 7 cm from the bottom.
- In order to ensure that the Robot operates in full, please fully charge it before use. The charging time is about 5 hours.
- When charging, do not attach the water tank to ensure the safety of charging and prevent wet rags from damaging the floor.
Product Use / Start Cleaning
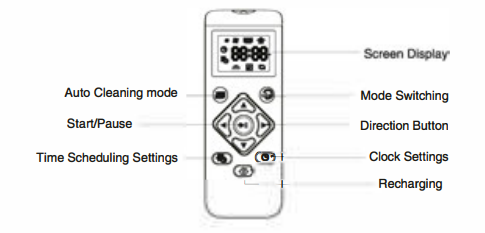
According to different cleaning needs, this product has a variety of cleaning mode to choose from. You can start various cleaning mode through a Robot, remote control or app.
Auto Cleaning
Applicable scenario: The most commonly used cleaning method is that the main engine uses a bow-shaped path to plan and clean the whole hause according to the actual home environment.
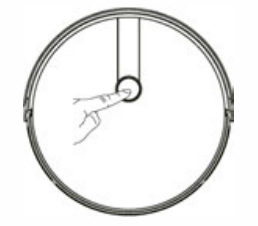
Setting method: In the shutdown state, press and hold the start/pause button. When the indicator light of the Robot is on, this indicates that the Robot is powered on. When the button is pressed for a short time, or you use the automatic cleaning bottom ![]() on the remote control, the Robot starts automatic cleaning.
on the remote control, the Robot starts automatic cleaning.
For enter the Robot super sunction mode, Press the ![]() one more time again.
one more time again.
Single Room Cleaning:
Applicable scenario: Used to cleaning the single room Setting method :Click the remote control mode switch button to select the single room cleaning mode to start the single room cleaning.
Friendly reminder: When one single room is in need of cleaning, please close the door and the Robot will do centralized cleaning in the room. If this room does not have a charging station, the Robot will return to the starting point after cleaning.
Single room cleaning mode is always the super sunction cleaning model.
Edge Cleaning
Applicable scenario: For indoor corners cleaning, the Robot cleans along the perimeter of fixed objects (such as walls), and returns to the charging station after the edge cleaning is finished.
Setting method: Click the “Mode Switch” button ![]() on the remote control to select the Edge cleaning mode to start the edge cleaning.
on the remote control to select the Edge cleaning mode to start the edge cleaning.
Manual Control
Applicable scenario: Suitable for manual control cleaning.
Setting method: Click the “Direction” button on the remote control ![]() , to control the robot to move forward and backward and turn etc.
, to control the robot to move forward and backward and turn etc.
Product use / Pause, Start and Shutdown
Pause: During the operation of the Robot, press the Robot start/pause button or “Pause” button on the remote control ![]() to pause the operation of the Robot.
to pause the operation of the Robot.
Start: If the Robot stops working for more than ten minutes, it will automatically switch to sleep mode (all the Robot lights are off). You can wake up the Robot by clicking the Robot start/pause button first; then click the Robot button again or any keys on the remote control and APP to restart.
Shutdown: After the Robot stops working, press the Robot start/pause button for a long time. When the indicator light of the Robot is off, it means the Robot is shut down.
*Recommendation: after the Robot finishes its work, do not shut down but keep it in charging state in order to perform better next time.
Product Usage / Time Scheduling Setting
Scheduling settings: Press the “Scheduling” button ![]() ton remote control for a short time to set the Robot time scheduling.
ton remote control for a short time to set the Robot time scheduling.
After you have set the time scheduling, the Robot will automatically start cleaning at the scheduled time.
PS: Before scheduling setting, you need to set the Robot time through timing setting button ![]() on the remote control.
on the remote control.
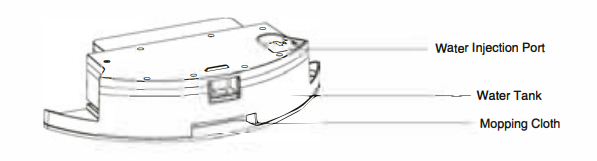
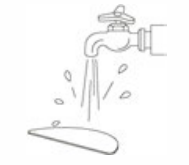
Product Use / Water Tank Use
Do not use the floor mopping function on carpets.
After mopping the floor, please empty the water tank in time and remove the mopping cloth.
A. Add water
B. Install Mopping Cloth
C. Install the Water Tank Assembly
D. Start Mopping the Floor
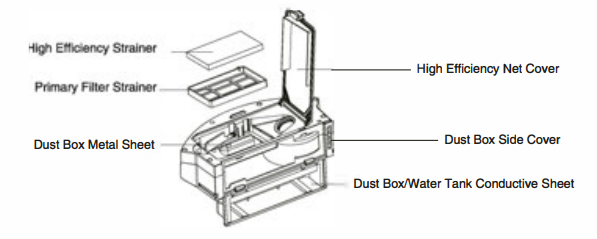
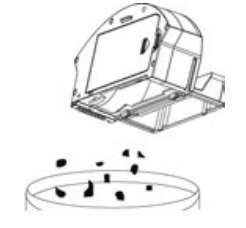
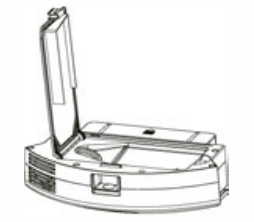
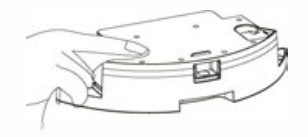
Component maintenance / Dust Container
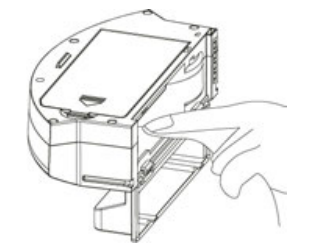
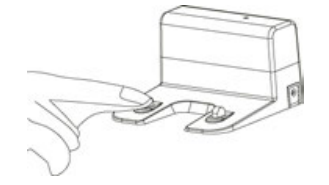
A. Press the dust box button to take out the dust box
B. Open the dust box side cover
C. Empty dust container
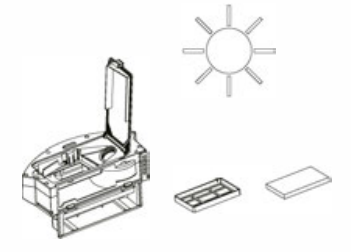
D. Open the lid of the high efficiency filter
E. Take out the high-efficiency filter and the primary filter. Tap gently on the high-efficiency filter to remove dust.
! Attention: Do not clean the high-efficiency filter with water.
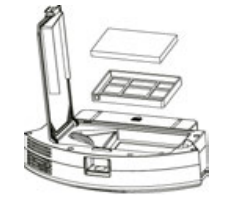
F. Rinse the primary filter screen
G. The dust container can be cleaned with a dishcloth.
! Attention: Do not wash the dust container with water
H. Air dry the dust container and filters; keep them dry to ensure its service life.Recommendation: wash the primary filter with water after use of approx. 15 – 30 days.The maximum service life of the high efficiency filter is 3 months.
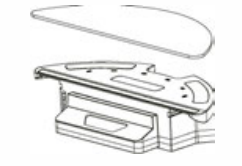
II. Place the primary filter and the high efficiency filter back into the dust container
Attention:
- Before installing the filter, please ensure that the high efficiency filter and the primary filter are in a dry state.
- Do not expose the high efficiency filter and primary filter to direct sunlight.
J. Close the dust container cover and install the dust container in the Robot.
![]() Note: Do not allow water to seep into the fan port when cleaning.
Note: Do not allow water to seep into the fan port when cleaning.
Component Maintenance / Water Tank and Mopping Cloth
A. Take out the water tank

B. Remove the mopping cloth
C. Empty the Water Tank
D. Rinse Cloth
E. Air dry
F. Dry or air dry the water tank
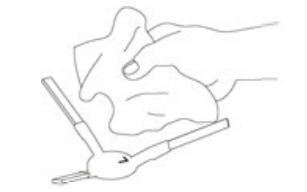
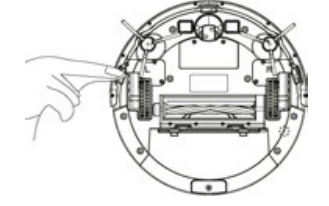
Component maintenance / main brush and side brush
A. Open the main brush cover
B. Take out the main brush shaft
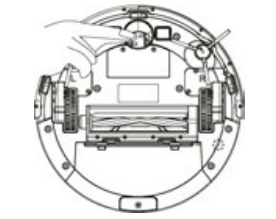
C. Thread removal tool
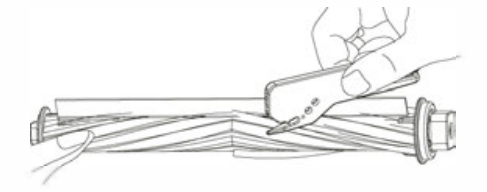
D. Cleaning main brush
Component maintenance / charging dock pins, down view sensor, drive wheel and universal wheel
Attention: The interior of the charging station pins, the down-view sensor and the bumper all contain sensitive Electronic components. Please use at all times a dry dishcloth when cleaning! Do not use any wet cloths in order to prevent damage caused by water inflow.
Clean charging station pins
Clean the down-view sensor
Clean drive wheels and universal wheel
If the product will not be used for a longtime, you need to fully charge it and turn it off before storing. The robot must be re-supplied with power every 3 months to maintain the life of the battery. If the battery is discharged or is not used for a longtime, the product may not be able to be charged. Please contact us for after-sales maintenance and do not disassemble it yourself.
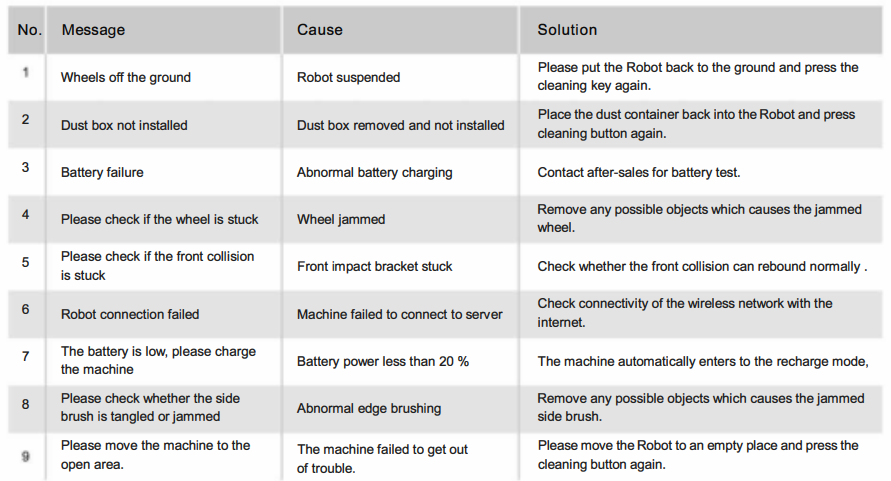
Troubleshooting
Product Parameter
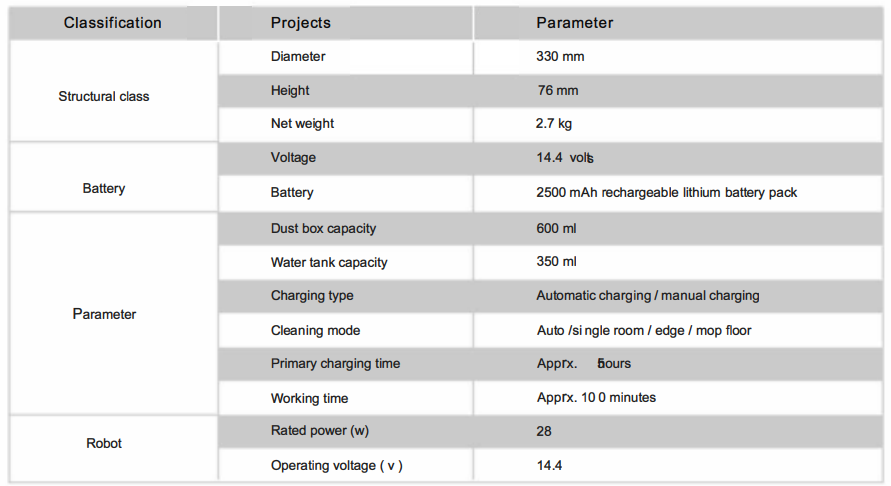
*Due to the continuous improvement of the product, this information is subject to the physical object. We reserve the right to update the product at any time.
![]() support.blaupunktrobotics.eu
support.blaupunktrobotics.eu
![]() +31 (0)88 566 7700
+31 (0)88 566 7700
References
[xyz-ips snippet=”download-snippet”]