BLUESOUND Pulse Soundbar+ Wireless Streaming Sound System Owner’s Manual

WELCOME TO #LIVINGHIFI
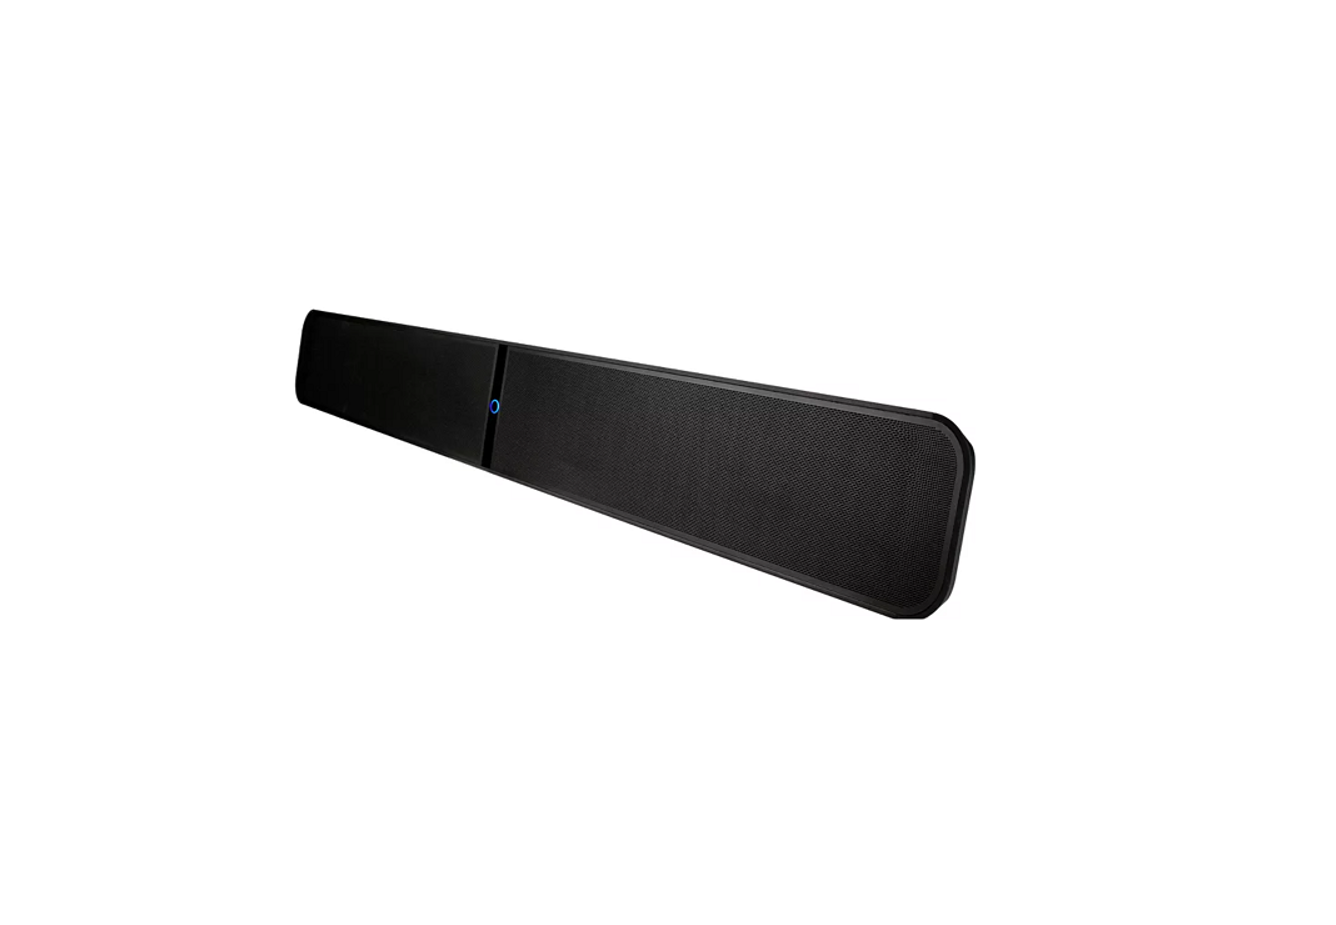
Thank you for purchasing your PULSE SOUNDBAR+. It’s the ultimate audiophile-grade soundbar for all your home entertainment needs, designed to fit perfectly under your HD TV and offer a fully immersive sonic experience.
IMMERSIVE AUDIO ENGINE. With an innovative virtual Dolby Atmos implementation, find yourself immersed in the recording studio or in the middle of the action, with every sound precisely positioned around you. Experience a wider, higher, and more enveloping soundstage with the PULSE SOUNDBAR+.
SURROUND YOURSELF WITH SOUND. Featuring 24-bit audio processing, audiophile-quality drivers, and 120 watts of total power, the PULSE SOUNDBAR+ is the audio centerpiece of your home. Capable of deep and crisp bass on its own, the SOUNDBAR+ can also be paired with the PULSE SUB+ to create dramatic soundscapes. Simply add a pair of PULSE FLEX 2i speakers as rear surround channels for a completely wireless surround sound experience.
THE INS AND OUTS. Connect nearly any audio source to the PULSE SOUNDBAR+ via its array of wired and wireless, digital and analog connection options. All of your audio can be accessed through HDMI eARC, Apple AirPlay 2, two-way aptX HD Bluetooth, TOSLINK optical, RCA, and our proprietary BluOS music streaming system.
This Owner’s Manual will provide you with a more detailed overview of your PULSE SOUNDBAR+ and its features. It also includes some troubleshooting tips and tricks and networking best practices. The Quick Setup Guide included with your SOUNDBAR+ will help you get it on the network and ready to listen to your music, movies, shows, and games
If you need more help or information please visit support.bluesound.com or send us an email at [email protected]
Included Accessories


120V AC Power Cord HDMI Cable


230V AC Power Cord Wall Mount Bracket Wall Mount Bracket Template


Ethernet Cable Spacers x8


Optical Audio Cable Two Kickstand F eet
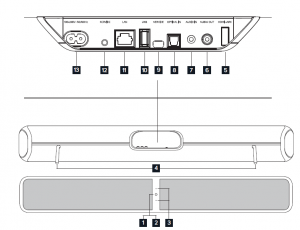
- STATUS INDICATORBelow is a table of the LED blink codes and their corresponding descriptions.LED BLINK CODE DESCRIPTIONSolid green Hotspot ModeWhite pulse Software update availableAlternate flashing red and green UpgradingFlashing red Factory Reset in processSolid white IndexingShort blue flash, then red Powering up, rebooting the unitFlashing green Connecting to NetworkSolid red Upgrade ModeFlashing blue Mute ModeSolid blue Connected to Network – ready to use with BluOS AppSolid purple Hotspot Mode timed out
- PLAY/PAUSE: This button has multiple functions – a visual indicator of network connectivity and a PLAY/PAUSE button. For a full listing of LED Blink Codes, please see #1 – Blink Codes. For an ungrouped Player, press the button to Play and Pause the stream. If listening to an Internet radio stream, the Pause function will work for 30 seconds. At this point, the buffer is full and the stream will Stop. When a Player is grouped, pressing the PLAY/PAUSE button will Mute that Player while other Players continue the stream. The Player’s LED will flash blue when muted. This button is also used for Factory Reset functions. See steps for Factory Reset later in this manual
- +/- VOLUME: Toggle the • buttons to vary volume level. The SOUNDBAR+ is equipped with an internal accelerometer, so that no matter which direction the Player is mounted, the volume buttons will always function the same way: pressing the upper button will increase volume; pressing the lower button will decrease volume
- KICKSTAND FEET (REMOVABLE) : When placing the PULSE SOUNDBAR+ on its own, attach the supplied Kickstand Feet for support.
- HDMI eARC: Using the HDMI cable provided, connect one end to the eARC input of the PULSE SOUNDBAR+ and the other end to an ARC-enabled HDMI output on your television. You may be required to enable ARC in your TV settings. Consult you TV user manual for more information. The HDMI source will appear as HDMI ARC in the BluOS App.
- SUBW OUT : The SUBW OUT connection can be used with a subwoofer cable (not provided). This is an optional connection since the PULSE SOUNDBAR+ can be connected to a Bluesound PULSE SUB+ using a built-in wireless connection. For wired subwoofers, use the SUBW OUT port. Connect one end of a subwoofer cable to the SUBW OUT on the PULSE SOUNDBAR+ and the other end to the corresponding input on the subwoofer. The SUBW OUT crossover is set at 80Hz
- ANALOG AUDIO IN : Using a 3.5mm Stereo Mini Plug to RCA cable (not provided) connect one end to the Audio In of the PULSE SOUNDBAR+ and the other end to the corresponding RCA output of a television or other audio source.The source will show as an Analog Input in the BluOS App
- OPTICAL IN : Using the Digital Optical Audio Cable provided, connect one end to the Optical In of thePULSE SOUNDBAR+ and the other end to the corresponding digital optical output of a television. The source will show as an Optical Input in the BluOS App.
- USB (TYPE B) : Use the SERVICE port in conjunction with USB (Type B Mini) to initially load firmware on the Player. This is not for consumer use. Only Authorized Bluesound Service personnel can access this USB port and SERVICE control button.
- USB (TYPE A) : Connect a USB mass storage device to the USB input. Typical USB mass storage devices compatible with the PULSE SOUNDBAR+ include portable flash memory devices and external hard drives (FAT32 and NTFS formatted).
- LAN PORT : The LAN PORT connection can be used with the Ethernet cable provided. This is an optionalconnection since the PULSE SOUNDBAR+ can be connected to the network through a Wi-Fi connection to your router. To setup the PULSE SOUNDBAR+ using the LAN Port a Wired Ethernet connection is required. Using the Ethernet cable provided, connect one end of the Ethernet cable to the LAN port of your wired Ethernet broadband routerand the other end to the PULSE SOUNDBAR+’s LAN port.
- SERVICE : Use the SERVICE port in conjunction with USB (Type B Mini) to initially load firmware on the Player. This is not for consumer use. Only Authorized Bluesound Service personnel can access this USB port and SERVICE control button.
- AC MAINS INPUT : The PULSE SOUNDBAR+ comes supplied with two separate AC power cords. Select the AC power cord appropriate for your region. Before connecting the plug to the wall outlet, connect firmly the other end of the AC power cord to PULSE SOUNDBAR+’s AC Mains input socket. Never force the plug into a wall outlet. An adaptor may be necessary in certain regions. Always disconnect the plug from the wall outlet first, before disconnecting the cable from the PULSE SOUNDBAR+’s AC Mains input socket.
CHOOSE PLACEMENT
The PULSE SOUNDBAR+ is designed to give you options and flexibility when positioning within your home.
WALL MOUNT. For wall mount installations, the SOUNDBAR+ comes with a mounting bracket and mounting template included in the box. Follow the mounting instructions on the mounting template to secure your SOUNDBAR+ to the wall. Typically it will be wall-mounted directly below your TV, but other placements are possible. Note that the SOUNDBAR+ can be attached to the wall mount bracket with the back panel facing up or down, allowing you to run the attached cables in your preferred direction. The SOUNDBAR+ is equipped with an internal accelerometer which ensures the left-right audio channels and the up/down volume buttons are always oriented correctly, no matter which direction it is positioned.
TABLETOP. For tabletop installations, the SOUNDBAR+ comes with two kickstand feet that slot into tooled keyholes on the back of the Player. Typically the SOUNDBAR+ will be table-mounted directly below your wall-mounted TV, but other placements are possible. Note that the SOUNDBAR+ can be positioned with the back panel facing up or down, allowing you to run the attached cables in your preferred direction. The
SOUNDBAR+ is equipped with an internal accelerometer which ensures the left-right audio channels and the up/down volume buttons are always oriented correctly, no matter which direction it is positioned.
TS100 TV STAND (sold separately). For installations where the SOUNDBAR+ is taller than the support legs supplied with your TV, and no wall-mounting is available, the TS100 is a dual-mounting, universal TV stand that holds both the TV and the SOUNDBAR+. Using a TS100 ensures precise placement and spacing, so that the height of your SOUNDBAR+ is never higher than the bottom of the TV. The TS100 is sold separately.
PLACEMENT CONSIDERATIONS FOR DOLBY ATMOS. For ideal results, place the PULSE SOUNDBAR+
below your television at approximately ear level and orient your seating position so that it directly faces the television. Avoid placing any obstructions between the SOUNDBAR+ and the listening position. The Dolby height virtualizer implementation in the SOUNDBAR+ is extremely flexible and does not require any additional or special room considerations to work. All viewers within the seating area will experience an enhanced height sensation
WARNING!
Steps to Factory Reset:
- Disconnect the player from electrical
- Wait 30 seconds
- Reconnect the power
- Once the LED turns Red, press and hold the PLAY/PAUSE button. The LED will immediately turn Green and then back to Red – continue to hold the button for 30 seconds
- After 30 seconds, the LED will begin to blink red – then release the button
- All customization to the Bluesound player will be removed and restored to factory settings
IMPORTANT: Removing your finger from the Standby button at any time before the LED begins flashing red will cancel the factory reset and leave the player in Upgrade Mode. Just start the steps again to factory reset the player. You will know the factory reset is successful if the player returns to Hotspot mode (wireless connection –the LED will turn solid green). If the player is connected to your network through a wired Ethernet connection, it will simply connect as if it was a new player (LED will turn solid blue).
Read More About This Manual & Download PDF:
References
[xyz-ips snippet=”download-snippet”]