
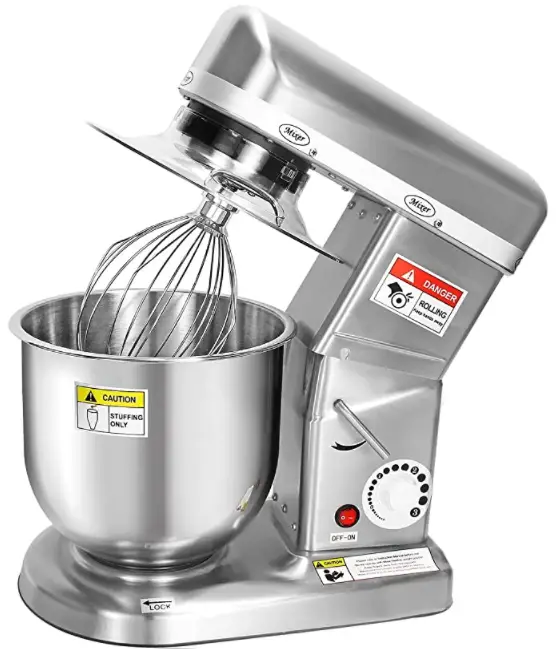
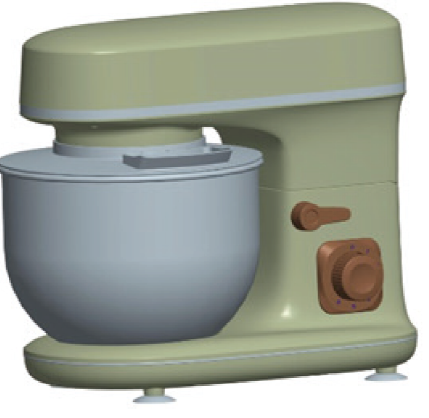
BluMill SL-9827H Stand Mixer
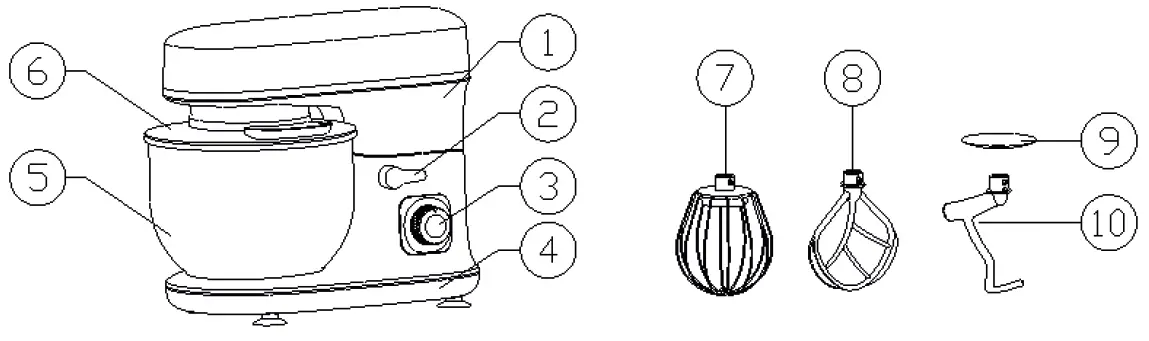
| 1 | Swivel arm | 6 | Lid |
| 2 | Release button | 7 | Whisk |
| 3 | Speed control knob | 8 | Flat beater |
| 4 | Main house | 9 | Splashguard |
| 5 | Mixing bowl | 10 | Kneading hook |
Important safety precautions
When using any kind of electrical appliance, some basic safety precautions must always be followed, including the following:
- Read all instructions.
- To protect against risk of electrical shock do not put the appliance, unit cord or plug in water or any other liquid.
- Close supervision is necessary when a appliance is used by or near children.
- Unplug the appliance when it is not in use, changing accessories and before cleaning.
- Avoid contacting moving parts.
- If the supply cord is damaged, it must be replaced by the manufacturer or its service agent or a similarly qualified person in order to avoid a hazard.
- The use of attachments not recommended or sold by the manufacturer may cause fire, electrical shock or injury.
- Do not use outdoors.
- Do not let the cord hang over the edge of the table or counter.
- Keep hands and utensils away from moving parts while processing food to reduce risk of severe injury to a person or damage to the food mixer.
- Some parts may be sharp, handle them carefully.
- To reduce the risk of injury, never place sharp objects on the base.
- Be certain the appliance is securely locked in place before operating the appliance.
- Do not attempt to defeat the lid interlock mechanism.
- Turn off the machine before replacing an attachment.
- Use the product and assemble the accessories as mentioned in the user manual only.
- Switch off the appliance before changing accessories or approaching parts which move in use.
- This appliance shall not be used by children. Keep the appliance and its cord out of reach of children.
- Appliances can be used by persons with reduced physical, sensory or mental capabilities or lack of experience and knowledge if they have been given supervision or instruction concerning use of the appliance in a safe way and if they understand the hazards involved. Children shall not play with the appliance.
- Always disconnect the appliance from the supply if it is left unattended and before assembling, disassembling or cleaning.
Control panel
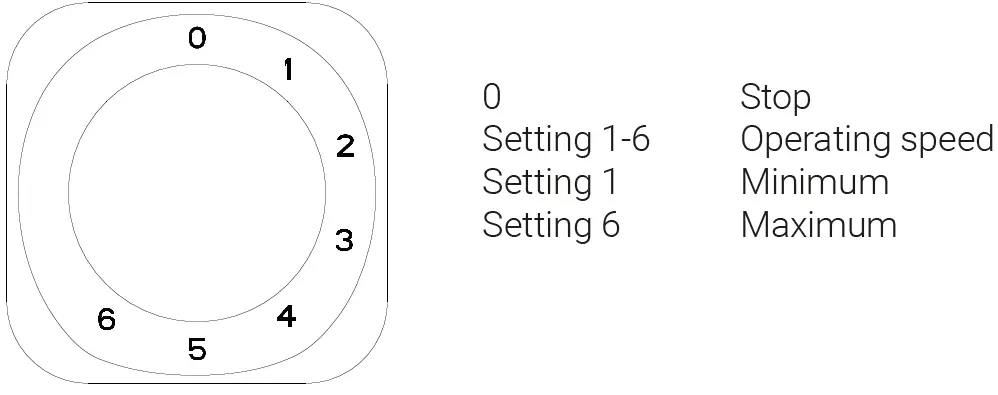
Setting speed
| Accessories | Picture | Speed setting | Time | Capacity |
| Kneading Hook | 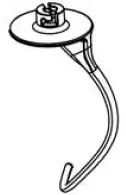 |
1, 4 | 1 min at speed 1
4 min at speed 4 |
700 g flour and 350ml water (Temperature 40+/-5 °C) |
| Flat beater | 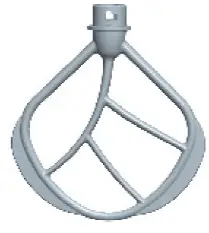 |
4-5 | 10 min | |
| Whisk | 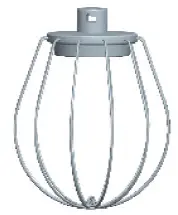 |
6 | 10 min |
Operating positions
Warning! Operate the appliance only when the accessory/tool is attached according to this table and always use the correct operating position.
| Item | Position | Accessory | ||
| 1 |
|
|
|
|
| 2 |
|
Set up Kneading Hook, Flat beater, Wisk, according to your desire. |

Risk of injury from the rotating tools!While the appliance is operating, keep fingers clear of the mixing bowl.Do not change tools until the appliance is at a standstill and has been unplugged. When switching off, the drive continues to run briefly.
How to use Kneading hook, Flat beater, Whisk
- Place the appliance on a flat surface, e.g. a kitchen counter, and make sure it is standing firmly.
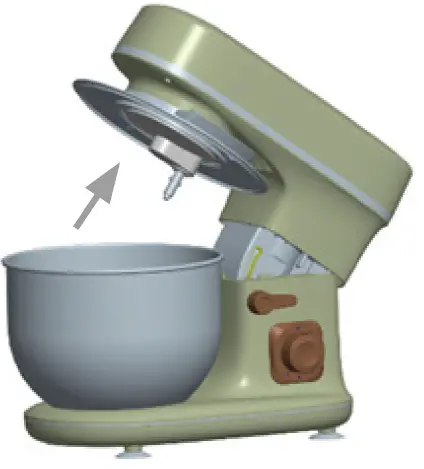
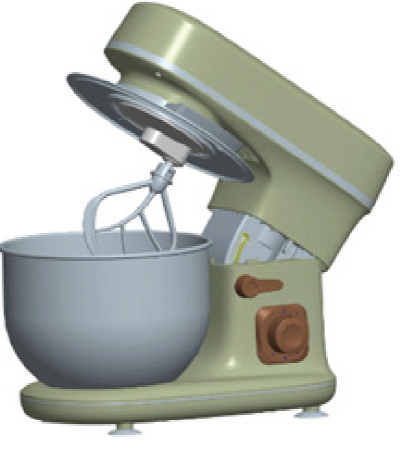
- Turn the arm release button (2) clockwise. At the same time lift the swivel arm (1) with a hand so that it locks into place with a click. The swivel arm tilts up.

- Place the food in the mixing bowl (5).
- Fit the mixing bowl in the recess on the main house (4).
- Turn the mixing bowl slightly clockwise, so it locks into position.
- Put the splashguard (9) onto the kneading hook (10) as shown in the picture. Turn and fi x the hook. The splashguard (9) can prevent the dough from climbing to the top of the hook.
- Fit the required accessory (10 with 9, 7 or 8) onto the motor spindle on the underside of the swivel arm (1).
- A. The kneading hook (10) is used for heavy dough, minced meat or other demanding kneading jobs.B. The flat beater (8) is used to mix lighter types of dough.C. The whisk (7) is used for whisking cream, egg whites, etc.
- Turn the accessory, so the pins on the spindle are aligned with the depressions on the accessory top edge. Press the accessory against the swivel arm and turn it anti-clockwise at the same time until the pins engage and the accessory locks into position securely. The accessory must not be loose nor should you be able to pull it free.
- Lower the swivel arm so that it locks into place with a click. The lid must fit tightly with the mixing bowl, otherwise it is fitted incorrectly. The appliance is now ready for use.
- Plug the power cord into the main power outlet.
- Select the setting you want by using the recommended speed, time and capacity which are shown in the table above.
- If you need to scrape inside the mixing bowl, wait until the accessory has stopped completely. Use the spatula, never your fingers.
- Switch off the appliance by turning the speed control knob to 0 when you have finished mixing. Switch off the appliance and unplug it before you change the accessories, or before you take the appliance apart or when it is not in use.
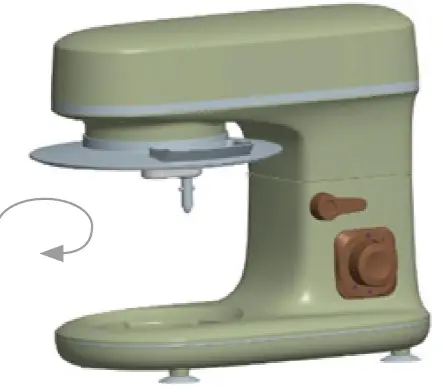
- Turn the swivel arm release button clockwise. At the same time lift the swivel arm with hand so that it locks into place with a click. The swivel arm tilts up.
- Detach the accessory by turning it clockwise.
- Remove the mixing bowl with prepared food anti-clockwise.
Important! The temperature of water should be added into the dough at 40 +/-5 °C when preparing the dough is in progress.
Capability of bowl5000 mL
CleaningWhen cleaning the appliance, you should pay attention to the following points:
- Remove the plug from the main socket, and allow the appliance to cool down before cleaning it.
- Do not immerse the motor section of the appliance in water and make sure no water enters the appliance.
- Clean the motor section by wiping it with a damp cloth. A little detergent can be added if the appliance is heavily soiled.
- Do not use scouring pads, steel wool or any form of strong solvents or abrasive cleaning agents to clean the appliance, as they may damage the outside surfaces of the appliance.
- Take the appliance apart and clean all of the accessories separately. They can be cleaned in warm soapy water or in the dishwasher. Make sure the parts are not fixed firmly in the dishwasher as this may change their shape.
- Be careful not to touch any sharp parts during use and cleaning.
- IMPORTANT! Allow to dry fully after cleaning before using it again. Do not use the appliance if it’s damp.
- After washing and drying, immediately place the attachment into the protective sleeve for storage.
Correct Disposal of this productThis marking indicates that this product should not be disposed with other household wastes throughout the EU. To prevent possible harm to the environment or human health from uncontrolled waste disposal, recycle it responsibly to promote the sustainable reuse of material resources. To return your used device, please use the return and collection systems or contact the retailer where the product was purchased. They can take this product for environmental safe recycling.SL-9827HAC 220-240 V 50 Hz 1300 W
![]()
[xyz-ips snippet=”download-snippet”]