![]()
![]() Installing your Cadence I Speed Sensor & Magnet on the SPR.
Installing your Cadence I Speed Sensor & Magnet on the SPR.
Bluetooth SMART & ANT+ Cadence I Speed Dual Bike Sensor SENSOR ID: SCA

- Cadence / Speed Sensor
- 3x10mm Magnet with adhesive backing
- Sensor Holder
- Double-sided EVA Tape (x2) 7.
- I0 Label Ito be applied to the bike)
- Battery Cover w10-ring
- CR2032 3V Lithium Battery
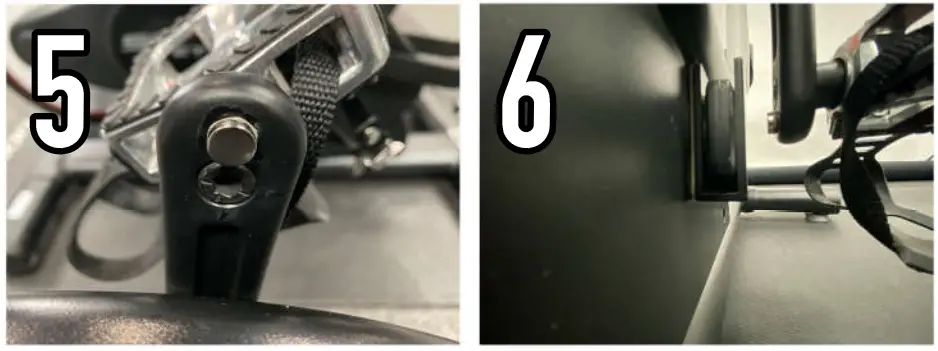
*The goal of this install is to simply allow the magnet to pass within 1/4- of the arrow symbol on the sensor. Without removing the adhesive on the magnet, place the magnet on the inside of the left crank arm to fine-tune placement before permanently placing it with the adhesive.Go to www.bodycraft.com for the video version of the installation specific to your bike. Select your model in the products section or enter it in the search bar.
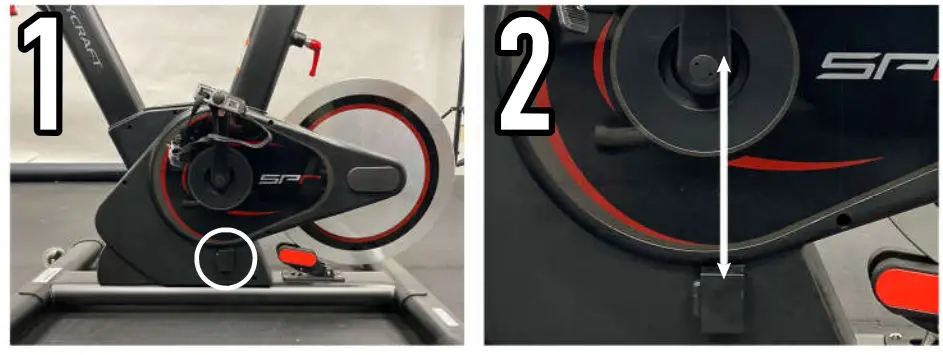
STEP A:Place part 44 (Double-sided EVA Tape) to the back of part 43 (Sensor Holder. Make sure the openings on Part 43 are facing toward the front of the bike and upwards (see pic M). Place Part #3 (Sensor Holder) on the bike shroud as shown in picture 42. The top of the sensor holder should touch bottom of the drive belt cover and should be centered to the right side of the crank arm shown in picture #2.
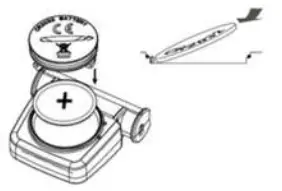
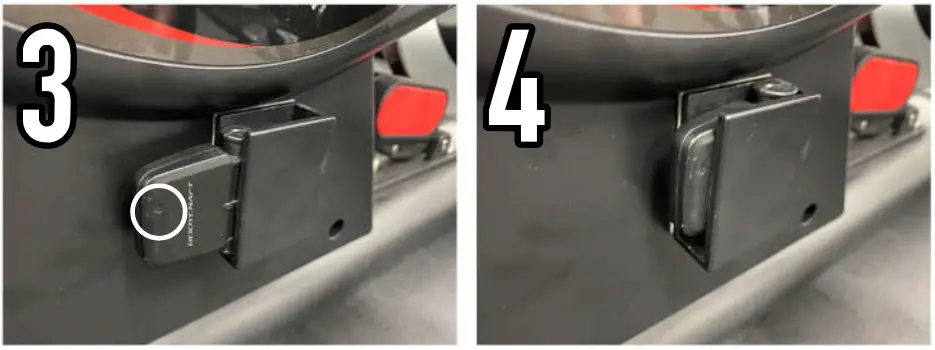
 STEP B:Remove the battery cover from part 41 (Cadence I Speed Sensor). Place part 47 (CR2032 3V Lithium Battery) positive +side up. Slide Part 41 (Cadence I Speed Sensor) into part 43 (Sensor Holder) making sure the arrow on part 41 is facing out and pointing toward the front of the bike.
STEP C:Remove the adhesive backing on part 42 (3x1Omm Magnet with adhesive backing). Place part 42 onto the inside end of the left crank arm as shown in pictures 44 and 45 while making sure not to cover the pedal bolt (shown) under the magnet in picture 45.
 NOTE: If installing sensors on multiple bikes, place part 45 (ID Label) on the rear stabilizer frame.
[xyz-ips snippet=”download-snippet”]