BOX DESIGN Pro-Ject Phono Box Instruction Manual
Dear music loverthank you for purchasing a Pro-Ject Audio Systems phono amplifier. In order to achieve maximum performance and reliability you should study these instructions for use carefully. Warning of a hazard for the user, the unit or possible misuse.
 Important notice.
Safety instructions
AC outlet voltages vary from country to country. Before connecting to the mains, make sure that the voltage in your area meets the voltage requirements printed on the power supply. The power supply is used to disconnect the unit from the mains. Make sure that the power supply is easily accessible at all times. Never handle the device, the power supply while your hands are wet or damp. Avoid letting liquids enter the device or the power supply. Never place any item containing liquid, such as a flower vase on or near the device. Never spill any liquid on the device or the power supply. Never place any naked flame sources, such as lighted candles on or near the device. The product shall not be used in damp or wet locations, next to a bathtub, sink, swimming pool or any other similar conditions.
Connectors
Make all connections whilst the phono amplifier is disconnected from the power supply. Take care to connect the left and right channels correctly. The right channel is usually marked red, the left channel black or white. Do not connect the phono amplifiers output to a phono input (sometimes labelled gram, disc or RIAA) on the amplifier. Never use any other power supply than the one supplied with the unit.
Connecting the record player
Connect the tonearm signal lead to the Input of the phono amplifier, the unit offers 2 inputs (see Input section on next page). The grounding wire may be connected to the screw terminal if you encounter hum problems when using the record player.
Connection to the amplifier
Connect the Output of the phono amplifier to a line input (such as AUX, CD, Tuner, Tape or Video) on your amplifier.RCA and XLR outputs are separated and both play all the time. 2 amplifiers can be connected.
Mains power connection
Connect the low voltage plug from the power supply to the Power 20V socket of the preamplifier before connecting the power supply to the mains.
To switch on from standby or to standby
The rocker switch on the left hand side of the front panel turns the unit on or off. The blue LED above the switch shows that the unit is switched on.
The preamplifier uses an “automatic” mute function which eliminates clicks and pops that may occur during power on/ power off / settings selection.
Settings
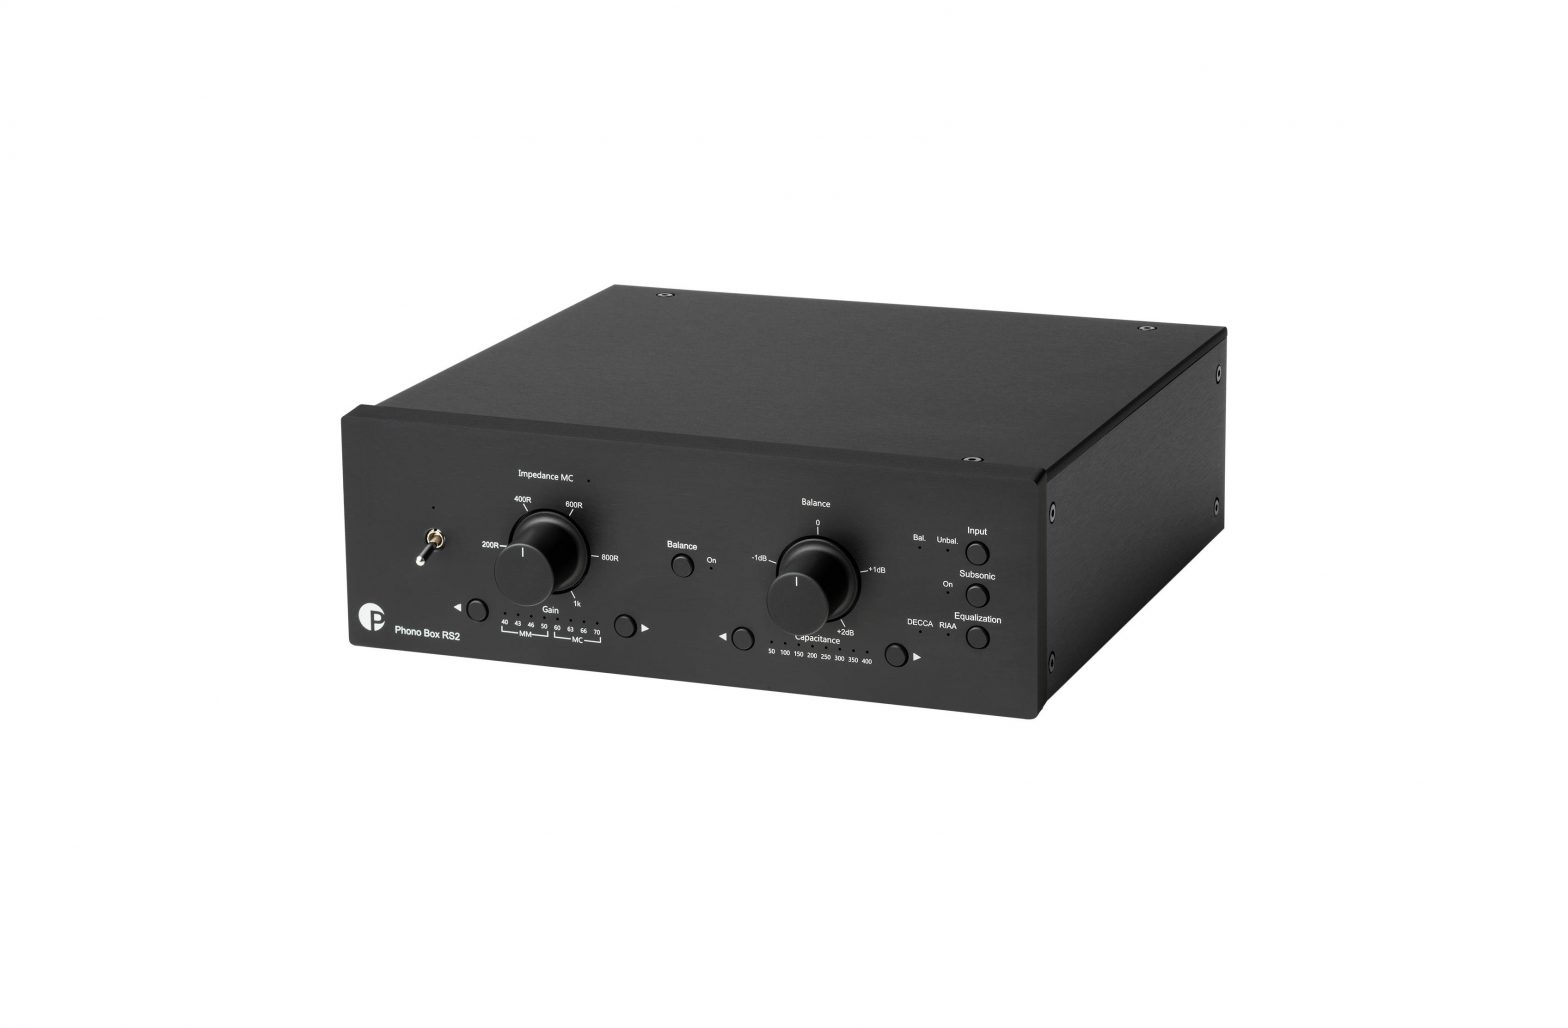
The phono preamplifier offers many possible settings:
InputSelects balanced (XLR) or unbalanced (RCA) input.2 turntables can be connected to the preamplifier and this button acts as input selector, settings for each input are stored in memory.
SubsonicTurn on and off subsonic filter.
EqualizationRIAA / DECCA selects the desired mode
BalanceIf the pushbutton is pressed, LED On lights up and balance between the left and right channel can be set using the potentiometer Balance on the right side.Maximal channel difference is 4dB (from -2 dB to +2 dB).
MM cartridges
The Phono Box RS2 operates in MM mode when one of the first four MM Gain settings are used.Gain setting in 4 steps 40, 43, 46 and 50 dBImpedance setting is possible using the potentiometer from 10 Ohms to 1000 OhmsCapacitance e is fixed to 50 pF in MC mode.To find out which type your cartridge is please consult the literature accompanying your cartridge. The literature for cartridges should also specify the correct input impedance (low-output MC cartridges) and the correct input capacitance (high-output MC and MM cartridges), into which the cartridge is designed to work with. If in doubt, please consult your dealer or manufacturer.
Examples of typical settings
Ortofon Rondo Red (Low-Output MC): Gain 60dB, Impedance 10 Ohms, Capacitance is irrelevant for low-output MC cartridges, and set to the lowest value of 50 pF when the Phono Box RS2 is operating in MC mode.Ortofon 2M Red (MM): Gain 40dB, Capacitance 150pF, Impedance 47k Ohms (47k Ohms are automatically selected when the Phono Box RS2 is operating in MM mode)Ortofon X5-MC (High-Output MC): Gain 40dB, Capacitance 350pF, Impedance 47k Ohms (47k Ohms are automatically selected when the Phono Box RS2 is operating in MM/High-Output MC mode)
Technical specifications Pro-Ject Phono Box RS2
| Input MM capacitance/impedance: 47kOhms | 50pF, 100pF, 150pF, 200pF, 250pF, 300pF, 350pF or 400pF / |
| Input MC impedance/capacitance: | Stepless 10ohms – 1000 Ohms / 50pF |
| MM Gain (+ 6dB using XLR sockets) | 40, 43, 46, 50 dB |
| MC Gain (+ 6dB using XLR sockets): | 60, 63, 66, 70 dB |
| Signal / Noise ratio MM (40dB): | 82dB (RCA, XLR), 89dB A-wt (RCA, XLR) (10mV) |
| Signal / Noise ratio MC (60dB) | 66dB (RCA,XLR), 76dB A-wt (RCA,XLR) (1mV) |
| MM THD+N: | <0,005%(mm40db,1khz) |
| MC THD+N: | <0,04%(mm60db,1khz) |
| MM THD: | <,0015%(mm40db,1khz) |
| RIAA-equalization curve accuracy | < +-0,4dB / 20Hz – 20kHz |
| Subsonic filter: | at 20Hz with 18dB/octave |
| Input: | 1 pair RCA/phono sockets, 1 pair XLR sockets |
| Line-level output: | 1 pair RCA/phono sockets, 1 pair XLR sockets |
| Wiring XLR sockets: | 1 ground, 2 “hot” and 3 “cold” |
| Outboard power supply | 20V/3A DC |
| Power consumption: | 310mA DC, max. 350mA |
| Dimension W x H x D (D with sockets): | 206 x 72 x 200 (230) mm |
| Weight: | 1600 g without power supply |
Potential incorrect use and fault conditions
No signal on one or both channels:No connection between player and phono amplifier or amplifier. This could be due to a faulty plug, broken wire or solder joint or simply loose plug/socket connection.Strong hum:No earth connection from cartridge or arm, or arm cable to phono amplifier, or earth loop.Output too quiet or too loud, or distorted: Input gain incorrectly set – input overloading or insufficiently amplified.
Service
Should you encounter a problem which you are not able to alleviate or identify, please contact your dealer for further advice. Only if the problem cannot be resolved there, the unit should be sent to the responsible distributor in your country.
Warranty
The manufacturer accepts no responsibility for damage caused by not adhering to these instructions for use. Modification or changes to any part of the product by unauthorized persons release the manufacturer from any liability over and above the lawful rights of the customer.
[xyz-ips snippet=”download-snippet”]