
BQobarsca Mobile Intelligent Terminal WinCE Instruction Manual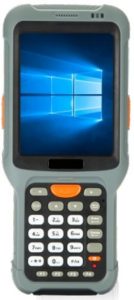
Introduction to S50 Series Products
Overview
S50 product is an industrial hand-held terminal independently researched and developed, designed and produced according to the industrial characteristics. Its appearance is adopt the ergonomic design, with the light, flexible, anti-vibration and anti-dropping features, as well as long standby time and stable operating system. S50 product is in accordance with IP65 industrial standards for water-proofing, dust-proofing, anti-dropping, anti-static and high & low temperature resistance design.
Applicable industries
It is mainly applicable for warehouse, channel, logistic, drug supervision,retail industry and other fields.
Product parameters
|
Performance parameters |
|
| Operating system | Microsoft Windows CE 6.0 |
| Processor | 806MHz/1GHz |
| Memory | 256M RAM +256M ROM/512M RAM +512M ROM |
|
Physical parameters |
|
| Display screen | 3.5* 240×320 TFT color touch screen |
| Dimensions | L 179.5 x W 78.18 x T 31.02mm |
| Weight | 370g (including standard battery) |
| battery | Unloadable 3.7V 3800mAH, 10 hours, Above 200 hours standby |
| Camera | 5 mega pixels |
| Keyboard | 26 regular keys, 1 power key, 1 reset key, 2 sides keys |
| Interface | 1 Mini USB 2.0, 1 MicroSD/TF slot, 1 SIM slot (optional), 1 charging interface, 3.5mm stereo headphone jack |
| Power Adapter | Input: AC 100-220V 50/60HZ; Output DC 2.5A |
| Input method | English, handwriting input |
| Audio (optional) | Loudspeaker, headphones |
| Way of notification | Speaker, indicator light and vibration |
|
Environmental parameters |
|
| Temperature | -20°C-50°C (Working) -30°C -60°C (Storage) |
| Electrostatic | ±15kV Air, ±8kV Contact |
| Relative humidity | 5%-95%RH |
| Protection grade | IP65 |
| Anti-dropping height | Bear the impact of dropping to smooth cement ground height from the height of 2.5m for many times |
| Anti-rolling strength | Almost 1000 times for rolling within the scope of 1m strength (impact force) |
|
Data communication parameters |
|
| WIFI | IEEE 802.11 a/b/g/n |
| Bluetooth | Bluetooth 2.1 |
| WWAN | GPRS/EVDO/TD-SCDMA/WCDMA |
| Decoding ability | 1D laser /2D image scan engine |
| Scanning precision: ≥. 3mi1 | |
| Depth of field: 3cm-70cm (Depends on barcode density and type) | |
| UPC/EAN, Code128, Code39, Code93, Code11, Interleaved 2 of 5, Discrete 2 of 5, Chinese 2 of 5, Codabar, MSI, RSS, etc PDF417: MicroPDF417, Composite, RSS, TLC-39, Data matrix, QR code, Micro QR code, Aztec, Postal Codes: US PostNet US Planet UK Postal, Japan Postal, Dutch Postal (KDQ, etc |
Product Appearance
Appearance view
 Front view
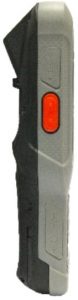 Side view
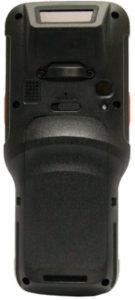 Back view
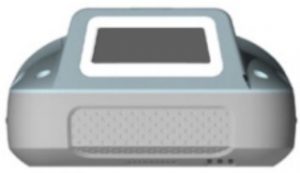 Top view
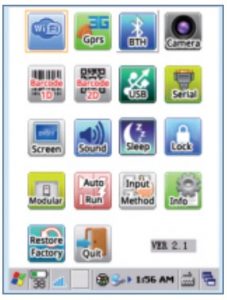
PDA Configuration Instructions
introduce the software function of s50 series devices in detail.
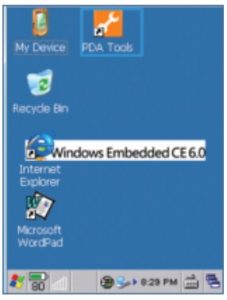
PDA Desktop
The terminal will be turned o by press the power button for 3 to 5 second, the following interface will be displayed.

Three indicating lights in the top right corner, the one in the leftmost will light after turn on the device, the middle one will turn to red when charging the device, and turn to green after the battery is fully charged. For example, the red marker box in the above picture displays battery level and signal strength. Battery level indicate: Normal above 30%; insufficient 10%-30%; low power less than 10%.
Note: We should charge at once at low power, please turn off the terminal if you can’ t charge it immediately.
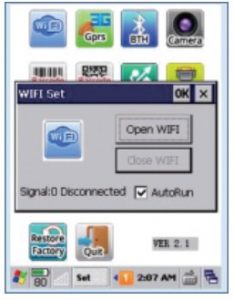
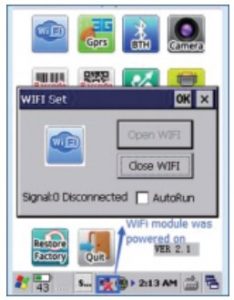
WIFI
Turn on/off the Wi-Fi module: Enable whether Wi-Fi module turn on when device power on.
- An icon will appear in the taskbar after turn on Wi-Fi module.
- If ‘Auto Run’ is selected, the Wi-Fi module will be turn on automatically when device power on.

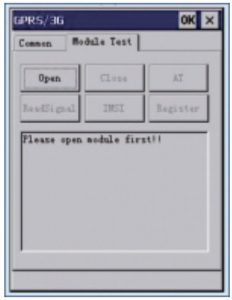
3G and GPRS Test
AT instruction test is usually used in 3G or GPRS module dial test.
- Obtain current signal value.
- If the option ‘Power module after power on device’ is selected, the current 3G or GPRS module will be turn on automatically in the boot process.(Note: Don’ t dial-up and connect to Internet automatically.)

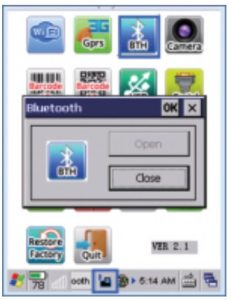
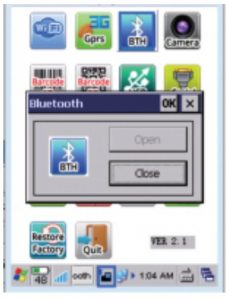
Bluetooth
- Open or close Bluetooth.
- The bluetooth icon will appear in the taskbar after turn on bluetooth.
- Double click the icon in the taskbar, the Bluetooth configuration interface will be activated.
- Click the icon in Bluetooth configuration interface, the window will be minimized to taskbar.
- Click ‘close’ turn off Bluetooth, the icon in the taskbar will disappear.

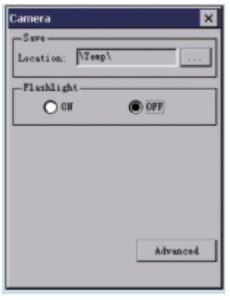
Camera
Turn on/off camera.
- ‘Photo OK’ : focus and take pictures.
- ‘View F3’ : Preview the photos.
- ‘Set F1’ : Set the path to save photos, open/close flashlight (closed in default), brightness and resolution ratio, etc.
- ‘Exit R’ : Close the camera.

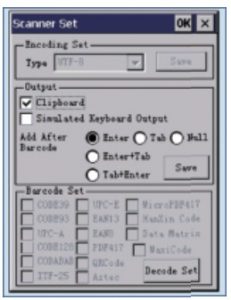
1D Scan Engine
Open/close and set various parameter of 1D scan engine.
- ‘Open Scanner’ : Turn on scan engine.
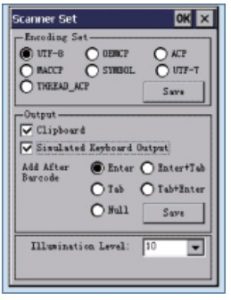
- ‘Advance’ : Set the code type and method of outputting barcode data information.
- ‘Initialization’ : Restore factory setting of the scan engine.
Note: When you click ‘Open Scanner‘ , and choose option Clipboard’ , the barcode data information will output in where the cursor displaying when you exit the program.
If we want to call API in the program to output barcode data information, we have to click icon Close Scanner’ to turn off scan engine, other wise it will have a impact on the program output barcode data information.
2D Scan Engine
Open/close and set various parameter of 2D scan engine.
- ‘Open Scanner’ : Turn on scan engine.
- ‘Advance’ ,the default password is 87651234:Set the code type and method of output 2D barcode data information.
Note: When you click ‘Open Scanner’ , and choose option ‘Clipboard’ , the barcode data information will output in where the cursor displaying when you exit the program.
If we want to call API in the program to output barcode data information, we have to click icon ‘Close Scanner’ to turn off scan engine, other wise it will have a impact on the program output barcode data information.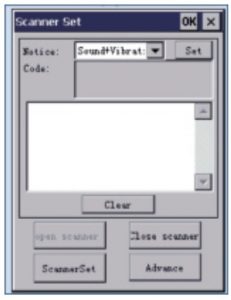
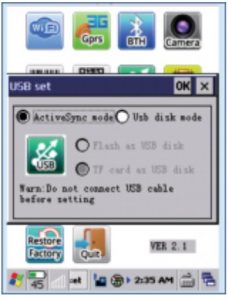
USB
Set data synchronization or USB disc loading.
- Synchronization: Install software Microsoft ActiveSync in the PC, and icon will appear in PC taskbar after the device connect with PC via USB cable, and then the data can be updated.
- USB disk mode : TF card as USB disk.
- Configuration method:Step 1: Disconnect USB cable, and reboot PDA.Step 2: Enter the USB configuration interface, choose relevant mode.Step 3: Reboot PDA.
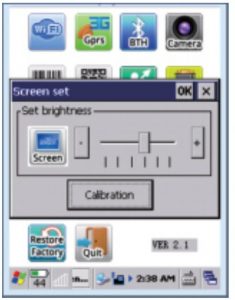
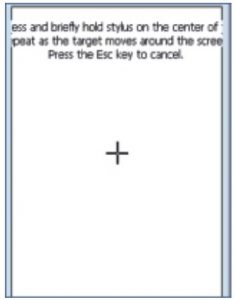
Screen Setting
Set the brightness and calibration of the screen
- Adjust the brightness through shift the scroll bar
- Press the center of ‘+’ ,and click icon ‘OK’ to save the brightness configuration after finish the setting.
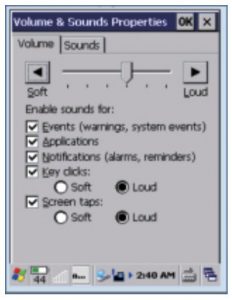
Sound
Set the volume and sounds
- Adjust the volume through shift the scroll bar.
- Set the sound for the system.
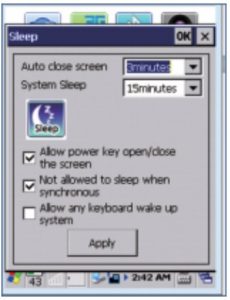
Sleep Setting
Set sleep and wake up parameter of the system.
- ‘Auto close screen‘ : The screen will close automatically when the system is in idle status,and the time interval reaches.
- ‘System sleep‘ :The device will enter into system sleep when the system is inidle status,and the time interval reaches,at this point, the system is working in low power consumption,and most of the hardware are in standby status.
- ‘Allow power key open/ close the screen‘ :If this choice is selected, the screen will be closed/opened by pressing the power button of the device.
- ‘Not allowed to sleep when synchronous’ : If this choice is selected,the system will not enter into sleep status when synchronizing data by plugging in USS cable.
- ‘Allow any keyboard to wake up system’ :If the choice is selected,any button”can wake up the system when the system is in close status or dormancy, or only the power button can wake up the system.
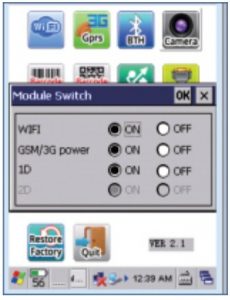
Modular Setting
Turn on/off of each hardware modular in PDA.
- WIFI:Turn on /off W IFl modular, WIFI Manager icon will appear in the taskbar after turn on.
- GSM/3G :Turn on /off GSM Modular or 3G Modular.
- 1D scan engine: Turn on /off 1D scan engine.
- 2D scan engine:Turn on /off 2D scan engine.
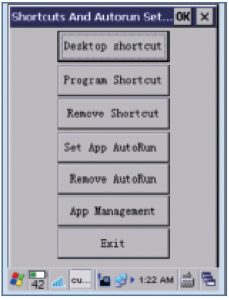
Auto Run
Set the application programs and shortcuts of Auto Run.
- ‘Desktop shortcut’ :Set up shortcut in the desktop.
- ‘Program shortcut’ : Set up shortcut in the main menu.
- ‘Remove shortcut’ :Remove all shortcuts set in A and B.
- ‘Set App Auto Run’ : Set application program auto run,which will run automatically after device power on.
- ‘Remove Auto Run’ : Cancel auto run software set in D.
- ‘App Management’ :The administrator set related application program r to users.

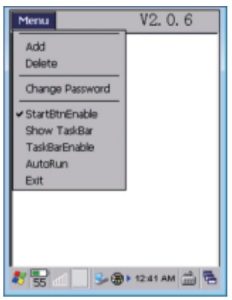
App Management: The default password is 87651234.
- ‘Add‘ : Add application program to the option ‘App management’
- ‘Delete‘ :Delete application program to the option ‘App management’
- ‘Change Password’ : Change the password for the App Management.
- ‘Show TaskBar’ : Show or hide TaskBar.
- ‘Auto Run’ :Set whether turn on the App Management when power on the device.
- ‘Exit’ : Exit App Management configuration interface.
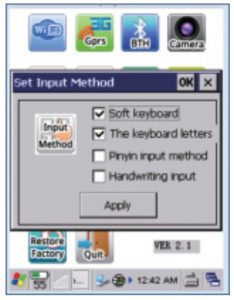
Input Method
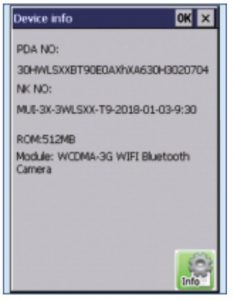
System Information
Display all information of the current device.
Restore Factory Default Setting
Restore Factory default setting (Note: All data in the device will be deleted, please operate carefully, this function is used under the circumstance of abnormal condition in the device,and problem can’ t be solved in normal method ).The default password for Restore Factory Setting is 87651234.
Troubleshooting
How to set WIFI Network
Step 1 : Turn on WIFI module :
- Click icone: Figure 4-1
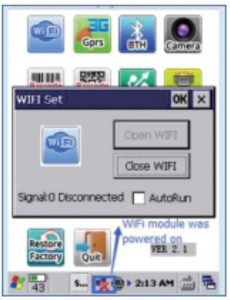 Figure 4-1
Step 2: Network configuration
- Click icon
- Choose option
- Obtain IP address via DHCP or specify an IP address.
- Click icone ‘OK’ to save configuration.


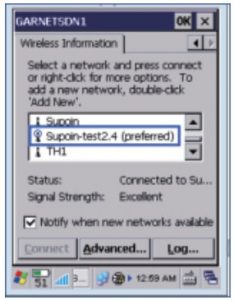
Step 3: Connect WIFI:
- Double click the icon in the task bar.
- Choose option ‘Wireless information’ as figure 4-5,choose a wireless Network.
- Input password as figure 4-6, click icon ‘OK’ .
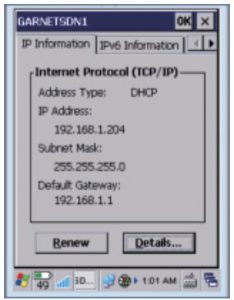
- Check the IP address after connect to the wireless network successfully as figure 4-7.

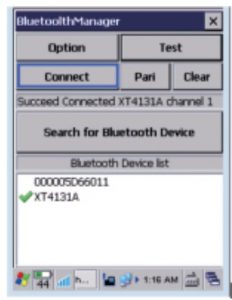
How to connect with the Bluetooth printer
Step 1: Turn on Bluetooth printer and let it stay enable pair statusStep 2: Connect to Bluetooth printer
- Turn on PDA Bluetooth module.
- Click icon search for Bluetooth Device to search Bluetooth device.
- Click icon connect to connect with relevant Bluetooth device.
- Input password which displayed in the printer screen.

How to Set Shortcuts and Auto Run
Shortcuts :
- Click icon
- Click icone
- Choose related application program and finish relevant configuration.

Auto Run:There are three methods to set Auto Run :
- Put the application program in the folder \Storage Card\AUTORUN\, and” name it as APP.EXE ;
- Click icon ,Choose related application program and finish relevant configuration,then reboot the device.Click icon AutoRun to remove all Auto Run.
- Set Auto Run via API,please refer to SDK.
How to Turn on/off 1D Scan Engine
Turn on 1D Scan EngineClick icone : ![]()
Turn off 1D Scan Engine Click icon : ![]()
How to Turn on/off 2D Scan Engine
Turn on 2D Scan Engine Click icone : ![]()
Turn off 2D Scan Engine Click icone : ![]()
Set up ActiveSync Mode USB Disk Mode
Click icon : ![]() Note:Please disconnect the device with PC before you do following configuration.
Note:Please disconnect the device with PC before you do following configuration.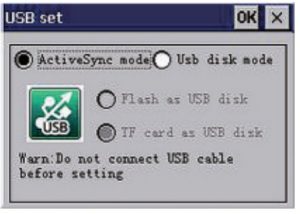
- Choose USS Disk Mode.
- We could find the Disk in the ‘My Computer’ ,then can send and receive data from PC. ActiveSync Mode: We need to install soft\vare Microsoft ActiveSync in PC,connect to PC via USS cable.then we will find the icon in the PC taskbar.
How to send 1D barcode data information with function Remote Desktop Connection to PC
Click icon : 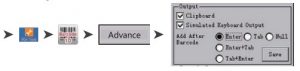
How to send 2D barcode data information with function Remote Desktop connection to PC
Click icon : 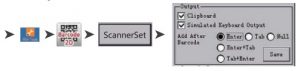
Precautions and Maintenance
Please carefully use your device with the excellent design and technology. The following suggestions can help you use the warranty service effectively .
- Please use the device according to this Manual, rather than trying to adopt other methods.
- Keep the device dry, to prevent the circuit board from corrosion, causing the failure on power-on and other problems due to put the device in humid place for a long time
- Keep the device clean and do not store it on the dust or dirty place for a long time. Thus,it may cause the failure of terminal on power-on or other problems.
- Do not put the device on the overheating or over-cooling place for a long time
- Do not forcefully knock or drop the device
- Do not disassemble the device casually.
The correct usage method and maintenance of equipment can help you better make use of product performance. Among the problems reflected by many clients, most of them are caused due to the improper operation or inattention of maintenance. In case of any abnormal operation,it is suggest to read this Manual carefully or contact R&D personnel.
[xyz-ips snippet=”download-snippet”]