BRASS MONKEY GH2020 Fridge/Freezer 35 Litre Portable Dual Zone User Manual
FEATURES
- Dual zone – fridge / freezer operation.
- Optional removable 15.6AH or 7.8AH battery
- Solar charging interface
- Detachable lids – pivot point reversible.
- With cutting board
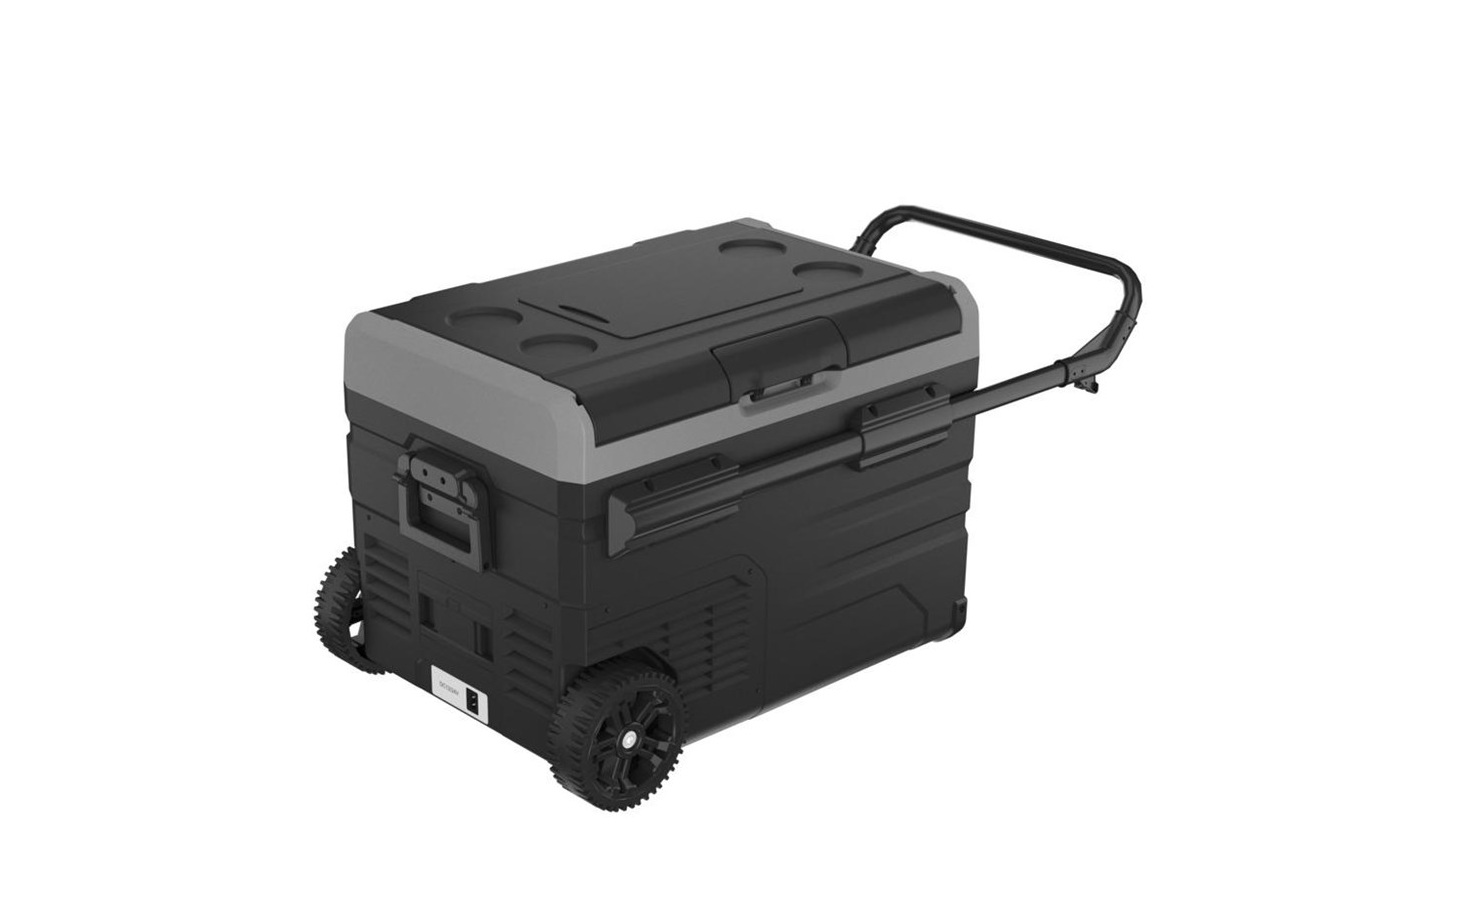
- With wheels and telescope handle
- DC power connections
- Powered by AC using the AC to DC power adapter
- High-efficiency DC compressor and conversion module
- Dual mode operation (Max & Economy)
- Digital temperature display with adjustable control
- 3 year warranty
- 3-stage low voltage battery protection
- APP control Via Bluetooth
BOX CONTENTS
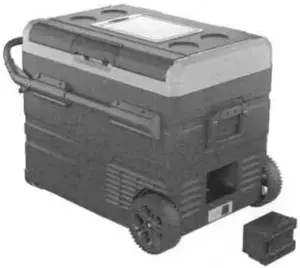
- 1 x Portable Dual Zone Fridge / Freezer
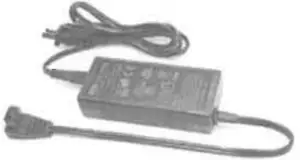
- 1 x Mains to DC Power Adapter
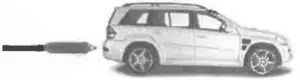
- 1 x 12 /24V Car Cigarette Power Lead
SPECIFICATIONS
- Input Voltage: 12 / 24V DC, (To power from mains use the included 240VAC to 12V DC power adapter)
- Average Power Consumption: 60W
- Power Consumption: 0.28kw.h / 24hr
- Rated Current for AC(Adaptor): 1.5A – 0.7A
- Rated Current for DC: 5.0A (12V) / 2.5A (24V)
- Temperature Range: -20°C to + 20°C (with ambient temperature at 25°C)
- Refrigerant: Insulation: R134a 100% CFC & HFC free PU Foam insulation
SAFETY
- The installation of DC power sources in a boat must be handled by a qualified electrician
- Make sure to connect power to the suitable voltage socket
- No electrical devices are to be used inside the product
- The product can be powered on only after being unpacked and put on a flat level surface for over 6 hours
- Fridge operating angle:- The fridge can be operated indefinitely at up to 5 degrees, and can be operated at between 6 and 45 degrees for up to 30mins.
- Product must be well ventilated. Ensure there is a minimum of 200mm clearance at the back, and 100mm around the sides
- The product should be in a well-ventilated space, away from heat sources. Try to avoid direct exposure to sunlight
- Keep product stable
- When there is water inside the tank, do not turn the product upside down to empty. Dry the water, do not soak in water
- Do not put metal in the air inlet vent, outlet vent, or gap
- Do not connect with power except 12/24VDC, or the 240VAC to 12VDC power adapter (included)
- Do not soak the product in water or wash with water
- The product should not be repaired. If there is any issues please consult the place of purchase
- Turn off the product before cleaning to avoid electric shocks or other issues
- Keep product away from wet or humid places
DIMENSIONS
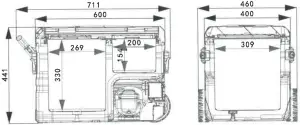 GH-2020
 GH-2022
 GH-2024
OPERATION
How to Turn on the Fridge
- Connect to power
- Long press
 to power off and short press to power on.
 - The internal temperature will display and the compressor will start
- SET: Press button to enter different modes, ECO (Energy Saving Mode), and MAX (Fast Cooling Mode). Factory setting is Max
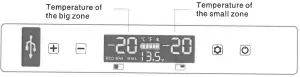
- When the power is on and the dual temperature zone is set to valid, press the + or – button to enter the big zone temperature setting, and then press the button to switch the big or small zone temperature setting. Then press + or – to adjust the temperature.
- In the power on state, long press the button + and button for 3 seconds to turn the big zone on or off, and press the buttons – and for 3 seconds to turn the right zone on or off. Note: You cannot turn both zones off at the same time.
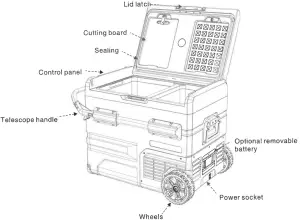
COMPONENTS
POWER SUPPLY AND CHARGING
- Optional Removable Battery
- AC to DC Adapter
- with AC to DC adapter
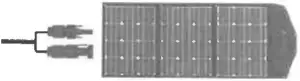
- Solar Panel (Optional)
- Car Cigarette lighter with DC Cable
- DC Cable (included)

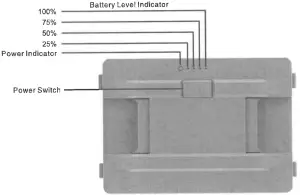
Optional Removable Battery Information
| Battery Model | Capacity | Rated Voltage | Charging Limited Voltage | Max Charging Current |
| GH-2052 | 7.8AH | 11.1V | 12.6V | 4A |
| GH-2054 | 15.6AH | 11.V | 12.6V | 4a |
![]() Warning: please do not open or disassemble the battery.
Warning: please do not open or disassemble the battery.
Solar panel charge connection
 Insert the solar charge cable into the refrigerator’s Solar charge interface
 ![]() Max Solar inputVoltage: 50VMax Solar input Current: 10A
Max Solar inputVoltage: 50VMax Solar input Current: 10A
- Checking Charge Status: When the refrigerator is powered ON and DC / AC power is connected, the battery icon on display screen will flash to show charging. To charge the fridge / freezer battery without running the compressor, simply connect the adapters without powering “ON” the fridge. To view charging status please press and hold button for 3 seconds. The fridge’s battery status and voltage will be displayed. When the voltage reaches 12.6V and the battery icon stops flashing, the unit has been fully charged and wiring should be disconnected to prevent internal component from damage.Warning: Do not charge fridge / freezer with DC 12V and Solar Panel at the same time! The fridge could be seriously damaged and pose a potential hazard to you.
AC Charging Management
If the fridge has not been used for a long time, the battery may be discharged, and the fridge will not power on. Please use the AC adapter to charge the fridge battery and run the fridge. After the fridge battery has charged up to 30%, you can switch to other methods for charging.
Car Cigarette Lighter Charging Management
The product has a three-level battery protection function, which not only guarantees the normal operation of the product, but also protect the battery of the vehicle. When in the power-on state, long press button ![]() for 3 seconds and the display screen flashes H, select low voltage production L(ow), M(edium), and H(igh) by clicking button
for 3 seconds and the display screen flashes H, select low voltage production L(ow), M(edium), and H(igh) by clicking button ![]() . The factory default is set to H(igh) protection.H should be set when the product is connected to car power, and M or L should be set when it is connected to a portable battery or other back-up battery. Because of the different output voltages between vehicles, the battery protection level can be set from H to M or from M to L if there is a voltage protection code Fl shown on the panel. The battery protection level should be set to H if the product will keep working after turning off the car engine, or the product may drain the battery.
. The factory default is set to H(igh) protection.H should be set when the product is connected to car power, and M or L should be set when it is connected to a portable battery or other back-up battery. Because of the different output voltages between vehicles, the battery protection level can be set from H to M or from M to L if there is a voltage protection code Fl shown on the panel. The battery protection level should be set to H if the product will keep working after turning off the car engine, or the product may drain the battery.
Solar Charging Management
To make sure your fridge is being charged by a solar panel, please turn the fridge on first. The battery icon will flash on the display screen to show the charging status. The fridge can be turned off while it is being charged. Press and hold button ![]() for over 3 seconds to check the battery status and volatage. An extension cable may be required to keep the fridge in a cool place (to avoid overheating) while the solar panel is in the sun. Input power for charging should be higher than the refrigerator power draw (about 40-45w), otherwise the optional battery will not charge at the same time. To ensure that solar charging power is higher than refrigerator working power, a 100-Watt solar panel is advised.
for over 3 seconds to check the battery status and volatage. An extension cable may be required to keep the fridge in a cool place (to avoid overheating) while the solar panel is in the sun. Input power for charging should be higher than the refrigerator power draw (about 40-45w), otherwise the optional battery will not charge at the same time. To ensure that solar charging power is higher than refrigerator working power, a 100-Watt solar panel is advised.
Battery Usage
- Optional Removable Battery: The lithium battery is back up power to keep the refrigerator working for short periods while off grid.
- Notice: When not using the battery power or fridge for a long time, please turn off the battery output. (Hold setting button for 3 Sec).
Maintain Battery Charge
-
- Home / Hotel: Use AC adapter to charge unit from AC outlet.
- Car / Boat: Use DC port to power the fridge and charge the battery.
- Outdoor Charge the battery with a solar panel (optional). Portable 12V power system / solar with / or petrol generator would be good companion.
Extended battery usage
-
- Cool down the fridge before your journey: It is always suggested to charge fridge battery and cool the fridge down in advance with the mains to DC adapter from the wall outlet the day before the trip.To prepare for off-grid fridge usage, place food and beverages inside fridge for cooling the day before. This will not only keep the optional battery more durable, but also save energy for outdoor activities once on battery mode.
- Disconnecting the Battery: The battery can be removed or disconnected with the side button. This prevents the battery from discharging. The product will work from the AC adapter or car outlet without the optional battery installed.Note: Please charge fully the optional battery before it is put into storage 1 month or more.
Food Storage
- Freezer (-4° F-32° F)(-20°C-0°C):
- Meat should be cut and packed properly when placed in the fridge.
- Do not put the fresh food and frozen food together.
- Do not store glass containers or other containers which seal in liquid in the freezer, to avoid explosion.
- Refrigerator (32° F-50° F)(0°C-10°C):
- Egg, butter, milk and bottle drinks can be stored.
- All food should be packed appropriately before being stored in the fridge.
- Place food in refrigerator after it gets cool in order to save energy.
Smart Control Fridge App Application Instruction
Downloading the “BRASS MONKEY FRIDGE” Application
- Using a pre-installed QR reader on your handheld smart device scan the QR code in the manual or on the carton, or search for the “BRASS MONKEY FRIDGE” APP in the iTunes App Store (for Apple devices) or Google store (Android Devices).
- Start the application and select the “Search” function.
- The application will prompt you to pair the fridge by pressing the set button on the fridge’s control panel. Once set button has been activated, the fridge will be paired with your smart device and the application will switch to a control panel allowing you to control the fridge’s functions.Please Scan the Qe code to download App
 Please Scan the Qe code to download App
Qr Code for Apple Devices
Qr Code for Android Device
CLEANING & MAINTENANCE
- Do not wash the product with water or soak.
- Please disconnect from power before cleaning the product to avoid electrical shock.
- Drain the product simply by removing the plug at the bottom.
- Clean it with a soft wet cloth.
If you will not use the product for a long period of time, ensure you:
- Turn it off and disconnect from power.
- Remove everything from inside (food, drinks, etc)
- Drain any remaining water by removing the drain plug, then wipe all internal surfaces with a soft cloth to ensure that they are clean and dry.
- Keep it stored away from wet or humid places.
TROUBLE SHOOTING
- The product is not working:
- If using the 240V AC to 12V DC adapter check the power supply is working
- If using the DC cable please ensure the cable still works.
- Check the power supply is working – Check if the plug and socket are connected
- Check the fuse – Check power switch on control panel is on
- Compressor starts delay protection for 3 minutes after turning on
- Food inside the product is frozen:
- Temperature is set too low
- Water flowing sound inside the tank:
- Refrigerant is flowing, this is normal
- Water drops around the case or door gap:
- When moisture in the air meets the lower temperature case it will naturally become liquefied and condensed Wipe away with a towel or soft cloth
- Code Ft displayed:
- Low voltage protection, which can be solved by setting the battery protection button from H to M or from M to L
- Code F2 displayed:
- Fan overload protection. Please turn off the product and restart it after 30 minutes. If the code displays again, please contact the place of purchase
- Code F3 displayed:
- Compressor frequent start protection. Please turn off the product and restart it after 30 minutes. If the code displays again, please contact the place of purchase
- Code F4 displayed:
- Compressor is overloaded or working at a low speed. Please turn off the product and restart it after 30 minutes. If the code displays again, please contact the place of purchase
- Code F5 displayed:
- High temperature compressor module protection. Please move the product to a ventilated area and turn it off for 30 minutes then restart it. If the code displays again, please contact the place of purchase
- Code F6 displayed:
- No parameter can be detected by the controller. Please restart the product. If the code displays again, please contact the place of purchase
- Code F7 / F8 displayed:
- Temperature sensor error protection. Please check the sensor terminal
The warranty for this product Is 3 years from date of purchase. During the warranty period the following are excluded from coverage:
- Intentional damage
- Damage by fire, flood, etc
- Damage or malfunction caused by incorrect usage and not following this user manual
- Damage or malfunction caused by disassembling
 report this ad
Distributed by:Tech Brands by Electus Distribution Pty. Ltd.320 Victoria Rd, Rydalmere, NSW 2116, AustraliaPh: 1300 738 555Intl: +61 2 8832 3200www.techbrands.comFax: 1300 738 500Made in China

[xyz-ips snippet=”download-snippet”]