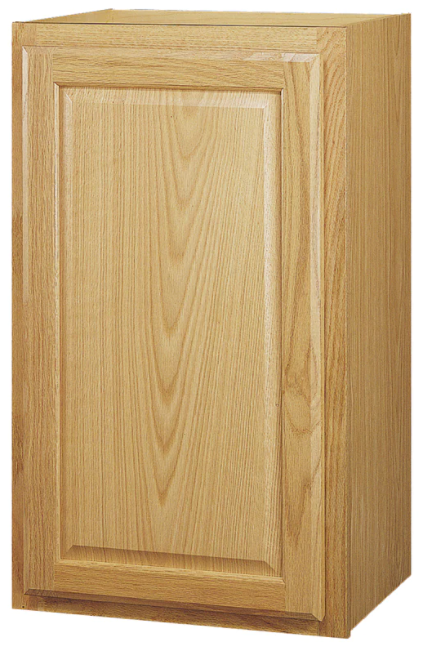
Cabinets Single Door Wall Cabinet
WARNING: SERIOUS OR FATAL INJURIES CAN OCCUR FROM FURNITURE TIP-OVER. TO HELP PREVENT TIP-OVER:
- Always use tip over restraints and/or wall anchors to secure furniture to the wall.
- Place heaviest items in the lowest drawers/bins or shelves.
- Do not set TV’s or other heavy objects on the top of this product.
- Never allow children to climb or hang on to the drawers/bins, doors or shelves of furniture.
- Never open more than one drawer at a time or defeat or remove any drawer interlock system.
PARTS LIST

| NO | QTY | DESCRIPTION |
| 1 | 1PC | Top Board |
| 2 | 1PC | Left Side Panel |
| 3 | 1PC | Right Side Panel |
| 4 | 1PC | Fixed Shelf |
| 5 | 1PC | Rear Cross Bar |
| 6 | 1PC | Bottom Board |
| 7 | 1PC | Door |
| 8 | 1PC | Back Board |
| NO | PARTS | QTY | DESCRIPTION | ||
| A | 6PCS | Cam Bolt | |||
| B | 6PCS | Cam Lock | |||
| c | 16PCS | Wood Dowel | |||
| D | 2PCS | Screw (3x14mm) | |||
| E | 1PC | Magnet | |||
| F | 10PCS | Screw (3x10mm) | |||
| G | 2PCS | Metal Hinge | |||
| H | 1PC | Magnet Plate | |||
| I | 1PC | Machine Screw (4x20mm) | |||
| J | 8D | 1PC | Knob | ||
| K | 14PCS | Screw (2.5x12mm) | |||
| L | 2PCS | Plastic Anchor | |||
| M | 2PCS | Screw (4x45mm) | |||
| 1PC | Wall Mounting Paper Template |
TOOLS NEEDED FOR ASSEMBLY: FLAT & PHILLIPS SCREWDRIVER (NOT INCLUDED) THE USE OF A POWER SCREWDRIVER IS NOT RECOMMENDED FOR ASSEMBLY DO NOT USE ITEM IF ANY PARTS ARE MISSING OR DAMAGED.
STEP 1:

- Screw 1 cam bolt (A) into cam bolt hole on left side panel (2).
- Screw 1 cam bolt (A) into cam bolt hole on right side panel (3).
- Attach 2 metal hinges (G) to right side panel (3) by inserting 4 screws (F) through holes on metal hinges (G), then tighten to right side panel (3).
STEP 2:
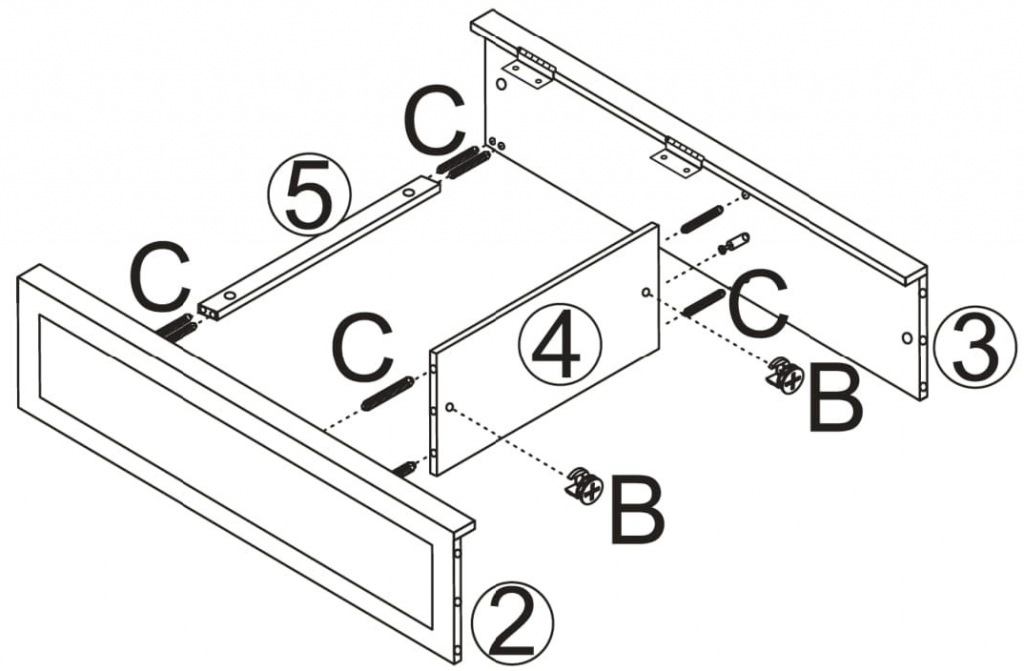
- Insert 4 wood dowels (C) into holes on ends of rear cross bar(5).
- Insert 4 wood dowels (C) into holes on ends of shelf (4 ).
- Attach left side panel (2) to rear cross bar (5) and fixed shelf (4) by inserting wood dowels (C) into wood dowel holes and inserting 1 cam bolt (A) into cam lockhole.
- Insert 1 cam lock (B) into cam lock hole on fixed shelf (4), then rotate clockwise to secure cam bolt (A) in place.
- Repeat above steps to assemble right side panel (3) to rear cross bar (5) and fixed shelf (4).
STEP 3:

- Screw 2 cam bolts (A) into cam bolt holes on bottom board (6).
- Screw 2 cam bolts (A) into cam bolt holes on top board (1 ).
- Attach 1 magnet (E) to top board (1) by inserting 2 screws (D) through holes on magnet (E), then tighten to top board (1 ).
STEP4:
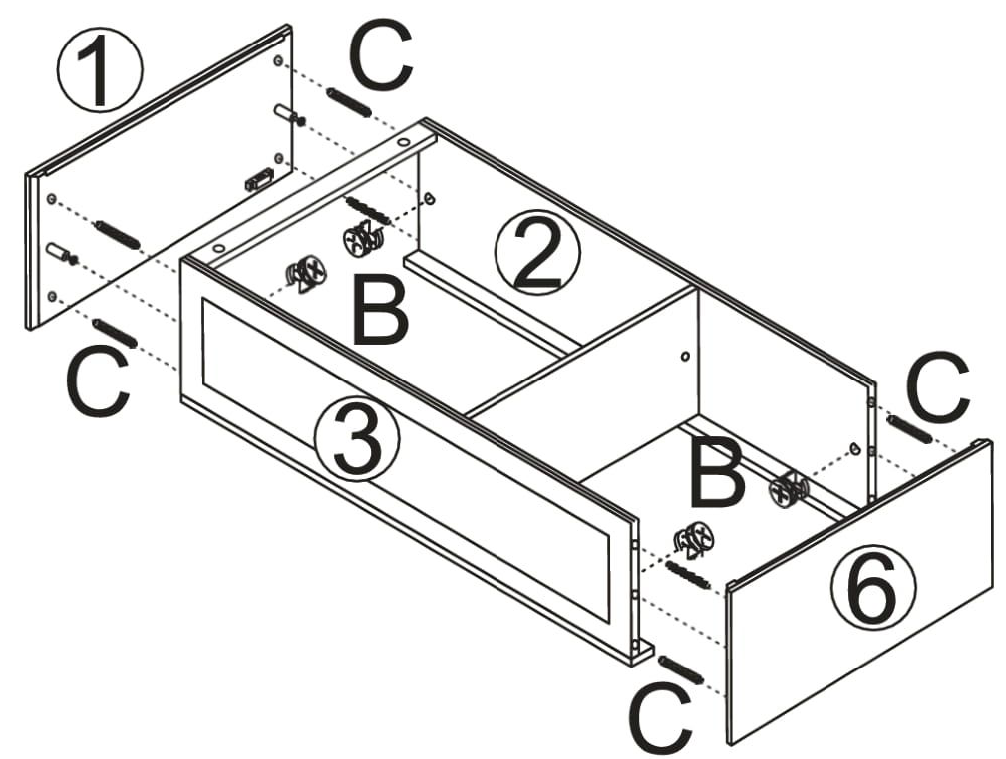
- Insert 4 wood dowels (C) into wood dowel holes on the bottom board (6).
- Attach bottom board (6) to pre-assembled unit by inserting wood dowels (C) into wood dowel holes and inserting cam bolts (A) into cam lock holes on side panels (2) and (3).
- Insert 2 cam locks (B) into cam lock holes on side panels (2) and (3), then rotate clockwise to secure cam bolts (A) in place.
- Repeat above steps to assemble top board (1) to pre-assembled unit.
STEP 5:

- Attach back board (8) to pre-assembled cabinet by inserting 14 screws (K) through holes on back board (8), then tighten to back of cabinet.
STEP 6:
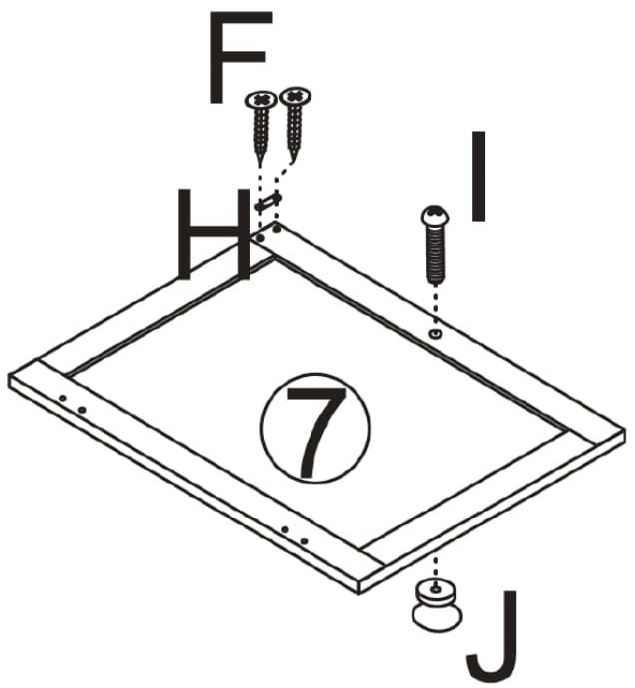
- Attach magnet plate (H) to door (7) by inserting 2 screws (F) through holes on magnet plate (H), then tighten to door (7).
- Attach knob (J) to door (7) by inserting 1 machine screw (I) through hole on door (7), then tighten to knob (J).
STEP 7:
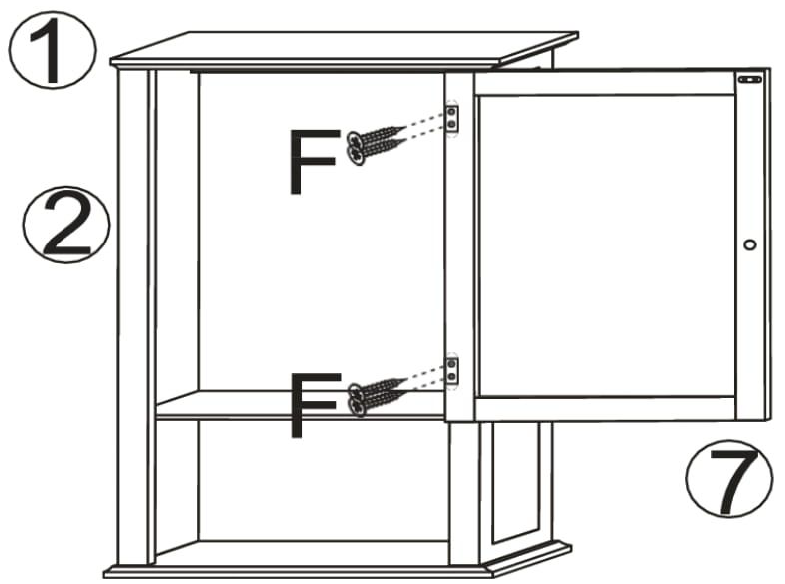
- Attach door (7) to right side panel (3) by inserting 4 screws (F) through holes on metal hinges, then tighten to right side panel (3).
STEP 8:
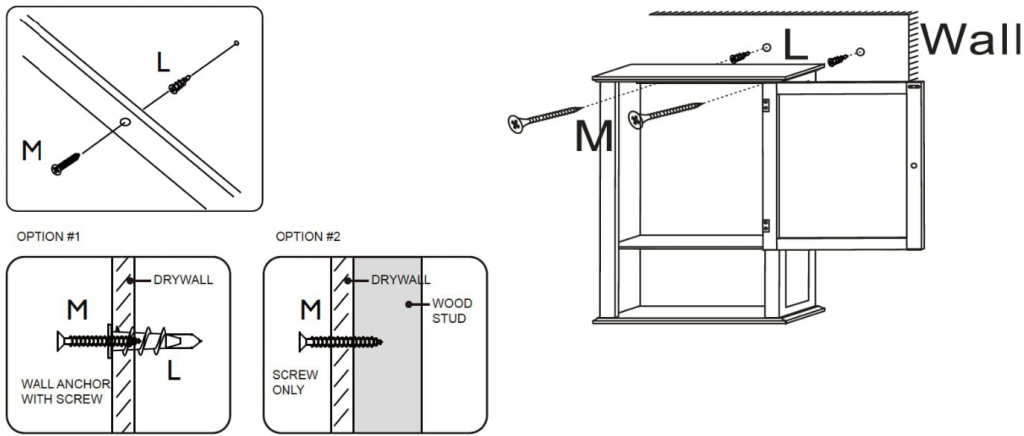
Option 1: Securing to Drywall
- Using wall mounting paper template to determine position, screw 2 plastic anchors (L) into drywall.
- Insert 2 screws (M) through holes on inside of cabinet and into plastic anchors (L) and tighten.
Option 2: Securing to Drywall and Wood Stud
- Insert 2 screws (M) through holes on inside of cabinet, then tighten through drywall and into wood stud.
ATTENTION ADULTS: Cabinet should be checked periodically for damage or loose screws/parts. Take appropriate action necessary to correct hazards such as tightening of screws and taking any damaged parts away from children.
WARNING: Please make sure your item is secured to the wall, per assembly instructions.
CARE INSTRUCTIONS:Wipe clean with a water dampened cloth. Wipe dry with clean cloth.
IMPORTANT: Keep assembly instructions for future reference.
![]()
[xyz-ips snippet=”download-snippet”]