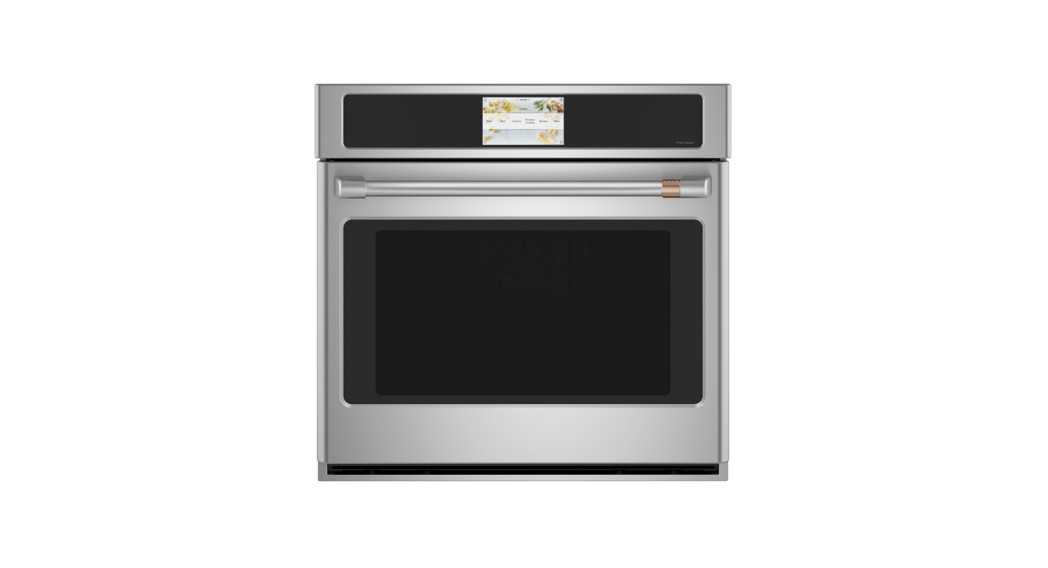
CTS90DM Direct Air Convection Built-In Electric Wall Oven
Owner’s Manual
TMOwner’s Manual
Direct Air Convection Built-In Electric Wall OvenModels: CTS90DM, CTS90DP (30″ Single Oven) CTD90DM, CTD90DP (30″ Double Oven)
ContentsSafety Information. . . . . . . . . . . . . . . . . . . . . . . . . . . . . . .3Using the Oven Oven Controls . . . . . . . . . . . . . . . . . . . . . . . . . . . . . . . . .6 Double Oven . . . . . . . . . . . . . . . . . . . . . . . . . . . . . . . . . .7 Settings . . . . . . . . . . . . . . . . . . . . . . . . . . . . . . . . . . . . . .7 Sabbath . . . . . . . . . . . . . . . . . . . . . . . . . . . . . . . . . . . . . .9 Oven Racks . . . . . . . . . . . . . . . . . . . . . . . . . . . . . . . . . .10 Aluminum Foil and Oven Liners. . . . . . . . . . . . . . . . . . .12 Cookware . . . . . . . . . . . . . . . . . . . . . . . . . . . . . . . . . . . .12 Cooking Modes . . . . . . . . . . . . . . . . . . . . . . . . . . . . . . .13 Probe . . . . . . . . . . . . . . . . . . . . . . . . . . . . . . . . . . . . . . .15 Cooking Guide . . . . . . . . . . . . . . . . . . . . . . . . . . . . . . . .16 Air Fry Guide . . . . . . . . . . . . . . . . . . . . . . . . . . . . . . . . .18 Dehydrating Guide . . . . . . . . . . . . . . . . . . . . . . . . . . . . .19
Care And Cleaning Cleaning The Oven Exterior . . . . . . . . . . . . . . . . . . . .20 Cleaning The Oven Interior. . . . . . . . . . . . . . . . . . . . .21 Probe . . . . . . . . . . . . . . . . . . . . . . . . . . . . . . . . . . . . . . .22 Oven Light . . . . . . . . . . . . . . . . . . . . . . . . . . . . . . . . . . .22 Oven Door . . . . . . . . . . . . . . . . . . . . . . . . . . . . . . . . . . .23Troubleshooting Tips . . . . . . . . . . . . . . . . . . . . . . . . . . .24Limited Warranty . . . . . . . . . . . . . . . . . . . . . . . . . . . . . . .26Accessories . . . . . . . . . . . . . . . . . . . . . . . . . . . . . . . . . . .27Consumer Support . . . . . . . . . . . . . . . . . . . . . . . . . . . . .28
Write the model and serial numbers here: Model # _______________________________ Serial # _______________________________ You can find them on a label on the side trim or on the front of the (lower) oven behind the oven door.EspañolPara consultar una version en español de este manual de instrucciones, visite nuestro sitio de internet cafeappliances.com.49-2000791 Rev. 0 10-20 GEA
THANK YOU FOR MAKING CAFÉ A PART OF YOUR HOME.We take pride in the craftsmanship, innovation and design that goes into every Café product, and we think you will too. Among other things, registration of your appliance ensures that we can deliverimportant product information and warranty details when you need them. Register your Café appliance now online. Helpful websites are available in the Consumer Support section of this Owner’s Manual. You may also mail in the pre-printed registration card included in thepacking material.TM
SAFETY INFORMATION
IMPORTANT SAFETY INFORMATIONREAD ALL INSTRUCTIONS BEFORE USING THE APPLIANCEWARNING Read all safety instructions before using the product. Failure to follow these instructions may resultin fire, electrical shock, serious injury or death.
WARNING GENERAL SAFETY INSTRUCTIONS
8VHWKLVDSSOLDQFHRQOIRULWVLQWHQGHGSXUSRVHDV described in this Owner’s Manual.%HVXUHRXUDSSOLDQFHLVSURSHUOLQVWDOOHGDQG grounded by a qualified installer in accordance with the provided installation instructions.‘RQRWDWWHPSWWRUHSDLURUUHSODFHDQSDUWRIRXU oven unless it is specifically recommended in this manual. All other servicing should be performed by a qualified technician.%HIRUHSHUIRUPLQJDQVHUYLFHGLVFRQQHFWWKH power supply at the household distribution panel by removing the fuse or switching off the circuit breaker.‘RQRWOHDYHFKLOGUHQDORQH²FKLOGUHQVKRXOGQRW be left alone or unattended in an area where an appliance is in use. They should never be allowed to climb, sit or stand on any part of the appliance.CAUTION Do not store items of interestto children in cabinets above an oven – children climbing on the oven to reach items could be seriously injured.8VHRQOGUSRWKROGHUV²PRLVWRUGDPSSRWKROGHUV on hot surfaces may result in burns from steam. Do not let pot holders touch hot heating elements. Do not use a towel or other bulky cloth in place of pot holders.1HYHUXVHRXUDSSOLDQFHIRUZDUPLQJRUKHDWLQJ the room.
‘RQRWWRXFKWKHKHDWLQJHOHPHQWVRUWKHLQWHULRU surface of the oven. These surfaces may be hot enough to burn even though they are dark in color. During and after use, do not touch, or let clothing or other flammable materials contact any interior area of the oven; allow sufficient time for cooling first. Other surfaces of the appliance may become hot enough to cause burns. Potentially hot surfaces include the oven vent opening, surfaces near the opening and crevices around the oven door.‘RQRWKHDWXQRSHQHGIRRGFRQWDLQHUV3UHVVXUH could build up and the container could burst, causing an injury.‘RQRWXVHDQWSHRIIRLORUOLQHUWRFRYHUWKH oven bottom or anywhere in the oven, except as described in this manual. Oven liners can trap heat or melt, resulting in damage to the product and risk of shock, smoke or fire.$YRLGVFUDWFKLQJRULPSDFWLQJJODVVGRRUVRUFRQWURO panels. Doing so may lead to glass breakage. Do not cook on a product with broken glass. Shock, fire or cuts may occur.&RRNPHDWDQGSRXOWUWKRURXJKO²PHDWWRDWOHDVW an internal temperature of 160°F and poultry to at least an internal temperature of 180°F. Cooking to these temperatures usually protects against foodborne illness.
WARNING KEEP FLAMMABLE MATERIALS AWAY FROM THE OVENFailure to do so may result in fire or personal injury.
‘RQRWVWRUHRUXVHIODPPDEOHPDWHULDOVLQRUQHDU an oven, including paper, plastic, pot holders, linens, wall coverings, curtains, drapes and gasoline or other flammable vapors and liquids.1HYHUZHDUORRVHILWWLQJRUKDQJLQJJDUPHQWVZKLOH using the appliance. These garments may ignite if they contact hot surfaces, causing severe burns.
‘RQRWOHWFRRNLQJJUHDVHRURWKHUIODPPDEOH materials accumulate in or near the oven. Grease in the oven or near the oven may ignite.Remote Operation – This appliance is configurable to allow remote operation at any time. Do not store any flammable materials or temperature sensitive items inside of the appliance.
READ AND SAVE THESE INSTRUCTIONS
49-2000791 Rev. 0
3
SAFETY INFORMATION
IMPORTANT SAFETY INFORMATIONREAD ALL INSTRUCTIONS BEFORE USING THE APPLIANCE
WARNING IN THE EVENT OF A FIRE, TAKE THE FOLLOWING STEPS TO PREVENT INJURY AND FIRE SPREADING
‘RQRWXVHZDWHURQJUHDVHILUHV1HYHUSLFNXSD flaming pan.,IWKHUHLVDILUHLQWKHRYHQGXULQJEDNLQJVPRWKHU the fire by closing the oven door and turning the oven off or by using a multi-purpose dry chemical or foam-type fire extinguisher.
,IWKHUHLVDILUHLQWKHRYHQGXULQJVHOIFOHDQWXUQ the oven off and wait for the fire to go out. Do not force the door open. Introduction of fresh air at selfclean temperatures may lead to a burst of flame from the oven. Failure to follow this instruction may result in severe burns.
WARNING OVEN SAFETY INSTRUCTIONS
6WDQGDZDIURPWKHRYHQZKHQRSHQLQJWKHRYHQ door. Hot air or steam which escapes can cause burns to hands, face and/or eyes..HHSWKHRYHQYHQWXQREVWUXFWHG.HHSWKHRYHQIUHHIURPJUHDVHEXLOGXS*UHDVHLQ the oven may ignite.3ODFHRYHQUDFNVLQGHVLUHGORFDWLRQZKLOHRYHQLV cool. If rack must be moved while oven is hot, do not let pot holder contact hot heating element in oven.:KHQXVLQJFRRNLQJRUURDVWLQJEDJVLQWKHRYHQ follow the manufacturer’s directions.
3XOOLQJRXWWKHVWDQGDUGUDFNVWRWKHLUVWRSORFNV or the extension rack to its fully open position is a convenience in lifting heavy foods. It is also a precaution against burns from touching hot surfaces of the door or oven walls.‘RQRWOHDYHLWHPVVXFKDVSDSHUFRRNLQJXWHQVLOV or food in the oven when not in use. Items stored in an oven can ignite.1 HYHUSODFHFRRNLQJXWHQVLOVSL]]DRUEDNLQJVWRQHV or any type of foil or liner on the oven floor. These items can trap heat or melt, resulting in damage to the product and risk of shock, smoke or fire.
WARNING SELF-CLEANING OVEN SAFETY INSTRUCTIONS
The self-cleaning feature operates the oven at temperatures high enough to burn away food soils in the oven. Follow these instructions for safe operation.
‘RQRWWRXFKRYHQVXUIDFHVGXULQJVHOIFOHDQRSHUDWLRQ.HHSFKLOGUHQDZDIURPWKHRYHQGXULQJ self-cleaning. Failure to follow these instructions may cause burns.
%HIRUHRSHUDWLQJWKHVHOIFOHDQFFOHZLSHJUHDVH and food soils from the oven. Excessive amount of grease may ignite, leading to smoke damage to your home.
%HIRUHVHOIFOHDQLQJWKHRYHQUHPRYHVKLQVLOYHU colored oven racks (on some models), the probe, any aluminum foil, and any broiler pan, grid, and other cookware. Only porcelain coated oven racks may be left in the oven.
READ AND SAVE THESE INSTRUCTIONS
4
49-2000791 Rev. 0
SAFETY INFORMATION
IMPORTANT SAFETY INFORMATIONREAD ALL INSTRUCTIONS BEFORE USING THE APPLIANCE
WARNING SELF-CLEANING OVEN SAFETY INSTRUCTIONS (Cont.)
,IWKHVHOIFOHDQLQJPRGHPDOIXQFWLRQVWXUQWKH oven off and disconnect the power supply. Have it serviced by a qualified technician.
‘RQRWXVHDSURWHFWLYHFRDWLQJWROLQHWKHRYHQDQG do not use commercial oven cleaner unless certified for use in a self-cleaning oven.
‘RQRWFOHDQWKHGRRUJDVNHW7KHGRRUJDVNHWLV essential for a good seal. Care should be taken not to rub, damage or move the gasket.
The remote enable equipment installed on this oven has been tested and found to comply with the limits forD&ODVV%GLJLWDOGHYLFHSXUVXDQWWRSDUWRIWKH)&& Rules. These limits are designed to:(a) provide reasonable protection against harmful interference in a residential installation. This equipment generates, uses and can radiate radio frequency energy and, if not installed and used in accordance with the instructions, may cause harmful interference to radio communications. However, there is no guarantee that interference will not occur in a particular installation. If this equipment does cause harmful interference to radio or television reception, which can be determined by turning the equipment off and on, the user is encouraged to try to correct the interference by one or more of the following measures:
5HRULHQWRUUHORFDWHWKHUHFHLYLQJDQWHQQD,QFUHDVHWKHVHSDUDWLRQEHWZHHQWKHHTXLSPHQWDQG receiver.&RQQHFWWKHHTXLSPHQWLQWRDQRXWOHWRQDFLUFXLW different from that to which the receiver is connected.&RQVXOWWKHGHDOHURUDQH[SHULHQFHGUDGLR79 technician for help.(b) accept any interference received, including interference that may cause undesired operation of the device.Note that any changes or modifications to the wireless communication device installed on this oven that are not expressly approved by the manufacturer could void the user’s authority to operate the equipment.
How to Remove Protective Shipping Film and Packaging Tape
Carefully grasp a corner of the protective shipping film with your fingers and slowly peel it from the appliance surface. Do not use any sharp items to remove the film. Remove all of the film before using the appliance for the first time.
To assure no damage is done to the finish of the product, the safest way to remove the adhesive from packaging tape on new appliances is an application of a household liquid dishwashing detergent. Apply with a soft cloth and allow to soak.
NOTE: The adhesive must be removed from all parts. It cannot be removed if it is baked on.
NOTE: Some cooking functions and features are not available until after you WiFi connect your new oven to your local home wireless network. Please follow the instructions on the oven control and the WiFi & Remote Enable section of this guide. This provides capability to use SmartHQ app functions and ensures that the oven has the latest software.
READ AND SAVE THESE INSTRUCTIONS
49-2000791 Rev. 0
5
USING THE OVEN: Oven Controls
Oven ControlsControl graphics are representative; your oven may have alternate graphic appearances.12:30 PM
UPPER OVEN LOWER OVEN
12:30 PMUPPER OVEN
GET CONNECTED
12:30 PMLOWER OVEN
Bake
Broil Convection
Precision Cooking
Air Fry
More
Bake
Broil
Convection
Precision Cooking
Air Fry
More
12:30 PMGET CONNECTED
Bake
Broil
Convection
Precision Cooking
Air Fry
More
Single Wall Oven Main Menu
Double Wall Oven Main MenusUpper Oven and Lower OvenWhen using a double oven you can set separate modes in each oven. The selected oven will appear above the cooking modes. NOTE: If using a single oven, there will not be an oven selection.BakeThis option allows the user to access the traditional bake mode.Broil%URLO FDQEHVHOHFWHGWRDFFHVV%URLO/RZDQG%URLO+LJK See the Cooking Modes section for more information.Convection7KLVRSWLRQDOORZVRXWRXWLOL]HWKHFRQYHFWLRQVVWHP to cook in a variety of modes. See the Cooking Modes section for more information.Precision Cooking3UHFLVLRQ&RRNLQJLVDVXLWHRIFXVWRPL]HGFRRNLQJ cycles that have been designed for specific foods. The display will guide you through setting the oven and food appropriately for the cycle selected. Precision cooking cycles vary based on food type; see the Cooking Modes section for more detailed information.Air FryThis allows the user to access the Air Fry cooking mode. See the Cooking Modes section for more information.MoreSelect this option to access the Dehydrate, Proof, Warm, Self Clean, and Steam Clean options.Oven LightTo turn on or off the oven cavity lights, press the %RWK cavity lights will be illuminated if using a double oven.SettingsPress the to access the Settings. See the Settings section for more information.
FavoriteThis option allows the user to save their favorite cycles for easy access in the future. After selecting a cooking mode and setting the temperature and any timers, press the to save it as a favorite for future use. After saving a cycle, press the on the main menu to quickly access the saved mode.Kitchen TimerThis feature works as a countdown timer. Press the , select the amount of time for the timer to operate, andpress Set. The oven will continue to operate once the timer countdown is complete. To turn off the timer, select the and press Cancel.Cook TimeThis function counts down cooking time and turns off the oven when the cooking time is complete. Press the during a cycle, select the amount of cooking time, and press Start7KLVFDQRQOEHXVHGLQ%DNH&RQYHFWLRQ %DNH&RQYHFWLRQ5RDVWDQG$LU)UPRGHVDelay TimeThis feature delays the start time for an oven cycle.8VHWKLVIHDWXUHWRVHWDWLPHZKHQRXZDQWWKHRYHQ to start. Select a cycle, then press the . Select Delay Time to set the time of day for the oven to turn on and press Set. A cook time can also be programmed if desired.Wi-Fi & Remote EnablePress GET CONNECTED to connect your oven to Wi-Fi. This option allows you to download content to your oven and control it remotely. The oven must be connected to Wi-Fi before Remote Enable can be activated. For instructions on how to connect your oven, see the Wi-Fi Connect/Remote Enable section under Settings in this manual.
6
49-2000791 Rev. 0
USING THE OVEN: Double Oven / Settings
Double OvenWhen using both cavities to cook, the control will allow you to switch back and forth between the upper and lower oven to review the cycle selection for each. When viewing the cooking mode screen you can access the alternate cavity by pressing on the banner at the top or bottom of the screen.
12:30 PM
TO UPPER OVEN
12:30 PM
BAKE 350°F
BAKEPREHEATED350°F
BAKEPREHEATED400°F
TO LOWER OVEN
CANCEL
Settings
8SSHU2YHQ%DNH&FOH
BAKE 400°F
CANCEL/RZHU2YHQ%DNH&FOH
There are numerous settings that are accessed by pressing12:30 PMSETTINGS Wi-Fi & REMOTE ENABLE SET CLOCK LOCK CONTROL SABBATH SOUND
in the top right corner of the main screen.12:30 PMSETTINGSSABBATH SOUND DISPLAY COOKING SYSTEM
Slide up and down to access all the settings
Wi-Fi & Remote Enable
This appliance is configurable to allow remote operation at any time. Do not store any flammable materials orWHPSHUDWXUHVHQVLWLYHLWHPVLQVLGH%XVLQJWKH:L)L Connect feature, you will be able to control essential oven operations such as temperature settings, timers and cooking modes using your smartphone or tablet.*Select the then Wi-Fi & Remote Enable – follow the instructions on your oven display and phone app. It is necessary to turn on Wi-Fi before using Remote Enable on your oven.Connecting your Wi-Fi Connect Enabled oven1. Have your smart phone or tablet ready with the ability to access the internet and download the SmartHQ app.2. You will need to know the password of your home Wi-Fi router. Have this password ready while you are setting up your Café oven.3. On your smart phone or tablet, visit cafeppliances.com/connect to learn more about connected appliance features and to download the app to connect to your oven.
4. Follow the onscreen instructions in the app to connect your Café oven. When connected, your oven should show that it is connected to your home Wi-Fi network.5. If there are issues connecting wirelessly to your oven, visit cafeppliances.com for assistance regarding oven wireless connectivity.To connect additional smart devices, repeat steps 3 and 4.Remote Starting your OvenTo be able to start the oven remotely once connected to Wi-Fi, press Remote Enable on the main menu or access Wi-Fi & Remote Enable in the settings menu and turn Remote Enable on. The oven can now be started remotely using a connected device. The icon must be active to start the oven remotely. To disconnect your phone from Remote Enable, access the Wi-Fi & Remote Enable settings and turn Remote Enable off.NOTE: )RRGVWKDWVSRLOHDVLO²VXFKDVPLONHJJVILVK VWXIILQJVSRXOWUDQGSRUN²VKRXOGQRWEHDOORZHGWR sit for more than 1 hour before or after cooking. RoomWHPSHUDWXUHSURPRWHVWKHJURZWKRIKDUPIXOEDFWHULD%H sure that the oven light is off because heat from the bulb will speed harmful bacteria growth.
* Compatible Apple or Android devices and home Wi-Fi network required.
49-2000791 Rev. 0
7
USING THE OVEN: Settings / Oven Door Camera
Settings (Cont.)
There are numerous settings that are accessed by pressing in the top right corner of the main screen.
12:30 PMSETTINGS Wi-Fi & REMOTE ENABLE SET CLOCK LOCK CONTROL SABBATH SOUND
12:30 PMSETTINGSSABBATH SOUND DISPLAY COOKING SYSTEM
Slide up and down to access all the settings
Set ClockThis feature allows you to set the clock and specifies how the time of day will be displayed. Options are for a standard 12-hour clock with AM and PM selections or 24-hour military time display.Lock ControlSelect this option in order to lock the LCD from any undesired screen selections. To unlock the screen, pressand press Unlock on the next screen.SabbathSabbath mode disables the oven lights (the oven light will not turn on when the door is opened), all sounds (the control will not beep when the screen is pressed), &RQYHFWLRQPRGHV%URLOPRGHV:DUP3URRIDQGDOO time functions. Sabbath mode can only be used with WUDGLWLRQDO%DNH7KLVIHDWXUHFRQIRUPVWRWKH6WDU. Jewish Sabbath requirements. Please reference the Sabbath Mode section for more information.SoundThis setting screen allows you to change the volume, the end of cycle tone, and turn on or off the touch sound.
DisplayThis screen shows the options for brightness, clock off, energy saver, and screen time out. Clock off will remove the clock from the display when the screen is inactive, but it will be shown after pressing the screen. The screen can be set to never time out or it can be set to shut off after 1, 5, or 10 minutes.CookingThe oven is set to Fahrenheit, however, in this setting the cooking unit can be changed to Celsius.Auto Recipe Conversion can be turned on in order to automatically reduce the programmed cooking WHPSHUDWXUHIRU&RQYHFWLRQ%DNHRU&RQYHFWLRQ%DNH 0XOWL1RWHWKDWWKLVZLOORQOUHGXFHWKHFRRNLQJ temperature, not the baking time.When the 12 Hour Shut Off option is turned on, it will automatically shut off the oven after 12 hours of continuous use.Adjust Temperature allows the oven temperature to be adjusted up to 35°F hotter or down to 35°F FRROHU8VHWKLVIHDWXUHLIRXEHOLHYHRXURYHQ temperature is too hot or cold and wish to change it. For double ovens, the upper and lower oven temperatures are adjusted separately. Do not use thermometers, such as those found in grocery stores, to check the temperature setting of your oven. These thermometers may vary 2040 degrees.SystemThis screen allows you to clear your saved user data and shows the current software version.
Oven Door Camera
The Oven Door Camera allows for remote viewing of the center of the oven cavity using the SmartHQ app. Download the latest SmartHQ app and follow instructions in the app to connect your range. From the app’s home page, select your range, then tap on the camera icon to start the camera stream to your smart device. The oven lights will illuminate while the camera is streaming. The camera stream will stop if the oven door is opened, and is not allowed during certain modes such as Proof and Self Clean.
8
49-2000791 Rev. 0
USING THE OVEN: Settings / Sabbath
Sabbath
Sabbath mode disables the oven lights (the oven light will not turn on when the door is opened), all sounds (the control ZLOOQRWEHHSZKHQWKHVFUHHQLVSUHVVHG&RQYHFWLRQPRGHV%URLOPRGHV:DUP3URRIDQGDOOWLPHIXQFWLRQV6DEEDWK PRGHFDQRQOEHXVHGZLWKWUDGLWLRQDO%DNH7KLVIHDWXUHFRQIRUPVWRWKH6WDU.-HZLVK6DEEDWKUHTXLUHPHQWVNOTE: If a power outage occurs during when the oven is in Sabbath Mode, the unit will return to Sabbath Mode when power is restored.
Entering Sabbath ModePress the on the main screen to access the Settings menu and scroll down to Sabbath.Start a Sabbath Bake8VHWKHNHSDGRQWKHVFUHHQWRHQWHUWKHWHPSHUDWXUH WKDWRXZRXOGOLNHWRXVHIRU6DEEDWK%DNH2QFHWKH temperature is set, press the to set the cook time for the cycle in hours and minutes. If using a double oven, you can then set the temperature and time desired for the other cavity by selecting it to the left of the temperature display. If a timer is not set, the oven will start a bake cycle during Sabbath mode and continue until Sabbath mode is turned off. You can also set whether the oven light will be on or off by pressing the on this screen. Once you have programmed the temperature and time, press Start. The next screen will display the settings thatRXSURJUDPPHGIRURXU6DEEDWK%DNH
12:30 PM
SABBATH i
BAKE TEMP
1
— °F
4
7
2
3
5
6
8
9
0 START
UPPER OVEN LOWER OVEN
12:30 PM
SABBATH i
BAKE TEMP
1
— °F
4
7
2
3
5
6
8
9
0 START
Programming Screens
Adjusting the Temperature During a Sabbath Bake
SABBATH
12:30 PM
EXIT SABBATH
If the temperature needs to be adjusted after SURJUDPPLQJWKHRYHQIRUD6DEEDWK%DNHSUHVVRQH of the temperature icons displayed on the Sabbath cycle screen and press Enter. This will allow you to adjust the WHPSHUDWXUHIRUWKHFFOH1RWHWKDWWKHGLVSODZLOOQRW show that the oven temperature has been changed.Exit the Sabbath Mode
ENTER 200°F
250°F
Oven On 300°F
350°F
TURN OFF 400°F
Select temperature, then press ENTER to edit.
SABBATH
12:30 PM
EXIT SABBATH
To exit Sabbath mode, either press the X in the upper right corner if in the programming screen, or press Exit Sabbath if in the cycle screen. There is also an option to turn off the cycle when on the cycle screen by pressing Turn Off, but your oven will still remain in Sabbath mode until you exit the mode. NOTE: If a power outage occurs while the oven is in Sabbath Mode, the unit will return to Sabbath Mode when power is restored, however the oven will return to the off state even if it was in the middle of a bake cycle when the power outage occurred.
ENTER 200°F
Upper Oven On 5:30
250°F
300°F
350°F
TURN OFF 400°F
ENTER 200°F
Lower Oven On 5:30
250°F
300°F
350°F
TURN OFF 400°F
Select temperature, then press ENTER to edit.
Single and Double Oven Sabbath Cycle Screens
49-2000791 Rev. 0
9
USING THE OVEN: Oven Racks
Oven RacksYour oven has six rack positions. Recommended rack positions for various types of foods are provided in the Cooking Guide. Adjusting rack position is one way to impact cooking results. For example, if you would prefer darker tops on cakes, muffins, or cookies, try moving food one rack position higher. If you find foods are too brown on top try moving them down next time.When baking with multiple pans and on multiple racks, ensure there is sufficient space between pans to allow air to flow.Your Oven may have extension racks and/or traditional flat racks.To avoid possible burns, place the racks in the desired position before you turn the oven on.Flat RacksWhen placing and removing cookware, pull the rack out to the bump (stop position) on the rack support.To remove a rack, pull it toward you, tilt the front end up and pull it out.To replace, place the curved end of the rack (stop-locks) onto the oven supports, tilt up the front of the rack and push the rack in.Racks may become difficult to slide, especially after a self-clean. Put some vegetable oil on a soft cloth or paper towel and rub onto the left and right edges.NOTE: 8VLQJRWKHUFRRNLQJRLOVZLOOFDXVHDGLVFRORULQJ or a rust like color residue on the racks and cavity sides. To clean this residue, use a soap and water or a vinegar and water solution. Rinse with clean water and dry with a soft cloth.
10
49-2000791 Rev. 0
USING THE OVEN: Oven Racks/ Aluminum Foil and Oven Liners
Oven Racks (Cont.)Extension RacksAlways pull the rack out by its upper front rail to its fully open position, when placing or removing cookware. Extension racks cannot be used in the top rack position.If extension racks are difficult to extend, lubricate the racks with the graphite lubricant provided with your oven. Remove the rack from the oven, remove debris in the side tracks with a paper towel, shake the graphite lubricant and place 4 small drops on the two bottom tracks of the left and right sides. Open and close the rack several times to distribute the lubricant.To order additional graphite lubricant, read the Accessories section of the manual.To Remove An Extension Rack:1. Make sure the rack is pushed all the way into the oven so that side paddles on the rack disengage from the oven support.2. Slide the rack toward you to the bump (stop position) on the rack support.3. Firmly grasp both sides of the rack frame and the sliding rack, tilt the front end up and pull it out.To Replace An Extension Rack:1. Firmly grasp both sides of the rack frame and the sliding rack.2. Place the curved end of the rack (stop-locks) onto the oven supports, tilt up the front of the rack and push it in as far as it will go.If extension racks are difficult to replace or remove, wipe the oven rack supports with vegetable oil. Do not wipe oil on the rack slides.NOTE: 8VLQJRWKHUFRRNLQJRLOVZLOOFDXVHDGLVFRORULQJ or a rust like color residue on the racks and cavity sides. To clean this residue, use a soap and water or a vinegar and water solution. Rinse with clean water and dry with a soft cloth.To Lubricate the Paddle:Shake lubricant and apply to the moving parts of the paddle mechanisms as shown.
Fully Open Position
8SSHU)URQW Rail
Grasp here
Aluminum Foil and Oven Liners
CAUTION Do not use any type of foil or oven liner to cover the oven bottom. These items can trap heator melt, resulting in damage to the product and risk of shock, smoke or fire. Damage from improper use of these items is not covered by the product warranty.Foil may be used to catch spills by placing a sheet on a lower rack, several inches below the food. Do not use more IRLOWKDQQHFHVVDUDQGQHYHUHQWLUHOFRYHUDQRYHQUDFNZLWKDOXPLQXPIRLO.HHSIRLODWOHDVW´IURPRYHQZDOOV to prevent poor heat circulation.
49-2000791 Rev. 0
11
USING THE OVEN: Cookware Guidelines / Oven Cooking Modes
Cookware Guidelines
7KHPDWHULDOILQLVKDQGVL]HRIFRRNZDUHDIIHFWEDNLQJ performance.Dark, coated and dull pans absorb heat more readily than light, shiny pans. Pans that absorb heat more readily can result in a browner, crisper, and thicker crust. If using dark and coated cookware check food earlier than minimum cook time. If undesirable results are obtained with this type of cookware consider reducing oven temperature by 25º F next time.
Shiny pans can produce more evenly cooked baked goods such as cakes and cookies.Glass and ceramic pans heat slowly but retain heat well. These types of pans work well for dishes such as pies and custards.Air insulated pans heat slowly and can reduce bottom browning..HHSFRRNZDUHFOHDQWRSURPRWHHYHQKHDWLQJCookware used in broil modes and air fry must be broilsafe.
Oven Cooking Modes
Your new oven has a variety of cooking modes to help you get the best results. These modes are described below. Refer to the Cooking Guide section for recommendations for specific foods. Remember, your new oven may perform differently than the oven it is replacing.
Baking and Roasting Modes
Convection Bake Multi Rack
Select a mode for baking and roasting based on the type and quantity of food you are preparing. When preparing baked goods such as cakes, cookies, and pastries always preheat the oven first. Follow recipe recommendations for food placement. If no guidelines are provided, center food in the oven.Traditional BakeThe traditional bake mode is intended for single rack cooking. This mode uses heat primarily from the lower element but also from the upper element to cook food. To use this mode press the Bake pad, enter a temperature, and then press Start. Preheating is generally recommended when using this mode.Convection Bake Single Rack with Direct Air7KH&RQYHFWLRQ%DNHPRGHLVLQWHQGHGIRUVLQJOHUDFN cooking. This mode uses heat from the lower element and also the upper and rear elements, along with air movement directly down from the top of the oven to enhance evenness. Your oven is equipped with Auto Recipe Conversion, so it is not necessary to convert the temperature when using this mode. To use this mode press the Bake pad under Convection, enter a temperature, and then press Start. Preheating is generally recommended when using this mode.
7KH&RQYHFWLRQ%DNH0XOWL5DFNPRGHLVLQWHQGHG for baking on multiple racks at the same time. This mode uses heat primarily from the rear element but also heat from the upper and lower elements, along with air movement from the convection fan to enhance cooking evenness. Your oven is equipped with Auto Recipe Conversion, so it is not necessary to convert theWHPSHUDWXUHZKHQXVLQJWKLVPRGH%DNLQJWLPHPLJKW be slightly longer for multiple racks than what would be expected for a single rack. To use this mode press the Bake Multi Rack pad under Convection, enter a temperature, and then press Start. Always preheat when using this mode.Convection Roast with Direct AirThe Convection Roast mode is intended for roasting whole cuts of meat on a single rack. This mode uses heat from the lower, upper, and rear elements along with air movement directly down from the top of the oven to improve browning and reduce cooking time. It is not necessary to convert temperature. Check food earlier than the recipe suggested time when using this mode, or use the probe. To use this mode press the Roast pad under Convection, enter a temperature, and then press Start. It is not necessary to preheat when using this mode.
12
49-2000791 Rev. 0
USING THE OVEN:%URLOLQJ0RGHV
Broiling Modes
Always broil with the door closed. The broil element in this oven is very powerful. Monitor food closely whileEURLOLQJ8VHFDXWLRQZKHQEURLOLQJRQXSSHUUDFN positions as placing food closer to the broil element increases smoking, spattering, and the possibility of fats igniting. Broiling on rack position 6 is not recommended.Try broiling foods that you would normally grill. Adjust rack positions to adjust the intensity of the heat to the food. Place foods closer to the broil element when a seared surface and rare interior is desired. Thicker foods and foods that need to be cooked through should be broiled on a rack position farther from the broiler or byXVLQJ7UDGLWLRQDO%URLO/RRU&RQYHFWLRQ%URLO/R)RU best performance, center food below the broil heating element.Traditional Broil Hi7KH7UDGLWLRQDO%URLO+LPRGHXVHVLQWHQVHKHDWIURPWKH XSSHUHOHPHQWWRVHDUIRRGV8VH%URLO+LIRUWKLQQHUFXWV of meat and/or foods you prefer less done on the interior. To use this mode press the Broil pad once under Traditional and then press Start. It is not necessary to preheat when using this mode.
Traditional Broil Lo7KH7UDGLWLRQDO%URLO/RPRGHXVHVOHVVLQWHQVHKHDW from the upper element to cook food thoroughly while DOVRSURGXFLQJVXUIDFHEURZQLQJ8VH%URLO/RIRUWKLFNHU cuts of meat and/or foods that you would like cooked all the way through. To use this mode press the Broil pad twice under Traditional and then press Start. It is notnecessary to preheat when using this mode.Convection Broil Hi with Direct Air7KH&RQYHFWLRQ%URLO+LPRGHXVHVLQWHQVHKHDWIURPWKH upper element along with air movement directly down from the top of the oven for improved searing and browning. To use this mode press the Broil pad once under Convection and then press Start. For best results preheat 5 minutes when using this mode.Convection Broil Lo with Direct Air7KH&RQYHFWLRQ%URLO/RPRGHXVHVOHVVLQWHQVHKHDW from the upper element along with air movement directly down from the top of the oven. To use this mode press the Broil pad twice under Convection and then press Start. For best results preheat 5 minutes when using this mode.
49-2000791 Rev. 0
13
USING THE OVEN: Specialty Cooking Modes
Specialty Cooking Modes
Air FryThe Air Fry mode is a special, no-preheat convection cooking mode designed to produce foods with a crispier exterior than traditional oven cooking. The Air Fry mode is intended for single rack cooking only. Select Air Fry, then input the desired set temperature and press Start. The temperature can be set between 300°F and 500°F. Preheating is not recommended for this mode. Follow traditional oven recipe or package guidelines for set temperatures and cook times; adjust cook time to achieve your desired crispness. Additional guidelines for using this mode can be found in the Cooking Guide.WarmWarm mode is designed to keep hot foods hot for up to 3 hours. To use this mode, press the More pad, then Warm, and then press Start. Cover foods that need to remain moist and do not cover foods that should be crisp. Preheating is not required. Do not use warm to heat cold food other than crisping crackers, chips or dry cereal. It is also recommended that food not be kept warm for more than 2 hours.ProofProof mode is designed for rising (fermenting and proofing) bread doughs. Press the More pad, then Proof, and then press Start. Cover dough well toSUHYHQWGULQJRXW%UHDGZLOOULVHPRUHUDSLGOWKDQDW room temperature.DehydrateDehydrate is a special convection mode that is designed for dehydrating foods such as fruits, vegetables or herbs, and making fruit leathers or jerkies. The dehydrate mode uses airflow and low heat to remove moisture from foods. Select More, then Dehydrate, then input the desired set temperature and press Start. The temperature can be set between 105ºF and 225ºF. Recommended temperature settings and expected time ranges for different food types, as well as additional instructions related to this mode are available in the dehydrating guide. When the dehydrate mode is running, 12 hour shut-off is automatically disabled. The door must be partially open when running the dehydrate mode. Prop oven door open with the dehydrate door stopper included with your wall oven.
Precision CookingThese modes provide guidance or pre-set cooking algorithms to assist the user in cooking various types of food. The selection you make in the Precision Cooking menu will guide you to input the information required to help cook your food. At the end of estimated cooking time, check the food to see if it is done to your liking.1RWHWKDWGLIIHUHQFHVLQIRRGVKDSHSUHSDUDWLRQDQG preferences for doneness can impact the time required to cook the food.Some cycles require the food temperature probe supplied with your oven. The target temperature for the probe is automatically set based on selections made for each food. Always check foods using a secondary food thermometer as probe placement can impact the measured temperature. See Probe section for more details on using and positioning the probe properly.On some screens i will show up. Press i to access additional information that pertains to the cooking cycles within the category.Additional cycles will be available through software updates. Connect your oven to have access to these updates. See the WiFi Connect section for details on how to connect your oven.
14
49-2000791 Rev. 0
USING THE OVEN: Probe
ProbeInternal food temperature is frequently used as an indicator of doneness, especially for roasts and poultry. The Probe mode monitors the internal food temperature and turns the oven off when the internal food temperature reaches the programmed temperature.
WARNING Consuming undercooked food can result in foodborne illness. Use probe according tothe following instructions to ensure all portions of the food reach minimum safe cooking temperatures. Recommendations for minimum safe food temperatures can be found at foodsafety.gov or IsItDoneYet.gov.Always check the temperature at multiple locations in the food with a food thermometer after cooking to ensure that all portions of the food have reached the minimum safe internal temperature for that food.
Proper Probe PlacementAfter preparing the meat and placing it on the cooking pan follow these instructions for proper probe placement.,QVHUWWKHSUREHLQWRWKHIRRGVRWKDWWKHWLSRIWKH probe will rest in the center of the thickest part of the food. For best performance the probe should be fully inserted into the food. If the probe is not located properly, it may not accurately measure the temperature of the coolest portion of the food. Some foods, particularly small items, are not well suited for FRRNLQJZLWKWKHSUREHGXHWRWKHLUVKDSHRUVL]H7KHSUREHVKRXOGQRWWRXFKERQHIDWRUJULVWOH)RUZKROHSRXOWULQVHUWWKHSUREHLQWRWKHWKLFNHVW part of the breast.)RUERQHOHVVURDVWVLQVHUWWKHSUREHLQWRWKHFHQWHU of the roast.)RUERQHLQKDPRUODPELQVHUWWKHSUREHLQWRWKH center of the lowest large muscle or joint.)RUFDVVHUROHVRUGLVKHVVXFKDVPHDWORDILQVHUWWKH probe into the center of the dish.)RUILVKLQVHUWWKHSUREHIURPMXVWDERYHWKHJLOOLQWR the meatiest area, parallel to the backbone.Probe UsageTo use the probe without preheating: 1. Insert the probe into the food (see Proper ProbePlacement). 2. Place the food in the oven and connect the probe intothe probe outlet in the oven. 3. Select the desired cooking mode and temperature.%HIRUHSUHVVLQJVWDUWSUHVVWKHProbe icon at the bottom right of the screen. The probe setting screen will be displayed. Enter the desired internal food temperature and press Start. The probe temperature can be set between 100°F and 200°F.
To use the probe with preheating: 1. Press the desired cook mode (Traditional Bake,Convection Bake, or Convection Roast) pad and enter the desired cooking temperature. 2. Insert the probe into the food (see Proper Probe Placement). 3. Once the oven is preheated, place the food in the oven and connect the probe to the probe outlet, PDNLQJVXUHLWLVIXOOLQVHUWHG8VHFDXWLRQWKHRYHQ walls and probe outlet are hot. 4. The oven will detect that the probe has been inserted and the probe setting screen will be displayed. Enter the desired internal food temperature and press Start. The probe temperature can be set between 100°F and 200°F.Probe Care GuidelinesNOTE: some double oven models have a probe in the upper oven only.8VHRISUREHVRWKHUWKDQWKHRQHSURYLGHGZLWKWKLV product may result in damage to the probe.8VHWKHKDQGOHVRIWKHSUREHDQGSOXJZKHQLQVHUWLQJ and removing them from the meat and outlet7RDYRLGGDPDJLQJRXUSUREHGRQRWXVHWRQJVWR pull on the cable when removing it.7RDYRLGEUHDNLQJWKHSUREHPDNHVXUHIRRGLV completely defrosted before inserting the probe.7RSUHYHQWSRVVLEOHEXUQVGRQRWXQSOXJWKHSUREH from the outlet until the oven has cooled.1HYHUOHDYHWKHSUREHLQVLGHWKHRYHQGXULQJDVHOIRU steam clean cycle.‘RQRWVWRUHWKHSUREHLQWKHRYHQ
49-2000791 Rev. 0
15
USING THE OVEN: &RRNLQJ*XLGH6LQJOH2YHQVDQG8SSHU2YHQV
Cooking Guide – Single Ovens and Upper Ovens
The table below provides some guidelines for typical cooking modes. If you would like to use Precision Cooking modes they can be substituted for the modes shown below for applicable foods.
FOOD TYPEBaked Goods Layer cakes, sheet cakes, bundt cakes, muffins, quick breads on a Single Rack Layer cakes* on Multiple RacksChiffon cakes (angel food)Cookies, biscuits, scones on a Single Rack Cookies, biscuits, scones on Multiple Racks Beef & PorkHamburgers
RECOMMENDED RECOMMENDED
MODE(S)
RACK POSITION(S)
&RQYHFWLRQ%DNH 7UDGLWLRQDO%DNH&RQYHFWLRQ%DNH0XOWL &RQYHFWLRQ%DNH 7UDGLWLRQDO%DNH &RQYHFWLRQ%DNH 7UDGLWLRQDO%DNH&RQYHFWLRQ%DNH0XOWL
3 2 and 41 3 2 and 4
%URLO+L
5 ext.
ADDITIONAL SUGGESTIONS8VHVKLQFRRNZDUH Ensure adequate airflow (see illustration below).8VHVKLQFRRNZDUH 8VHVKLQFRRNZDUH Ensure adequate airflow.8VHDEURLOSDQPRYHIRRGGRZQIRUPRUHGRQHQHVVOHVVVHDULQJ Watch food closely when broiling. For best performance, center food below the broil heating element.
Steaks & Chops
%URLO+L
5 ext.
Roasts PoultryWhole chicken%RQHLQFKLFNHQEUHDVWVOHJV thighs%RQHOHVVFKLFNHQEUHDVWVWhole turkey7XUNH%UHDVW Fish Casseroles Frozen Convenience Foods 3L]]DRQDVLQJOHUDFN 3L]]DRQPXOWLSOHUDFNVPotato products, chicken nuggets, DSSHWL]HUVRQVLQJOHUDFNVPotato products, chicken nuggets, DSSHWL]HUVRQPXOWLSOHUDFNV
7UDGLWLRQDO%DNH Convection Roast7UDGLWLRQDO%DNH Convection Roast%URLO/R 7UDGLWLRQDO%DNH Convection Roast%URLO/R 7UDGLWLRQDO%DNH Convection Roast 7UDGLWLRQDO%DNH Convection Roast 7UDGLWLRQDO%DNH Convection Roast%URLO/R&RQYHFWLRQ%DNH 7UDGLWLRQDO%DNH&RQYHFWLRQ%DNH 7UDGLWLRQDO%DNH &RQYHFWLRQ%DNH0XOWL &RQYHFWLRQ%DNH 7UDGLWLRQDO%DNH Air Fry (on single and upper ovens only)&RQYHFWLRQ%DNH0XOWL
1 or 22 2 or 32 or 3 1 or 2 1 or 2 5 (1/2 thick or less) 4 (>1/2 inch)33 2 and 432 and 4
*When baking four cake layers at a time, use racks on 2 and 4 for a single/upper oven. Place the pans as shown so that one pan is not directly above another.Cook food thoroughly to help protect against food borne illness. Minimum safe food temperature recommendations for food safety can be found at IsItDoneYet.gov. Make sure to use a food thermometer to take food temperatures.
8VHDEURLOSDQPRYHIRRGGRZQIRUPRUHGRQHQHVVOHVVVHDULQJ Watch food closely when broiling. For best performance, center food below the broil heating element. Leave uncovered, use a low sided pan such as a broil pan. Preheating is not necessary.8VHDORZVLGHGSDQVXFKDVDEURLOSDQ Preheating is not necessary.%URLOVNLQVLGHGRZQILUVW:DWFKIRRGFORVHOZKHQEURLOLQJ)RU best performance when broiling, center food below the broil heating element. Move food down for more doneness/less searing and up forgreater searing/browning when broiling. For best performance when broiling, center food below the broil heating element. 8VHDORZVLGHGSDQVXFKDVDEURLOSDQ Preheating is not necessary. 8VHDORZVLGHGSDQVXFKDVDEURLOSDQ Preheating is not necessary.Watch food closely when broiling. For best performance, center food below the broil heating element.8VHVKLQFRRNZDUH 8VHVKLQFRRNZDUH 8VHVKLQFRRNZDUHZKHQXVLQJWUDGLWLRQDOEDNH and convection bake. 8VHGDUNFRRNZDUHRUFRRNLHVKHHWZKHQXVLQJ$LU)U 8VHVKLQFRRNZDUH6ZLWFKIRRGORFDWLRQSDUWLDOOWKURXJK cooking for more even cooking results.Single/upper oven
16
49-2000791 Rev. 0
USING THE OVEN: Cooking Guide – Lower Double Oven
Cooking Guide – Lower Double Oven
The table below provides some guidelines for typical cooking modes. If you would like to use Precision Cooking modes they can be substituted for the modes shown below for applicable foods.
FOOD TYPEBaked Goods Layer cakes, sheet cakes, bundt cakes, muffins, quick breads on a Single Rack Layer cakes* on Multiple RacksChiffon cakes (angel food)Cookies, biscuits, scones on a Single Rack Cookies, biscuits, scones on Multiple Racks Beef & PorkHamburgers
RECOMMENDED RECOMMENDED
MODE(S)
RACK POSITION(S)
&RQYHFWLRQ%DNH 7UDGLWLRQDO%DNH&RQYHFWLRQ%DNH0XOWL &RQYHFWLRQ%DNH 7UDGLWLRQDO%DNH &RQYHFWLRQ%DNH 7UDGLWLRQDO%DNH&RQYHFWLRQ%DNH0XOWL
3 1 ext. and 4 flat1 3 1 ext. and 4 flat
%URLO+L
5 ext.
ADDITIONAL SUGGESTIONS8VHVKLQFRRNZDUH Ensure adequate airflow (see illustration below).8VHVKLQFRRNZDUH 8VHVKLQFRRNZDUH Ensure adequate airflow.8VHDEURLOSDQPRYHIRRGGRZQIRUPRUHGRQHQHVVOHVVVHDULQJ Watch food closely when broiling. For best performance, center food below the broil heating element.
Steaks & Chops
%URLO+L
5 ext.
8VHDEURLOSDQPRYHIRRGGRZQIRUPRUHGRQHQHVVOHVVVHDULQJ Watch food closely when broiling. For best performance, center food below the broil heating element.
Roasts PoultryWhole chicken%RQHLQFKLFNHQEUHDVWVOHJV thighs%RQHOHVVFKLFNHQEUHDVWVWhole turkey7XUNH%UHDVW Fish Casseroles Frozen Convenience Foods 3L]]DRQDVLQJOHUDFN 3L]]DRQPXOWLSOHUDFNVPotato products, chicken nuggets, DSSHWL]HUVRQVLQJOHUDFNVPotato products, chicken nuggets, DSSHWL]HUVRQPXOWLSOHUDFNV
7UDGLWLRQDO%DNH Convection Roast7UDGLWLRQDO%DNH Convection Roast%URLO/R 7UDGLWLRQDO%DNH Convection Roast%URLO/R 7UDGLWLRQDO%DNH Convection Roast 7UDGLWLRQDO%DNH Convection Roast 7UDGLWLRQDO%DNH Convection Roast%URLO/R&RQYHFWLRQ%DNH 7UDGLWLRQDO%DNH&RQYHFWLRQ%DNH 7UDGLWLRQDO%DNH &RQYHFWLRQ%DNH0XOWL &RQYHFWLRQ%DNH 7UDGLWLRQDO%DNH Air Fry (on single and upper ovens only)&RQYHFWLRQ%DNH0XOWL
1 or 22 2 or 32 or 3 1 or 2 1 or 2 5 (1/2 thick or less) 4 (>1/2 inch)33 1 ext. and 4 flat31 ext. and 4 flat
Leave uncovered, use a low sided pan such as a broil pan. Preheating is not necessary.8VHDORZVLGHGSDQVXFKDVDEURLOSDQ Preheating is not necessary.%URLOVNLQVLGHGRZQILUVW:DWFKIRRGFORVHOZKHQEURLOLQJ)RU best performance when broiling, center food below the broil heating element. Move food down for more doneness/less searing and up forgreater searing/browning when broiling. For best performance when broiling, center food below the broil heating element. 8VHDORZVLGHGSDQVXFKDVDEURLOSDQ Preheating is not necessary. 8VHDORZVLGHGSDQVXFKDVDEURLOSDQ Preheating is not necessary.Watch food closely when broiling. For best performance, center food below the broil heating element.8VHVKLQFRRNZDUH 8VHVKLQFRRNZDUH 8VHVKLQFRRNZDUHZKHQXVLQJWUDGLWLRQDOEDNH and convection bake.8VHGDUNFRRNZDUHRUFRRNLHVKHHWZKHQXVLQJ$LU)U 8VHVKLQFRRNZDUH6ZLWFKIRRGORFDWLRQSDUWLDOOWKURXJKcooking for more even cooking results.
*When baking four cake layers at a time, use 1 extension and 4 flat for a lower double oven. Place the pans as shown so that one pan is not directly above another.Cook food thoroughly to help protect against food borne illness. Minimum safe food temperature recommendations for food safety can be found at IsItDoneYet.gov. Make sure to use a food thermometer to take food temperatures.
Lower double oven
49-2000791 Rev. 0
17
USING THE OVEN: Cooking Guide
Cooking Guide
Air Fry Cooking GuideAir Fry is a special, no-preheat, cooking mode that is designed to produce foods with a crispier exterior than traditional oven cooking. Select Air Fry, then input the desired set temperature and press Start. The temperature can be set between 300°F and 500°F.Air Fry Cookware Guidelines· Only use broil safe cookware when using Air Fry mode. · A dark sheet pan is recommended. A dark panpromotes better browning and crisping. · Oven baking baskets and baking grids can also beused. A sheet pan should be placed on the rack below the foods to catch any drippings when using a baking basket.Primary recommended cookware
General Tips for Air Fry Mode· The Air Fry mode is designed for cooking on a single rack.· The Air Fry mode is designed to be used without preheating.· Rack position 3 is recommended for most foods. If foods are browning too rapidly try using a lower rack position.· Foods may cook faster than expected if the oven is already hot when food is placed in the oven.· When air frying foods with sauce, it is recommended to apply the sauce at the end of cooking.· If foods are browning too quickly, try a lower rack position or lower oven set temperature.· For packaged foods, use traditional oven cooking instructions for set temperature and expected cook time.· It is not necessary to flip or stir food during cooking· Arrange food in a single layer on the pan, do not overload the pan.· Always check internal food temperature to confirm minimum safe temperatures have been reached. Minimum safe food temperatures can be found on packages and at IsItDoneYet.gov.
Alternate cookware options
FOOD TYPEFresh boneless fish or poultry pieces, breaded such as nuggets, tenders, fillets Fresh bone in chicken wings Fresh bone in chicken drumsticks or thighsFresh French fries, thin (< ½ inch)Fresh French fries, thick (> ½ inch))UR]HQSDFNDJHG foods
RECOMMENDED RACK POSITION(S)3 extension 3 extension 3 extension 3 extension3 extension3 extension
RECOMMENDED
RECOMMENDED
SET TEMPERATURES (F°) COOK TIME (MIN)
NOTES
375-400 375-400
15-30 25-40
8VHUORZHUVHWWHPSHUDWXUHVIRUODUJHUSLHFHV 8VHVKLQFRRNZDUHSalt wings or coat in a dry rub, if using sauce apply after cooking or toward the end of cooking
375-400
30-55
8VHUORZHUVHWWHPSHUDWXUHVIRUODUJHUSLHFHV
400-425 375-400
15-30 20-35
Parchment paper is recommended when preparing fresh French fries. For crispier fries,toss fries in corn starch or rice flour before cooking.Parchment paper is recommended when preparing fresh French fries. For crispier fries,toss fries in corn starch or rice flour before cooking.
8VHWUDGLWLRQDORYHQQRW$LU)UFRRNLQJLQVWUXFWLRQVDVDJXLGHOLQHIRUVHWWHPSHUDWXUHDQGFRRNWLPH$GGLWLRQDO cook time beyond recommended package time may be required for some foods. If oven is hot when starting, foodmay cook faster than the minimum package time.
18
49-2000791 Rev. 0
USING THE OVEN: Cooking Guide
Cooking Guide
Dehydrating Guide (upper oven only on double oven models)
Dehydrate is a special convection mode that is designed for dehydrating foods such as fruits, vegetables or herbs, and making fruit leathers or jerkies. The dehydrate mode uses airflow and low heat to remove moisture from foods. The door must be partially open when runningWKHGHKGUDWHPRGH8VHWKHGRRUVSDFHUSURYLGHG with your oven to prop the door open to the appropriate position as shown below. Once the door prop is in place, select More, then Dehydrate, then input the desired set temperature and press Start. The temperature can be set between 105°F and 225°F. When the dehydrate mode is running, 12 hour shut-off is automatically disabled.Door Spacer to be used whendehydrating
,WLVQRUPDOWRVHHPRLVWXUHRQWKHLQWHULRURYHQ surfaces when dehydrating.6RPHIRRGVEHQHILWIURPDSUHWUHDWPHQW 5HPRYHH[FHVVPRLVWXUHIURPWKHH[WHULRURIIRRGVprior to dehydrating. 3LHUFHFKHFNRUFXWIRRGVVXFKDVEOXHEHUULHVcranberries or grapes prior to dehydrating. 3HULRGLFDOOEORWPHDWVWRUHPRYHH[FHVVIDWGXULQJdehydrating. ‘HKGUDWLQJPRUHWKDQUDFNVDWDWLPHLVQRWrecommended.
Food Type
Recommended Set Temperature(°F)
Expected Drying Time (hours)
Fruits Herbs
130-140 105-115
4 – 36 2 – 18
Meat/Jerky*
145-165
4 – 12
9HJHWDEOHV
125-130
3 – 24
*Meat should be heated to 165°F before dehydrating. See fsis.usda.gov for more information
&RQVXOWRQOLQHDQGERRNUHIHUHQFHVIRUGHWDLOHG information on how to safely and properly dehydrate foods.‘HKGUDWLQJDWWRRKLJKRIDWHPSHUDWXUHFDQSUHYHQW the interior of foods from sufficiently drying.‘HKGUDWLQJDWWRRORZRIDWHPSHUDWXUHRUWRRVORZO can allow microorganisms to grow resulting in spoilage or food borne illness.‘RQRWRQOUHORQH[WHULRUDSSHDUDQFHRUWH[WXUH check food interior to ensure that foods are sufficiently dried.‘HKGUDWLQJWLPHVDUHLPSDFWHGEWKHLQLWLDOFRQGLWLRQ of the food, ambient humidity, temperature setting, quantity of food, etc. Thinner, smaller pieces of foods will dehydrate more quickly than thicker or larger pieces.)RUEHVWSHUIRUPDQFHZKHQXVLQJWKHGHKGUDWHPRGH use grids or racks with small spacing that allow air to reach food from all sides. These can be placed directly on your oven rack. Parchment paper or silicone baking mats can be used for dehydrating purees.
Number of Oven Racks Used During DehydrateMode 1 rack 2 racks3 racks4 racks
Rack Positions in Your Oven3 (flat or extension rack)2 (extension rack) and 4 (flat rack)2 (flat rack), 3 (extension rack) and 5 (flat rack)2 (flat rack), 3 (flat rack), 4 (flat rack), and 5 (flat rack)
49-2000791 Rev. 0
19
CARE AND CLEANING: Cleaning The Oven – Exterior
Cleaning The Oven – Exterior
%HVXUHHOHFWULFDOSRZHULVRIIDQGDOOVXUIDFHVDUHFRROEHIRUHFOHDQLQJDQSDUWRIWKHUDQJHControl Panel
To lock the controls, press in the bottom left cornerand follow instructions on the display. Instructions for unlocking are visible when the display is locked. It’s a good idea to wipe the control panel after each use. Clean with mild soap and water or vinegar and water,
rinse with clean water and polish dry with a soft cloth. Do not use abrasive cleansers, strong liquid cleansers, plastic scouring pads or oven cleaners on the controlSDQHO²WKHZLOOGDPDJHWKHILQLVK
Oven ExteriorDo not use oven cleaners, abrasive cleansers, strong liquid cleansers, steel wool, plastic scouring pads, or cleaning powders on the interior or exterior of the oven. Clean with a mild soap and water or vinegar and water solution. Rinse with clean water and dry with a soft cloth. When cleaning surfaces, make sure that they are at room temperature and not in direct sunlight.
If stain on the door vent trim is persistent, use a mild abrasive cleaner and a sponge-scrubber for best results.Spillage of marinades, fruit juices, tomato sauces and basting liquids containing acids may cause discoloration and should be wiped up immediately. Let hot surfaces cool, then clean and rinse.
Painted Surfaces and Black Stainless Steel (on some models)
Painted surfaces may include the door and trim around the control panel. Clean these with soap and water or a vinegar and water solution.
Do not use commercial oven cleaners, cleaning powders, steel wool or harsh abrasives on any paintedVXUIDFHLQFOXGLQJ%ODFN6WDLQOHVV6WHHO
Stainless Steel – Excluding Black Stainless Steel (on some models)
Do not use a steel wool pad; it will scratch the surface.To clean the stainless steel surface, use warm sudsy water or a stainless steel cleaner or polish. Always wipe the surface in the direction of the grain. Follow the cleaner instructions for cleaning the stainless steel surface.
&OHDQHUVZLWKR[DOLFDFLGVXFKDV%DU.HHSHUV)ULHQG6RIW CleanserTM will remove surface rust, tarnish and smallEOHPLVKHV8VHRQODOLTXLGFOHDQVHUIUHHRIJULWDQGUXELQ the direction of the brush lines with a damp, soft sponge.To inquire about purchasing cleaning products including stainless steel appliance cleaner or polish, see the Accessories and Consumer Support sections at the end of this manual.
20
49-2000791 Rev. 0
CARE AND CLEANING: Cleaning The Oven -Interior / Probe
Cleaning The Oven – Interior
The interior of your new oven can be cleaned manually or by using Steam Clean or Self Clean modes.
Spillage of marinades, fruit juices, tomato sauces and basting liquids containing acids may cause discoloration and should be wiped up immediately. Let hot surfaces cool, then clean and rinse.
IMPORTANT: For models with Oven Camera in the door: If door glass is not clean, camera image clarity may be affected. Please follow directions below to properly clean the door glass.
Manual Cleaning
Do not use oven cleaners (unless certified for selfcleaning oven), strong liquid cleansers, steel wool, or scouring pads on the interior of the oven. Clean with a mild soap and water, or vinegar and water solution.
Rinse with clean water and dry with a soft cloth. When cleaning surfaces, make sure that they are at room temperature.
Steam Clean ModeSteam clean is intended to clean small spills using water and a lower cleaning temperature than Self-Clean.To use the Steam Clean feature, wipe grease and soils from the oven. Pour one cup of water into the bottom of the oven. Close the door. Press the More option, then select Steam Clean, and press Start to the right of the
screen. The oven door will lock. You cannot open the door during the 30 minute steam clean as this will decrease the steam clean performance. At the end of the steam clean cycle the door will unlock. Wipe out any excess water and any remaining soil. NOTE: Water in the bottom of the oven may be hot right after finishing the cycle.
Self Clean ModeRead Self-Cleaning Oven Safety Instructions at the beginning of this manual before using Self Clean Mode. Self clean uses very high temperatures to clean the oven interior. The oven door will lock when using this feature.%HIRUHRSHUDWLQJWKHVHOIFOHDQFFOHZLSHXSJUHDVHDQG soils from the oven. Remove all items from the oven other than enameled (dark color) racks. Shiny or silver racks, the meat probe, and any cookware or other items should all be removed from the oven before initiating a self clean cycle. Close the door. If using a double oven, select which oven you would like to clean. Select the More option, then Self Clean. Choose a 3, 4, or 5 hour cycle, and select the illuminated Start pad to the right of the screen. For heavily soiled ovens, the maximum 5 hour clean time is recommended. If you wish to use the default time, press Start immediately after selecting Self Clean. The oven will show that the door has locked and display the amount of time remaining in the cycle. Press the illuminated Cancel pad to the right of the screen if you wish to stop the cycle. The oven will turn off automatically when the self clean cycle is complete. The door will stay locked until the oven has cooled down. After the oven has cooled down wipe any ash out of the oven.
We recommend venting your kitchen with an open window or using a ventilation fan or hood during the first self-clean cycle.Soil on the front frame of the oven and outside the gasket on the door will need to be cleaned by hand. Clean these areas with hot water, soap-filled steel wool pads or cleaners such as Soft Scrub®. Rinse well with clean water and dry.Do not clean the gasket. The fiberglass material of the oven door gasket cannot withstand abrasion. It is essential for the gasket to remain intact. If you notice it becoming worn or frayed, replace it.Make sure the oven light bulb cover is in place and the oven light is off. When using the Self Clean Mode in aGRXEOHRYHQRQOWKHXSSHURUORZHURYHQFDQXWLOL]H the cycle at one time. Additionally, no other mode may be started in the alternate oven cavity while self clean is in progress.IMPORTANT: The health of some birds is extremely sensitive to the fumes given off during the self-cleaning cycle of any range. Move birds to another well-ventilated room.
49-2000791 Rev. 0
21
CARE AND CLEANING: Probe / Oven Light
Probe
The temperature probe may be cleaned with soap and water or a soap-filled scouring pad. Cool the temperature probe before cleaning. Scour stubborn spots with a soapfilled scouring pad, rinse and dry. To order additional temperature probes see the Accessories and Consumer Support sections at the end of this manual.
Do not immerse the temperature probe in water. Do not store the temperature probe in the oven. Do not leave the temperature probe inside the ovenduring a self or steam clean cycle.
Oven Light
WARNING
SHOCK OR BURN HAZARD:%HIRUHUHSODFLQJRYHQOLJKWEXOEGLVFRQQHFWWKHHOHFWULFDOSRZHUWRWKH oven at the main fuse or circuit breaker panel. Failure to do so may result in electric shock or burn.
CAUTION
BURN HAZARD: The glass cover and bulb should be removed when cool. Touching hot glass with bare hands or a damp cloth can cause burns.
1. Disconnect power at the main fuse or circuit breaker panel.2. Remove oven racks. 3. Slide a flat blade screwdriver or butter knife betweenthe metal housing and the glass light cover. NOTE: on some models there is a metal clip visibly holding the glass. The tool needs inserted between the metal housing and the clip holding the glass. 4. Support the glass light cover with two fingers to prevent the cover from falling to the bottom of the oven. 5. Gently twist the screwdriver blade or butter knife toORRVHQWKHJODVVOLJKWFRYHU%HFDUHIXOQRWWRFKLS the oven coating.
6. Remove the glass light cover. 7. Remove the bulb by firmly grasping and sliding thebulb straight out until the two prongs have cleared the ceramic holder. 8. Do not touch the glass of the new replacement bulb with your fingers. It will cause the bulb to fail when it lights. Grasp the replacement bulb with a clean towel or facial tissue with the prongs facing down. Align the two prongs in the ceramic holder, pressing gently until the bulb is securely in the ceramic socket. 9. Slide the protective lens into the holder and push until the clips snap into the housing. 10. Reconnect power.
22
49-2000791 Rev. 0
CARE AND CLEANING: Oven Door
Oven Door7KHGRRULVYHUKHDY%HFDUHIXOZKHQUHPRYLQJDQGOLIWLQJWKHGRRU’RQRWOLIWGRRUEWKHKDQGOH %HIRUHUHPRYLQJWKHGRRUGLVFRQQHFWWKHFDPHUDKDUQHVVEXQKRRNLQJWKHFRQQHFWRUWKDWLVVQDSSHG into the bottom of the door.
Oven Door RemovalNOTE: Door removal is not a requirement for installation of the product but is an added convenience. To remove the door: 1. Open the oven door as far as it will go. 2. Push both hinge locks down toward the door frame tothe unlocked position. This may require a flat-blade screwdriver. DO NOT LIFT THE DOOR BY THE HANDLE!+LQJH8QORFNHG PositionHinge SlotHinge Arm3. Place hands on both sides of the door and close the oven door to the removal position (approximately ´±´>FP±4. Lift the door up and out until the hinge arms clear the slots. NOTE: The oven door LVYHUKHDY%HVXUHRX have a firm grip before lifting the oven door off the Hinge Clears Slot KLQJHV8VHFDXWLRQRQFHWKHGRRULVUHPRYHG’R not lay the door on its handle. This could cause dents or scratches.
Replacing the Oven Door
NOTE: The oven door is heavy. You may need help lifting the door high enough to slide it into the hinge slots. Do not lift the door by the handle.
1. Lift the oven door by grasping each side.
2. With the door at the same angle as
the removal position
DSSUR[LPDWHO´±´> %RWWRP
FP± position), seat the notch
Edge of Slot
Hinge Arm
of the hinge arm into the
bottom edge of the hinge
slot. The notch of the hinge
arm must be fully seated
into the bottom of the slot.
+LQJH1RWFK
3. Fully open the door. If the door will not fully open, the indentation is
Hinge in Locked Position
not seated correctly in
the bottom edge of the slot.
1RWFKRI+LQJH Securely Fitted ,QWR%RWWRPRI
4. Push the hinge locks up Hinge Slot
against the front frame
of the oven cavity, to the locked position.
5. Close the oven door.
49-2000791 Rev. 0
23
TROUBLESHOOTING TIPS
Troubleshooting tips … %HIRUHRXFDOOIRUVHUYLFHSave time and money! Review the charts on the following pages first and you may not need to call for service.
ProblemMy new oven doesn’t cook like my old one. Is something wrong with the temperature settings?Food does not bake properlyFood does not broil properlyOven temperature too hot or too cold Oven does not work or appears not to work“Crackling” or “popping” sound Why is my range making a “clicking” noise when using my oven?Clock and timer do not work Oven light does not work Oven will not self-cleanExcessive smoking during clean cycle
Possible CauseYour new oven has a different cooking system from your old oven and therefore may cook differently than your old oven.Oven controls improperly set. Rack position is incorrect or rack is not level. ,QFRUUHFWFRRNZDUHRUFRRNZDUHRILPSURSHUVL]H being used. Oven temperature needs adjustment. Ingredient substitutionOven controls improperly set. Improper rack position being used.Food being cooked in a hot pan. Cookware not suited for broiling. Aluminum foil used on the broiling pan and grid has not been fitted properly and slit as recommended. In some areas the power (voltage) may be low. Oven temperature needs adjustment.A fuse in your home may be blown or the circuit breaker tripped. Oven controls improperly set. Oven is in Sabbath ModeThis is the sound of the metal heating and cooling during both the cooking and cleaning functions. Your range has been designed to maintain a tighter control over your oven’s temperature. You may hear your oven’s heating elements “click” on and off more frequently than in older ovens to achieve better results during baking, broiling, convection, and self-clean cycles. A fuse in your home may be blown or the circuit breaker tripped. Light bulb is loose or defective.The temperature is too high to set a self-clean operation. Oven controls improperly set. Excessive soil or grease.
What To DoFor the first few uses, follow your recipe times and temperatures carefully. If you still think your new oven is too hot or too cold, you can adjust the temperature yourself to meet your specific cooking preference. See the Special Features Section to adjust the oven temperature. NOTE: This adjustment DIIHFWV7UDGLWLRQDO%DNH&RQYHFWLRQ%DNHDQG &RQYHFWLRQ%DNH0XOWLWHPSHUDWXUHVLWZLOOQRWDIIHFW &RQYHFWLRQ5RDVW7UDGLWLRQDO%URLO&RQYHFWLRQ%URLO or Clean. See the Cooking Modes section. See the Cooking Modes section and Cooking Guide. See the Cookware section.See the Cooking option under the Settings section. Substituting ingredients can change the recipe outcome. Make sure you select the appropriate broil mode. See the Cooking Guide for rack location suggestions. Make sure cookware is cool 8VHDSDQVSHFLILFDOOGHVLJQHGIRUEURLOLQJ If using aluminum foil conform to pan slits.Preheat the broil element for 10 minutes. See the Cooking option under the Settings section.Replace the fuse or reset the circuit breaker.6HHWKH8VLQJWKH2YHQVHFWLRQ 9HULIWKDWWKHRYHQLVQRWLQ6DEEDWK0RGH6HHWKH Sabbath option under the Settings section. This is normal.This is normal.Replace the fuse or reset the circuit breaker.Tighten or replace bulb.Allow the oven to cool and reset the controls.See the Cleaning the Oven section. Press Cancel on the pad to the right of the screen to stop the cycle. Open the windows to rid the room of smoke. Wait until the door unlocks. Wipe up the excess soil and reset the clean cycle.
24
49-2000791 Rev. 0
TROUBLESHOOTING TIPS
Troubleshooting tips … %HIRUHRXFDOOIRUVHUYLFH
ProblemExcessive smoking during broilingOven door will not open after a clean cycleOven not clean after a clean cycle
Possible CauseFood too close to burner element.Oven too hot.Oven controls improperly set. Oven was heavily soiled.
“F– and a number or letter” are displayed on LCD screen
You have a function error code. If the function code repeats.
LCD is not functioning properly
A fuse in your home may be blown or the circuit breaker tripped.Oven controls improperly set.
LCD screen is locked.
LCD is faulty.
Power outage, clock resets
Power outage or surge
“Burning” or “oily” odor This is normal in a new oven and will disappear in emitting from the vent time.
Strong odor Fan noise
An odor from the insulation around the inside of the oven is normal for the first few times the oven is used.A cooling fan may automatically turn on.
My oven door glass appears to be “tinted” or have a “rainbow” color. Is this defective?Sometimes the oven takes longer to preheat to the same temperature
1R7KHLQQHURYHQJODVVLVFRDWHGZLWKDKHDW barrier to reflect the heat back into the oven to prevent heat loss and keep the outer door cool while baking.Cookware or food in oven
1XPEHURIUDFNVLQRYHQ
Different cooking modes
Oven will not work remotelyOven camera image is not clearNo image on oven camera app
Router issues, no wireless signal, etc. Oven is not connected. Oven door glass is dirtyCamera cable unplugged
What To DoLower the rack position of the food.Allow the oven to cool below locking temperature.See the Cleaning the Oven section. Clean up heavy spillovers before starting the clean cycle. Heavily soiled ovens may need to self-clean again or for a longer period of time. Press Dismiss on the LCD screen. Allow the oven to cool for one hour. Put the oven back into operation.Disconnect all power to the oven for at least 30 seconds and then reconnect power. If the function error code repeats, call for service. Replace the fuse or reset the circuit breaker.See the Cooking Modes or Settings section to ensure proper use. Ensure unit is updated to the most recent software update. 8QORFNWKHVFUHHQESUHVVLQJWKHUnlock icon. If this does not correct the issue, cycle power at the circuit breaker and ensure unit is updated to the most recent software update. Cycle power at the circuit breaker and ensure unit is updated to the most recent software update. If issue persists, call service to assess the issue. Reset the clock. If the oven was in use, you must reset it by pressing Cancel, setting the clock and resetting any cooking function. To speed the process, set a self-clean cycle for a minimum of 3 hours. See the Cleaning the Oven section. This is temporary and will go away after several uses or a self-clean cycle.This is normal. The cooling fan will turn on to cool internal parts. It may run for up to 1-1/2 hours after the oven is turned off.7KLVLVQRUPDO8QGHUFHUWDLQOLJKWRUDQJOHVRX may see this tint or rainbow color.The cookware or food in the oven will cause the oven to take longer to preheat. Remove items to reduce preheat time. Adding more racks to the oven will cause the oven to take longer to preheat. Remove some racks. The different cooking modes use different preheat methods to heat the oven for the specific cooking mode. Some modes will take longer than others (i.e. convection bake multi). For assistance with oven wireless network connectivity, please call 1-800-220-6899.Follow directions in Cleaning the Oven section to properly clean oven door glass. Check to make sure camera cable is plugged into bottom of door.
49-2000791 Rev. 0
25
LIMITED WARRANTY
Café Electric Oven Limited Warranty
cafeappliances.com$OOZDUUDQWVHUYLFHLVSURYLGHGERXU)DFWRU6HUYLFH&HQWHUVRUDQDXWKRUL]HGVHUYLFHWHFKQLFLDQ7RVFKHGXOHVHUYLFH online, visit us at cafeappliances.com/service. Please have your serial number and your model number available when scheduling service.Servicing your appliance may require the use of the onboard data port for diagnostics. This gives a Café factory service technician the ability to quickly diagnose any issues with your appliance and helps Café improve its products by providing Café with information on your appliance. If you do not want your appliance data to be sent to Café, please advise your technician not to submit the data to Café at the time of service.
For the period ofOne year From the date of the original purchase
Café will replaceAny part of the oven which fails due to a defect in materials or workmanship. During this limited one-year warranty, Café will provide, free of charge, all labor and in-home service to replace the defective part.
What Café will not cover: Service trips to your home to teach you how to usethe product.,PSURSHULQVWDOODWLRQGHOLYHURUPDLQWHQDQFH )DLOXUHRIWKHSURGXFWLILWLVDEXVHGPLVXVHGmodified or used for other than the intended purpose or used commercially.5HSODFHPHQWRIKRXVHIXVHVRUUHVHWWLQJRIFLUFXLW breakers.‘DPDJHWRWKHSURGXFWFDXVHGEDFFLGHQWILUH floods or acts of God.
‘DPDJHWRILQLVKVXFKDVVXUIDFHUXVWWDUQLVKRU small blemishes not reported within 48 hours of delivery.,QFLGHQWDORUFRQVHTXHQWLDOGDPDJHFDXVHGE possible defects with this appliance.‘DPDJHFDXVHGDIWHUGHOLYHU 3URGXFWQRWDFFHVVLEOHWRSURYLGHUHTXLUHGVHUYLFH 6HUYLFHWRUHSDLURUUHSODFHOLJKWEXOEVH[FHSWIRULED lamps.
EXCLUSION OF IMPLIED WARRANTIESYour sole and exclusive remedy is product repair as provided in this Limited Warranty. Any implied warranties, including the implied warranties of merchantability or fitness for a particular purpose, are limited to one year or the shortest period allowed by law.
This limited warranty is extended to the original purchaser and any succeeding owner for products purchased for home XVHZLWKLQWKH86$,IWKHSURGXFWLVORFDWHGLQDQDUHDZKHUHVHUYLFHED&DIp$XWKRUL]HG6HUYLFHULVQRWDYDLODEOHRX PDEHUHVSRQVLEOHIRUDWULSFKDUJHRURXPDEHUHTXLUHGWREULQJWKHSURGXFWWRDQ$XWKRUL]HG&DIp6HUYLFHORFDWLRQ for service. In Alaska, the limited warranty excludes the cost of shipping or service calls to your home. Some states do not allow the exclusion or limitation of incidental or consequential damages. This limited warranty gives you specific legal rights, and you may also have other rights which vary from state to state. To know what your legal rights are, consult your local or state consumer affairs office or your state’s Attorney General.Warrantor: GE Appliances, a Haier company/RXLVYLOOH.<Extended Warranties: Purchase a Café extended warranty and learn about special discounts that are available while your warranty is still in effect. You can purchase it online anytime atcafeappliances.com/extended-warrantyCafé Service will still be there after your warranty expires.
Staple your receipt here. Proof of the original purchase date is needed to obtain service under the warranty.
26
49-2000791 Rev. 0
ACCESSORIES
AccessoriesLooking For Something More?Café Appliances offers a variety of accessories to improve your cooking and maintenance experiences! Refer to the Consumer Support page for phone numbers and website information. The following products and more are available:Accessories6PDOO%URLOHU3DQô´[ó´[ò³ /DUJH%URLOHU3DQô´[ó´[ò³ ;/
%URLOHU3DQ´[ó´[³PartsOven racks Oven elements Light bulbs ProbeCleaning SuppliesCitruShineTM Stainless Steel Wipes Stainless Steel Appliance Cleaner Graphite Lubricant
7KHODUJHEURLOHUSDQGRHVQRWILWLQ´´UDQJHV
7KH;/EURLOHUSDQGRHVQRWILWLQ´ZDOORYHQV´GURSLQVRU´´UDQJHVNOTES: Go to the cafeappliances.com to see recommended cleaners.
49-2000791 Rev. 0
27
CONSUMER SUPPORT
Consumer SupportCafé WebsiteHave a question or need assistance with your appliance? Try the Café website 24 hours a day, any day of the year! You can also shop for more great Café products and take advantage of all our on-line support services designed for RXUFRQYHQLHQFH,QWKH86cafeappliances.comRegister Your ApplianceRegister your new appliance on-line at your convenience! Timely product registration will allow for enhanced communication and prompt service under the terms of your warranty, should the need arise. You may also mail in the SUHSULQWHGUHJLVWUDWLRQFDUGLQFOXGHGLQWKHSDFNLQJPDWHULDO,QWKH86cafeappliances.com/registerSchedule ServiceExpert Café repair service is only one step away from your door. Get on-line and schedule your service at your FRQYHQLHQFHDQGDRIWKHHDU,QWKH86cafeappliances.com/serviceExtended WarrantiesPurchase a Café extended warranty and learn about special discounts that are available while your warranty is still in effect. You can purchase it on-line anytime. Café Service will still be there after your warranty expires. ,QWKH86cafeappliances.com/extended-warrantyRemote ConnectivityFor assistance with wireless network connectivity (for models with remote enable), visit our website at cafeappliances.com/connectParts and AccessoriesIndividuals qualified to service their own appliances can have parts or accessories sent directly to their homes 9,6$0DVWHU&DUGDQG’LVFRYHUFDUGVDUHDFFHSWHG2UGHURQOLQHWRGDKRXUVHYHUGD ,QWKH86cafeappliances.com/parts Instructions contained in this manual cover procedures to be performed by any user. Other servicing generally should be referred to qualified service personnel. Caution must be exercised, since improper servicing may cause unsafe operation.Contact UsIf you are not satisfied with the service you receive from Café, contact us on our website with all the details including your phone number, or write to: ,QWKH86*HQHUDO0DQDJHU&XVWRPHU5HODWLRQV_&DIp$SSOLDQFHV$SSOLDQFH3DUN_/RXLVYLOOH.< cafeappliances.com/contact
28
3ULQWHGLQWKH8QLWHG6WDWHV
49-2000791 Rev. 0
TMManual del Propietario
Cocinas con Control Frontal EléctricoModelos: CTS90DM, CTS90DP (Horno de Pared Simple de 30″) CTD90DM, CTD90DP (Horno de Pared Doble de 30″)
ContenidoInformación de Seguridad . . . . . . . . . . . . . . . . . . . . . . . .3Uso de la Cocina Controles del Horno . . . . . . . . . . . . . . . . . . . . . . . . . . . . .6 Horno Doble . . . . . . . . . . . . . . . . . . . . . . . . . . . . . . . . . . .7 Settings (Configuraciones). . . . . . . . . . . . . . . . . . . . . . . .7 Cámara de la Puerta del Horno . . . . . . . . . . . . . . . . . . .8 Modo Sabático . . . . . . . . . . . . . . . . . . . . . . . . . . . . . . . . .9 Estantes del Horno . . . . . . . . . . . . . . . . . . . . . . . . . . . .10 Papel de Aluminio y Cobertores del Horno . . . . . . . . . .12 Utensilios . . . . . . . . . . . . . . . . . . . . . . . . . . . . . . . . . . . .12 Modos de Cocción . . . . . . . . . . . . . . . . . . . . . . . . . . . . .13 Probe (Sonda) . . . . . . . . . . . . . . . . . . . . . . . . . . . . . . . .15 Guías de Cocción . . . . . . . . . . . . . . . . . . . . . . . . . . . . .16 Guía de Freír con Aire . . . . . . . . . . . . . . . . . . . . . . . . .18 Guía de Deshidratación . . . . . . . . . . . . . . . . . . . . . . . . .19
Cuidado y Limpieza Cuidado y limpieza – Exterior. . . . . . . . . . . . . . . . . . . . .20 Cuidado y limpieza – Interior . . . . . . . . . . . . . . . . . . . . .21 Probe (Sonda) . . . . . . . . . . . . . . . . . . . . . . . . . . . . . . . .22 Luz del Horno. . . . . . . . . . . . . . . . . . . . . . . . . . . . . . . . .22 Puerta del Horno . . . . . . . . . . . . . . . . . . . . . . . . . . . . . .23Consejos para la Solución de Problemas . . . . . . . . . .24Garantía Limitada . . . . . . . . . . . . . . . . . . . . . . . . . . . . . .26Accesorios . . . . . . . . . . . . . . . . . . . . . . . . . . . . . . . . . . . .27Soporte para el Consumidor . . . . . . . . . . . . . . . . . . . . .28
Escriba los números de modelo y de serie aquí:Nº de Modelo __________________________Nº de Serie ____________________________Los encontrará en una etiqueta detrás de la puerta o del cajón.
49-2000791 Rev. 0 10-20 GEA
GRACIAS POR HACER QUE CAFÉ SEA PARTE DE SU HOGAR.Sentimos orgullo por el nivel de arte, innovación y diseño de cada uno de los electrodomésticos de Café, y creemos que usted también. Entre otras cosas, el registro de su electrodoméstico asegura que podamos entregarle información importante del producto y detalles de la garantía cuando los necesite. Registre su electrodoméstico Café ahora a través de Internet. Sitios web útiles están disponibles en la sección de Soporte para el Consumidor de este Manual del Propietario. También puede enviaruna carta en la tarjeta de inscripción preimpresa que se incluye con el material embalado.TM
2
49-2000791 Rev. 0
INFORMACIÓN DE SEGURIDAD
INFORMACIÓN IMPORTANTE DE SEGURIDADLEA TODAS LAS INSTRUCCIONES ANTES DE USAR ESTE ELECTRODOMÉSTICO
ADVERTENCIA
Lea todas las instrucciones de seguridad antes de utilizar este producto. No seguir estas instrucciones puede generar un incendio, una descarga eléctrica, lesiones corporales o la muerte.
ADVERTENCIA INSTRUCCIONES GENERALES DE SEGURIDAD
8VHHVWHHOHFWURGRPpVWLFRVyORSDUDVXSURSyVLWRRULJLQDO como se describe en el Manual del Propietario.
6ROLFLWHTXHXQLQVWDODGRUFDOLILFDGRLQVWDOHVXHOHFWURGRPpVWLFR y que esté adecuadamente conectado a tierra, de acuerdo con las instrucciones de instalación provistas.
1RLQWHQWHUHSDUDURUHHPSOD]DUQLQJXQDSDUWHGHOKRUQR a menos que se recomiende específicamente en este manual. Cualquier otra reparación deberá ser realizada por un técnico calificado.
$ QWHVGHUHDOL]DUFXDOTXLHUVHUYLFLRWpFQLFRGHVFRQHFWHHO suministro de corriente desde el panel de distribución del hogar, retirando el fusible o desconectando el disyuntor.
1RGHMHDORVQLxRVVRORV±QRVHGHEHUiGHMDUDORVQLxRV solos o fuera de su radio de atención en el área donde el electrodoméstico se encuentre en uso. Nunca se les deberá permitir trepar, sentarse o pararse sobre ninguna parte del electrodoméstico.
PRECAUCIÓN
No coloque artículos de interés
para los niños sobre los gabinetes que están sobre un
KRUQR±VLORVQLxRVVHWUHSDQVREUHHOKRUQRSDUDOOHJDUD estos artículos podrían sufrir lesiones graves.
8VHVyORPDQJRVGHROODVVHFDV±ORVPDQJRVK~PHGRV sobre superficies calientes pueden producir quemaduras debido al vapor. No deje que los mangos de las ollas toquen los elementos que están calientes. No use una toalla u otra tela voluminosa para reemplazar el mango de las cacerolas.
1XQFDXVHHOHOHFWURGRPpVWLFRSDUDFDOHQWDUR calefaccionar la habitación.
1RWRTXHHOHOHPHQWRFDOHQWDGRUQLODVXSHUILFLHLQWHULRUGHO horno. Es posible que estas superficies estén demasiado calientes como para quemar, aunque su color sea oscuro. Durante y después del uso, no toque ni permita que telas u otros materiales inflamables toquen cualquier área interior del horno; espere a que haya pasado un tiempo suficiente para que se enfríen. Otras superficies del electrodoméstico se podrán calentar lo suficiente como para ocasionar lesiones. Las superficies potencialmente calientes incluyen la abertura de la ventilación del horno, superficies cercanas a la abertura y grietas alrededor de la puerta del horno.1RFDOLHQWHHQYDVHVGHFRPLGDTXHQRKDDQVLGR abiertos. Se podría acumular presión y el envase podría explotar, ocasionando una lesión.1RXVHQLQJ~QWLSRGHDOXPLQLRRFREHUWRUSDUDFXEULU el fondo del horno o cualquier parte del horno, excepto como se describe en este manual. Los cobertores de horno pueden atrapar el calor o derretirse, ocasionando daños sobre el producto y el riesgo de descargas, humo o incendios.(YLWHODVUDOODGXUDVRLPSDFWRVVREUHODVSXHUWDVGHYLGULRR los paneles de control. Hacer esto podrá producir la rotura de vidrios. No cocine un producto con un vidrio roto. Es posible que se produzcan descargas, incendios o cortes.&RFLQHFDUQHVFDUQHVGHDYHHQIRUPDFRPSOHWD±OD carne por lo menos a una temperatura interna de 160º F y la carne de ave por lo menos a una temperatura interna de 180º F. Normalmente la cocción a estas temperaturas es una protección contra las enfermedades transmitidas por la comida.
ADVERTENCIA MANTENGA LOS MATERIALES INFLAMABLES ALEJADOS DE LA COCINASi esto no se cumple, se podrán sufrir lesiones personales graves o incendios.
1RJXDUGHQLXVHPDWHULDOHVLQIODPDEOHVHQRFHUFDGH un horno, incluyendo papel, plástico, mangos de ollas, trapos, cobertores de pared, cortinas, paños y gasolina u otros vapores y líquidos inflamables.1XQFDXVHSUHQGDVKROJDGDVRTXHFXHOJXHQPLHQWUDV usa el electrodoméstico. Estas prendas se podrán incendiar si entran en contacto con superficies calientes, ocasionando quemaduras graves.
1RSHUPLWDTXHODJUDVDGHODFRFFLyQXRWURVPDWHULDOHV inflamables se acumulen en o cerca del horno. La grasa que está en o cerca del horno se podrá incendiar.F uncionamiento Remoto – Este electrodoméstico permite su configuración para un funcionamiento remoto en cualquier momento. No guarde materiales inflamables ni ítems sensibles a la temperatura dentro de este electrodoméstico.
LEA Y GUARDE ESTAS INSTRUCCIONES
49-2000791 Rev. 0
3
INFORMACIÓN DE SEGURIDAD
INFORMACIÓN IMPORTANTE DE SEGURIDADLEA TODAS LAS INSTRUCCIONES ANTES DE USAR ESTE ELECTRODOMÉSTICO
ADVERTENCIA EN CASO DE INCENDIO, SIGA LOS SIGUIENTES PASOS PARA EVITAR LESIONES O LA PROPAGACIÓN DEL FUEGO
1RXVHDJXDVREUHHOIXHJRGHODJUDVD1XQFDWRPHXQD olla que se esté incendiando.6LKDXQLQFHQGLRHQHOKRUQRGXUDQWHHOKRUQHDGR ahogue el fuego cerrando la puerta del horno y apagando el mismo o usando un químico seco multipropósito o un extintor de incendio con espuma.
(QFDVRGHTXHKDDIXHJRHQHOKRUQRGXUDQWHHOFLFOR de limpieza automática, apague el horno y espere a que el fuego se extinga. No fuerce la puerta para abrirla. La entrada de aire fresco sobre las temperaturas de la limpieza automática podrá conducir a la producción de llamas en el horno. Si no se siguen estas instrucciones, se podrán producir quemaduras graves.
ADVERTENCIA INSTRUCCIONES DE SEGURIDAD DEL HORNO
0DQWpQJDVHDOHMDGRGHOKRUQRDODEULUODSXHUWDGHO mismo. El aire caliente o el vapor que sale puede causar quemaduras en las manos, rostro y/u ojos.0DQWHQJDGHVREVWUXLGDODYHQWLODFLyQGHOKRUQR0DQWHQJDHOKRUQROLEUHGHDFXPXODFLyQGHJUDVD/D grasa del horno se puede incendiar.&RORTXHORVHVWDQWHVGHOKRUQRHQODXELFDFLyQGHVHDGD mientras éste se encuentra frío. Si es necesario mover el estante mientras el horno está caliente, evite que el mango de la olla tenga contacto con el elemento calentador en el horno.$OXVDUODVEROVDVSDUDFRFLQDURGRUDUHQHOKRUQRVLJD las instrucciones del fabricante.
(VFRQYHQLHQWHHPSXMDUKDFLDDIXHUDORVHVWDQWHV estándares hasta el tope o empujar el estante extensible hasta la posición completamente abierta para levantar comidas pesadas. Esto también es una precaución contra quemaduras por tocar superficies calientes de la puerta o las paredes del horno.1RGHMHSURGXFWRVWDOHVFRPRSDSHOXWHQVLOLRVGHFRFLQDQL comida en el horno cuando éste no se encuentre en uso. Los artículos guardados en el horno se pueden incendiar.1XQFDFRORTXHORVXWHQVLOLRVGHFRFLQDSLHGUDVSDUD pizza u horneado o cualquier otro tipo de aluminio o cobertor en la base del horno. Estos ítems pueden atrapar el calor o derretirse, ocasionando daños sobre el producto y el riesgo de descargas, humo o incendios.
ADVERTENCIA INSTRUCCIONES DE SEGURIDAD DEL HORNO CON LIMPIEZA AUTOMÁTICA
La función de limpieza automática usa el horno en temperaturas lo suficientemente altas como para consumir la suciedad de comida que haya dentro del horno. Para un funcionamiento seguro, siga estas instrucciones.
1RWRTXHODVVXSHUILFLHVGHOKRUQRGXUDQWHHOFLFORGH limpieza automática. Mantenga a los niños alejados del horno durante la limpieza automática. Si no se siguen estas instrucciones, se podrán producir quemaduras.
$QWHVGHXWLOL]DUHOFLFORGHOLPSLH]DDXWRPiWLFDOLPSLH la grasa y restos de comida que haya en el horno. Una cantidad excesiva de grasa se puede incendiar, lo cual puede producir daños con humo en su hogar.
$QWHVGHXVDUHOFLFORGHOLPSLH]DDXWRPiWLFDGHOKRUQR retire los estantes de color gris brillante (en algunos modelos), la sonda, cualquier papel de aluminio, y cualquier bandeja para asar, rejilla, u otros utensilios. Sólo se pueden dejar dentro del horno los estantes para horno cubiertos de porcelana.
LEA Y GUARDE ESTAS INSTRUCCIONES
4
49-2000791 Rev. 0
INFORMACIÓN DE SEGURIDAD
INFORMACIÓN IMPORTANTE DE SEGURIDADLEA TODAS LAS INSTRUCCIONES ANTES DE USAR ESTE ELECTRODOMÉSTICO
ADVERTENCIA INSTRUCCIONES DE SEGURIDAD DEL HORNO CON LIMPIEZA AUTOMÁTICA (Cont.)
6LHOPRGRGHOLPSLH]DDXWRPiWLFDIXQFLRQDGHIRUPD incorrecta, apague el horno y desconecte el suministro de corriente. Solicite el servicio de un técnico calificado.1ROLPSLHODMXQWDGHODSXHUWD/DMXQWDGHODSXHUWDHV esencial para un buen sellado. Se debe tener cuidado de no frotar, dañar ni mover la junta.
1RXVHOLPSLDGRUHVSDUDKRUQR1RVHGHEHUiXVDU limpiadores comerciales para horno ni revestimientos de protección para hornos de ningún tipo en o alrededor de cualquier parte del horno.
El equipo de acceso remoto instalado en este horno fue probado y cumple con los límites establecidos para un dispositivo digital de clase B, según la parte 15 de la Normativa de la FCC. Estos límites fueron diseñados para:(a) brindar una protección razonable contra interferencias nocivas en una instalación residencial. Este equipo genera, usa y puede emitir energía de radiofrecuencia y, si no se instala y utiliza de acuerdo con las instrucciones, puede ocasionar interferencias perjudiciales en las comunicaciones de radio. Sin embargo, no se garantiza que no se presenten interferencias en una instalación en particular. Si el equipo provoca interferencias perjudiciales para la recepción de radio o televisión, lo cual puede comprobar encendiendo y apagando el equipo, se aconseja al usuario que intente corregir la interferencia con una de las siguientes medidas:
5HRULHQWHRUHXELTXHODDQWHQDUHFHSWRUD$ XPHQWHODVHSDUDFLyQHQWUHHOHTXLSRHOUHFHSWRU&RQHFWHHOHTXLSRDXQWRPDFRUULHQWHGHXQFLUFXLWRGLIHUHQWH del tomacorriente al que se encuentra conectado el receptor.3DUDVROLFLWDUDXGDFRQVXOWHFRQHOSURYHHGRUPLQRULVWDRD un técnico experimentado de radio/ TV.(b) tolerar cualquier interferencia recibida, incluyendo las interferencias que puedan provocar un funcionamiento no deseado del dispositivo.Observe que todos los cambios o modificaciones sobre el dispositivo de comunicación inalámbrico instalado en este horno que no estén expresamente aprobados por el fabricante podrían anular la autoridad del usuario para operar el equipamiento.
Cómo Retirar la Película Protectora de Envío y la Cinta de Embalaje
Con cuidado tome un extremo de la película protectora de envío con los dedos y lentamente retire la misma de la superficie del electrodoméstico. No utilice ningún producto filoso para retirar la película. Retire toda la película antes de usar el electrodoméstico por primera vez.
Para asegurar que no haya daños sobre el acabado del producto, la forma más segura de retirar el adhesivo de la cinta de embalaje en electrodomésticos nuevos es aplicando un detergente líquido hogareño para lavar platos. Aplique con una tela suave y deje que se seque.
NOTA: El adhesivo deberá ser eliminado de todas las partes. No se puede retirar si se hornea con éste dentro.
NOTA: Algunos funciones y características de cocción no estarán disponibles hasta que conecte su horno nuevo al WiFi de su red hogareña local inalámbrica. Por favor sigas las instrucciones del control del horno y la sección de WiFi y Remote Enable (Acceso Remoto) de esta guía. Esto brindará capacidad para el uso de las funciones de la aplicación SmartHQ y asegurará que el horno cuenta con el software más reciente.
LEA Y GUARDE ESTAS INSTRUCCIONES
49-2000791 Rev. 0
5
USO DEL HORNO: Controles del Horno
Controles del HornoLos gráficos del control son representativos; es posible que su horno presente un aspecto gráfico alternativo.12:30 PM
UPPER OVEN LOWER OVEN
12:30 PMUPPER OVEN
GET CONNECTED
12:30 PMLOWER OVEN
Bake
Broil Convection
Precision Cooking
Air Fry
More
Bake
Broil
Convection
Precision Cooking
Air Fry
More
12:30 PMGET CONNECTED
Bake
Broil
Convection
Precision Cooking
Air Fry
More
Menú Principal del Horno de Pared Simple
Menús principales del Horno de Pared DobleUpper Oven and Lower Oven (Horno Superior y Horno Inferior)Al usar un horno doble, usted puede configurar modos separados en cada horno. El horno seleccionado aparecerá en los modos de cocción. NOTA: Si usará un horno simple, no habrá selección de hornos.Bake (Hornear)Esta opción le permite al usuario acceder al modo de horneado tradicional.Broil (Asar)La función Broil (Asar) puede ser seleccionada para acceder a Broil Low (Asado Bajo) y Broil High (Asado Alto). Para más información, consulte la sección de Modos de Cocción.Convection (Convección)Esta opción le permite utilizar el sistema de convección para cocinar en una variedad de modos. Para más información, consulte la sección de Modos de Cocción.Precision Cooking (Cocción de Precisión)Precision Cooking (Cocción de Precisión) consta de una serie de ciclos de cocción que fueron diseñados para comidas específicas. La pantalla lo guiará a través de la configuración del horno y de la comida de forma apropiada para el ciclo seleccionado. Los ciclos de cocción de precisión varían de acuerdo al tipo de comida; para acceder a información más detallada, consulte la sección de Modos de Cocción.Freír con AireEsta función le permite al usuario acceder al modo de cocción Air Fry (Freír con Aire). Para más información, consulte lasección de Modos de Cocción.More (Más)Seleccione esta opción para acceder a las opciones de Proof (Leudar), Probe (Sonda), Warm (Calentar), Self Clean (Limpieza Automática), y Steam Clean (Limpieza con Vapor).Oven Light (Luz del Horno)Para encender o apagar las luces de la cavidad del horno presione . Ambas cavidades del horno serán iluminadas si usará un horno doble.Settings (Configuraciones)Presione para acceder a la función Settings
(Configuraciones). Para más información, consulte la sección de Configuraciones.Favorite (Favoritos)Esta opción le permite al usuario guardar sus ciclos favoritos para un fácil acceso en el futuro. Luego de seleccionar un modo de cocción y de configurar una temperatura y un temporizador, presione para guardar dicha configuración como favorita para uso futuro. Luego de guardar un ciclo, presione en el menú principal para acceder rápidamente al modo guardado.Kitchen Timer (Temporizador de la Cocina)Esta función trabaja como un temporizador con cuenta regresiva. Presione , seleccione la cantidad de tiempo que desea que el temporizador funcione, y presione Set (Conjunto). El horno continuará funcionando cuando la cuenta regresiva del temporizador se haya completado. Para apagar el temporizador, seleccione y presione Cancel (Cancelar).Cook Time (Tiempo de Cocción)Esta función realiza una cuenta regresiva del tiempo de cocción y apaga el horno cuando el tiempo de cocción está completo. Presione durante un ciclo, seleccione la cantidad de tiempo de cocción, y presione Start (Iniciar). Esta función sólo puede ser usada en los modos Bake (Hornear), Convection Bake (Hornear por Convección), Convection Roast (Dorar por Convección), y Air Fry (Freír con Aire).Delay Time (Tiempo de Retraso)Esta función retrasa el tiempo de inicio de un ciclo del horno. Use esta función para configurar el tiempo en que desea que el horno se inicie. Seleccione un ciclo, y luego presione . Seleccione Delay Time (Tiempo de Retraso) para configurar la hora del día en que el horno se encenderá y presione Set (Configurar). Si lo desea, también puede ser programado un tiempo de cocción.Wi-Fi & Remote Enable (Wi-Fi y Acceso Remoto)Presione GET CONNECTED (Conéctese) para conectar el horno al Wi-Fi. Esta opción le permite descargar contenido a su horno y controlar el mismo de forma remota. El horno deberá ser conectado al Wi-Fi antes de que Remote Enable (Acceso Remoto) sea activado. Para acceder a instrucciones sobre cómo conectar su horno, consulte la sección de Conexión a Wi-Fi/ Acceso Remoto, bajo Configuraciones en este manual.
6
49-2000791 Rev. 0
USO DEL HORNO: Horno Doble / Settings (Configuraciones)
Horno Doble
Al usar ambas cavidades para cocinar, el control le permitirá oscilar entre el horno superior e inferior, a fin de revisar la sección del ciclo de cada uno. Al revisar la pantalla del modo de cocción, usted puede acceder a la cavidad alterna presionando el titular de la pantalla.
12:30 PM
TO UPPER OVEN
12:30 PM
BAKE 350°F
BAKEPREHEATED350°F
BAKEPREHEATED400°F
TO LOWER OVEN
CANCEL
BAKE 400°F
Ciclo de Horneado del Horno Superior
Settings (Configuraciones)
CANCELCiclo de Horneado del Horno Inferior
Existen numerosas configuraciones que son accedidas presionando la esquina superior derecha de la pantalla principal.
12:30 PM
12:30 PM
SETTINGS
SETTINGS
Wi-Fi & REMOTE ENABLE SET CLOCK LOCK CONTROL SABBATH SOUND
SABBATH SOUND DISPLAY COOKING SYSTEM
Realice el deslizamiento hacia arriba y hacia abajo para acceder a todas las configuraciones
Wi-Fi & Remote Enable (Wi-Fi y Acceso Remoto)
Este electrodoméstico puede ser configurado para un funcionamiento remoto en cualquier momento. No guarde ningún ítem inflamable o sensible a la temperatura en la parte interior. Al usar la función Wi-Fi Connect (Conexión Wi-Fi), usted podrá controlar funciones esenciales de su horno tales como las configuraciones de temperatura, temporizadores y modos de cocción, utilizando su teléfono inteligente o tableta*.Seleccione las y luego Wi-Fi & Remote Enable±VLJDODV instrucciones de la pantalla de su horno y de la aplicación de su teléfono. Es necesario activar la función Wi-Fi antes de usar Remote Enable (Acceso Remoto) en su horno.Conecte su horno con Conexión Habilitada de Wi-Fi1. Tenga preparado su teléfono inteligente o tableta con la posibilidad de acceso a Internet y descargue la aplicación SmartHQ.2. Usted deberá conocer la contraseña del enrutador Wi-Fi de su hogar. Tenga esta contraseña a mano al configurar el horno de Café.3. En su teléfono inteligente o tableta, visite cafeappliances.com/connect para conocer más sobre las funciones del electrodoméstico conectado y para descargar la aplicación para conectarse a su horno.4. Siga las instrucciones en pantalla de la aplicación para conectar su horno de Café. Una vez conectado, su horno debe mostrar que se encuentra conectado a la red de Wi-Fi de su hogar.
5. Si se producen inconvenientes para conectarse de forma inalámbrica a su horno, visite cafeappliances.com y solicite asistencia en relación a la conectividad inalámbrica de su horno.Para conectar dispositivos inteligentes adicionales, repita los pasos 3 y 4.Inicio Del Horno en Forma RemotaPara poder iniciar el horno de forma remota una vez conectado a Wi-Fi, presione Remote Enable (Acceso Remoto) en el menú principal o acceda a Wi-Fi & Remote Enable (Wi-Fi y Acceso Remoto) desde el menú de configuraciones y active Remote Enable (Acceso Remoto). El horno puede ser iniciado ahora de forma remota con un dispositivo conectado. El ícono deberá estar activo para iniciar el horno de forma remota. Para desconectar su teléfono de Remote Enable (Acceso Remoto), acceda a las configuraciones de Wi-Fi & Remote Enable (Wi-Fi y Acceso Remoto) y desactive Remote Enable (Acceso Remoto).Luego de usar el horno, recuerde verificar que el ícono esté iluminado, si desea iniciar el horno de forma remota en el futuro.NOTA: Las comidas que se echan a perder rápidamente, tales como leche, huevos, pescado, rellenos, ave y cerdo, no se deberán dejar reposar por más de 1 hora antes y después de la cocción. La temperatura ambiente estimula el desarrollo de bacterias nocivas. Asegúrese de que la luz del horno esté apagada, ya que el calor de la lámpara acelerará el crecimiento de bacterias nocivas.
* Se requiere el uso de dispositivos y de una red Wi-Fi hogareña que sean compatibles con Apple o Android.
49-2000791 Rev. 0
7
USO DEL HORNO: Settings (Configuraciones) / Cámara de la Puerta del Horno
Settings (Configuraciones) (Cont.)
Existen numerosas configuraciones que son accedidas presionando en la esquina superior derecha de la pantalla principal.
12:30 PMSETTINGS Wi-Fi & REMOTE ENABLE SET CLOCK LOCK CONTROL SABBATH SOUND
12:30 PMSETTINGSSABBATH SOUND DISPLAY COOKING SYSTEM
Realice el deslizamiento hacia arriba y hacia abajo para acceder a todas las configuraciones
Set Clock (Configuración del Reloj)Esta función le permite configurar el reloj y especifica cómo la hora del día será exhibida. Las opciones para mostrar la hora son el horario de un reloj estándar de 12 horas con selecciones AM y PM o de estilo militar de 24 horas.Lock Control (Control de Bloqueo)Seleccione esta opción a fin de bloquear el LCD desde cualquier selección de pantalla no deseada. Para desbloquear la pantalla, presione y presione Unlock (Desbloquear) en la siguiente pantalla.Sabbath (Modo Sabático)El modo sabático desactiva las luces del horno (la luz del horno no se encenderá cuando la puerta sea abierta), todos los sonidos (el control no emitirá un pitido cuando se presione la pantalla), los modos de Convection (Convección), los modos de Broil (Asar), Warm (Calentar), Proof (Leudar), y todas las funciones de tiempo. El modo sabático sólo puede ser usado con la función tradicional de Bake (Hornear). Esta función se activa conforme con los requisitos Sabáticos Judíos de la Estrella K. Para más información, por favor consulte la sección Sabbath Mode (Modo Sabático).Sound (Sonido)Esta pantalla de configuración le permite cambiar el volumen, el tono de fin de ciclo, y encender o apagar el sonido táctil.
Display (Pantalla)Esta pantalla muestra las opciones de brillo, reloj apagado, ahorro de energía, y tiempo de inactividad de la pantalla. La función de reloj apagado eliminará el reloj de la pantalla cuando la misma se encuentre inactiva, pero será mostrado luego de presionar sobre la pantalla. La pantalla puede ser configurada para que nunca quede inactiva o puede ser configurada para que se apague luego de 1, 5 o 10 minutos.Cooking (Cocción)El horno está configurado en grados Fahrenheit; sin embargo, en esta configuración la unidad de cocción puede ser cambiada a Celsius.La función Auto Recipe Conversion (Conversión de Receta Automática) puede ser activada a fin de reducir automáticamente la temperatura de cocción programada para Convection Bake (Hornear por Convección) o Convection Bake Multi (Hornear por Convección Múltiple). Observe que esto no reducirá la temperatura de cocción, ni el tiempo de horneado.Cuando la opción de 12 Hour Shut Off (Apagado Luego de 12 Horas) sea activada, la misma se apagará de forma automática luego de 12 horas de uso continuo.La función Adjust Temperature (Temperatura Ajustada) permite que la temperatura del horno sea ajustada hasta 35° F más caliente o 35° F más fría. Use esta función si considera que la temperatura de su horno está demasiado caliente o fría y desea modificarla. Para los modelos con horno doble, las temperaturas de los hornos superior e inferior se ajustan de forma separada. No use termómetros, tales como los que se encuentran en tiendas, para controlar la configuración de temperatura del horno. Estos termómetros pueden variar entre 20 y 40 grados.System (Sistema)Esta pantalla le permite borrar sus datos de usuario guardados y mostrar la versión actual de su software.
Cámara de la Puerta del Horno
La Cámara de la Puerta del Horno permite la visualización remota del centro de la cavidad del horno utilizando la aplicación SmartHQ. Descargue la versión más reciente de la aplicación SmartHQ y siga las instrucciones en la aplicación para conectar su cocina. Desde la página de inicio de la aplicación, seleccione su cocina y luego presione sobre el ícono de la cámara para iniciar la visualización de la cámara en su dispositivo inteligente. Las luces del horno se iluminarán mientras la cámara está realizando la visualización. La visualización de la cámara se detendrá si se abre la puerta del horno, y la misma no está permitida durante ciertos modos tales como Proof (Leudar) y Self Clean (Limpieza Automática).
8
49-2000791 Rev. 0
USO DEL HORNO: Modo Sabático
Modo Sabático
El modo sabático desactiva las luces del horno (la luz del horno no se encenderá cuando la puerta sea abierta), todos los sonidos (el control no emitirá un pitido cuando se presione la pantalla), los modos los modos de Convection (Convección), los modos de Broil (Asar), Warm (Calentar), Proof (Leudar), y todas las funciones de tiempo. El modo sabático sólo puede ser usado con la función tradicional de Bake (Hornear). Esta función se activa conforme con los requisitos Sabáticos Judíos de la Estrella K.
NOTA: Si se produce un corte de corriente durante el momento en que el horno se encuentra en Sabbath Mode (Modo Sabático), la unidad regresará a dicho modo cuando la energía sea restablecida.
Ingreso al Modo SabáticoPresione en la pantalla principal para acceder al menú Settings (Configuraciones) y haga el desplazamiento hacia abajo hasta Sabbath (Sabático).Inicie un Horneado SabáticoUse la tecla de la pantalla para ingresar la temperatura que desea usar para Sabbath Bake (Horneado Sabático). Una vez configurada la temperatura, presione para configurar el tiempo de cocción del ciclo en horas y minutos. Si usará un horno doble, entonces puede seleccionar la temperatura y el tiempo deseados para la otra cavidad seleccionando los mismos sobre la izquierda de la pantalla de temperatura. Si no se configura un temporizador, el horno comenzará un ciclo de horneado durante el modo Sabbath (Sabático) y continuará hasta que dicho modo sea apagado. Usted puede también seleccionar si la luz del horno se encenderáo apagará presionando sobre la pantalla. Una vez que haya programado la temperatura y el tiempo, presione Start (Iniciar). La siguiente pantalla exhibirá las configuraciones que programó para Sabbath Bake (Horneado Sabático).
12:30 PM
SABBATH i
BAKE TEMP
1
— °F
4
7
2
3
5
6
8
9
0 START
UPPER OVEN LOWER OVEN
12:30 PM
SABBATH i
BAKE TEMP
1
— °F
4
7
2
3
5
6
8
9
0 START
Programación de pantallas
12:30 PM
Ajuste de Temperatura Durante un Horneado SabáticoSi es necesario ajustar la temperatura luego de programar el horno para Sabbath Bake (Horneado Sabático), presione uno de los íconos de temperatura exhibidos en la pantalla del ciclo Sabbath (Sabático) y presione Enter (Ingresar). Esto le permitirá ajustar la temperatura para el ciclo. Observe que la pantalla no mostrará que la temperatura del horno cambió.Salida del Modo SabáticoPara salir del modo Sabbath (Sabático), presione la X en la esquina superior derecha si se encuentra en la pantalla de programación, o presione Exit Sabbath (Salir del Modo Sabático) si se encuentra en la pantalla del ciclo. Existe también la opción de apagar el ciclo cuando se encuentre en la pantalla del ciclo presionando Turn Off (Apagar), pero el horno aún permanecerá en el modo Sabbath (Sabático) hasta que salga del modo. NOTA: Si se produce un corte de energía mientras el horno se encuentra en Sabbath Mode (Modo Sabático), la unidad regresará a dicho modo cuando la energía sea restablecida; sin embargo, el horno regresará al estado de apagado incluso aunque se encuentre en el medio del ciclo de horneado cuando el corte de energía se haya producido.
SABBATH
EXIT SABBATH
ENTER 200°F
250°F
Oven On 300°F
350°F
TURN OFF 400°F
Select temperature, then press ENTER to edit.
SABBATHENTER 200°F
12:30 PM
EXIT SABBATH
Upper Oven On 5:30
250°F
300°F
350°F
TURN OFF 400°F
ENTER 200°F
Lower Oven On 5:30
250°F
300°F
350°F
TURN OFF 400°F
Select temperature, then press ENTER to edit.
Pantallas del Ciclo Sabático en Hornos Simples y Dobles
49-2000791 Rev. 0
9
USO DEL HORNO: Estantes del Horno
Estantes del HornoEl horno cuenta con seis posiciones de estantes. En la Guía de Cocción, se brindan recomendaciones de posiciones de los estantes para diferentes tipos de comidas. Se ajusta un estante en una dirección para afectar los resultados de cocción. Por ejemplo, si se prefieren partes superiores más oscuras en tartas, panecillos o galletas, pruebe moviendo la comida a un estante que se encuentre una posición más arriba. Si encuentra que las comidas están demasiado doradas en la parte superior, pruebe moviendo las mismas más abajo la próxima vez.Al hornear con múltiples ollas y en múltiples estantes, asegúrese de que haya suficiente espacio entre las ollas para que fluya el aire.Es posible que su horno cuente con estantes extensibles y/o estantes planos tradicionales.Para evitar posibles quemaduras, coloque los estantes en la posición deseada antes de encender el horno.Estantes PlanosAl colocar y retirar utensilios de cocina, empuje el estante hacia afuera del tope (posición de detención) sobre el soporte del estante.Para retirar el estante, empuje el mismo hacia usted, incline el extremo frontal hacia arriba y empuje hacia afuera.Para hacer un reemplazo, coloque el extremo curvo del estante (bloqueadores) en los soportes del horno, incline hacia arriba el frente y empuje el estante hacia adentro.Es posible que resulte difícil deslizar los estantes, especialmente luego de la limpieza automática. Coloque aceite vegetal en una tela húmeda o toalla de papel y frote sobre los extremos izquierdo y derecho.NOTA: El uso de otros aceites de cocina provocará una descoloración o un residuo de color similar al óxido en los estantes y laterales de las cavidades. Para limpiar este residuo, use agua y jabón o una solución de vinagre y agua. Enjuague con agua limpia y seque con una tela seca.
10
49-2000791 Rev. 0
USO DEL HORNO: Estantes del Horno / Papel de Aluminio y Cobertores del Horno
Estantes del Horno (Cont.)Estantes ExtensiblesSiempre empuje hacia afuera el estante desde el riel frontal superior hasta la posición de detención en su máxima extensión, al colocar o retirar utensilios. Los estantes extensibles no podrán ser usados en la posición del estante superior.Si resulta difícil extender estos estantes, lubrique los mismos con lubricante de grafito, provisto con el horno. Retire el estante del horno, retire cualquier obstrucción en el recorrido deslizable con una toalla de papel, agite el lubricante de grafito y coloque 4 gotitas en los dos recorridos inferiores de los lados izquierdo y derecho. Abra y cierre el estante varias veces para distribuir el lubricante.Para ordenar un lubricante de grafito adicional, lea la sección de Accesorios de este manual.Para Retirar un Estante Extensible:1. Asegúrese de introducir la parrilla hasta el fondo del horno, de modo que las paletas laterales del armazón de la parrilla se desenganchen de la cavidad.2. Deslice la parrilla hacia usted hasta que llegue al tope (posición detenida) del soporte de la parrilla.3. Tome de manera firme ambos lados de la estructura del estante y deslizando este último, incline el extremo del frente hacia arriba y empuje hacia fuera.Para Reemplazar un Estante Extensible:1. Tome firmemente ambos lados del armazón de la parrilla y la parrilla deslizable.2. Coloque el extremo curvo del estante en la posición deseada, incline el frente hacia arriba y presione la parrilla hacia adentro.Si resulta difícil reemplazar o retirar los estantes extensibles, limpie los soportes de los estantes del horno con aceite vegetal. No quite el aceite de cocina del espacio de deslizamiento.NOTA: El uso de otros aceites de cocina provocará una descoloración o un residuo de color similar al óxido en los estantes y laterales de las cavidades. Para limpiar este residuo, use agua y jabón o una solución de vinagre y agua. Enjuague con agua limpia y seque con una tela seca.Para lubricar la paleta:Agite el lubricante y aplique el mismo a las partes móviles de los mecanismos de las paletas como se muestra.
Riel frontal superior Posición de apertura totalTomar aquí
Papel de Aluminio y Cobertores del Horno
PRECAUCIÓN No use ningún tipo de aluminio o cobertor de horno para cubrir el fondo del horno. Estos ítemspueden atrapar el calor o derretirse, ocasionando daños sobre el producto y el riesgo de descargas, humo o incendios. Los daños por uso inadecuado de estos ítems no están cubiertos por la garantía del producto.Se podrá usar aluminio para evitar derrames, colocando una hoja sobre un estante inferior varias pulgadas debajo de la comida. No use más aluminio que el necesario y nunca cubra totalmente el estante de un horno con papel de aluminio. Mantenga el aluminio a por lo menos 1 1/2″ de las paredes del horno, para evitar una circulación deficiente del calor.
49-2000791 Rev. 0
11
USO DEL HORNO: Utensilios / Modos de Cocción en el Horno
Utensilios
Pautas de Uso de UtensiliosEl material, el acabado y el tamaño de los utensilios afectan el horneado.Las ollas oscuras, revestidas y opacas absorben el calor más rápidamente que las ollas claras y brillantes. Al usar ollas que absorben el calor más rápidamente, las comidas podrán resultar más doradas, crocantes y con una capa más gruesa.Si utiliza utensilios oscuros y revestidos, controle la comida antes del tiempo mínimo de cocción. Si se obtienen resultados no deseados con este tipo de utensilios, considere la posibilidad de reducir la temperatura del horno en 25º F la próxima vez.
Las ollas brillantes pueden producir resultados de horneado más parejos en tortas y galletas.Las ollas de vidrio y cerámica calientan con lentitud, pero retienen bien el calor.Estos tipos de ollas funcionan bien con platos tales como tartas y postres con natilla.Las ollas con aislante de aire calientan lentamente y pueden producir fondos dorados.Mantenga los utensilios limpios para una cocción más pareja.Cookware used in broil modes and air fry must be broil-safe.
Modos de Cocción en el Horno
Su nuevo horno posee una variedad de modos de cocción para que pueda obtener los mejores resultados. Estos modos se describen a continuación. Para acceder a recomendaciones para comidas específicas, consulte la sección de la Guía deCocción. Recuerde que es posible que su nuevo horno funcione de manera diferente que aquel que está reemplazando.
Modos de Horneado y DoradoSeleccione un modo para hornear y dorar basado en el tipo y cantidad de comida que está preparando. Al preparar comidas horneadas tales como tartas, galletas y masas, siempre precaliente el horno primero. Siga las recomendaciones de la receta sobre la colocación de la comida. Si no se brindan pautas, centre la comida en el horno.Horneado TradicionalEl modo de horneado tradicional está pensado para la cocción en un solo estante. Este modo usa el calor principalmente desde el elemento inferior, pero también desde el elemento superior para cocinar la comida. Para usar este modo, presione la tecla Bake (Hornear), ingrese una temperatura, y luego presione Start (Iniciar). El precalentamiento generalmente se recomienda al usar este modo.Estante Simple de Horneado por Convección con Aire Directo
Honeado por Convección en Estantes MúltiplesEl modo Convection Bake Multi Rack (Honeado por Convección en Estantes Múltiples) está pensado para honear en múltiples estantes al mismo tiempo. Este modo utiliza el calor principalmente desde el elemento trasero, pero también calienta desde los elementos superior e inferior, junto con el movimiento de aire desde el ventilador por convección para mejorar una cocción pareja. El horno está equipado con la función Auto Recipe Conversion (Conversión de Receta Automática); de modo que no es necesario convertir la temperatura al usar este modo. Es posible que el tiempo de horneado sea un poco más prolongado con estantes múltiples, en comparación con lo que se espera con un solo estante. Para usar este modo, presione la tecla Bake Multi Rack (Horneado en Estantes Múltiples) en Convection (Convección), ingrese una temperatura, y luego presione Start (Iniciar). Siempre realice el precalentamiento al usar este modo.
El modo de horneado por convección está pensado para la cocción en un solo estante. Este modo utiliza el calor del elemento inferior y también de los elementos superior y trasero, junto con el movimiento de aire directamente descendente desde la parte superior del horno, para que la cocción sea más pareja. El horno está equipado con la función Auto Recipe Conversion (Conversión de Receta Automática); de modo que no es necesario convertir la temperatura al usar este modo. Para usar este modo, presione la tecla Bake (Hornear) en Convection (Convección), ingrese una temperatura, y luego presione Start (Iniciar). El precalentamiento generalmente se recomienda al usar este modo.
Dorado por Convección con Aire DirectoEl modo Convection Roast (Dorado por Convección) está pensado para dorar cortes enteros de carne en un solo estante. Este modo utiliza el calor de los elementos inferior, superior y trasero, junto con el movimiento del aire directamente desde la parte superior del horno, a fin de mejorar el dorado y reducir el tiempo de cocción. No es necesario convertir la temperatura. Cuando use este modo, o si usa la sonda, controle la comida antes que el tiempo sugerido en la receta. Para usar este modo, presione la tecla Roast (Dorar) en Convection (Convección), ingrese una temperatura, y luego presione Start (Iniciar). No es necesario realizar el precalentamiento al usar este modo.
12
49-2000791 Rev. 0
USO DEL HORNO: Modo para Asar
Modo para Asar
Siempre ase con la puerta cerrada. El elemento para asar en el horno es muy potente. Monitoree la comida de cerca al asar. Tenga cuidado al asar en posiciones de estantes superiores, ya que colocar la comida más cerca del elemento para asar incrementa el humo, salpicaduras y la posibilidad de que se incendien las grasas. No se recomienda asar en el estante de la posición 6.Intente asar las comidas que normalmente haría a la parrilla. Ajuste las posiciones de los estantes para ajustar la intensidad del calor a la comida. Coloque las comidas más cerca del elemento para asar, cuando se desee una superficie más cocinada y un interior poco cocido. Las comidas más gruesas y las comidas cuyo interior debe ser cocinado deberían ser asadas en un estante en una posición alejada del usado para asar, o usando las funciones Tradicional Broil Lo (Asado Tradicional Bajo) o Convection Broil Lo (Asado por Convección Bajo). Para un mejor rendimiento, centre la comida debajo delelemento calentador para asar.Asado Tradicional AltoEl modo Traditional Broil Hi (Asado Tradicional Alto) usa calor intenso del elemento superior para soasar las comidas. Use la función Broil Hi (Asado Alto) para cortes más delgados de carne y/o comidas que prefiera que quedan menos cocinadas en su interior. Para usar este modo, presione la tecla Broil (Asar) una vez en Traditional (Tradicional) y luego presione Start (Iniciar). No es necesario realizar el precalentamiento al usar este modo.
Asado Tradicional BajoEl modo Traditional Broil Lo (Asado Tradicional Bajo) usa menos calor intenso del elemento superior para cocinar la comida completamente mientras también se realiza el dorado superficial. Use la función Broil Lo (Asado Bajo) para cortes de carne más gruesos y/o comidas que desee que queden completamente cocinadas. Para usar este modo, presione la tecla Broil (Asar) dos veces en Traditional (Tradicional) y luego presione Start (Iniciar). No es necesario realizar el precalentamiento al usar este modo.Asado por Convección Alto con Aire DirectoEl modo Convection Broil Hi (Asado por Convección Alto) usa calor intenso desde el elemento superior, junto con el movimiento del aire directamente desde la parte superior del horno para mejorar la cocción y el dorado. Para usar este modo, presione la tecla Broil (Asar) una vez en Convection (Convección) y luego presione Start (Iniciar). Para obtener mejores resultados, precaliente durante 5 minutos al usar estemodo.Asado por Convección Bajo con Aire DirectoEl modo Convection Broil Lo (Asado por Convección Bajo) usa calor menos intenso desde el elemento superior, junto con el movimiento del aire directamente desde la parte superior del horno. Para usar este modo, presione la tecla Broil (Asar) dos veces en Convection (Convección) y luego presione Start (Iniciar). Para obtener mejores resultados, precaliente durante 5minutos al usar este modo.
49-2000791 Rev. 0
13
USO DEL HORNO: Modos de Cocción de Especialidades
Modos de Cocción de Especialidades
Fritura con AireAir Fry (Freír con Aire) es un modo de cocción especial por convección sin precalentamiento, diseñado para producir comidas con un exterior más crocante que en cocciones con hornos tradicionales. El modo Air Fry (Freír con Aire) fue diseñado para la cocción en un solo estante únicamente. Seleccione Air Fry (Freír con Aire), y luego ingrese la configuración de temperatura deseada y presione Start (Iniciar). La temperatura se podrá configurar entre 300°F y 500°F. No es necesario el precalentamiento al estar en este modo. Siga las pautas de la receta para hornos tradicionales o del paquete en relación a los ajustes de temperatura y tiempos de cocción; ajuste el tiempo de cocción para lograr la textura crocante deseada. Se podrán encontrar pautas adicionales para utilizar este modo en la Guía de Cocción.CalentarEl modo Warm (Calentar) está diseñado para mantener comidas calientes hasta durante 3 horas. Para usar este modo, presione la tecla More (Más), luego presione Warm (Calentar) y finalmente presione Start (Iniciar). Cubra las comidas que necesitan mantener la humedad y no cubra aquellas comidas que deberían quedar crocantes. No se requiere precalentar las mismas. No use la función Warm (Calentar) para calentar comida fría, excepto galletas crujientes, papas fritas o cereales secos. También se recomienda que la comida no se mantenga caliente por más de dos horas.LeudarEl modo Proof (Leudar) está diseñado para elevar (fermentar y leudar) masas de pan. Presione la tecla More (Más), luego presione Proof (Leudar), y finalmente presione Start (Iniciar). Cubra bien la masa para evitar que se seque. El pan se elevará más rápidamente que a temperatura ambiente.DeshidratarDehydrate (Deshidratar) es un modo de convección especial diseñado para deshidratar comidas tales como frutas, verduras o hierbas, y pieles de frutas o charquis. El modo de deshidratación utiliza el flujo de aire y un nivel bajo de calor para eliminar la humedad de las comidas. Seleccione More (Más), luego Dehydrate (Deshidratar), luego ingrese la configuración de temperatura deseada y presione Start (Iniciar). La temperatura se puede configurar entre 105°F y 225°F. Las configuraciones de temperatura recomendadas y las variaciones de tiempo esperadas entre diferentes tipos de comida, así como también instrucciones adicionales relacionadas con este modo están disponibles en la guía de deshidratación. Cuando el modo de deshidratación se encuentre en funcionamiento, el apagado en 12 horas se deshabilitará automáticamente. La puerta deberá estar parcialmente abierta cuando esté activo el modo de deshidratación. Deje la puerta abierta con el bloqueador de la puerta de deshidratación incluido con su horno de pared.
Cocción de PrecisiónEstos modos brindan orientación o algoritmos de cocción configurados previamente para ayudar al usuario en la cocción de diferentes tipos de comidas. La selección que usted realizó en el menú Precision Cooking (Cocción de Precisión) lo guiará para ingresar la información requerida como ayuda para cocinar su comida. Al final del tiempo de cocción estimado, controle que la comida esté hecha de acuerdo a su gusto. Observe que las diferencias en la forma de la comida, la preparación y las preferencias de terminación pueden afectar en el tiempo requerido para cocinar la comida.Algunos ciclos requieren que la sonda de temperatura de la comida sea suministrada con el horno. El objetivo de temperatura para la sonda es configurado de forma automática en base a las selecciones realizadas para cada comida. Siempre controle las comidas usando un termómetro de comidas secundario, ya que el posicionamiento de la sonda puede impactar en la temperatura medida. Para más detalles sobre el uso y posicionamiento correctos de la sonda, consulte la sección de la Sonda.En algunas pantallas, se visualizará i . Presione i para acceder a información adicional perteneciente a los ciclos de cocción dentro de dicha categoría.Ciclos adicionales estarán disponibles a través de actualizaciones del software. Conecte su horno para tener acceso a estas actualizaciones. Para acceder a detalles sobre cómo conectar su horno, consulte la sección Wi-Fi Connect.
14
49-2000791 Rev. 0
USO DEL HORNO: Probe (Sonda)
Probe (Sonda)La temperatura interna de la comida con frecuencia se usa como indicador de que está lista, especialmente al dorar o preparar carne de ave. El modo Probe (Sonda) monitorea la temperatura interna de la comida y apaga el horno cuando esta última alcanza la temperatura programada.
ADVERTENCIAEl consumo de comida semicruda puede hacer que se contraigan enfermedades producidas por la comida. Use la sonda de acuerdo con las siguientes instrucciones, a fin de asegurar que todas las partes de la comida alcancen temperaturas de cocción mínimamente seguras. Puede encontrar recomendaciones de temperaturas de cocción mínimamente seguras en foodsafety.gov o en IsItDoneYet.gov. Controle siempre la temperatura en múltiples partes de la comida, utilizando un termómetro de comidas luego de realizar la cocción, a fin de asegurar que todas las partes de la misma hayan alcanzado una temperatura interna mínimamente segura en dicha comida.
Ubicación Correcta de la Sonda
Luego de preparar la comida y de colocarla en la olla, siga estas instrucciones para una ubicación correcta de la sonda.
,QVHUWHODVRQGDHQODFRPLGDGHPRGRTXHODSXQWDGH la sonda se apoye en el centro de la parte más gruesa de la comida. Para un mejor rendimiento, la sonda debería ser completamente insertada en la comida. Si la sonda no es ubicada correctamente, es posible que no mida con precisión la temperatura de la parte más fría de la comida. Algunas comidas, particularmente las más pequeñas, no son adecuadas para la cocción con el uso de una sonda, debido a sus formas o tamaños.1RGHEHUtDWRFDUHOKXHVRODJUDVDQLHOFDUWtODJR3DUDFRFLQDUXQDYHHQWHUDLQVHUWHODVRQGDHQODSDUWH más gruesa de la pechuga.3DUDGRUDUVLQKXHVRVLQVHUWHODVRQGDHQHOFHQWURGHO dorado.3DUDFRFLQDUMDPyQRFRUGHURFRQKXHVRVLQVHUWHODVRQGD en el centro de la articulación o del músculo más bajo y largo.3DUDSUHSDUDUFD]XHODVRSODWRVWDOHVFRPRSDVWHOGH carne, inserte la sonda en el centro del plato.3DUDFRFLQDUSHVFDGRLQVHUWHODVRQGDMXVWRDUULEDGHOD agalla en la zona más carnosa paralela a columna.Uso de la SondaPara usar la sonda sin precalentamiento:1. Inserte la sonda en la comida (consulte sobre la Ubicación Correcta de la Sonda).2. Coloque la comida en el horno y conecte la sonda en su correspondiente tomacorriente en el horno.3. Seleccione el modo y la temperatura de cocción deseados. Antes de presionar Start (Iniciar), presione el icono Probe (Sonda) en la parte inferior derecha de la pantalla. Se visualizará la pantalla de configuración de la sonda. Ingrese la temperatura interna deseada para la comida y presione Start (Iniciar). La temperatura de la sonda se puede configurar entre 100°F y 200°F.
Para usar la sonda con precalentamiento:1. Presione la tecla del modo de cocción deseado (Horneado Tradicional, Horneado por Convección, o Dorado por Convección) e ingrese la temperatura de cocción deseada.2. Inserte la sonda en la comida (consulte sobre la Ubicación Correcta de la Sonda).3. Una vez que el horno fue precalentado, coloque la comida en el mismo y conecte la sonda en su correspondiente tomacorriente, asegurándose de que esté completamente insertada. Tenga cuidado, ya que las paredes del horno y el tomacorriente de la sonda están calientes.4. El horno detectará que la sonda fue insertada y se visualizará la pantalla de configuración de la sonda. Ingrese la temperatura interna deseada para la comida y presione Start (Iniciar). La temperatura de la sonda se puede configurar entre 100°F y 200°F.Pautas para el Cuidado de la SondaNOTA: algunos modelos con horno doble cuentan con una sonda sólo en el horno superior.6LVHXVDXQDVRQGDTXHQRVHDODSURYLVWDFRQHVWH producto, se podrán producir daños sobre la sonda.8VHODVPDQLMDVGHODVRQGDDOHQFKXIDUGHVHQFKXIDUOD misma, luego de insertar o de retirar la sonda de la carne o del tomacorriente.3DUDHYLWDUGDxRVVREUHODVRQGDQRXVHDJDUUDGHUDVSDUD empujar el cable al retirarlo.3DUDHYLWDUURPSHUODVRQGDDVHJ~UHVHGHTXHOD comida haya sido completamente descongelada antes de insertarla.3DUDHYLWDUSRVLEOHVTXHPDGXUDVQRGHVHQFKXIHODVRQGD del tomacorriente del horno hasta que este último se haya enfriado.1XQFDGHMHODVRQGDGHQWURGHOKRUQRGXUDQWHXQFLFORGH limpieza automática o de limpieza con vapor.
1RJXDUGHODVRQGDGHQWURGHOKRUQR
49-2000791 Rev. 0
15
USO DEL HORNO: Guía de Cocción – Hornos Simples y Hornos Superiores
Guía de Cocción – Hornos Simples y Hornos Superiores
La siguiente tabla brinda algunas pautas para los modos de cocción típicos. Si desea usar los modos de Precision Cooking (Cocción de Precisión), los mismos pueden ser sustituidos por los modos mostrados a continuación para comidas pertinentes.
TIPO DE COMIDAProductos HorneadosTortas con capas, tortas rectangulares, roscas, panecillos, pan rápido en un Solo EstanteTortas con capas* en Múltiples EstantesTortas de grasa (pastel de ángel)Galletas, galletitas, bizcochitos en un Solo EstanteGalletas, galletitas, bizcochitos en Múltiples EstantesBife y Cerdo
MODO(S) RECOMENDADO(S)Horneado por Convección Horneado TradicionalHorneado por Convección MúltipleHorneado por Convección Horneado TradicionalHorneado por Convección Horneado TradicionalHorneado por Convección Múltiple
Hamburguesas
Asar Alto
Bifes y Chuletas
Asar Alto
Dorados
Horneado Tradicional Dorado por Convección
Ave
Pollo entero
Horneado Tradicional Dorado por Convección
Pechugas, patas, muslos con huesos
Asado Bajo Horneado Tradicional Dorado por Convección
Pechugas de pollo deshuesadas
Asado Bajo Horneado Tradicional Dorado por Convección
Pavo entero
Horneado Tradicional Dorado por Convección
Pechuga de Pavo
Horneado Tradicional Dorado por Convección
Pescado
Asado por Convección Bajo Asado Bajo
Cazuelas
Horneado por Convección Horneado Tradicional
Comidas Congeladas a Conveniencia
Pizza en un estante simple
Horneado por Convección Horneado Tradicional
Pizza en estantes múltiples
Horneado por Convección Múltiple
Productos con papa, patitas de pollo fritas, aperitivos en un Solo Estante
Horneado por Convección Horneado TradicionalFritura con Aire (en hornos simples y superiores únicamente)
Productos con papa, patitas de pollo fritas, aperitivos en Múltiples Estantes
Horneado por Convección Múltiple
POSICIÓN(ES) DE ESTANTES RECOMENDADA3 2 y 41 3 2 y 45 ext.5 ext.1 o 22 2 o 32 o 3 1 o 2 1 o 2 5 (mitad del grosor o menos) 4 (>1/2 pulgada)33 2 y 432 y 4
 report this ad
SUGERENCIAS ADICIONALESUse utensilios brillantes.Asegúrese de que haya un flujo de aire adecuado (Vea la ilustración).Use utensilios brillantes.Use utensilios brillantes.Asegúrese de que haya un flujo de aire adecuado.Use una olla para asar; mueva la comida hacia abajo para que quede más preparada y menos soasada. Preste atención a la comida al asarla.Para un mejor rendimiento, centre la comida debajo del elemento calentador para asar.Use una olla para asar; mueva la comida hacia abajo para que quede más preparada y menos soasada. Preste atención a la comida al asarla.Para un mejor rendimiento, centre la comida debajo del elemento calentador para asar.Deje sin cubrir, use una olla chata tal como una olla para asar. No se requiere precalentarla.Use una olla chata tal como una olla para asar. No se requiere precalentarla.Ase del lado de la piel hacia abajo primero. Preste atención a la comida al asarla. Para un mejor rendimiento, centre la comida debajo del elemento calentador para asar.Mueva la comida más abajo para que quede más preparada y menos soasada y más arriba para soasar/ dorar al asar. Para un mejorrendimiento, centre la comida debajo del elemento calentador para asar. Usa una olla chata tal como una olla para asar. No se requiere precalentarla. Use una olla chata tal co
References
Appliance Service and Repair, Factory Trained Service | Café
Home | Food Safety and Inspection Service
GE Appliance Parts | Appliance Parts, Accessories & Water Filters
Warranty and Extended Service Contracts | Café Appliances
FoodSafety.gov
Café, Customizable Kitchen Appliances for the Modern Home
cafeppliances.com
How to Connect Your Smart Appliances with SmartHQ App | Café
cafeppliances.com
cafeappliances.com/register
[xyz-ips snippet=”download-snippet”]