Carrier RMAP-ST, RMAP-XL, RMAP-SST, RMAP-SXL AIR PURIFIER
Note
This guide is for quick reference only. Please see the User Manual for complete product information and operational instructions.
CAUTION
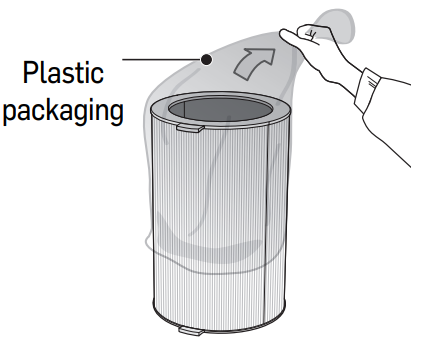
- Be sure to unplug the unit before removing the filter packaging.
- Remove the plastic packaging from the filter before use.
- Keep plastic packaging away from children as it may cause suffocation.
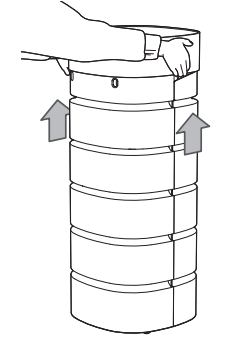
How to Prepare/Change the Filter
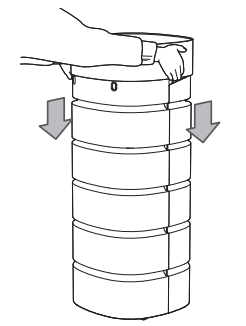
- Hold the top cover of the product with both hands and pull up.

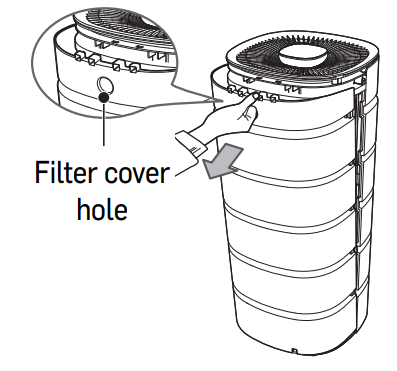
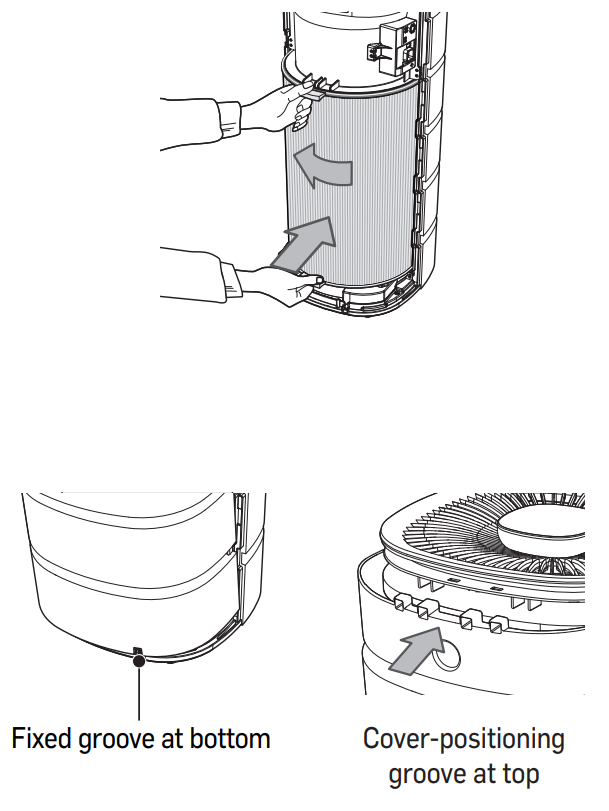
- Grasp the filter cover hole on the rear and pull it forward. Remove the filter from the unit by pulling it straight out.
- Remove the plastic packaging from the filter.
- Failing to remove the packaging will result in abnormal sounds and the filter will not work properly; and it may cause a fire or other damage to the product.
- Failing to remove the packaging will result in abnormal sounds and the filter will not work properly; and it may cause a fire or other damage to the product.
- Slide the filter back into the unit
- Replace filter cover.
- Insert the cover into the fixed groove at the bottom of the product.
- Slide the cover forward so that the cover fits into the top grooves.
- Hold the top cover of the product with both hands and slide it back in place, making sure the logo appears in the front.
- When the filter installation is complete, plug the unit into a 120V outlet, press the + ” ” button on the control panel for five seconds or more to initialize it.
- The red filter light will turn off when the product is reset.
Display
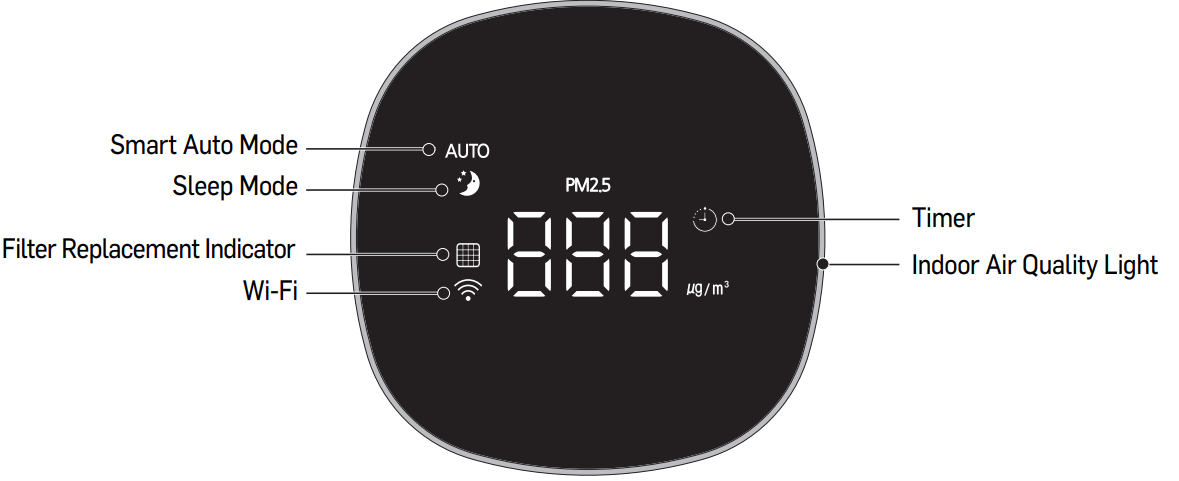
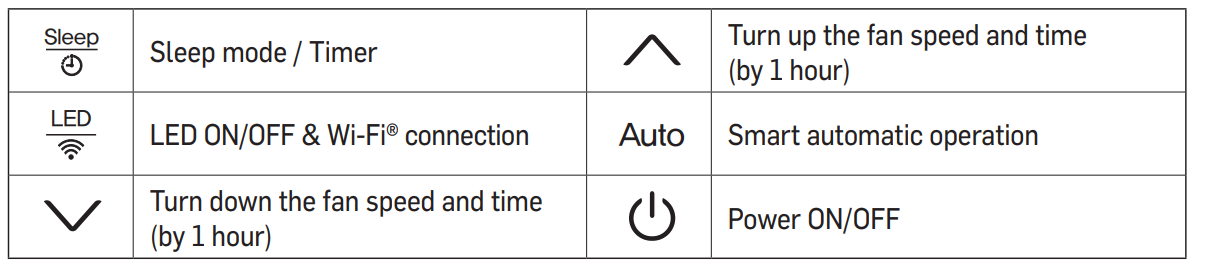
Control Panel
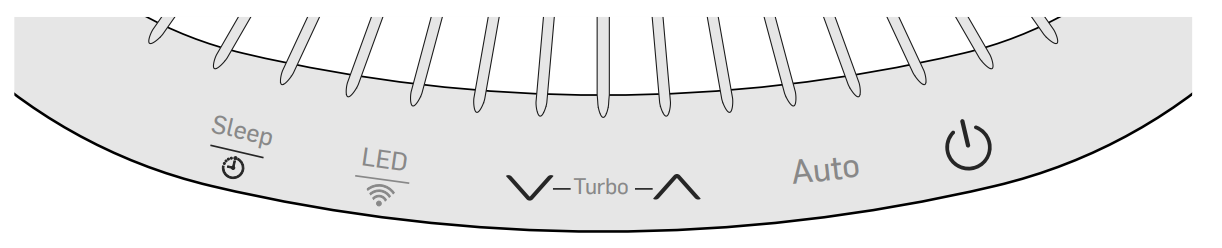
Control Panel Descriptions
Normal Operation
When the air purifier turns on, the sensor is initialized and the display shows during initialization.
- Press the button to turn on.
- The previously selected operation mode will be displayed.
- Press the button on the control panel to select your desired fan speed.
- You can adjust the fan speed from level 1 (F1) to level 18 (F18).
Note: The default home display on Wi-Fi® models will show a PM2.5 reading. Once the button is pushed, the display will switch to show the designated fan speed.
How to Install Casters (Optional)
- Inside of the air purifier package, there is a small box containing four casters and eight screws.
- Remove the four bottom bases from the air purifier with a screwdriver
- Replace each base with a caster, utilizing two screws per caster
- Retain the removed bottom bases and screws for future use.
Note
If there is no caster box inside the product box, please contact customer service at 1-888-320-0909.
©2021 Carrier. All Rights Reserved.The manufacturer reserves the right to discontinue or change at any time, specifications or designs without notice or without incurring obligations. Third-party trademarks and Third-party trademarks and logos are the property of their respective owners. carrierathome.com 1-888-320-0909
References
[xyz-ips snippet=”download-snippet”]