Caséta® Wireless Quick Start Guide
Lutron® Smart Bridge, Pico® remote controls & in-wall dimmers
Welcome—and thank you for purchasing a Caséta® Wireless dimming kit.
Before you install the dimmers, please watch the installation video at www.casetawireless.com/support
We hope you enjoy the convenience of Caséta® Wireless!
Double your warranty
Love Caséta® Wireless dimmers? Have ideas for making them better? Tell us what you think and we’ll extend your warranty by 1 year. www.casetawireless.com/register
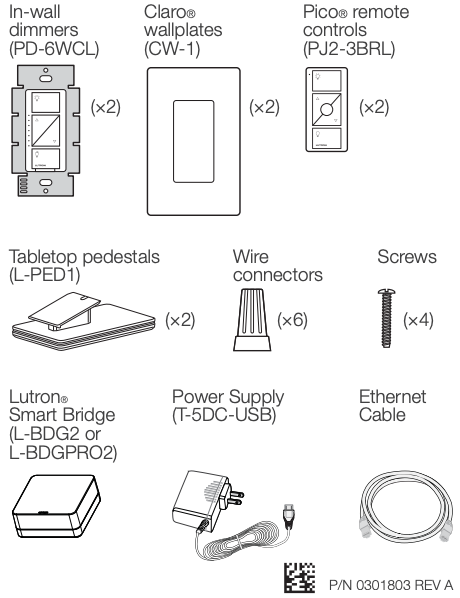
Contents supplied
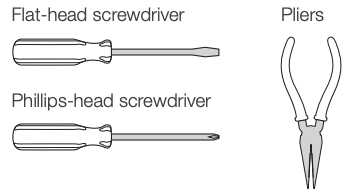
Tools you’ll need
Works with energy efficient dimmable light bulbs:
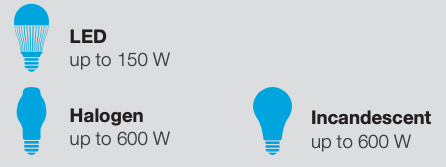
NOTE: You can mix and match dimmable LED, halogen, and incandescent light bulbs with Caséta® Wireless dimmers.
Dimmable LED light bulbs vary in their dimming performance. If you’re using these bulbs and they flicker or turn off, please visit for information on adjusting the dimmer for best bulb performance.
For a complete list of compatible dimmable LEDs, please visit www.casetawireless.com/bulblist
Compatible light bulbs include:
Cree®CR6-575L
EcoSmart®ECS BR30 W27 FL 120ECS 20 WW FL 50WE 120
Feit®A19/OM/LED
Philips®9290002295
Sylvania®LED12A19/DIM/O/827LED21PAR38/DIM/P/930/FL30
Installing your dimmers
Installation for lights with one wall switch (single-pole)
- Turn power off at circuit breaker!

 WARNING: SHOCK HAZARD.May result in serious injury or death. Turn off power at circuit breaker or fuse before installing.Important note (3-Way):Some lights have one wall switch, while others have two or more wall switches (such as stair lights, which have a switch at both the top and bottom of the stairs). We’ve included instructions for lights with one wall switch (called a single-pole). If your light has more than one switch (called a 3-way), please visit for complete installation instructions and how-to videos.
 - Remove existing switch from wallRemove the wallplate from switch.
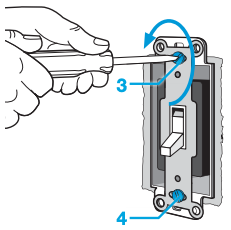
 Remove the switch and pull it away from the wall.
 Disconnect all three wires* from the switch.
 * If your switch has more than 3 wires attached, see “Installing Caséta® Wireless in a 3-way switch application” video at
 - Remove side sections (if necessary)
 Do not remove outside side sections on dimmers at the end of gang.
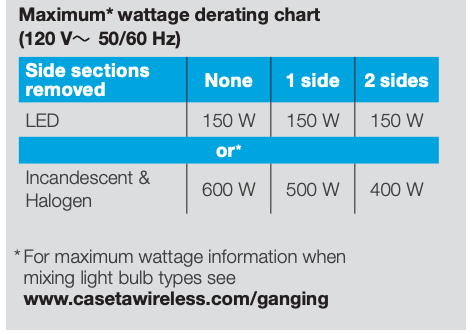
 Important note:Removing side sections reduces the dimmer’s maximum wattage rating. See the chart below for maximum wattage information.
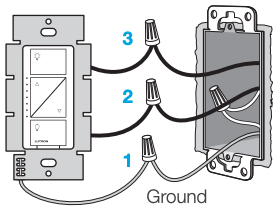
- Connect the dimmer

- Connect the bare copper (or green) “ground” wire from the wallbox to the green wire on the dimmer using a wire connector.
- Connect either of the remaining wires from the wallbox to either of the remaining wires on the dimmer using a second wire connector.
- Connect the remaining wire from the wall to the remaining wire on the dimmer using a third wire connector.
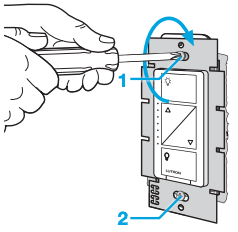
- Mount the dimmerUse the screws provided.

- Attach the wallplateAttach the adapter to the dimmer using the screws provided and snap on the wallplate.
 (If you installed the dimmer next to other dimmers or switches, you’ll need to install a wallplate with the correct size/number of openings to accommodate all the devices.)
 - Turn power on at circuit breaker
 Repeat Steps 1 through 7 to install the second dimmer.
Using your Caséta® Wireless kit
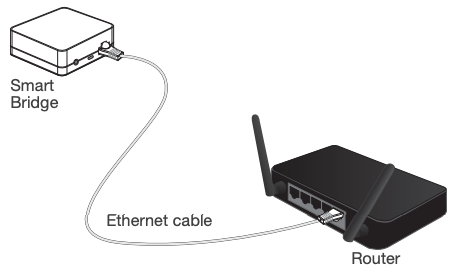
- Install the Lutron® Smart BridgeA. Connect the Smart Bridge to your Wi-Fi router using the Ethernet cable.
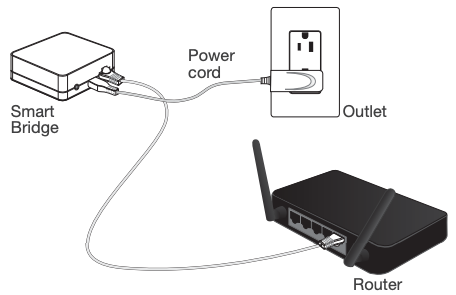
 B. Connect the power cord to the Smart Bridge and plug it into an outlet.
- Download the Lutron® app and walk through setup
 Apple is a trademark of Apple Inc., registered in the U.S. and other countries. HomeKit is a trademark of Apple Inc.App Store is a service mark of Apple Inc., registered in the U.S. and other countries.
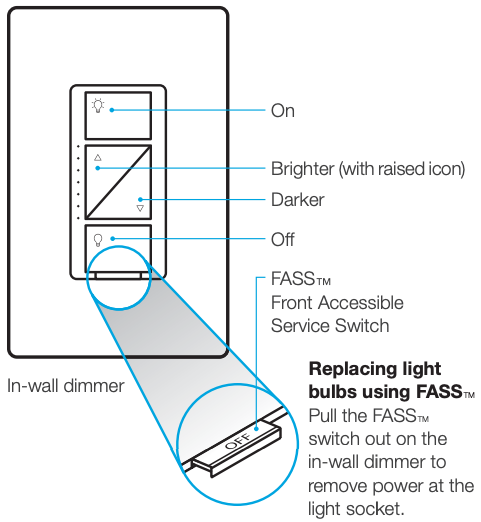
Using your controls
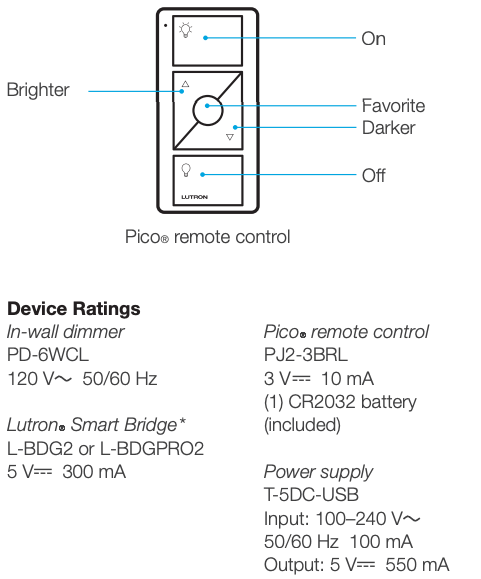
* Connected to a Class 2, LPS, or SELV, limited energy (<15 W) power source only
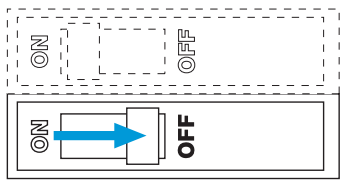
Troubleshooting
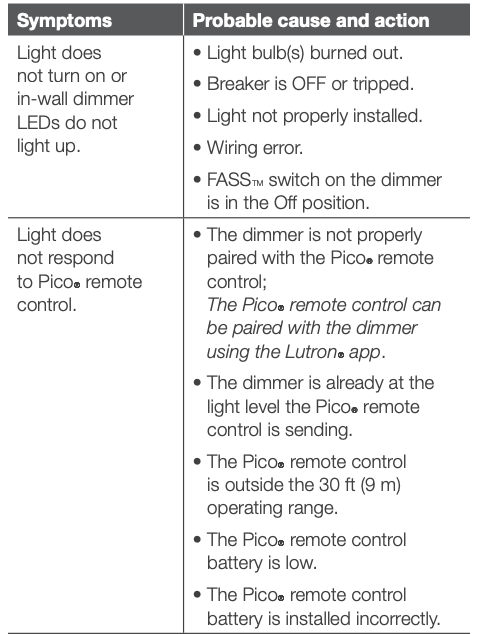
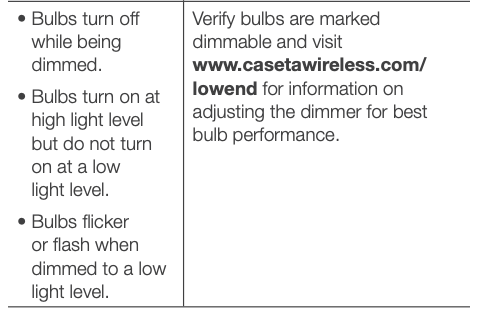
Important notes:
- For indoor use only
- Operate between 32 ˚F (0 ˚C) and 104 ˚F (40 ˚C)
Go to www.casetawireless.com/support for additional troubleshooting suggestions.
CAUTION
Use only with permanently installed fixtures with dimmable LED, halogen, or incandescent lamps. To avoid overheating and possible damage to other equipment, do not use to control receptacles, motor-driven appliances, or transformer-supplied appliances.
Codes
Install in accordance with all national and local electrical codes.
Grounding
When no “grounding means” exist in wallbox, the National Electrical Code (NEC®) allows a control to be installed as a replacement if 1) a nonmetallic, noncombustible faceplate is used with nonmetallic attachment screws or 2) the circuit is protected by a ground fault circuit interrupter (GFCI). When installing a control according to these methods, cap or remove green wire before screwing control into wallbox.
Use of the HomeKit logo means that an electronic accessory has been designed to connect specifically to iPod, iPhone, or iPad, respectively, and has been certified by the developer to meet Apple performance standards. Apple is not responsible for the operation of this device or its compliance with safety and regulatory standards. Please note that the use of this accessory with iPod, iPhone, or iPad may affect wireless performance.
FCC/IC Information
For FCC/IC information, please visit: www.lutron.com/fcc-ic
Caseta Lutron Smart Bridge Wireless Quick Start Guide – Caseta Lutron Smart Bridge Wireless Quick Start Guide –
[xyz-ips snippet=”download-snippet”]


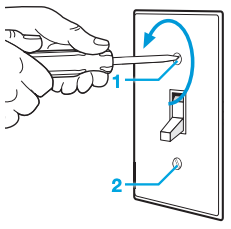 Remove the switch and pull it away from the wall.
 Disconnect all three wires* from the switch.
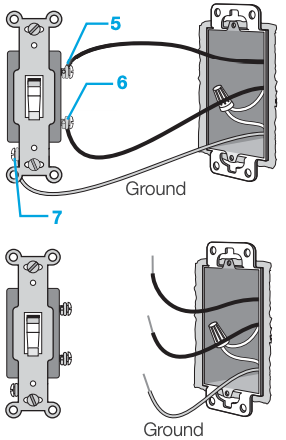 * If your switch has more than 3 wires attached, see “Installing Caséta® Wireless in a 3-way switch application” video at
 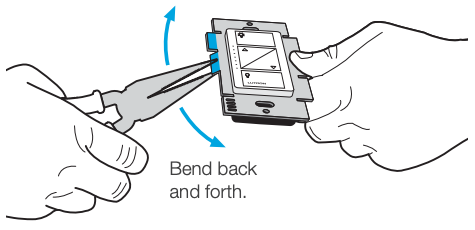 Do not remove outside side sections on dimmers at the end of gang.
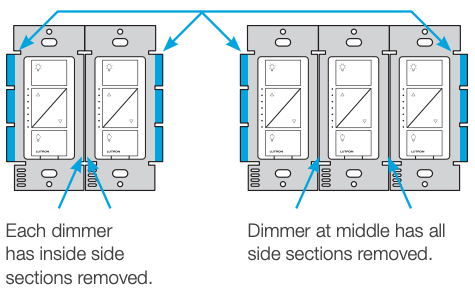 Important note:Removing side sections reduces the dimmer’s maximum wattage rating. See the chart below for maximum wattage information.
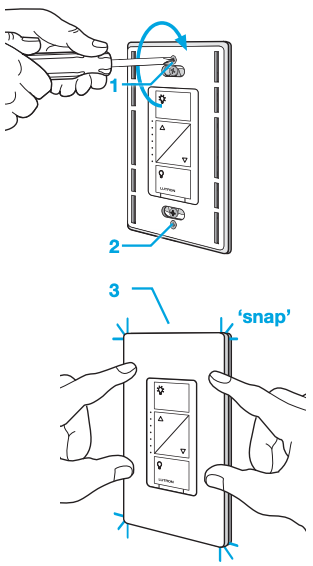 (If you installed the dimmer next to other dimmers or switches, you’ll need to install a wallplate with the correct size/number of openings to accommodate all the devices.)
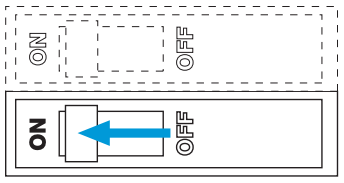 Repeat Steps 1 through 7 to install the second dimmer.
 B. Connect the power cord to the Smart Bridge and plug it into an outlet.
 Apple is a trademark of Apple Inc., registered in the U.S. and other countries. HomeKit is a trademark of Apple Inc.App Store is a service mark of Apple Inc., registered in the U.S. and other countries.