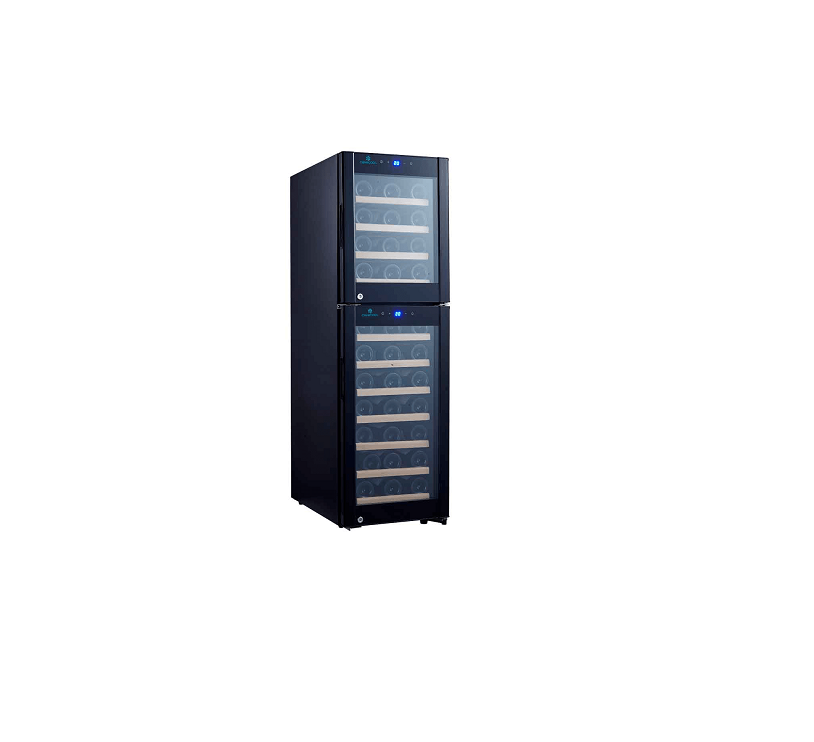
cave cool Primo Pearl User Guide
General
Please read the information contained herein so that you can become familiar with your device quickly and take advantage of the full scope of its functions. This user guide will provide important information for the initial commissioning, safety, intended use and care of the device.![]() WarningIf a dangerous situation is not avoided, this can lead to death or serious injuries. Follow the instructions to avoid the danger of death or serious personal injuries.SafetyTo reduce the risk of fire, electrical shock, or injury when using your appliance, follow these basic precautions.
WarningIf a dangerous situation is not avoided, this can lead to death or serious injuries. Follow the instructions to avoid the danger of death or serious personal injuries.SafetyTo reduce the risk of fire, electrical shock, or injury when using your appliance, follow these basic precautions.
- PLEASE READ all instructions before installing, operating, or servicing the appliance.
- DANGER AND WARNING: Failure to follow this safety statement may result in severe personal injury or death, property or equipment damage.
- Never attempt to repair or perform maintenance on the unit until the electricity has been disconnected.
- Never remove the round grounding prong from the plug and never use a two-prong grounding adaptor.
- Altering, cutting of power cord, removal of power cord, removal of power plug, or direct wiring can cause serious injury, fire or loss of property and life, and will void the warranty.
- Never use an extension cord to connect power to the unit.
Disposal of packagingThe packaging protects the device against damages during transportation. When disposing the recyclable packaging, please follow disposal regulations.
Important precautions
- Do not lift unit by door handle.
- Keep the door closed before installing.
- Ambient temperature below 10°C or above 32°C will hinder the performance of the appliance.
- This unit is not designed for use in a garage, shed or any other outside installation.
- Be sure the back plate and two flanks are free from obstruction. Obstructing free airflow can cause the unit to malfunction and will void the warranty.
- Allow unit temperature to stabilize for 24 hours before use.
- Do not block any internal fans.
- Use only genuine supplier’s replacement parts. Imitation parts can damage the unit, affect its operation or performance and may void the warranty.
Installation
Before using your wine cooler:
- Remove the exterior and interior packing.
- Before connecting the appliance to the power outlet, let it stand upright for approximately 2 hours. This will reduce the possibility of malfunction in the cooling system from handing during transportation.
- Clean the interior surface with lukewarm water using a soft cloth.
- Place your appliance on a tabletop strong enough to support the appliance when fully loaded.
- To level your appliance, adjust the front legs at the bottom of the appliance.
Bottle shelvesRemove all bottles from the shelves. Lift the shelf upwards and gently pull it out. The wine shelves can be removed to accommodate larger bottles.
Design and function
Unit overview
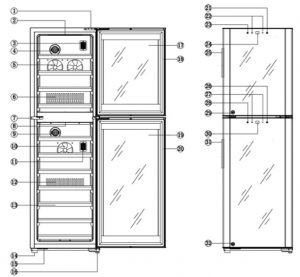
- Upper hinge
- Light – Upper zone
- Temp. sensor – Upper zone
- Carbon filter – Upper zone
- Fans – Upper zone
- Exhaust – Upper zone
- Lock catch – Upper door
- Light – Lower zone
- Carbon filter – Lower zone
- Fan – Lower zone
- Temp. sensor – Lower zone
- Exhaust – Lower zone
- Shelf
- Foot
- Lock catch – Lower door
- Lower hinge
- Glass – Upper door
- Magnetic seal – Upper door
- Glass – Lower door
- Magnetic seal – Lower door
- Light on/off – Upper zone
- Temp. setting – Upper zone
- Temperature °C/°F – Upper zone
- Temp. display – Upper zone
- Handle – Upper door
- Light on/off – Lower zone
- Temp. setting – Lower zone
- Temperature °C/°F – Lower zone
- Lock – Upper door
- Temp. display – Lower zone
- Handle – Lower door
- Lock – Lower door
Buttons functions

- Temperatures can be set in the range 5-10°C in the lower zone and 10-18°C in the upper zone.
- The temperature can be adjusted by 1°C.
- After setting the desired temperature, the set temperature will flash for 10 seconds on the display and then revert back to displaying the internal cabinet temperature.
Cleaning and maintenance
- Prior to commissioning, clean the appliance thoroughly.
- Before cleaning switch off the wine cabinet and unplug from the wall power outlet. Remove all content.
- Do not use aggressive or abrasive cleaning agents or solvents.
Cleaning
- Wash the inside with a damp cloth soaked in lukewarm water and a bit of mild detergent.
- After cleaning the interior, leave the door open until the interior of the device is completely dry.
- If condensation is formed inside, please wipe the inside with a soft cloth.
- Be sure to keep the door gasket clean to keep the unit running efficiently.
- Use a soft cloth for drying.
Moving the applianceTurn off the appliance first and unplug the unit from the wall outlet. Remove all content. Securely tape down all loose items inside your appliance. Tape door shut. Make sure that the device stays in the upright position during transportation.
Troubleshooting
| Fault | Possible cause |
| Wine refrigerator did not turn on. | Not plugged into the correct voltage. Also, the circuit breaker may have tripped or a blown fuse. |
| Wine refrigerator is not cold enough. | Check the temperature control setting. External environment may require a higher setting. The door is open too often. The door is not closed completely. The door seal does not seal properly. The wine refrigerator does not have the correct clearance. The fan cover is dirty. Please clean the fan cover. |
| The light does not work. | Please call the warranty service number. |
| Vibrations | Check to ensure that the wine refrigerator is level. |
| The wine refrigerator seems to make too
much noise. |
The wine refrigerator is not level. Also, please check the fan. |
| The door will not close properly. | The wine refrigerator is not level. The door is not properly installed. The sealing is weak. The shelves are out of position. |
| LED display error. | Please call the warranty service number. |
| Condensed water on the surface of cabinet. | There may be some water condensation on the surface of wine cabinet (especially the glass door) if the item is in a damp room. Please wipe it away with dry cloth. |
| Condensation formed inside the cabinet. | If the environment has a high level of humidity or the door of wine cabinet has been left open for a long period or opened frequently, wipe off the door and walls and leave the door closed as long as possible. |
Disposal of the device
Old electric and electronic devices may contain valuable materials and/or damaging substances. Therefore, do not put your old device into the non-recyclable waste under any circumstances.
Technical data
| Model No. | CC160B |
| Capacity | 160 L / 51 bottles |
| Cooliong system | Compressor |
| Voltage | AC220-240V |
| Rated current | 1A |
| Frequency | 50Hz |
| Input power | 90W |
| Power consumption (kWh/Year) | 197 |
| Ambient temperature | 10 – 32°C |
| Temperature control range | 5 – 10°C and 10 – 18°C |
| Net weight | 48 Kg |
| Dimensions (W x H x D) | 39,5 x 127,5 x 58 cm. |
References
[xyz-ips snippet=”download-snippet”]