CAY P6SLite User Manual
Main page
Scan QR Code To Download APP Note: iPhone devices; iOS 8 or above Android 4.0 or more
Sign up
- Download the app P6SLite from the store.
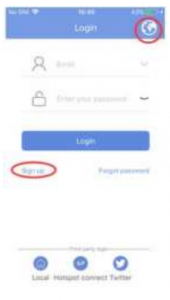
 Select Service area: China/International. The default is China Service Zone. Please choose International Service Zone if the device is out of China.
- And Sign up to create a new Cloud account.
- Or click Local icon to login without Cloud account. (Ref. to 1.2)
- Or click Twitter icon to login with Twitter account. (Ref. to 1.2)
Login

- Select service area as the same as when signing up.
- Enter your credentials and select Login.
- You can also select Local or Twitter icon to Login without Cloud account
Add Device
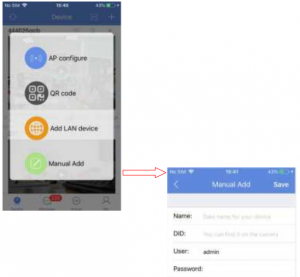
- AP mode is mainly used for direct hot spot connection with WIFI camera.
- Scan QR codes of IP device. (label on device) to add device.
- Add the advice in the LAN, when the smart phone and the IP device are in the same LAN.
- Manually add the device. Input DID, user name and password of the device manually.
Device

 Device refresh button。
 Fast add device by scanning a QR of IP device.
 Adding devices (Ref. to 1.3 Add device)
 Push to read Alarm message.
 To View download or screenshot pages。
 Information of current account, version No. of the APP.
Message
Push Message icon to go to LIVE video of alarm IP device.
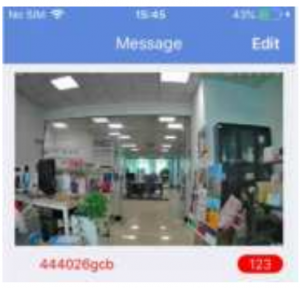
Image
Push Image icon to go to the list of playback movie, image (downloaded in smartphone, and snapshot of Live.
Live

- In the Preview lit of device. You can see the status of the IP device. Online or Offline.
- Drop-down to list to refresh.
- Push
 to go to LIVE of IP device.

 Push to trigger a siren of IP device. (Device should support siren).
 Push to select IR LED mode: Normal, Color and Smart.
 full screen display.
 Push one time to start recording in Smartphone. Push again to stop recording.
 Snapshot LIVE Image.
 To control Pan/Tilt/Zoom of IP device. (Device should support PTZ)
 Keep pushing to talk. (Device should support PTZ)
 Image quality selectionLD: CIF 352*288SD: D1 704*576HD: Full HD 1920 *1080
 Push to ON/OFF the audio from IP device. (Device should support audio IN
Playback
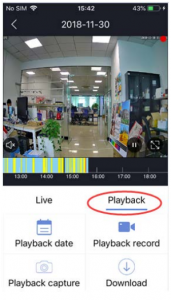
 Select to playback the recording in SD card according to the date.
 Push to start recording what playback in smartphone. Push again to stop recording.
 snapshot a still image during playback.
 Download recording file in SD card or HDD of IP device. (Device should support this function)
Playback date

- Choose the date and start time to playback.
- Click Start Play

- Yellow means the recording when motion alarm triggered.
- Blue means the recording in Schedule
Download
Push Download icon to the page of video List.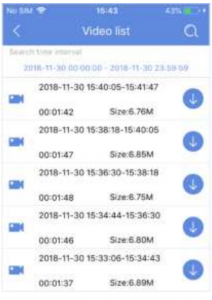
![]() Push to download the file in SD card of IP device.
Push to download the file in SD card of IP device.![]() Search file in SD card according to the date.
Search file in SD card according to the date.
Device options

 Subscribe or Unsubscribe push notify function ,Subscribe: As long as an alarm triggers, the user will receive an message from APP.Unsubscribe: the user won’t receive any message from APP.
 Push to go to 1.5.2.
 Push to View pictures of alarm snapshots.
 Setup parameters of IP device from APP.
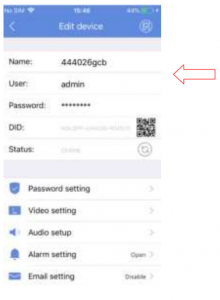
Edit device
Push ![]() to save the setup of parameters.
to save the setup of parameters.
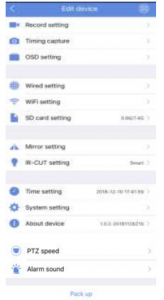
- Password settingsTo modify the password of IP device.
- Video settingTo modify parameters of main stream and sub-stream of IP device.
- Audio setupTo setup parameters of audio input of IP device.
- Alarm settingTo setup parameters of Alarm. (Ref. to 3.1)
- Email settingEnable: send email when alarm trigger.Disable: will not send email when alarm trigger.
- FTP settingEnable: upload snapshot/video to ftp server when alarm trigger.Disable: will not upload snapshot/video to ftp server when alarm trigger.
- Recording settingTo setup recording.
- Timing captureTo setup interval time to save snapshot to SD card and FTP server.
- OSD settingTo display IP device name and time on Live channel.
- Wired settingTo setup IP address or DHCP of IP device.
- WIFI settingTo setup WIFI SSID and password of IP device. (Device should support this function)
- SD Card settingTo format SD card of IP device. (Device should support this function.)
- Mirror settingHorizontal or vertical rotate the image.
- IR-Cut SettingTo setup IR CUT in Normal, Color and Smart mode.Normal: The image is color at day and BW in the night (IR LED ON).Color: The image will keep color at day and night.(IR LED will not power ON)Smart: The image is color at day and BW in the night (IR LED ON).When motion detection triggered, White LED will power ON and image is color.(the user can setup the time of White LED ON)
- Time setting:To setup time zone, DST of the IP device from APP.
- System settingTo restore and reboot IP device from APP.
- About deviceThe FW version of IP device.
- PTZ speedTo setup Pan/tilt/zoom speed from leve 1~10 of the IP device. (Device should support this function.)
- Alarm SoundTo setup the sound type, volume of Siren. (Device should support this function.)
Alarm Setting

- Motion detection:Open: When there is motion object, trigger alarm.Disable: Will not trigger alarm when there is motion object.
- SensitivityTo setup sensitivity of Motion detection.
- Check to active the function when alarm is triggered.
- Detection AreaSelect the area of motion detection.
- Alarm timeSelect the time to trigger alarm. The user can select all day or custom
Detection Area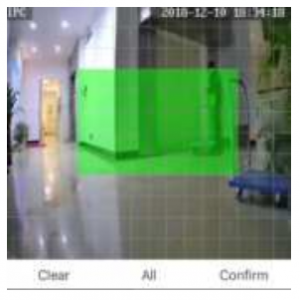 Alarm time/Custom
Green means the motion detection zone and alarm time selected.
Record Setting
Check to setup different recording mode (timer, Alarm, motion or disable) by time and date.The square below will show the color of recording mode.
IR-CUT Setting
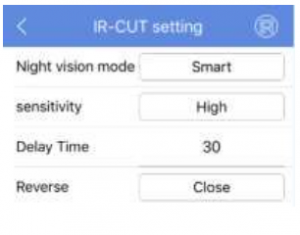
Normal: The image is color at day and BW in the night (IR LED ON).Color: The image will keep color at day and night.(IR LED will not power ON)Smart: The image is color at day and BW in the night (IR LED ON).When motion detection triggered, White LED will power ON and image is color.(the user can setup the time of White LED ON)
Alarm Sound
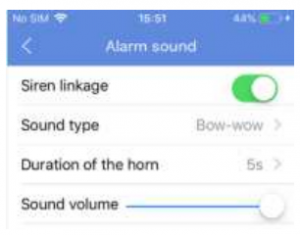
Enable/disable Siren Linkage of the IP device from APP.
Sound type: There are 3 modes at option. Siren, Dog barking and customs recording.
Duration of the horn: 5, 10, 20, 30 seconds at option
Contact Us
SHENZHEN CAY TECHNOLOGY CO., LTD.Add: 3/F, 4 Block, Hongfa Hi Tech. Park, Tangtou Ave., Shiyan, Bao’an District, ShenzhenTech. support: 86-755-85293003 85291891Email: ©2018 Shenzhen CAY Technology Co., Ltd. Copyright

[xyz-ips snippet=”download-snippet”]

