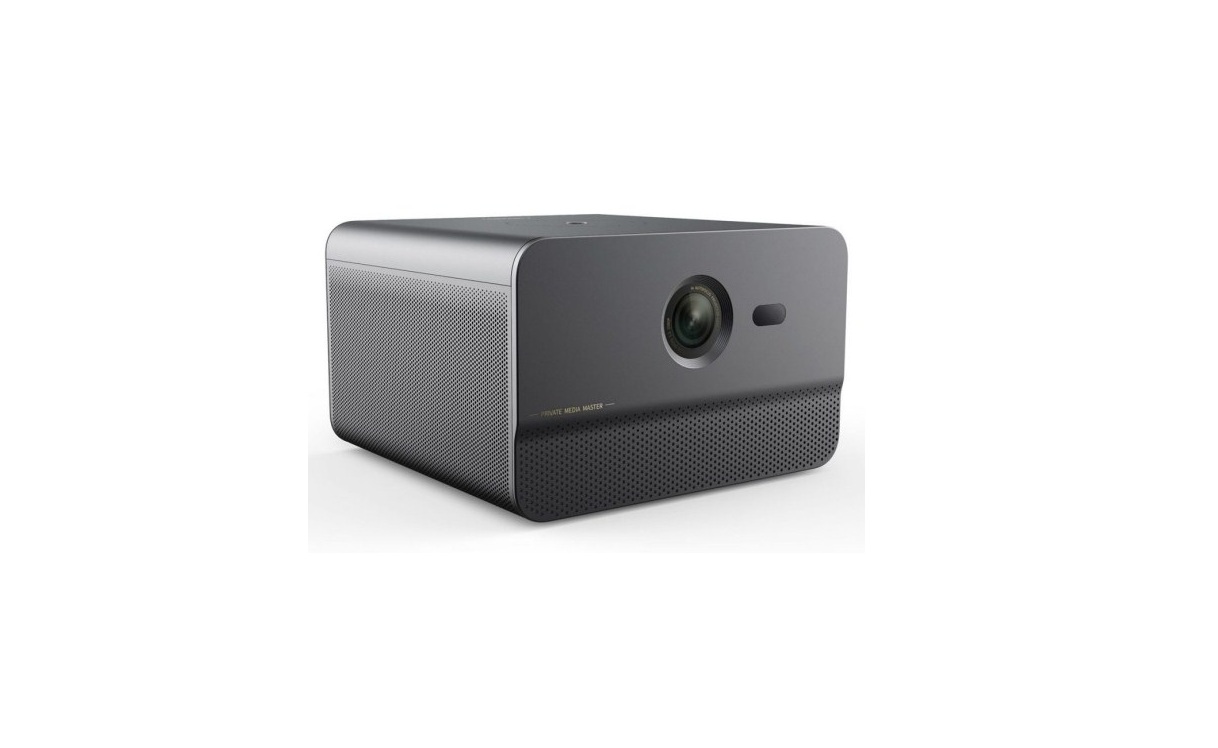
Changhong M3000 LED Projector User Guide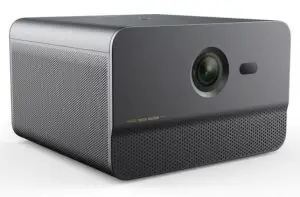
Preface
Dear User.Hello! Thank you for choosing Changhong Smart Projector. This product manual is intended for use with the M3000 model. If you have any questions about this product, please contact your local authorized dealer and we will be happy to assist you.The diagrams in this product manual are only examples, and may differ from the actual product, please refer to the actual product (this statement is throughout this product manual).
Packing List
| Host | 1 unit |
| User’s Manual | 1 unit |
| Power adapter | 1 unit |
| Remote control | 1 Unit |
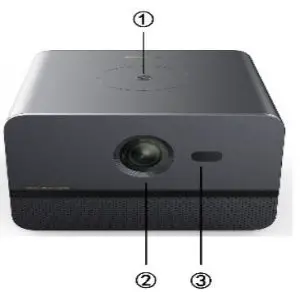
Host appearance
- Power button 1
- Projection window 2
- Infrared head 3

| Power input | 1 |
| S/PDIF | 2 |
| Network port | 3 |
| USB | 4 |
| HDMI (ARC) | 5 |
| Audio output | 6 |
| Air outlet | 7 |
| Air inlet | 8 |
| Sound hole | 9 |
| Infrared head | 10 |
Remote control
Remote control appearance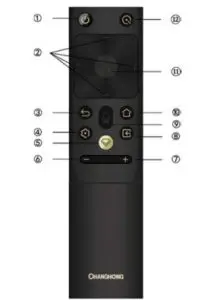
| Power button 1 | 1 |
| Arrow keys 2 | 2 |
| Back key 3 | 3 |
| Menu key 4 | 4 |
| Focus key 5 | 5 |
| Volume down 6 | 6 |
| Volume Up 7 | 7 |
| Source key 8 | 8 |
| Undefined 9 | 9 |
| Home button 10 | 10 |
| Confirm key 11 | 11 |
| Undefined 12 | 12 |
Note: Short press the “focus” button to enter “electric focus”, long press the “focus” button to enter “auto focus”.
Remote control pairingThis machine uses a Bluetooth remote control. The remote control must be paired with this machine before it can be used normally. When the machine is turned on for the first time, if the main unit is not paired with the remote control, please follow the steps below to pair.
Press the “Power” button on the main unit to start the machine, move the remote control as close as possible to the main unit, and press the “Menu” and “Volume Down” keys at the same time for more than three seconds. When the indicator of the remote control flashes quickly, let go and wait, and “Pairing” appears on the screen. “Success” prompt means that the pairing is successful. If the pairing fails, please retry again.
Optical mouse functionEnter the optical mouse function: After the pairing is successful, shake the remote control to bring up the optical mouse arrow. After moving the mouse arrow to the target position, press the “confirm” key to confirm the operation.Exit the optical mouse function: Shake the remote control to exit the optical mouse state; or let the remote control idle for more than ten seconds to automatically exit the optical mouse.
On/OffPower on: When the device is turned off, after correctly connecting the power cord, lightly press the “Power” button on the device or the “Power” button on the remote control to turn on the device.Shut down: When the device is running, press the “Power” button on the body or the “Power” button on the remote control, and the device will enter standby mode.
FocusAuto Focus:Method one: Long press the “focus” button to activate the “auto focus” function. Method 2: Long press the “Menu” button on the remote control -> Select “Display Settings” -> Select “Focus Mode” -> Select “Auto” -> When the device moves, the picture will automatically adjust to clear.
Motorized focus:① Turn on the “Motorized focus” funcƟon: short press the “focus” key or follow the steps below, long press the remote control “menu” key -> select “display settings” -> select “focus mode” -> select “manual “;
② Select “Motorized focus” -> Use the “Left/Right” button on the remote control to adjust the focus until the picture changes from blur to clear.
Keystone correctionAutomatic keystone correction:① Turn on the “automaƟc keystone correcƟon” funcƟon: long press the remote control “menu” button -> select “display settings” -> select “calibration method” -> select “auto”;② When the device moves, the screen will automaƟcally perform keystone correcƟon.Motorized keystone correction:① Turn on the “Motorized Keystone Correction” function: long press the “Menu” button on the remote control -> select “Display Settings” -> select “Calibration Method” -> select “Manual”;② Select the correcƟon method as required, and correct the image with the arrow keys on the remote control.
Internet connection
Wireless network:① Long press the “Menu” buƩon on the remote control -> select “Network” -> select “Wireless Network”;② Select the network to be connected with the “up/down” buƩon, and press the “confirm” button;③ Enter the wireless network password in the pop-up menu, select the connection and press the “OK” button.Wired network:Use a commercially available network cable to connect one end to the network port on a network hub or other device, and the other end to the network port of the machine.
Signal source switching① Press the “Source” buƩon on the remote control to call up the source switching menu, and switch the signal source according to usage requirements.10. Multi-screen interaction① Connect the smartphone (supporting DLNA protocol) and this machine to the same local area network;② Enter mulƟ-screen interaction: press the remote control “home” button -> select “multiscreen interaction”;③ AŌer entering the mulƟ-screen interaction, there are “video projection”, “music projection”, “picture projection”, “mobile phone projection”, Miracast projection and other projection options to choose from. Please follow your needs and follow the page prompts to use the “multi-screen interaction” function.
Speaker mode① Long press the remote control “menu” buƩon -> select “Bluetooth” -> turn on Bluetooth function;② Search and connect the device on the smart terminal, and then push the smart terminal audio to the device for playback.
More settings① Press the “Source” buƩon on the remote control to enter the HDMI channel;② Press the “Menu” buƩon on the remote control to display the scene mode and advanced settings menu;③ The HDMI version can be switched under the advanced seƫngs menu.
Special Notice
- Do not look directly at the bright light emitted by the machine to avoid the strong light from damaging the eyes;
- Do not block the vents, and install the machine in a well-ventilated place to prevent the machine from overheating;
- Do not use volatile oils, thinners and other solvents to clean the machine. These solvents may deteriorate the cabinet or damage the painted surface;
- Do not touch or wipe the lens with your hands or ordinary cleaning cloth. To remove dust on the lens, please use an ear wash ball;
- Do not touch the power plug and the machine with wet hands;
- If liquid or foreign objects fall into the machine, please turn off the power and pull out the plug, and contact an authorized dealer or seller for disposal;
- If the machine receives a heavy blow or the case is damaged, please turn off the power and unplug it, and contact an authorized dealer or seller for handling;
- When checking, adjusting or repairing, please contact the authorized dealer or seller for handling, non-professional operation may cause electric shock or damage the machine;
- Please use the power adapter provided with the machine;
- Please ensure that the machine is operated and stored in the correct temperature range. The storage environment temperature is -20~50℃, and the operating environment temperature is 0~35℃. If it exceeds this range, it may cause permanent damage to the machine;
- Executive standard: Q/20541230-8.168-2020;
- This device contains a radio transmitter module with model approval code: CMIIT ID: 2019AP1686M.
Warranty service
If the product fails during use, or if you have any comments or suggestions, please contact an authorized dealer or seller. Regarding the after-sales service including installation, service and maintenance, please refer to the local country (region) laws and the local authorized dealer’s policy.
 report this ad
Sichuan Changhong Electric Co., Ltd.Address: No. 35, Mianxing East Road, High-tech Zone, Mianyang City, Sichuan Province Website: Laser.changhong.com
References
[xyz-ips snippet=”download-snippet”]