
CHAUVET DJ SCORPION Dual Instruction Manual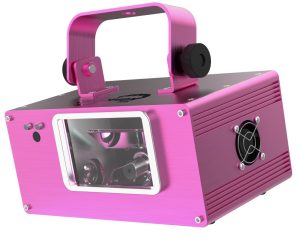
OPERATION
This product is not designed for continual use. Make sure there are regular breaks during operation to maximize the life of your laser. Always disconnect the Scorpion Dual V2 from power when not in use.
Control Panel Operation
To access the control panel functions, use the four buttons located underneath the display. When the product is on, the LED monitor on the rear panel will show the current operating mode (standalone or DMX). The product will retain the last saved settings when powered off.
|
Button |
Function |
| <MENU> |
Selects an operation mode or backs out of the current menu option. |
|
<U P> |
Scrolls up the list of options or selects a higher value. |
|
<DOWN> |
Scrolls down the list of options or selects a lower value. |
|
<ENT> |
Activates a menu option or a selected value. |
Menu Map
|
Mode |
Programming Steps |
Description |
|
OMX Mode |
001-503 |
Selects OMX starting address |
|
Slave Mode |
SLA |
Stave mode |
|
Remote Control |
rEN |
Wireless remote control |
|
Test Mode |
tSt |
Test pattern |
|
Sound Active/Auto Modes |
Sou | Sound-Active mode |
| Aut |
Auto mode |
|
|
Sensitivity |
S 0-9 |
Sound sensitivity control |
Configuration (DMX)
Set the product in DMX mode lo control with a DMX controller.
- Connect the product to a suitable power outlet.
- Tum the product on.
- Connect a OMX cable from the OMX output of the OMX controller to the OMX input socket on the product.
Starting Address
When selecting a OMX starting address, always consider the number of OMX channels the selected OMX mode uses. If you choose a starting address that is too high, you could restrict the access to some of the product’s channels.The Scorpion Dual V2 uses up to 10 OMX channels in OMX mode, which defines the highest configurable address to 503.If you are not familiar with the OMX protocol, download the OMX Primer from www.chauveUiqhting.com.
To select the starting address, do the following:
- Press <MENU> repeatedly until 001-503 blinks on the display.
- Use <USE> or <DOWN> to select the starting address.
- Press <ENTER>
Test Mode
Activate the laser test pattern as follows.
- Press <MENU> repeatedly until tSt blinks on the display.
- Press <ENTER> .
DMX Channel Modes, Assignments, and Values
|
Channel |
Function | Value |
Setting |
| 1 |
Control Function |
000 ↔ 085086 ↔ 170171 ↔ 255 |
OMX mode (other channels activated)Auto programSound Active |
|
2 |
Strobe |
000 ↔ 009010 ↔ 249250 ↔ 255 |
No FunctionSlow to fastOn |
| 3 |
Pattern Selection |
000 ↔ 255 |
Patterns as shown in Patterns table. |
|
4 |
Zoom |
000 ↔ 1271280 ↔ 169170 ↔ 209210 ↔ 255 |
100%-5%Zoom InZoom OutZoom in and out |
|
5 |
Y-Axis Rolling |
000 ↔ 127128 ↔ 191192 ↔ 255 |
Fixed position on y-axis (0 to 359•)Clockwise rolling, slow to fast.Counter clockwise rolling, slow to fast. |
|
6 |
X-Axls Rolling |
000 ↔ 1271280 ↔ 191192 ↔ 255 | Fixed posiUon on x-axis (0 to 359″)Clockwise rolling, slow to fastCounter-dockwise rolling, slow to fast |
|
7 |
Z-Axis Rolllng |
000 ↔ 127128 ↔ 191192 ↔ 255 | Fixed position on z-axis (0 to 359″)Clockwise rolling, slow to fastCounter-clockwise rolling, slow to fast |
|
8 |
Pan | 000 ↔ 127128 ↔ 191192 ↔ 255 | Fixed position (128 horizontal points)Clockwise movement, slow to fastCounter-clockwise movement, slow to fast |
|
9 |
Tilt |
000 ↔ 127128 ↔ 191192 ↔ 255 |
Fixed position (128 vertical points)Clockwise movement, slow to fastCounter-clockwise movement, slow to fast |
|
10 |
Scan Speed |
000 ↔ 127128 ↔ 169170 ↔ 209210 ↔ 255 |
Fast to slow (manual)Slow to fast (automatic)Fast to slow (automatic)Fast to slow, then slow lo fast (automatic repeat) |
- For manual operation of lasers using OMX control, be sure Channel 1 Is set to OMX mode (000-085).
- For automatic operation of lasers using OMX control, be sure Channel 1 Is set to Auto program (086-170).
- Channel 2 must be set to 010-255 for Channel 1 to be operational.
Patterns
|
DMX |
PATTERNS | DMX | PATTERNS | DMX | PATTERNS | DMX |
PATTERNS |
|
000-007 |
 |
064-071 |  |
128-135 |  |
190-197 |  |
|
008-015 |
 |
072-079 |  |
138-143 |  |
198-205 |
|
|
016-023 |
 |
080-087 |  |
144-151 |  |
206-213 |
|
|
024-031 |
 |
088-095 |  |
152-159 | 214-221 |  |
|
|
032-039 |
 |
096-103 |  |
160-167 | 222-229 | ||
|
040-047 |
 |
104-111 |  |
168-175 | 230-237 |
|
|
|
048-055 |
 |
112-119 | 176-181 |  |
238-245 |
|
|
|
066-083 |
 |
120-127 | 182-189 |  |
246-255 |  |


Configuration (Standalone)
Set the product in one of the standalone modes lo control without a OMX controller. (Standalone)
- Connect the product lo a suitable power outlet.
- Tum the product on.
![]() Never connect a product that Is operating In any standalone mode {Auto or Sound-Active) to a DMX string connected to a DMX controller. Products In standalone mode may transmit OMX signals that could interfere with the DMX signals from the controller.
Never connect a product that Is operating In any standalone mode {Auto or Sound-Active) to a DMX string connected to a DMX controller. Products In standalone mode may transmit OMX signals that could interfere with the DMX signals from the controller.
Sound-Active Mode
To enable the Sound-Active program, do the following:
- Press <MENU> repeatedly until Sou (Sound-Active) or Aut (Auto) blinks on the display.
- Use <UP> or <DOWN> to select Sou.
- Press <ENTER>.
Sound Sensitivity
To set the sound sensitivity, follow the instructions below:
- Press <MENU> repeatedly until S 0-9 blinks on the display.
- Use <UP> or <DOWN> to select the desired sound sensitivity.
- Press <ENTER> .
The product will only respond to low frequencies of music (bass and drums). The laser will blackout when In Sound-Active mode after 3 seconds of silence or noise below the sensitivity setting.
Auto Mode
To enable the auto mode, follow the instructions below:
- Press <MENU> repeatedly until Sou (Sound-Active) or Aut (Auto) blinks on the display.
- Use <UP> or <DOWN> to select Aul
- Press <ENTER> .
Master/Slave Mode
The Master/Slave mode allows a single Scorpion Dual V2 product (the master) to control the actions of one or more Scorpion Dual V2 products (the slaves) without the need of a DMX controller. The master will be set to operate in either Auto mode or Sound-Active mode, ‘While the slaves will be set to operate in Slave mode. Once set and connected, the slaves will operate in unison with the master. Configure the products as indicated below.
Slaves:
- Press <MODE> repeatedly until SLA shows on the display.
- Press <ENTER>.
- Connect the DMX input of the first slave to the OMX output of the master.
- Connect the DMX input of the subsequent slaves to the OMX output of the preVious slave.
- Finish setting and connecUng alt the slaves.
Master unit:
- Set the master to operate in either Auto mode or Sound-Active mode.
- Make the master the first unit In the OMX daisy chain.
- Configure all the alive units before connecting the master unit to the OMX d1i1y chain.
- Never connect I DMX controller to a OMX strtng configured for Master/Slave because the controller may lnterfere with the signals from the m11ter unit.
- Do not connect more than 31 Slave units to the master unit.

[xyz-ips snippet=”download-snippet”]