
![]() TOAST-AIR® TOUCH AIR FRYER+ OVENUSER GUIDE
TOAST-AIR® TOUCH AIR FRYER+ OVENUSER GUIDE
 RJ50-SS-T
COOKING FORWARD™Welcome!Thank you for choosing the Toast-Air® Touch Air Fryer + Oven as the newest addition to your kitchen. Whether this is your first Chefman® appliance or you’re already part of our family, we’re happy to be cooking with you. The Air Fryer + Oven boasts nine cooking functions plus the ability to set two different functions to occur sequentially. (Put a breadcrumb-topped casserole in the oven, set it to bake then broil, and it will cook through with a golden crisp topping to finish.) With a 20-liter capacity, the Air Fryer + Oven can bake a 10-inch pizza or air fry 2 pounds of chicken wings. Made of sleek stainless steel, the toaster looks great on any counter, and cleaning it is a breeze, too.We know you’re excited to get cooking, but please take a few minutes to read our directions, safety instructions, and warranty information.From our kitchen to yours,The Chefman® Team![]() READ ALL INSTRUCTIONS BEFORE USEFor your safety and continued enjoyment of this product, always read the instruction manual before using it.
READ ALL INSTRUCTIONS BEFORE USEFor your safety and continued enjoyment of this product, always read the instruction manual before using it.
SAFETY INSTRUCTIONS
IMPORTANT SAFEGUARDSWARNING: When using electrical appliances, basic safety precautions should always be followed including the following:
- Read all instructions.
- Do NOT touch hot surfaces. Use handle or dials.
- To protect against electrical shock do NOT immerse the cord or plug in water or other liquid.
- Close supervision is necessary when any appliance is used by or near children.
- Unplug from outlet when not in use and before cleaning. Allow cooling before putting on or taking off parts.
- Do NOT operate any Chefman® brand appliance with a damaged cord or plug or after the appliance malfunctions or has been damaged in any manner. Contact Chefman® Customer Support.
- The use of accessory attachments not recommended by Chefman® may cause injuries.
- Do NOT use outdoors.
- Do NOT let the cord hang over the edge of the table or counter or touch hot surfaces.
- Do NOT place on or near a gas or electric burner, or in an oven.
- Extreme caution must be used while moving the oven when it contains hot oil or other hot liquids.
- Always plug the cord into the wall outlet first. To disconnect, turn off the oven.
- Do NOT use the oven for other than intended use.
- Oversize foods or metal utensils must NOT be inserted in the oven as they may create a fire or risk of electric shock.
- A fire may occur if the oven is covered with or touching flammable material, including curtains, draperies, walls, and the like, when in operation.Do NOT store any item on top of the oven when in operation.
- Do NOT clean with metal scouring pads. Pieces can break off the pad and touch electrical parts involving a risk of electric shock.
- Extreme caution should be exercised when using containers constructed of anything other than metal or glass.
- Do NOT store any materials, other than Chefman®’s recommended accessories, in this oven when not in use.
- Do NOT place cardboard or plastic in the oven.
- Do NOT cover the crumb tray or any part of the oven with metal foil. This will cause overheating.
SAVE THESE INSTRUCTIONS
SHORT CORD INSTRUCTIONS
A short power-supply cord is provided to reduce the hazards of entanglement or tripping over a longer cord. Longer detachable power-supply cords or extension cords are available and may be used if care is exercised in their use. If a longer detachable power supply an extension cord is used:
- The marked electrical rating of the extension cord should be at least as great as the electrical rating of the appliance.
- The cord should be arranged so that it will not drape over the countertop or tabletop where it can be pulled on by children or tripped over.
California Proposition 65:(Applicable for California Residents only)![]() WARNING: Cancer and Reproductive Harm – www.P65Warnings.ca.gov.
WARNING: Cancer and Reproductive Harm – www.P65Warnings.ca.gov.![]() Do not place the appliance on a stovetop or any other heatable surface.POWER CORD SAFETY TIPS
Do not place the appliance on a stovetop or any other heatable surface.POWER CORD SAFETY TIPS
- Never pull or yank on a cord or the appliance.
- To insert the plug, grasp it firmly and guide it into an outlet.
- To disconnect the appliance, grasp the plug and remove it from the outlet.
- Before each use, inspect the power cord for cuts and/or abrasion marks.If any are found, this indicates that the appliance should be serviced, and the power cord replaced. Please contact Chefman® Support for assistance.
- Never wrap the cord tightly around the appliance, as this could place undue stress on the cord where it enters the appliance and causes it to fray and break.
DO NOT OPERATE THE APPLIANCE IF THE POWER CORD SHOWS ANY DAMAGE OR IF THE APPLIANCE WORKS INTERMITTENTLY OR STOPS WORKING ENTIRELY.
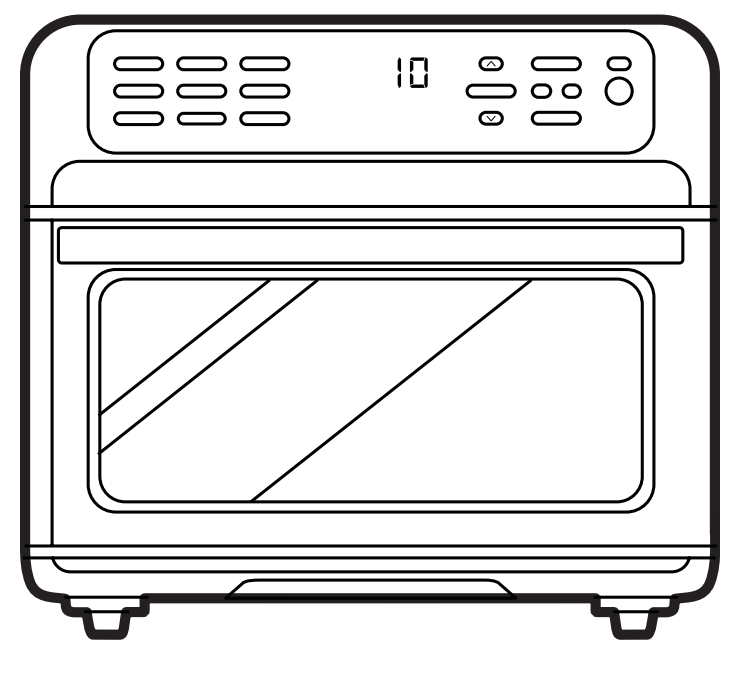
FEATURES

| 1. Capacitive Touch Control Panel2. Easy-Clean Interior3. Rack Insert Positions4. Safety Auto-Shutoff Door5. Cool-Touch Door Handle | 6. Air Fry Basket7. Broil/Bake Pan8. Flat Wire Rack9. Pull Out Crumb Tray10. Dehydrating Racks (2) |
CONTROL PANEL
9 Cook Function Buttons – Press to choose (can choose two from top two rows with Dual Cook Function)Temp/Time Display – Alternates between the twoToast Settings Display – Shows the shade of your toast or bagelTemp/Time Button – Press to choose Time or Temp for setting. Press and hold to switch between temperature units (°F and °C).Temp/Time Arrow – Press up arrow for more time, higher temp, or darker toast shade;press down for less time, lower temp, and a lighter shadeDual Cook Button – Press to set two cook functions to happen sequentially.1 and 2 Buttons – Press to set first and second functions for Dual Cook.Frozen Button – Press when toasting frozen bread or bagels to automatically add more time to reach the desired shade.Oven Light Button – Press to turn on the oven light. Press and hold to turn off sound (beeps) on the unit.Start/Stop Button – Press to begin or cancel cooking.
| Temp Temp Range(°F) | Increments(°F) | Time Range | Time Increments |
Shade Range |
|
| Bake | 200 – 450 | 25 | 1 min – 4 hrs | 1 min | n/a |
| Cony. Bake | 200 – 450 | 25 | 1 min – 4 hrs | 1 min | n/a |
| Broil | 400 or 450 | n/a | 1 min – 20 min | 1 min | n/a |
| Air Fry | 200 – 450 | 25 | 1 min -1 hr | 1 min | n/a |
| Slow Cook | 200 or 300 | n/a | 30 min –24 hrs | 30 min | n/a |
| Warm | 200 – 350 | 25 | 1 min -1 hr | 1 min | n/a |
| Toast | Fixed at 450 | n/a | n/a | n/a | 1-5 |
| Bagel | Fixed at 450 | n/a | n/a | n/a | 1-5 |
| Dehydrate | 95-165 | 10 | 30 min –72 hrs | 30 min | n/a |
OPERATING INSTRUCTIONS
BEFORE FIRST USE
- Read and remove all packing materials and stickers from the inside and outside of the Air Fryer + Oven except for the rating label on the bottom, which should remain on the unit. Be sure that all accessories are accounted for before throwing away any packaging.
- Gently wipe the exterior of the oven with a clean, damp cloth and dry thoroughly. Wipe the interior with mild liquid soap and a damp cloth or sponge.NOTE: Do not use abrasive cleaners, like steel wool pads, as they may damage the finish.
- Hand wash the removable crumb tray and dry thoroughly; the crumb tray is not dishwasher safe.
- Hand washes and dry the broil/bake pan, wire rack, basket, and dehydrating racks. The basket and all racks are top-rack dishwasher safe; the broil pan is not.
- Place the Air Fryer + Oven on a flat, heat-resistant surface positioned at least 2 inches away from the wall or any other objects.
- Ensure that the crumb tray is inserted into the bottom of the oven below the door. Do not operate the unit without a crumb tray in place.
HOW TO COOK IN THE AIR FRYER + OVENThe Air Fryer + Oven has nine cooking functions, so you can customize your cooking for perfect results every time. Not only that, but you can also program the oven to perform two different cooking functions sequentially. For example, you can use Air Fry to cook potatoes to crisp perfection then hold them until the rest of dinner is ready by programming the Warm function to come on as soon as air frying ends. (For more on the Dual Cook function, see p. 17.)Metal, ovenproof glass, or ceramic bakeware without glass lids can be used in the oven.However, the top of the container must be at least 1½-inches away from the upper heating element. What follows is how to cook using the different settings.NOTE: On first use, the unit may emit a slight odor, which is normal and will dissipate with use.BAKE OR CONVECTION BAKEBaking is a general cooking method that works just like your regular oven. Use it to make small-batch cookies, brownies, or to bake a cake. You can also roast meats and chicken using the Bake function. Convection Bake moves the air around with a fan to cook foods faster and hotter and is great for pizza.
- Ensure the crumb tray is inserted in its position below the oven door and plug-in unit.
- Place the food on the bake pan or rack.NOTE: Using foil with Convection Bake function can significantly affect the cook temperature and time.
- Slide the food into the oven.NOTE: For baked goods, it’s wise to preheat the empty oven for 5 minutes or so before adding food.
- Press Bake or Convection Bake button on the control panel. The button will turn blue.
- Press the Temp/Time button and set the desired time and temperature by pressing the up and down arrows.
- Press the Start/Stop button to begin cooking; the button will turn red.
- To pause cooking, open the oven door. The timer and the heating will pause. (But the oven may still be hot.) When the door is closed, cooking and timing will continue from where it left off. To stop cooking before the timer ends, press the Start/Stop buttonNOTE: The interior light does not come on when you open the oven door. To turn it on, press the Light button on the control panel; press it again to turn it off. (The Light button will turn blue when the oven light is on.)
- Cook until the timer ends. The unit will beep, the word End will appear on the display, and the oven will turn off.
- Using oven mitts, carefully remove the basket or rack from the oven. Check food for doneness, serve, and enjoy!
BROIL
- Ensure the crumb tray is inserted in its position below the oven door and plug-in unit.
- Place the food on the broil pan or in a basket on a broiling pan.
- Slide the broil pan into the oven’s top rack position.NOTE: Be sure that the food is not directly touching the heating elements; lower the pan if so.
- Press the Broil button on the control panel. The button will turn blue.
- Press the Temp/Time button and set the desired time and temperature by pressing the up and down arrows.NOTE: You will have two temperature choices: Low (400˚F) and High (450˚F).
- Press the Start/Stop button to begin cooking; the button will turn red.
- To pause cooking, open the oven door. The timer and the heating will pause. (But the oven may still be hot.) When the door is closed, cooking and timing will continue from where it left off. To stop cooking before the timer ends, press the Start/Stop buttonNOTE: The interior light does not come on when you open the oven door. To turn it on, press the Oven Light button on the control panel; press it again to turn it off. (The Light button will turn blue when the oven light is on.)
- Cook until the timer ends. The unit will beep, the word End will appear on the display, and the oven will turn off.
- Using oven mitts, carefully remove food from the oven. Check for doneness, serve, and enjoy!
AIR FRYAir frying uses fast-moving hot air to cook food to crisp perfection without the need for oil.It’s a great choice for cooking many frozen prepared foods as well as french fries, chicken wings, and more.
- Ensure the crumb tray is inserted in its position below the oven door and plug-in unit.
- Place the food in the basket and place the basket on the broil/bake pan. Alternatively, place food directly on the wire rack and place the broil pan in the bottom position in the oven as a drip tray.
- Slide the pan with the basket or rack into the oven.
- Press the Air Fry button on the control panel. The button will turn blue.
- Press the Temp/Time button and set the desired time and temperature by pressing the up and down arrows.
- Press the Start/Stop button to begin cooking; the button will turn red.
- To pause cooking, open the oven door. The timer and the heating will pause. (But the oven may still be hot.) When the door is closed, cooking and timing continue from where it left off. To stop cooking before the timer ends, press the Start/Stop button.NOTE: The interior light does not come on when you open the oven door. To turn it on, press the Oven Light button on the control panel; press it again to turn it off. (The Light button will turn blue when the oven light is on.)
- Cook until the timer ends. The unit will beep, the word End will appear on the display, and the oven will turn off.
- Using oven mitts, carefully remove food from the oven. Check for doneness, serve, and enjoy!
SLOW COOKSlow cooking means just what it says: slowly cooking foods at a lower temperature. Slow cooking is a great choice for tough cuts of meat because slow cooking makes them tender.
- Ensure the crumb tray is inserted in its position below the oven door and plug-in unit.
- Place the food on the broil/bake pan or rack.
- Slide the food into the oven.
- Press the Slow Cook button on the control panel. The button will turn blue.
- Press the Temp/Time button and set the desired time and temperature.NOTE: You will have two temperature choices: Low (200˚F) and High (300˚F).
- Press the Start/Stop button to begin cooking; the button will turn red.
- To pause cooking, open the oven door. The timer and the heating will pause. (But the oven may still be hot.) When the door is closed, cooking and timing will continue from where it left off. To stop cooking before the timer ends, press the Start/Stop buttonNOTE: The interior light does not come on when you open the oven door. To turn it on, press the Light button on the control panel; press it again to turn it off. (The Light button will turn blue when the oven light is on.)
- Cook until the timer ends. The unit will beep, the word End will appear on the display, and the oven will turn off.
- Using oven mitts, carefully remove the basket or rack from the oven. Check food for doneness, serve, and enjoy!
WARMThe Warm function heats the oven at a lower temperature, perfect for reheating leftovers without drying them out.
- Ensure the crumb tray is inserted in its position below the oven door and plug-in unit.
- Place the food on the boil/bake pan or rack.
- Slide the food into the oven.
- Press the Warm button on the control panel. The button will turn blue.
- Press the Temp/Time button and set the desired time and temperature by pressing the up and down arrows.
- Press the Start/Stop button to begin cooking; the button will turn red.
- To pause cooking, open the oven door. The timer and the heating will pause. (But the oven may still be hot.) When the door is closed, cooking and timing will continue from where it left off. To stop cooking before the timer ends, press the Start/Stop button.NOTE: The interior light does not come on when you open the oven door. To turn it on, press the Light button on the control panel; press it again to turn it off. (The Light button will turn blue when the oven light is on.)
- Cook until the timer ends. The unit will beep, the word End will appear on the display, and the oven will turn off.
- Using oven mitts, carefully remove the basket or rack from the oven. Check food for doneness, serve, and enjoy!
TOASTThe Air Fryer + Oven can toast multiple slices of bread to the just-right shade.
- Ensure the crumb tray is inserted in its position below the oven door and plug the unit in if necessary.
- Place bread on the wire rack and slide the rack into the Air Fryer + Oven.NOTE: If toasting one or two pieces, center them in the middle of the rack for the best results.
- Press the Toast button on the control panel. It will turn blue.
- Press the arrow buttons up or down to set your shade, 1 being the lightest and 5 being the darkest. (The shade choice will display in blue below the Temp/Time display.NOTE: If bread is frozen, press the Frozen button to automatically adjust shade time to perfectly toast frozen bread the same as fresh. When selected, the button will turn blue.
- Press the Start/Stop button to begin toasting. The Start/Stop button will turn red and a countdown will appear on the display letting you know how long toasting will take.
- To pause toasting, open the oven door. The timer and the heating will pause. (But the oven may still be hot.) When the door is closed, cooking and timing will continue from where it left off. To stop cooking before the timer ends, press the Start/Stop button.NOTE: The interior light does not come on when you open the oven door. To turn it on, press the Light button on the control panel; press it again to turn it off. (The Light button will turn blue when the oven light is on.)
- Toast until the timer ends. The unit will beep, the word End will appear on the display, and the oven will turn off.
- Carefully remove toast from the oven and enjoy!
BAGELThe Air Fryer + Oven works well for toasting bagels—which often are a struggle to fit into conventional slot toasters—to crisp-chewy perfection.
- Ensure the crumb tray is inserted in its position below the oven door and plug the unit in if necessary.
- Place bagels on the wire rack cut side up and slide rack into the Air Fryer + Oven.NOTE: If toasting one or two pieces, center them in the middle of the rack for the best results.
- Press the Bagel button on the control panel. It will turn blue.
- Press the arrow buttons up or down to set your shade: 1 being the lightest and 5 being the darkest. (The shade choice will display in blue below the Temp/Time display.)NOTE: If the bagel is frozen, press the Frozen button to automatically adjust shade time to perfectly toast frozen bagels the same as fresh. When selected, the button will turn blue.
- Press the Start/Stop button to begin toasting. The Start/Stop button will turn red and a countdown will appear on the display letting you know how long toasting will take.
- To pause toasting, open the oven door. The timer and the heating will pause. (But the oven may still be hot.) When the door is closed, cooking and timing will continue from where it left off. To stop cooking before the timer ends, press the Start/Stop button.NOTE: The interior light does not come on when you open the oven door. To turn it on, press the Light button on the control panel; press it again to turn it off. (The Light button will turn blue when the oven light is on.)
- Toast until the timer ends. The unit will beep, the word End will appear on the display, and the oven will turn off.
- Carefully remove the bagel from the oven and enjoy!
DEHYDRATEDehydrating is a great method for creating tasty, long-lasting snacks from favorite fruits and vegetables. It’s also perfect for drying herbs and creating lightweight, packable meals for backpacking.
- Ensure the crumb tray is inserted in its position below the oven door and plug-in unit.
- Place the food on the dehydrating racks with room between each piece.
- Slide racks into the oven.
- Press the Dehydrate button on the control panel. It will turn blue.
- Press the Temp/Time button and set the desired time and temperature by pressing the up and down arrows.
- Press the Start/Stop button to begin cooking; the button will turn red.NOTE: Rotate rack position occasionally for most even drying.
- To pause dehydrating, open the oven door. The timer and the heating will pause. (But the oven may still be hot.) When the door is closed, cooking and timing will continue from where it left off. To stop cooking before the timer ends, press the Start/Stop button.NOTE: The interior light does not come on when you open the oven door. To turn it on, press the Oven Light button on the control panel; press it again to turn it off. (The Light button will turn blue when the oven light is on.)
- Cook until the timer ends. The unit will beep, the word End will appear on the display, and the oven will turn off.
- Using oven mitts, carefully remove the food from the oven. Check for doneness and enjoy!
HOW TO USE THE DUAL COOK FUNCTIONThe Dual Cook function lets you program two cooking methods to happen sequentially.For example, you can set the Air Fryer + Oven to Bake for 30 minutes and then broil for 5 minutes, and the unit will automatically switch from Bake after 30 minutes to Broil for 5 minutes.The top two rows of the cook functions can all be set to Dual Cook. (Bake, Convection Bake, Broil, Air Fry, Slow Cook, and Warm.)
- To use Dual Cook, press the Dual Cook button. The Dual Cook button will turn blue as well as the Number 1 button and the most recent cook function used.
- Choose the cook function you would like to start with by pressing that cook function’s button; it will turn blue.
- Set the desired time and temperature for the first cook function; the first cook function is now set.
- To set the second cook function, press the Number 2 button; it will turn blue. (The Number 1 button will turn white.)
- Choose the cook function you would like to finish with and then press that button; it will turn blue.
- Set the desired time and temperature for the second cook function.
- Press the Start/Stop button to begin cooking; the button will turn red. The button of the function that is currently cooking will be blue as will be the Number 1 button. (The second function button will be white as will the Number 2 button.)NOTE: To exit the Dual Cook function after starting, press the Dual Cook button.
- When the first function has finished, the unit will beep and the oven will automatically switch to the second function. The second function button will turn to blue as will the number 2 button.
- To pause cooking, open the oven door. The timer and the heating will pause. (But the oven may still be hot.) When the door is closed, cooking and timing will continue from where it left off. To stop cooking before the timer ends, press the Start/Stop button.NOTE: The interior light does not come on when you open the oven door; to turn it on, press the Oven Light button on the control panel; press it again to turn it off. (The Light button will turn blue when the oven light is on.)
- Cook until the timer ends. The unit will beep, the word End will appear on the display, and the oven will turn off.
- Using oven mitts, carefully remove food from the oven. Check for doneness, serve, and enjoy!
COOKING TIPS
- If not cooking on the broil pan, consider inserting it in the bottom rack position as a drip tray for easy cleanup.
- If warming leftover cooked meat using the Warm function, fill the broil pan with 1 cup of water and place below the food being warmed to keep it from drying out.
- When working with delicate food that can easily crumble, take the rack out of the Air Fryer + Oven and assemble your food directly on the rack.
- If using a pizza stone, preheat the stone in the oven for at least 20 minutes before baking your pizza. Place the stone in the Air Fryer + Oven and set to the highest temperature. You can incorporate both preheating and cooking by setting the timer for 30-40 minutes to incorporate the preheating and baking times all in one cycle.
CLEANING AND MAINTENANCE
The Air Fryer + Oven is easy to clean. Simply follow the directions below.
- Unplug the unit and allow it to cool completely before cleaning.
- Gently wipe the exterior with a clean, damp cloth and dry thoroughly.
- Using a sponge, soft cloth, or nylon pad, wash the glass on the door with dish soap and warm water. Do not use a spray glass cleaner.
- Using a mild liquid soap and a damp cloth or sponge, wipe the interior walls. Do not use abrasive cleaners like steel wool pads, as they may damage the finish.Be sure to clean the top interior of the Air Fryer + Oven. Removing grease on a regular basis will prevent smoke caused by a buildup of oils and will keep cooking consistently.
- Slide-out the crumb tray and toss out crumbs. Wipe clean. Remove any baked-on grease by soaking the tray in hot, sudsy water. Use non-abrasive cleaners like a sponge,cloth, or brush. The crumb tray is not dishwasher safe.
- Hand wash the bake/broil pan, wire rack, basket, and dehydrating racks and dry thoroughly. The racks and basket are also top-rack dishwashers safe. The broil panis not dishwasher safe.
- Fully dry the Air Fryer + Oven and all accessories before storing.
TERMS AND CONDITIONS
Limited Warranty
Our products are backed by a limited 1-year warranty. To register, follow the instructions on the Chefman® Warranty Registration page in this User Guide.We offer a limited 1-year warranty from the date of purchase. This warranty is void without proof of purchase within the USA, Canada, or Mexico. Service centers and retail stores do not have the right to alter or change the Terms and Conditions of this warranty.WHAT THE WARRANTY COVERS
- Manufacturer DefectsChefman® products are warranted against defects in material and workmanship for a period of 1 year from the date of purchase when used in accordance with the Chefman® User Guide.
- Qualified ReplacementsIf your product does not work as it should, we will send you a new one. If the product is no longer available, we will replace it with one that is comparable.
THIS WARRANTY DOES NOT COVER
- Misuse – Damage that occurs from neglectful or improper use of products; damage that occurs as a result of usage with incompatible voltage. See Safety Instructions for information on proper use.
- Poor Maintenance – General lack of proper care. See Cleaning and Maintenance for information on proper maintenance.
- Commercial Use – Damage that occurs from commercial use.
- Altered Products – Damage that occurs from alterations or modifications by any entity other than Chefman®; removal of a rating label.
- Catastrophic Events – Damage that occurs from fire, floods, or natural disasters.
- Loss of Interest – Claims of loss of interest or enjoyment.
CHEFMAN® WARRANTY REGISTRATIONWhat do I Need to Register my Product
|
|
- Contact Information
- Model Number
- Proof of Purchase (online confirmation, receipt, gift receipt)
- Date code
 report this ad
NOTE: Label depicted here is an example.How Do I Register my Product?We offer two convenient ways to access the Chefman® registration form:
- Visit chefman.com/register.
- Scan the QR code below to access the site:
 http://www.chefman.com/register
For product information,visit chefman.comOTHER LIMITATIONS: ALL WARRANTIES OF ANY KIND WHATSOEVER, EXPRESS, IMPLIED AND STATUTORY, ARE HEREBY DISCLAIMED. ALL IMPLIED WARRANTIES OF MERCHANTABILITY AND FITNESS FOR A PARTICULAR PURPOSE ARE HEREBY DISCLAIMED, PROVIDED THAT IF ANY IMPLIED WARRANTIES OF ANY KIND ARE REQUIRED BY ANY JURISDICTION, INCLUDING MERCHANTABILITY AND FITNESS FOR A PARTICULAR PURPOSE, THE DURATION OF SUCH IMPOSED IMPLIED WARRANTY IS LIMITED TO ONE (1) YEAR. THIS WARRANTY DOES NOT COVER, AND CHEFMAN® SHALL NOT BE LIABLE FOR, INCIDENTAL, INDIRECT, SPECIAL, OR CONSEQUENTIAL DAMAGES, INCLUDING WITHOUT LIMITATION, DAMAGE TO, OR LOSS OF USE OF THE PRODUCT, OR LOST SALES OR PROFITS OR DELAY OR FAILURE TO PERFORM THIS WARRANTY OBLIGATION. THE REMEDIES PROVIDED HEREIN ARE THE EXCLUSIVE REMEDIES UNDER THIS WARRANTY, WHETHER BASED ON CONTRACT, TORT, OR OTHERWISE.This Warranty gives you specific legal rights, and you may also have other rights that vary from state to state or province to province. Some states or provinces do not allow the exclusions or limitations set forth in this Warranty, so the above limitations or exclusions may not apply to you depending on the jurisdiction of purchase.Chefman® is a registered trademark of RJ BRANDS, LLC.Toast-Air® is a registered trademark of RJ BRANDS, LLC.
![]() www.chefman.com©mychefman
www.chefman.com©mychefman![]() ©CHEFMAN 2020
©CHEFMAN 2020
References
[xyz-ips snippet=”download-snippet”]