![]()
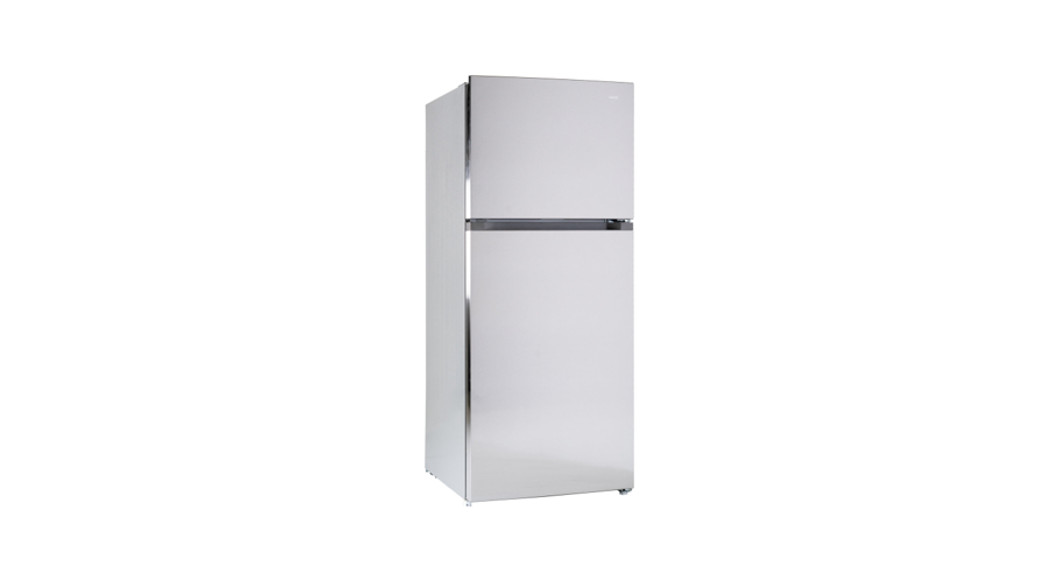
 BOTTOM MOUNT REFRIGERATORUSER MANUALMODELCBM396NWCBM395NBSCBM394NSSCBM393NBCustomer Service 1300 796 688www.chiq.com.au
PART NAMES AND LOCATIONS
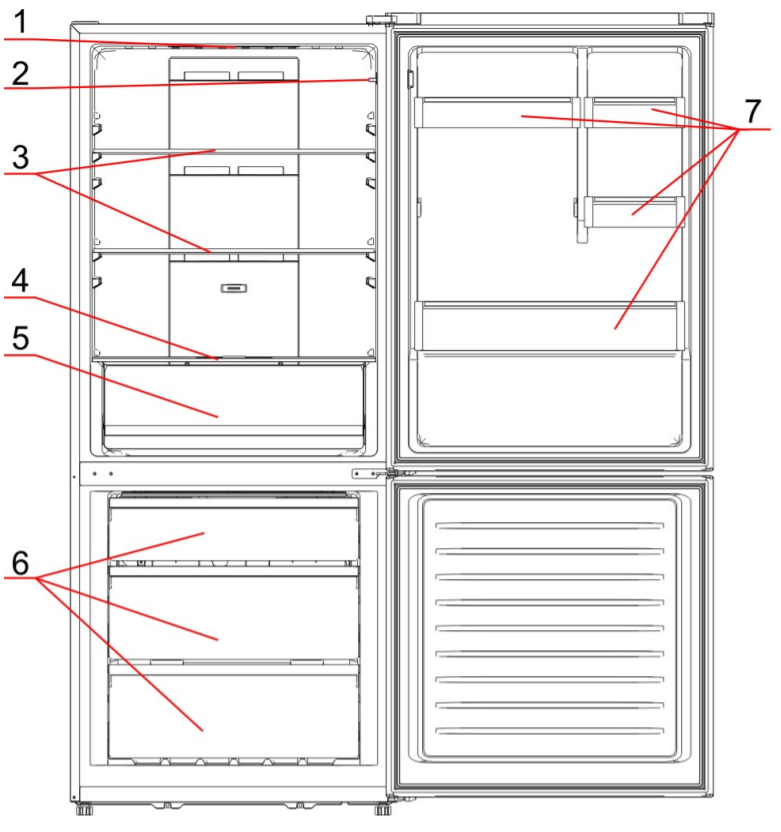
| No | Description |
| 1 | Light |
| 2 | Lighting switch |
| 3 | Fridge glass shelves |
| 4 | Vegetable and fruit crisper cover |
| 5 | Vegetable and fruit crisper |
| 6 | Freezing drawers |
| 7 | Fridge door shelves |
IN ACCESSORY BAG: USER MANUAL, WARRANTY CARD & Door reversal parts(top hinge and hinge cover)****As the manufacturer holds the authority to redesign or modify its products without notice:Any modifications or upgrades of our products will result in this refrigerator varying slightly from this manual but the functionality will remain the same to that as set out within this manual.
IMPORTANT SAFETY INSTRUCTIONS
![]() WARNING
WARNING![]() Follow these basic precautions to reduce the risk of fire, electrical shock hazards, or injury when operating the refrigerator:
Follow these basic precautions to reduce the risk of fire, electrical shock hazards, or injury when operating the refrigerator:
- This product has been designed for use in a normal domestic environment. It is not intended for commercial use which will avoid warranty, such as supermarket, food shop, pharmacy, commercial kitchen &, etc.
- Persons with a lack of experience and knowledge reduced physical or mental capabilities, need to be given supervision or instruction concerning the use of the appliance by a person responsible for their safety.
- Children should be supervised to ensure that they do not play with the appliance. Cleaning and user maintenance shall not be made by children without supervision.
- It is critical to use this appliance safely. Read all instructions before operating the refrigerator and do not attempt to repair or modify this unit in any way as it can cause harm or void the warranty.
- Please ensure all persons using this appliance are also informed and comply with the details set out within this manual and the product Terms and Conditions.
- When unpacking the appliance for the first time, keep all cardboard and plastic packaging out of reach from children.
- Report any notable defects with the appliance to Chiq or retailer as soon as it is noted.Failure to do so can result in a non-warranty claim. Keep all packaging materials in a safe location until the unit has been installed properly.
- If the supplied power cord of this unit is damaged, it must be replaced by a qualify service agent or similarly qualified persons in order to avoid any risk of injury. It is recommended the power cord is situated in a safe location when operating or transporting the appliance to prevent any damage that may cause electrical shock or fire hazards.
- DANGER or WARNING:Service of this unitThe installation or any service of the appliance is recommended by a qualified technician or service company.Ventilation HazardsNever clean the refrigerator or refrigerator parts with flammable fluids, or store gasoline or any other flammable vapors and liquids in the vicinity of this or any other refrigerator as the gas and/or vapor can cause a fire hazard, explosion, or inhalation.Electrical ConnectionMake certain, when installing or moving the unit that the power outlet has been connected to, has been fitted by a qualified electrician and the ground wire has been connected properly to meet the Australian Electrical Standards.
R600a WARNINGSNOTE: This model uses R600a flammable refrigerant in its sealed system.The following must be observed for your safety:R600a Refrigerant Warning
- This appliance contains 0.053kg R600a refrigerant which is environmentally friendly, but flammable. It does not damage the ozonelayer, nor does it increase the greenhouse effect.
- During transportation and installation, ensure that the tubing of the refrigerant circuit is not damaged.
- Leaking refrigerant can ignite and may damage the eyes.
- In the event, any damage does occur, avoid exposure to open fires and any device which creates a spark. Disconnect the appliance from themains power.
- Thoroughly ventilate the room in which the appliance is located for several minutes.
- Notify Customer Service for necessary action and advice.
- The room for installing the appliance must be at least 1 cubic meter per 8 grams of refrigerant. The refrigerant quantity contained in thisappliance is listed above in grams; it is also noted on the Rating Plate of the appliance.
* Do not store explosive substances such as aerosol cans with a flammable propellant in this appliance.
It is hazardous for anyone other than an Authorised Service Person to carry out servicing or repairs to this appliance. In Queensland, the authorized person must hold a Gas Work Authorisation for hydrocarbon refrigerants, before carrying out servicing or repairs which involve the removal of covers.
- Keep ventilation openings, in the appliance enclosure or in the built-in structure, clear of obstruction.
- Do not use mechanical devices or other means to accelerate the defrosting process, other than those recommended by the manufacturer.
- Do not damage the refrigerant circuit.
- Do not use electrical appliances inside the food storage compartments of the appliance, unless they are of the type recommended by the manufacturer.
- Do not store explosive substances such as aerosol cans with a flammable propellant in the appliance.
Disposal
The environment and personal safety must be considered when disposing of this appliance. Please ensure the appliance is taken to a recycling center for safe recycling. DO NOT dispose of the appliance in landfills as the insulation and refrigerant gas contained in these appliances are flammable.
INSTALLATION INSTRUCTIONS
Before Using the Refrigerator
- Remove the exterior and interior packing.
- Before connecting the refrigerator to a power source, let the unit stand upright for approximately 4 hours to mitigate the possibility of a malfunction in the cooling system from improper handling during transportation.
- Clean the interior surface with warm water using a soft cloth.
Installing the Refrigerator
- This appliance is designed to be free-standing only, and should not be recessed or built-in.
- Allow at least 5cm of space between the back and sides of the refrigerator to allow proper air ventilation. Insufficient space will result in cooling and working life issues and voiding warranty.
- Place the refrigerator on a leveled/even floor surface that is strong enough to support the weight of the refrigerator when it is fully loaded to prevent vibrations.
- Place the refrigerator on concrete, tile floor, or waterproof floor is recommended. The fridge will produce defrost water or condensation moisture, it might cause water damage in some extreme circumstances.
- The front feet can be adjusted to level the appliance properly. Adjust the two front feet to keep the refrigerator leveled or elevated.
- Situate the refrigerator away from direct sunlight and sources of direct heat (stove, heater, radiator, etc.). Direct sunlight may also affect the acrylic coating and heat sources may cause an increase in power consumption.
- This unit is not designed for outside installation.
- Avoid situating the refrigerator in moist OR pest infestation areas.
- Plug the refrigerator into a dedicated, properly installed-grounded wall outlet. Do not under any circumstances cut or remove the third (ground) prong from the power cord.Any questions concerning power and/or grounding should be directed toward a certified electrician or an authorized service center.
- After plugging the appliance into a wall outlet, turn the unit on and allow the unit to cool down for 4-6 hours before placing food in the refrigerator.
- Do not place heavy items on the top of this appliance.
ENERGY-SAVING TIPS
- Allow hot foods to cool to room temperature before placing them in the refrigerator.Overloading the refrigerator forces the compressor to work harder. Foods that freeze too slowly may lose quality or spoil.
- Be sure to wrap foods properly, and wipe containers dry before placing them in the refrigerator. This cuts down on frost build-up inside the refrigerator.
- Organize and label food to reduce door openings and extended searches. Remove as many items as needed at one time, and close the door as soon as possible.
OPERATING INSTRUCTIONS
 |
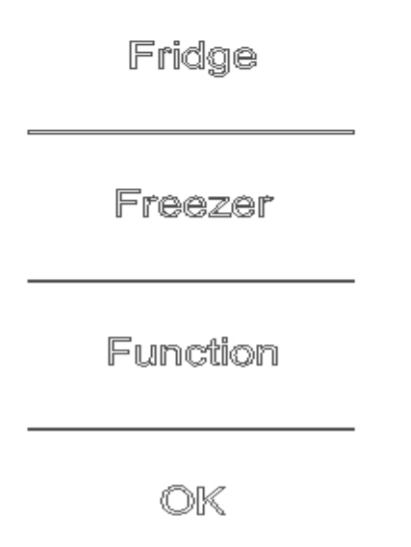 |
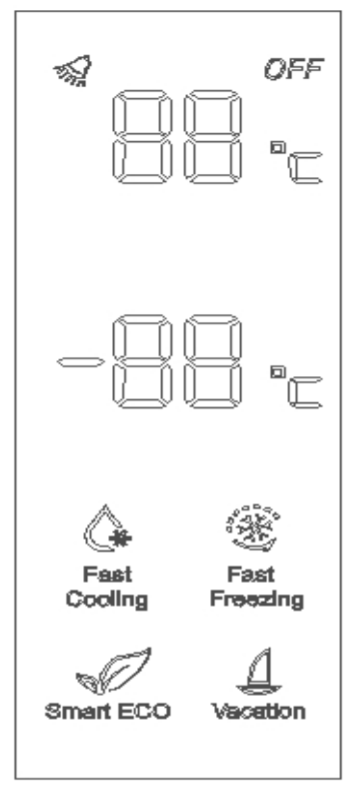
STARTWhen the refrigerator system is connected to the power supply for the first time, all icons on the display panel will be on for 2s, and the system runs in the Smart ECO mode by default.When all the doors are closed, the display will turn off automatically if no key operation within 3 minutes. It will light up if the refrigerator door is opened or any key is pressed.![]() Smart Eco ModeWhen the smart mode is on, the temperature of the fridge compartment is set at 4 ℃, and the freezer compartment at – 18 ℃.Under the Smart mode, the refrigerator is running more efficiently and with better performance.The fridge and freezer temperature settings can’t be changed when the smart mode is active.Turn on the Smart functionPress the Function key till the Smart symbol is flashing, then quickly press the OK key to confirm. If the OK key is not pressed within 5s, the setting won’t be changed. The smart symbol will stay on when it is acting properly.Turn off Smart functionUnder the Smart mode, press the Function key till the Smart symbol is flashing, then quickly press the OK key to confirm. The smart symbol will disappear when it is turned off.
Smart Eco ModeWhen the smart mode is on, the temperature of the fridge compartment is set at 4 ℃, and the freezer compartment at – 18 ℃.Under the Smart mode, the refrigerator is running more efficiently and with better performance.The fridge and freezer temperature settings can’t be changed when the smart mode is active.Turn on the Smart functionPress the Function key till the Smart symbol is flashing, then quickly press the OK key to confirm. If the OK key is not pressed within 5s, the setting won’t be changed. The smart symbol will stay on when it is acting properly.Turn off Smart functionUnder the Smart mode, press the Function key till the Smart symbol is flashing, then quickly press the OK key to confirm. The smart symbol will disappear when it is turned off.
![]() Fast Freezing modeWhen the Fast Freeze function is enabled, the freezer temperature will be set at -32 ℃, and after 26 hours of running, the Fast Freeze function will be turned off automatically. Cooling down the freezer temperature in a rapid manner is beneficial to the prevention of food nutrition against loss and thepreservation of freshness.Turn on Fast Freeze modePress the Function key till the Fast Freeze is flashing, then quickly press the OK key to confirm. If the OK key is not pressed within 5s, the setting won’t be changed. The FastFreeze symbol will stay on when it is acting properly.Turn off Fast Freeze modeAfter a cumulative running period of 26 hours, the Fast Freeze function will be turned off automatically.Or press the Function key till the Fast Freeze is flashing, then quickly press the OK key to confirm. The smart symbol will disappear when it is turned off.
Fast Freezing modeWhen the Fast Freeze function is enabled, the freezer temperature will be set at -32 ℃, and after 26 hours of running, the Fast Freeze function will be turned off automatically. Cooling down the freezer temperature in a rapid manner is beneficial to the prevention of food nutrition against loss and thepreservation of freshness.Turn on Fast Freeze modePress the Function key till the Fast Freeze is flashing, then quickly press the OK key to confirm. If the OK key is not pressed within 5s, the setting won’t be changed. The FastFreeze symbol will stay on when it is acting properly.Turn off Fast Freeze modeAfter a cumulative running period of 26 hours, the Fast Freeze function will be turned off automatically.Or press the Function key till the Fast Freeze is flashing, then quickly press the OK key to confirm. The smart symbol will disappear when it is turned off.![]() Fast cooling modeWhen the Fast cooling function is enabled, the fridge temperature will be set at 2 ℃,Turn on Fast cooling modePress the Function key till the Fast cooling is flashing, then quickly press the OK key to confirm. If the OK key is not pressed within 5s, the setting won’t be changed. The Fast cooling symbol will stay on when it is acting properly.Turn off Fast cooling modePress the Function key till the Fast cooling is flashing, then quickly press the OK key to confirm. The fast cooling symbol will disappear when it is turned off.
Fast cooling modeWhen the Fast cooling function is enabled, the fridge temperature will be set at 2 ℃,Turn on Fast cooling modePress the Function key till the Fast cooling is flashing, then quickly press the OK key to confirm. If the OK key is not pressed within 5s, the setting won’t be changed. The Fast cooling symbol will stay on when it is acting properly.Turn off Fast cooling modePress the Function key till the Fast cooling is flashing, then quickly press the OK key to confirm. The fast cooling symbol will disappear when it is turned off.![]() Temperature settingThe number only shows the set temperature which might vary to the exact temperature inside the unit.Fridge compartment temperature setting Please make sure Smart ECO mode or fast cooling mode isn’t on before the temp setting can be changed. Keep pressing the fridge key to set temperature setting cycles as following:5 ℃→6 ℃→7 ℃ →8 ℃→OF→2 ℃→3 ℃→4 ℃→5 ℃. Stop pressing the key when it reaches the desired temp.After 5 seconds, the set temperature will be active.OF indicates the fridge compartment is switched off, and when the OF function takes effect, the fridge compartment will stop cooling.Be sure to take all food out of the fridge compartment before setting this function.Freezer compartment temperature settingPlease make sure Smart ECO mode or fast freezing mode isn’t on before the temp setting can be changed.Keep pressing the freezer key to set temperature setting cycles as follows: -18 ℃→-17 ℃→-16 ℃→-24 ℃→-23 ℃→-22 ℃→-21 ℃→-20 ℃→-19 ℃→-18 ℃. Stop pressing the key when it reaches the desired temp. After 5 seconds, the set temperature will be active.
Temperature settingThe number only shows the set temperature which might vary to the exact temperature inside the unit.Fridge compartment temperature setting Please make sure Smart ECO mode or fast cooling mode isn’t on before the temp setting can be changed. Keep pressing the fridge key to set temperature setting cycles as following:5 ℃→6 ℃→7 ℃ →8 ℃→OF→2 ℃→3 ℃→4 ℃→5 ℃. Stop pressing the key when it reaches the desired temp.After 5 seconds, the set temperature will be active.OF indicates the fridge compartment is switched off, and when the OF function takes effect, the fridge compartment will stop cooling.Be sure to take all food out of the fridge compartment before setting this function.Freezer compartment temperature settingPlease make sure Smart ECO mode or fast freezing mode isn’t on before the temp setting can be changed.Keep pressing the freezer key to set temperature setting cycles as follows: -18 ℃→-17 ℃→-16 ℃→-24 ℃→-23 ℃→-22 ℃→-21 ℃→-20 ℃→-19 ℃→-18 ℃. Stop pressing the key when it reaches the desired temp. After 5 seconds, the set temperature will be active.
![]() Vacation ModeUnder vacation mode, the fridge compartment is set to 14℃ and the temperatures setcannot be changed.Be sure to take all food out of the fridge compartment before setting this function.Turn on vacation modePress the function key until the vacation symbol is flashing and then click “OK” to enter this function.Turn off vacation modePress the function key until the vacation symbol is flashing and then click “OK” to quit this function.
Vacation ModeUnder vacation mode, the fridge compartment is set to 14℃ and the temperatures setcannot be changed.Be sure to take all food out of the fridge compartment before setting this function.Turn on vacation modePress the function key until the vacation symbol is flashing and then click “OK” to enter this function.Turn off vacation modePress the function key until the vacation symbol is flashing and then click “OK” to quit this function.
![]() Door open alarmIf the refrigerator door is opened for more than 3 minutes, the buzzer alarm will be continuously beeping. It can be stopped by pressing any key button but will be restored after 3 minutes if the door keeps opening.The alarm will stop when the door is closed properly.
Door open alarmIf the refrigerator door is opened for more than 3 minutes, the buzzer alarm will be continuously beeping. It can be stopped by pressing any key button but will be restored after 3 minutes if the door keeps opening.The alarm will stop when the door is closed properly.![]() Power cut memoryIn the case of power failure, the refrigerator will maintain the previous setting when the power supply is restored.
Power cut memoryIn the case of power failure, the refrigerator will maintain the previous setting when the power supply is restored.![]() Power-on delayIn order to protect the compressor from being damaged in the case of short-time power failure (i.e., less than 5 minutes), the compressor will not be started immediately after it is powered on. But it will restart after the power comes back on for more than 5 minutes.
Power-on delayIn order to protect the compressor from being damaged in the case of short-time power failure (i.e., less than 5 minutes), the compressor will not be started immediately after it is powered on. But it will restart after the power comes back on for more than 5 minutes.![]() Over-temperature alarm (only after a power outage)When the refrigerator system is powered on, if the freezer sensor temperature is higher than -10 ℃, digits of the freezer zone get flicked on the display. The freezer temperature can be displayed when any key is pressed, and the normal display will be restored when any key is pressed again or after 10s.
Over-temperature alarm (only after a power outage)When the refrigerator system is powered on, if the freezer sensor temperature is higher than -10 ℃, digits of the freezer zone get flicked on the display. The freezer temperature can be displayed when any key is pressed, and the normal display will be restored when any key is pressed again or after 10s.![]() Fault alarmIn case E0, E1, E2, EH, or EC is displayed on the display panel, it indicates a fault with the refrigerator. Please contact the CHIQ service center for a service call.NotesLarge quantities of food stored in the appliance or directly in front of the air vent will hinder the cooling efficiency of the appliance as this can affect the airflow.Change the thermostat settings in the fridge or freezer compartment, allow 6 hours for the temperature to stabilize between adjustments.Do not keep opening and closing the door which will increase the temperature in the unit.Please note different sections of the refrigerator compartment may be warmer or cooler than others – typically the back wall and bottom lowest shelf will be the coolest, the top door rack will be the warmest. To avoid frostbite, please don’t put raw vegetables too close to the coolest area.
Fault alarmIn case E0, E1, E2, EH, or EC is displayed on the display panel, it indicates a fault with the refrigerator. Please contact the CHIQ service center for a service call.NotesLarge quantities of food stored in the appliance or directly in front of the air vent will hinder the cooling efficiency of the appliance as this can affect the airflow.Change the thermostat settings in the fridge or freezer compartment, allow 6 hours for the temperature to stabilize between adjustments.Do not keep opening and closing the door which will increase the temperature in the unit.Please note different sections of the refrigerator compartment may be warmer or cooler than others – typically the back wall and bottom lowest shelf will be the coolest, the top door rack will be the warmest. To avoid frostbite, please don’t put raw vegetables too close to the coolest area.
GENERAL CARE AND MAINTENANCE
Cleaning the Refrigerator
- Upon installation of your new appliance, it is recommended that it be cleaned thoroughly and properly maintained thereafter.
- Turn off the refrigerator and then unplug the unit from the wall outlet.
- Remove all food content before washing the inside with a damp cloth soaked in lukewarm water and dishwasher liquid. Don’t use any chemical detergent which might damage the coating of the fridge.
- Be sure to keep the door gasket (seal) clean to keep the unit running efficiently as improper cleaning can cause the seal to dislodge and tear.
- Dry the interior and exterior with a soft cloth.
Vacation Time
- Turn off the refrigerator first and then unplug the unit from the powerpoint.
- Remove all food.
- Clean the refrigerator.
- Leave the lid open slightly to avoid the possible formation of condensation, mold, or odors.
- Use extreme caution in the case of children. The unit should not be accessible to child’s play.
- Short vacations: Leave the refrigerator operating during vacations of less than three weeks.
- Long vacations: If the appliance will not be used for several months, remove all food and unplug the power cord. Clean and dry the interior thoroughly. To prevent odor and mold growth, leave the door open slightly: blocking it open if necessary.
Repositioning and Relocating the Refrigerator
- Unplug the power cord from the wall outlet.
- Remove all the food and drinks.
- Securely tape down all loose items inside your refrigerator.
- Tape the doors to be closed securely.
- It is recommended that the refrigerator stays in the upright position during transportation. But if it is laid down for transport purposes, please lift it up immediately after the job is done. Please wait for at least 24 hours before putting in the power.
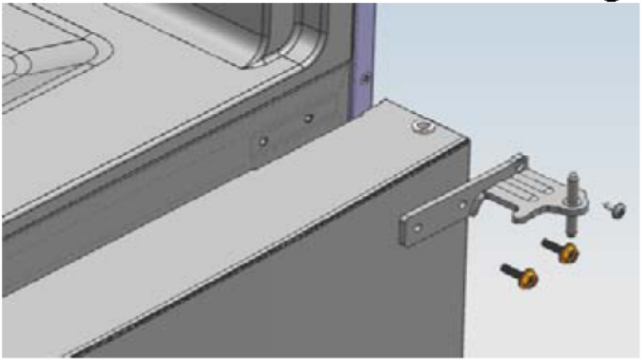
Door reversal instruction
The door reversal job requests some spare parts which are in the accessory bag, top hinge, and hinge cover.The following tool is required, flat screwdriver, Phillips screwdriver, adjustable spanner, socket wrench, and 8mm socket.
Reversing the Door• How to disassemble the fridge/freezer door.
- a. Screw off the hinge cover screw, remove the hinge cover and insert the communication wire into the hole on the cabinet top.
 b. Remove the 4 screws of the upper hinge cover, remove the hinge cover, and pry up the door bushing and small end cap cover on the door. c. Insert the door bushing and door communication wire into the hole on the door. and then put on tho small end cap cover d. Screw off the 2 screws as shown below to remove the hole cover on the cabinet top. get the cabinet communication wire out of the hole, Pry up the small end cap cover on the door. and get out the door bush and door communication wire. e. Insert the door bush into the round hole on the door, and put on the small end ca cover. f. Move the fridge door upward by over 50mm to remove the door.
 - a.Screw off the 3 screws of the middle hinge cover, and then remove the middle hinge.b. Move the freezer door upward by over 50mm to remove the door. c. Remove the adjustable front feet under the lower hinge and screw off the 4 screws of the lower hinge to disassemble the lower hinge. In this way, the door disassembly is finished.
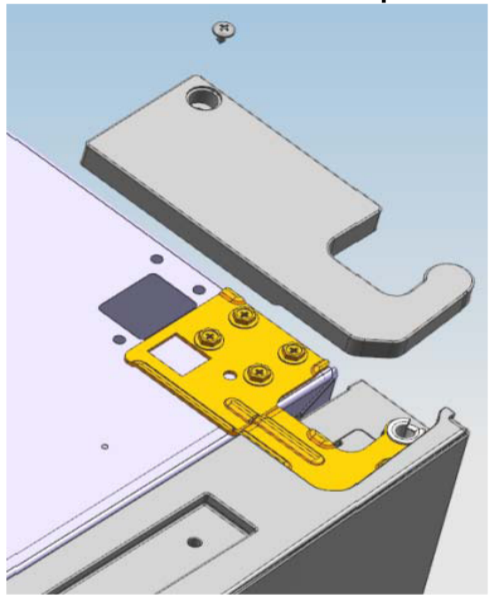 b. Remove the 4 screws of the upper hinge cover, remove the hinge cover, and pry up the door bushing and small end cap cover on the door.
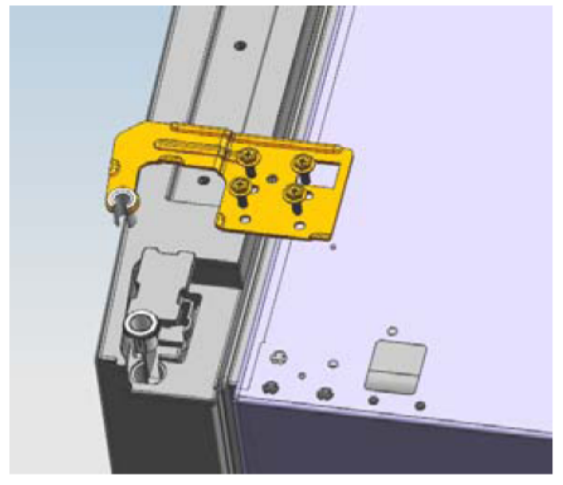 c. Insert the door bushing and door communication wire into the hole on the door. and then put on tho small end cap cover
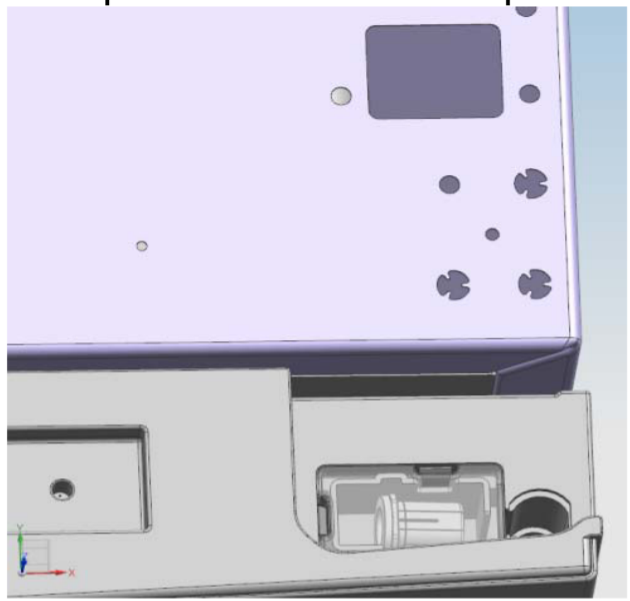 d. Screw off the 2 screws as shown below to remove the hole cover on the cabinet top. get the cabinet communication wire out of the hole, Pry up the small end cap cover on the door. and get out the door bush and door communication wire.
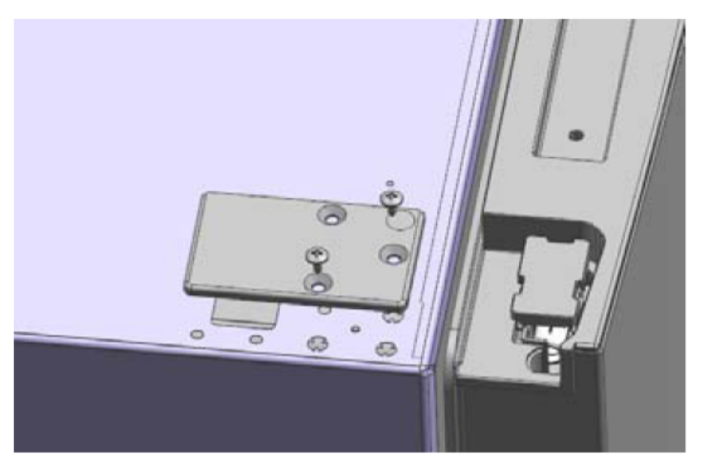 e. Insert the door bush into the round hole on the door, and put on the small end ca cover.
 f. Move the fridge door upward by over 50mm to remove the door.
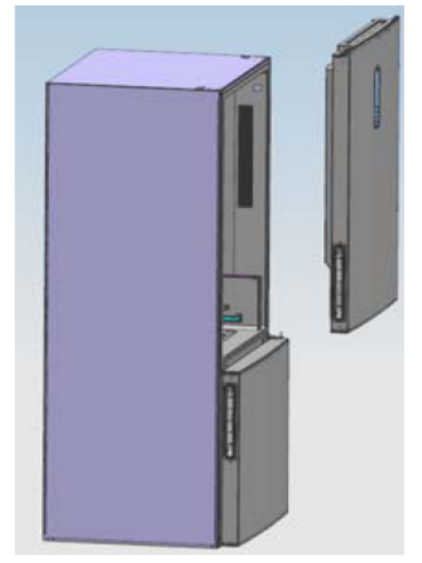
 b. Move the freezer door upward by over 50mm to remove the door.
 c. Remove the adjustable front feet under the lower hinge and screw off the 4 screws of the lower hinge to disassemble the lower hinge.
 In this way, the door disassembly is finished.
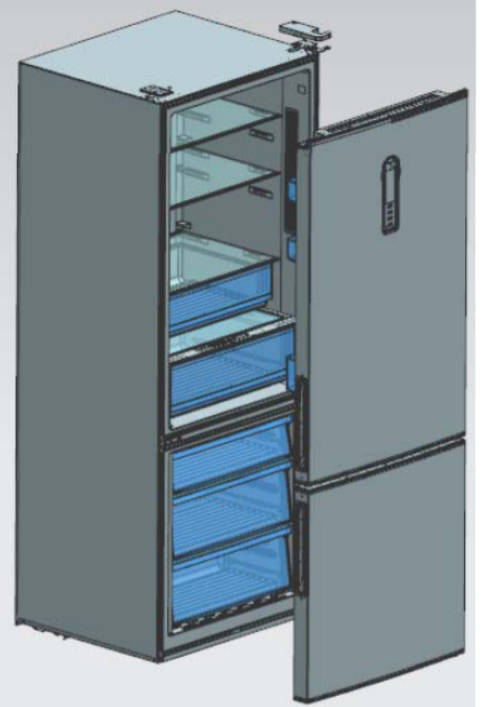
- How to assemble the door and lower hinge accessories correspondingly on the opposite side.a. Take the door bushing out as shown below, and assemble it to the corresponding position on the opposite side. b. Screw off the screws of the stopper as shown below, and assemble them to the another side of the door. c. Remove the axle and two stoppers on the lower hinge and assemble them to the position as shown below.
 b. Screw off the screws of the stopper as shown below, and assemble them to the another side of the door.
 c. Remove the axle and two stoppers on the lower hinge and assemble them to the position as shown below.
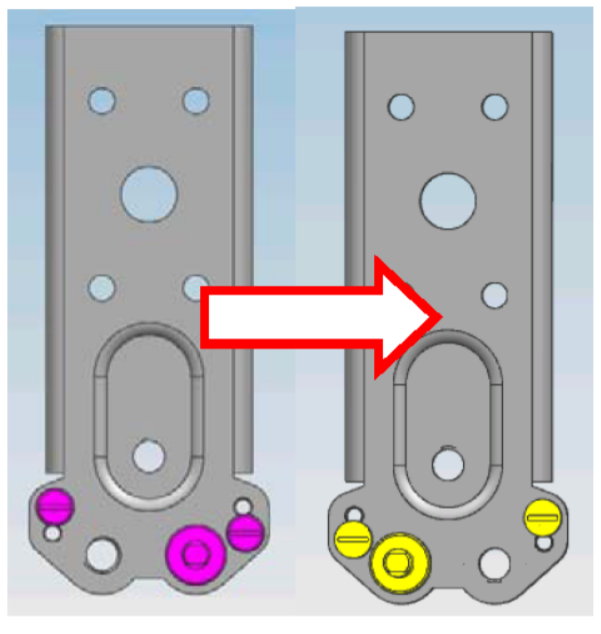
• How to assemble the fridge door and freezer doors to the opposite side.
- a. Remove the adjustable front foot as shown below by hand, assemble the lower hinge to the other side of the cabinet, and fix the screws. b Assemble the shorter adjustable front foot to the lower hinge side, and adjust the height of the foot to make the refrigerator level.
- Install the freezer door, turn the middle hinge by 180 t.7, assemble it to the other side of the cabinet, and screw up the 3 screws to fix the middle hinge.
-
Install the fridge door, assemble the left upper hinge to the other side of the cabinet, and use a tool to screw up the 4 screws to fix the upper hinge. Then, connect the door communication wire and the cabinet communication wire, install the left upper hinge cover, and fix it using a screw.
-
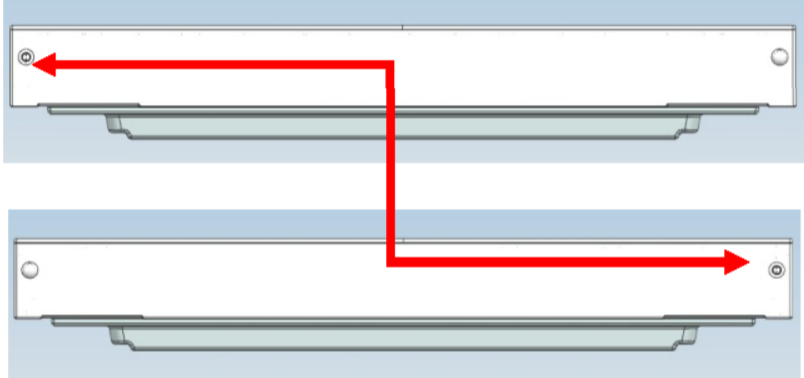
Assemble the hole cover to the other side of the cabinet, andscrew up the hole cover.
The door disassembly is finishedThe doors are opened from the left side. The doors are opened from the right side.
 b Assemble the shorter adjustable front foot to the lower hinge side, and adjust the height of the foot to make the refrigerator level.
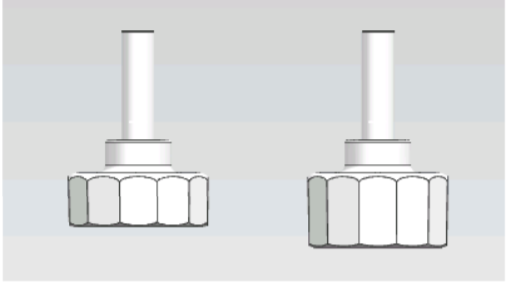

 The door disassembly is finished
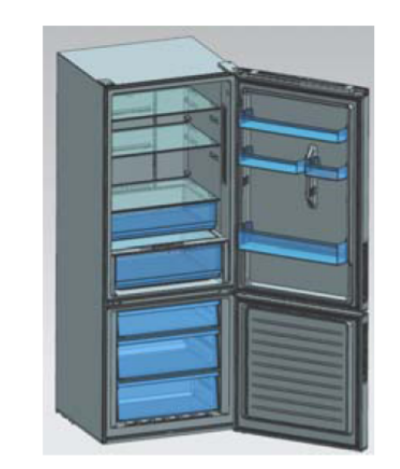 The doors are opened from the left side.
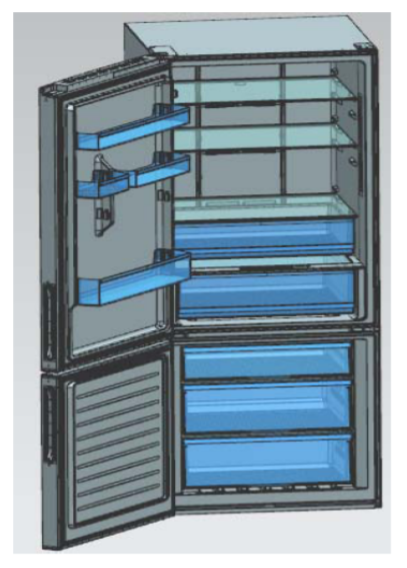 The doors are opened from the right side.
![]() Double-check that the door is aligned correctly and all the seals are closed on all sides. If necessary, re-adjust the leveling feet.
Double-check that the door is aligned correctly and all the seals are closed on all sides. If necessary, re-adjust the leveling feet.
NOTE: If you want to have the door swing reversed, we recommend you contact a qualified technician. You should only try to reverse the door yourself if you believe that you are qualified to do so.All parts removed must be saved to do the reinstallation of the door. You should rest the fridge freezer on something solid so that it will not slip during the door change process. Do not lay the fridge freezer flat as this may damage the coolant system. Ensure the fudge-freezer is unplugged and empty. We recommend that 2 people handle the fudge freezer during assembly.
TROUBLESHOOTING GUIDE
| Problem | Solution |
| The fridge has no power |
|
| The light is not working. |
|
| Compressor runs all the time |
|
| Freezer is too cold and the refrigerator is too warm |
|
| The temperature inside The refrigerator is too warm. |
|
| The temperature inside The refrigerator is too cold. |
|
| The temperature of the external refrigerator side walls are warm. |
|
| Popping or cracking sound when compressor comes on. |
|
| Bubbling or gurgling sound, like water boiling. |
|
| Vibrations. |
|
| Moisture forms on the inside refrigerator walls. |
|
| Moisture forms on outside of the refrigerator. |
|
| The doors will not close properly. |
|
For any inquiries, please call the CHiQ Customer care on 1300 796 688
![]() Customer Service1300 796 688www.chiq.com.au©Changhong Electric (Australia) P/L all rights reserved.
Customer Service1300 796 688www.chiq.com.au©Changhong Electric (Australia) P/L all rights reserved.
References
[xyz-ips snippet=”download-snippet”]