
CHORD Electronics ULTIMA PRE Owner’s Manual

Introduction
Welcome to the ULTIMA PRE Quickstart Guide. This shortened guide is supplementary to the main manual which should be referred to for full safety and operational information. Please note, more information on any of these topics is listed within the full manual found under the product page:chordelectronics.co.uk/product/ultima-pre
Warranty
The ULTIMA PRE comes with a comprehensive 5-year warranty. To activate the warranty, please register your device via the Chord Electronics website:chordelectronics.co.uk/register-product
Placement
Please ensure there is sufficient ventilation around ULTIMA PRE 2 at all times. Avoid placing ULTIMA PRE 2 in enclosed spaces, on soft surfaces, near sources of heat and never cover its ventilation holes. For optimum operation and ventilation leave some space around the unit.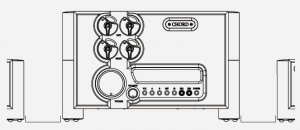
Connecting ULTIMA PRE to a source
First, you must ensure that ULTIMA PRE, and any connecting equipment, is turned off. You can connect ULTIMA PRE to a source using any of the highlighted inputs shown below. Please note that each input is arranged as a stereo pair, right and then left which is indicated on the furthermost sides of the inputs. Later, when you come to switch ULTIMA PRE on, each pair of inputs will be shown as ‘LINE X’ on the display. LINE 1-4 begins with the pairs of XLRs and LINE 5-8 is the RCA pair next to these and so on. Note that the connectors on the right hand side of the unit are outputs and bypass ports. You must not connect any inputs here

Connecting ULTIMA PRE to a power amplifier
To connect ULTIMA PRE to your power amplifier, choose either XLR or RCA. It is important to know that if you are using the volume dial or modifyingthe balance on ULTIMA PRE, it will only effect this output.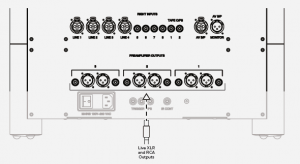
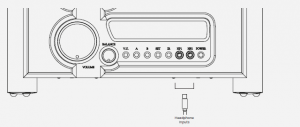
Connecting ULTIMA PRE to heaphones
If you want to use the Ultima Pre with headphones, it features two 1/4 inch headphone sockets on the front panel. Headphone mode does not automatically mutes your loudspeakers. You must the amplification off.
Connecting ULTIMA PRE to power
Once all audio inputs and outputs are correctly connected and carefully checked please connect the power cable to ULTIMA PRE.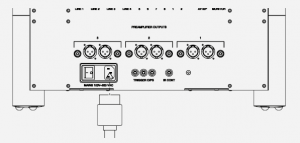
Powering up ULTIMA PRE 6.0
Now that the system is connected you must ensure that any volume control is set to the minimum and that nothing is playing. Then, switch on any sources before ULTIMA PRE and then finally your amplifier. This sequence should always be followed to protect connected devices. Slowly increase the voume to a comforable level.

To assign the main output with a particular input signal, press button A several times to cycle through the 7 line inputs to select the desire input.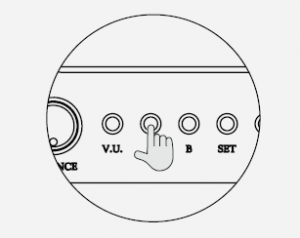
Volume and balance control 9.0
On your source commence playback and, using the left-hand dial, slowly increase the volume of ULTIMA PRE, to a safe listening level.The dial on the right adjusts balance. Typically, this should remain in the centre of its rotation for balanced sound between the left and right outputs, however if you require finer adjustment then ULTIMA PRE accommodates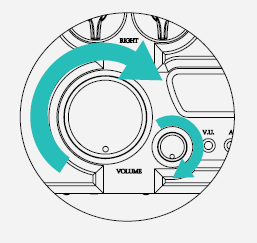
Product registration 10.0
Now that you have successfully completed the setup of your ULTIMA PRE we advise that you register your product with us. Registering helps us give you the best possible support and protects your investment: chordelectronics.co.uk/register-product/
Read More About This Manual & Download PDF:
References
[xyz-ips snippet=”download-snippet”]