

CARDIO – PULSE MEASUREMENT WITH PULSE BELTArt.-Nr. 9309 for Christopeit Sport Equipment
MANUAL
For pulse measurement, the pulse measuring unit 9309 must be in place. The use of the pulse measuring unit makes it possible for you to accurately monitor your own training program by exact, real-time measurement of your heart rate. The installation of the system is very simple and easily done.
The pulse measuring unit was developed especially for use with this machine. The user puts on the unit and the transmitter of the unit registers the ECG signals of the heart.
The transmitter amplifies the ECG signals and transmits them in the form of radio signals to the receiver installed in the computer. The transmitter switches on automatically when the pulse measuring unit is put on and the rear of the pulse measuring unit have made contact with the breast. Any kind of normal training clothes may be worn ver the pulse measuring unit. The receiver installed in the computer receives the signals from the transmitter and transfers these in the form of electrical impulses to the computer. The computer processes the signals and displays them as pulse beats per minute on the display. To attain an optimum performance of the pulse measuring nit, the machine should be set up for training in such a manner that it is as far as possible from all high-voltage power lines, electric motors and other sources which can cause interference. Adjust the strap to your chest measurement and put it on the entire unit as depicted in the illustration. Ensure that the strap is not too loose and that the transmitter is located at the center of your chest. The unit and thereby the pulse measuring system is then installed and ready for use. Clean the pulse measuring unit after each training session with a cloth moistened with a soap solution and then with a cloth moistened with pure water. This prevents the accumulation of sweat which could lead to inaccurate measurements. If you notice during training that the values which must be displayed by the computers appear irregularly or the symbol “P” appears in the display, conduct the following check procedure:
- Check that the strap is not too loose and/or has slipped too far downwards.
- Check whether the Christopeit-sport Brand on the transmitter of the pulse measuring unit is positioned correctly and is legible to a person looking at the person in training.
- Ensure that the computer is switched on.
- Moisten the part of the strap neat the transmitter and which comes into contact with the skin lightly with after to improve the transmission.
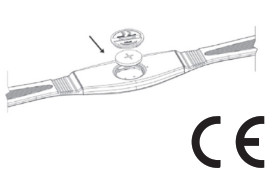
- Check whether the battery in the transmitter is spent and change this if necessary.
- Remove and replace the batteries.If you use both pulse measurements (you wear the pulse belt and put the hands onto hand pulse sensors) the display will show the value of hand pulse sensors. Don’t forget to press Start-key to start pulse measurement.
DISPOSAL/RECOMMENDATIONS:
 At the end of its life span, this product is not allowed to dispose over the normal household waste, but it must be given to an assembly point for the recycling of electric and electronic components. You may find the symbol
- on the product, on the instructions or on the packing. The materials are reusable in accordance with their marking. With the re-use, the material utilization or the protection of our environment. Please ask the local administration for the responsible disposal place.
- To protect the environment, do not dispose of the packaging materials, used batteries or parts of the machine as household waste. Put these in the appropriate collection bins or bring them to a suitable collection point.
- Do not use aggressive cleaning agents to clean up.
TOP-SPORTS GILLES GMBH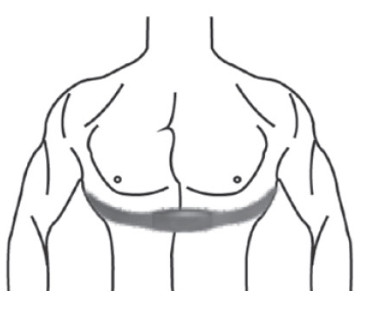 Friedrichstraße 5542551 VelbertTelefon: +49 (0)20 51 / 60 67-0Telefax: +49 (0)20 51 / 60 67-44e-mail: [email protected]www.christopeit-sport.com
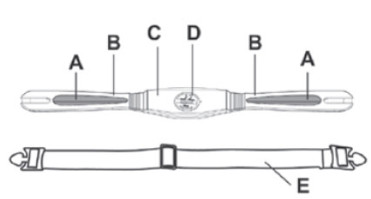
A. SensorsB. Transmission beltC. TransmitterD. Battery compartmentE. Belt straps
(This pulse belt is suitable for following Christopeit Sport items: EM 8 // EL 8 // EM 9 // EL 9 // ET 6 // ET 6 PRO // ET 6 VR // EMS 6 // CX 6 // CXM 6 // TM III Comfort // TM III Esprit // TM VI // EM 4 // CX 4 // EXM 4 // FXM 2 // TM 4 // Como // CX 7 // CXM 7 // Taxxon // Naxxos // TM 550S // TM 600S // TM 750S // TM 800S // TM 2000S // TM 5000S // EXM 4 // RS 3 // ET 2000 // XL 2000 // EMT 2200 // RST 3200 // RPT 6200 // CXT 7200 // RMT 8200 // ECO 1000 // ECO 2000 // AL 2000 // EL 5000 // BT 4000 // ET 6000)
References
[xyz-ips snippet=”download-snippet”]