
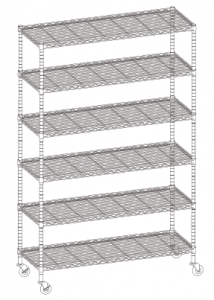
6 Tier wire shelving rack
Product Manual

Dear Customer, Thank you very much for purchasing our products. If there are any problems during the transportation of the product, please contact us in time.
Please refer to the following regulations for returns and product warranty policies
CL.store Return Policy (in accordance with Amazon.com): www.amazon.com/shops/HIHOME
WhatsApp E-mail:
Twitter: jaen04427806
FB: Gu Jaen
Follow us to get more discounts
6-TIER WIRE SHELVING RACK
 WS-776http://www.paylesshere.comWarning: Maximum weight capacity per shelf is 350lbs when equally distributed on feet levelers. Maximum entire unit weight capacity is 500lbs when equally distributed on casters. Failure to follow these instructions may result in serious injury or death of yourself and people around you. Some of the part are heavy and/or has shape edge, please install it carefully to avoid hurt you and people around you.
Caution: Do not stand on or climb on the shelving unit. Place heavier items on lower shelves and lighter ones on top shelves.
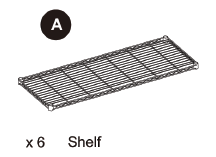
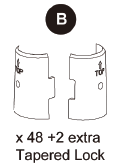
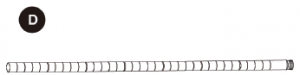
PACKAGE CONTENTS

![]()
(NOTE: Discard the black plastic spacers G. These between each shelf are only for packing purpose , not for assembling.)
ASSEMBLY INSTRUCTIONS
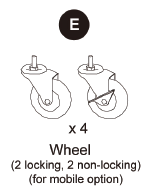
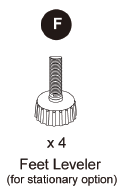
1. Stationary Option: Screw each feet leveler (F) into the bottom of each bottom pole (D). Turn clock wise to screw in place. Mobile Option: Screw each wheel (E) into the bottom of each bottom pole (D). Turn clock-wise to screw in place.

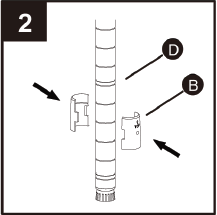
2. With the tapered end facing up, snap the two halves of a tapered lock (B) at the desired height on bottom pole (D). Repeat for the remaining bottom poles (D), making sure the tapered locks (B) are installed at the same grooved line on each bottom pole (D).
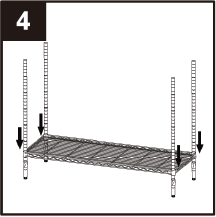
3. Rest shelf (A) on its side, then insert the bottom poles (D) through the corner holes of the shelf (A).

4. Turn assembly upright and push the shelf (A) firmly onto the tapered locks (B). Note: Make sure the lip of shelf (A) is facing down and the levelers (F) on bottom poles (D) are on the floor.
5. Repeat steps 2-4 for the second shelf (A).
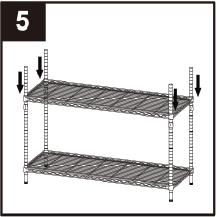
6. Screw top pole (C) onto bottom pole (D). Hand tighten.

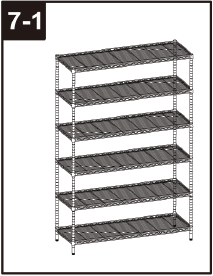
7-1. Repeat steps 2-4 for the remaining. shelves (A). Refer to image 7-1 for the assembled unit of stationary option.
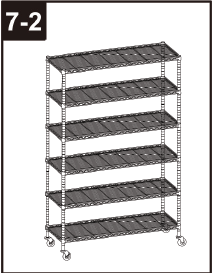
7-2. Repeat steps 2-4 for the remaining. shelves (A). 7-2 Refer to image 7-2 for the assembled unit of mobile option.
[xyz-ips snippet=”download-snippet”]