User ManualUNITE® 180 4K Panoramic Camera![]()
ClearOne® Contacts
| Headquarters 5225 Wiley Post Way Suite 500Salt Lake City, UT 84116 | HeadquartersTel: +1.801.975-7200 |
| SalesTel: +1.801.975.7200[email protected] | Technical SupportTel: +1.801.974.3760[email protected] |
Notices
© 2021 ClearOne, Inc.ClearOne, Inc. All rights reserved.Information in this document is subject to change without notice.Document: DOC-0477-001v1.0 August 2021
Introduction
The UNITE 180 4K Panoramic Camera
UNITE 180 4K Panoramic Camera provides a full 180-degree panoramic field-of-view with “real-time stitching” to achieve a variety of useful viewing modes for any application and environment.UNITE 180 is ready to use right out of the box. The camera itself has 6 viewing modes. Details are in the Quick-Start Guide.
PanoCAM Studio Camera Software
To use the camera’s power features, access the PanoCAM Studio software.This user manual provides detailed information about use of the PanoCAM Studio software.
• Datasheet• Quick-Start Guide
Installing the Software
To install PanoCAM Studio, complete the following steps:
- Connect the UNITE 180 camera to your computer’s USB port.Windows displays the software’s .exe file as if it was on a CD drive.
- Double-click the .exe file.

- Select your preferred folder location, then click Next.
- On the Ready to Install dialog window, click Install.The software displays the Installing window,and then the Completing the PanoCAM Studio Setup Wizard screen:The setup wizard places a shortcut on your desktop, and launches Studio.
- Click the Launch PanoCAM Studio checkbox, then click Finish.The setup wizard places a shortcut ( ) on your desktop, and launches Studio.Studio displays a set of informative windows, beginning with Manual selection.After you click Skip, or at the end of the information windows, Studio activates the camera and displays a window similar to the following:
Launching Studio with Any Application
For example, if you launch Studio when you have the UNITE 180 set as your video device in COLLABORATE Space, Studio displays the following screen:![]() To resolve this conflict, do the following:
To resolve this conflict, do the following:
- From within COLLABORATE Space, click the UNITE 180 checkbox to de-select it.
- From within Studio, click Try Again.Studio is now available within COLLABORATE Space:
The PanoCAM Studio Interface
For quick access to a topic, click the associated number on the following images:![]()
![]()
Preview Window Position
![]()
![]()
Manual Boxes
To create boxes manually, click on the window and diagonally drag your mouse.To access options for boxes, click the box to select it, then right-click.
- Auto-tracking. Click the checkbox to enable. The color of the manual box changes to blue.
- Pin. Makes the manual box irreplaceable by another box. Click the checkbox to enable.
- Delete. Deletes the manual box.
Display Layouts
Studio provides the following six display layouts:![]() 3.1 Compose Layout• Panoramic view on top, close-up boxes of tracked person, or manually defined boxes on the bottom.
3.1 Compose Layout• Panoramic view on top, close-up boxes of tracked person, or manually defined boxes on the bottom.![]() •Maximum number of close-up boxes: 8• When the camera detects no person, and no manual box has been selected, the output area displays a panorama on the top and blank icons on the bottom.
•Maximum number of close-up boxes: 8• When the camera detects no person, and no manual box has been selected, the output area displays a panorama on the top and blank icons on the bottom.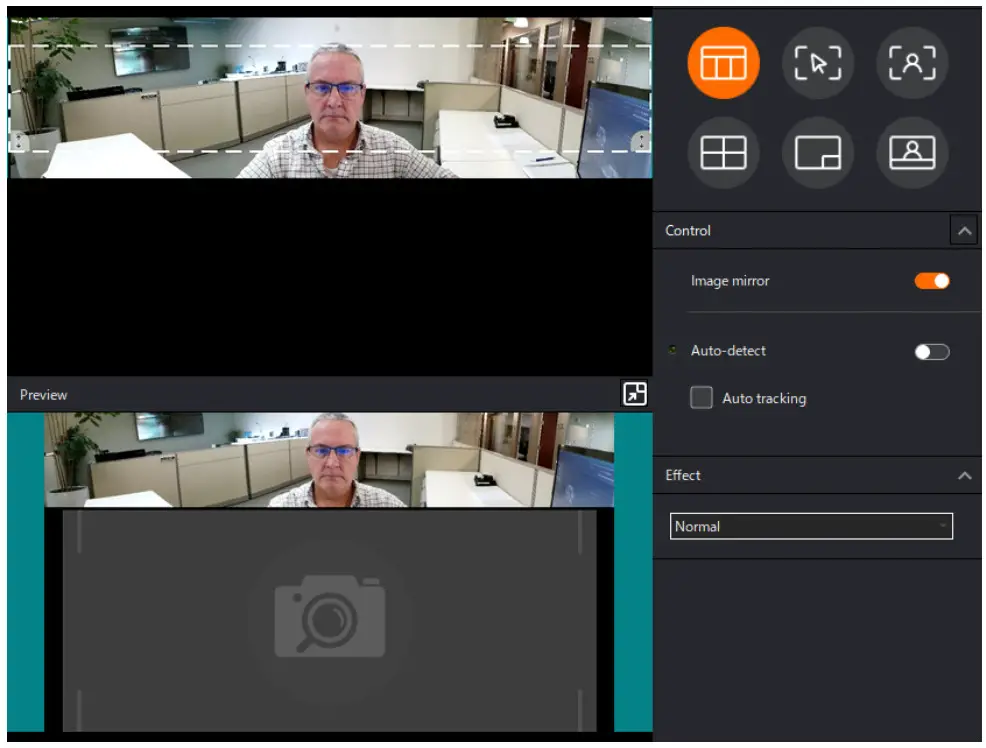 • When the detected persons or areas of a manual box selection are near each other, the system merges them into one close-up box.3.2 Manual Layout• The output screen displays the area of the manual box selection.• Face tracking is not available with Manual layout.3.3 Body Fit Layout (Autoframing Layout)• The output screen displays close-up views of each tracked person.• When the camera detects no person, and no manual box has been selected, the output screen displays a panorama.• The size of the manual boxes affects the width of the panorama in the output screen:
![]() 3.4 Grid Layout• Recommended for 1 to 4 participants.• Maximum number of close-up boxes: 4• In the output screen, the system displays each tracked person or manual selection in a separate close-up box.• When the camera detects no person, and no manual box has been selected, the output screen displays blank icons.• When the detected persons or areas of a manual box selection are near each other, the system merges them into one close-up box.
3.4 Grid Layout• Recommended for 1 to 4 participants.• Maximum number of close-up boxes: 4• In the output screen, the system displays each tracked person or manual selection in a separate close-up box.• When the camera detects no person, and no manual box has been selected, the output screen displays blank icons.• When the detected persons or areas of a manual box selection are near each other, the system merges them into one close-up box.![]() 3.5 Presentation Layout• In the output screen, the system displays a combo box, or picture-in-picture.• When the camera detects no person, and no manual box has been selected, the output screen displays the area within the yellow box.
3.5 Presentation Layout• In the output screen, the system displays a combo box, or picture-in-picture.• When the camera detects no person, and no manual box has been selected, the output screen displays the area within the yellow box.![]() 3.6 Speaker Layout• In the top of the output screen, the system displays the detected persons; In the bottom of the output screen, it displays a panorama view.• When the camera detects no person, and no manual box has been selected, the output screen displays blank icons in the top and a panorama view in the bottom.
3.6 Speaker Layout• In the top of the output screen, the system displays the detected persons; In the bottom of the output screen, it displays a panorama view.• When the camera detects no person, and no manual box has been selected, the output screen displays blank icons in the top and a panorama view in the bottom.![]()
Image Mirror
Image Mirror OffAuto-Detect
Auto-detect on:![]() Auto-detect while responding to movement:
Auto-detect while responding to movement:![]() Auto-detect after responding to movement:
Auto-detect after responding to movement:![]()
Auto-Tracking
Auto-tracking is similar to Auto-detect, but is more sensitive to visual changes (movement).![]()
Effect (Light Settings)
Normal![]() Custom Settings
Custom Settings![]()
Window Vertical Slider
Use the Window Vertical Slider to vertically position the window (defined by white dash lines).![]()
[xyz-ips snippet=”download-snippet”]