Colston COL-AIRFRY-001 1800W 22 qt Air
Fryer Oven XL User Manual
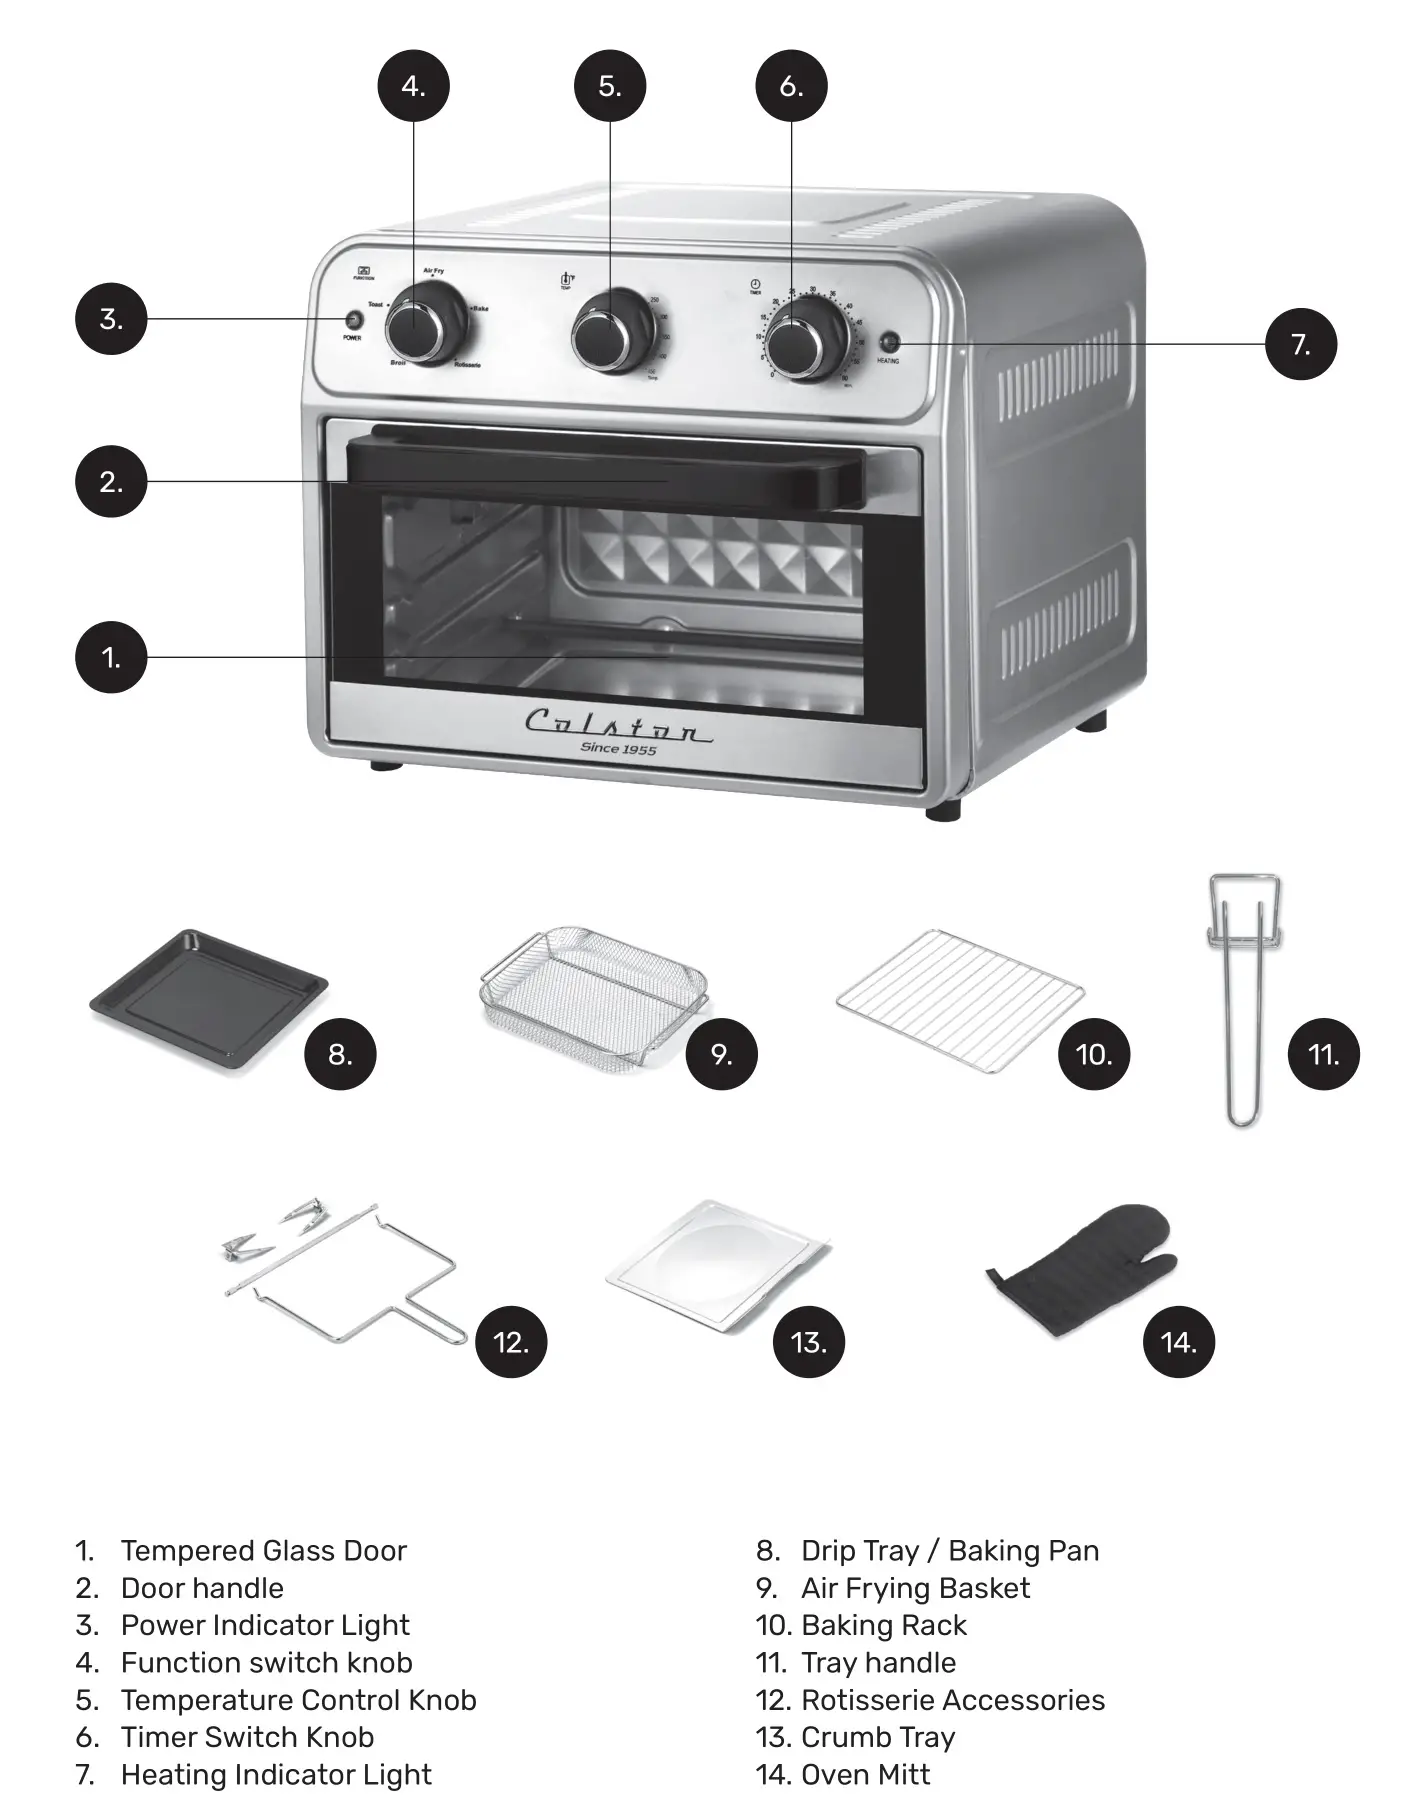
PARTS DESCRIPTION
IMPORTANT SAFEGUARDS
WHEN USING ELECTRICAL APPLIANCES, BASIC SAFETY PRECAUTIONS SHOULD ALWAYS BE FOLLOWED, INCLUDING THE FOLLOWING:
- READ ALL INSTRUCTIONS.
- Check that your main voltage corresponds to that stated on the appliance.
- Do not touch hot surfaces. Use handles or knobs.
- To protect against electrical shock, fire or personal injury, do not immerse cord, plugs, or the appliance in water or other liquid.
- Close supervision is necessary when any appliance is used by or near children.
- Unplug from outlet when not in use and before cleaning. Allow to cool before putting on or taking off parts.
- Do not operate any appliance with a damaged cord or plug or after the appliance malfunctions or has been damaged in any manner. Return the appliance to the nearest authorized service facility for examination, repair, or adjustment.
- The use of accessory attachments not recommended by the appliance manufacturer may cause injuries.
- Do not use outdoors. This appliance is for HOUSHOLD USE ONLY.
- Do not let the cord hang over the edge of a table or counter or touch hot surfaces.
- Do not place on or near a hot gas or electric burner, or where it could touch another heated oven.
- When operating the oven keep at least four inches of space on all sides of the oven to allow for adequate air circulation.
- Always operate on a stable, heat resistant surface. Do not use on a cloth-covered surface, near curtains or other flammable materials.
- Do not place the oven near the edge of a bench or table during operation. Ensure the surface is level, clean and free of water, flour, etc.
- Extreme caution must be used when moving an appliance containing hot oil or other hot liquids.
- Do not use the appliance for other than intended use.
- Oversize foods or metal utensils must not be inserted in the Convection Toaster Oven Air Fryer, as they may create a fire or risk of electric shock.
- A fire may occur if the Convection Toaster Oven Air Fryer is covered or touching flammable material, including curtains, draperies, walls, and the like, when in operation. Do not store any item on top of the appliance when in operation.
- Do not clean with metal scouring pads. Pieces can break off the pad and touch electrical parts involving a risk of electric shock.
- Extreme caution should be exercised when using containers constructed of other than metal or glass.
- Do not store any materials in this oven when not in use.
- Do not place any of the following materials in the oven: paper, cardboard, plastic, and the like.
- Do not cover crumb tray or any part of the oven with metal foil. This causes overheating of the oven.
- Do not leave unit unattended, especially when toasting or broiling.
- Use extreme caution when disposing of hot grease.
- Always wear protective, insulated oven mitts when inserting or removing items from the hot oven.
- To disconnect, turn all knobs back to the starting position making sure everything is OFF, then remove plug from wall outlet.
SAFETY TIPS
- When in use, always use oven mitts or potholders when touching any outer or inner surface of the oven, or when handling accessories.
- To reduce risk of fire, keep oven interior clean and free of food, oil, grease and any other combustible materials.
- Do not use metal utensils such as knives to remove food residue from the heating elements as this can damage the appliance as well as lead to electrocution.
- Do not store any materials in the oven when not in use.
3-PRONG PLUG INSTRUCTIONS
For your personal safety, this appliance must be grounded. This appliance is equipped with a power supply cord having a 3-prong grounding plug. To minimize possible shock hazard, the cord must be plugged into a matching 3 prong, grounding type wall receptacle, grounded in accordance with the National Electrical Code ANSI/NFPA 70 latest edition and all local codes and ordinances. If a matching wall receptacle is not available, it is the personal responsibility and obligation of the customer to have a properly grounded, 3-prong, wall receptacle installed by a qualified electrician. Do not attempt to modify the plug in any way.
SHORT CORD INSTRUCTIONS
A short power supply cord is provided to reduce the hazards resulting from becoming entangled in or tripping over a longer cord. Extension cords may be used if care is exercised in their use.Note: The electrical rating of the extension cord should be at least that of the appliance. If the electrical rating of the extension cord is too low, it could overheat and burn. The resulting extended cord should be arranged so that it will not drape over the countertop or tabletop where it can be pulled on by children or tripped over.
PRODUCT SPECIFICATIONS

ABOUT YOUR AIR FRYER OVEN XL
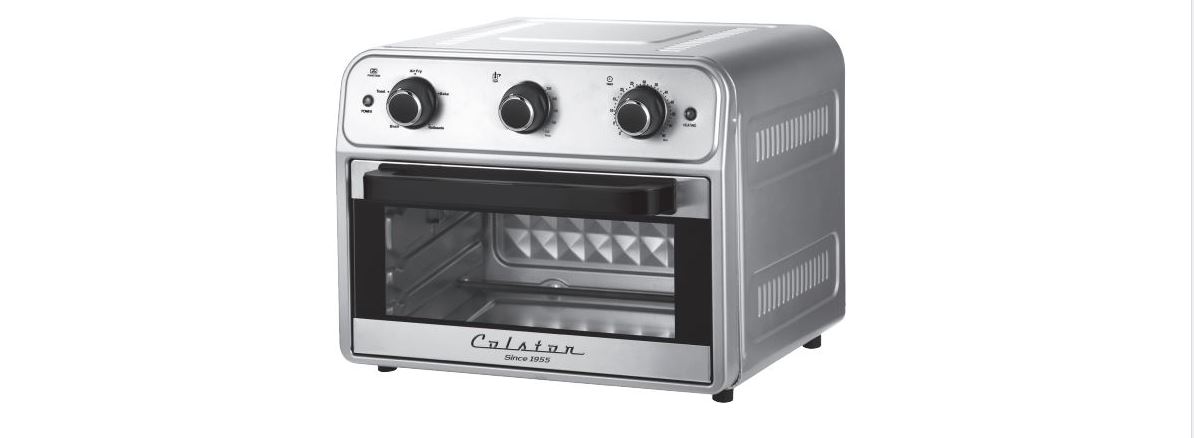
Fry, bake, toast, broil and rotisserie with your Colston Air Fryer Oven XL. This innovative and multifunctional appliance uses Rapid Hot Air Technology to cook food faster and make meals healthier. The air frying mechanism works by circulating super-hot air around your food. This delivers the same crispy texture and rich flavor of your favorite fried foods — with little to no oil. That means less fat and calories. The unit can also be used as your regular, everyday toaster/convection oven and features 5 easy-to-use functions: toast, air fry, bake, broil and rotisserie. The Air Fryer Oven contains six heating elements — four on top, two on the bottom. A built-in 60-minute timer and adjustable thermostat of up to 450°F enable you to customize your cooking for every dish. A built-in safety micro switch automatically stops operation when the door is open. The air fryer oven includes a drip tray/baking pan, air frying basket, baking rack, tray handle, rotisserie accessories and a crumb tray.
INDICATOR LIGHTS & CONTROL KNOBS
- The Power indicator light, located on the left side, turns blue once the timer is activated, indicating the unit is currently on. It is used to set desired times for all functions. Setting the oven timer powers the unit on and begins the cooking cycle.
- The Heating indicator light, located on the right side of the unit, turns orange when the unit heats up, and turns off once the set temperature is reached. It will then cycle on and off as it regulates and maintains the set temperature.
- The Function Dial is used to select the cooking method. Five different functions are available, Air Fry, Broil, Bake, Toast and Rotisserie.
- The cooking process can be stopped at any moment by turning the timer knob back to 0.
- The safety microswitch stops the cooking operation when the door is open.
- Remember to turn the temperature knob back to the starting point after each use to make sure you are adjusting correct temperature settings for each cooking process.
BEFORE THE FIRST USE
- Unpack the appliance and accessories and wash and wipe everything down. Wipe the interior of the oven with a damp cloth or sponge. Dry with a paper towel. Make sure the oven is dry before operating the unit.
- Position the oven on a flat and heat-resistant surface so that it is also positioned at least 4 inches (10cm) away from any surrounding objects.
- Unwind and plug in the power cord into the wall outlet. Place the crumb tray inside on the bottom of the unit. Make sure unit is clean and everything has been taken out of the oven.
- It is normal if some smoke or smell emanates from the appliance when using it for the first time. This is not harmful. To eliminate any packing oil that may remain after operating, we recommend operating the appliance for 20 minutes while setting the thermostat to the maximum temperature setting.
Tips:
- Baking rack positioning: the baking rack can be slid into any of the 3 levels available.
- Always place the baking pan / drip tray on the lowest level when cooking with the basket or baking rack. The baking pan will catch any grease or crumbs during the cooking cycle.
OPERATING INSTRUCTIONS
PREHEATING:
- Plug the unit into the power supply socket.
- Turn the left knob to select your desired cooking function.
- Turn the temperature knob to the right to start preheating at desired temperature and set the timer to 10 minutes.
- The Power light will turn on to indicate that the unit is ON.
- The Heating indicator light will turn on to indicate that the unit is heating up. When the target temperature is reached the orange Heating Light will turn off and will then cycle on and off to maintain the set temperature.
- You can now place your food in the unit to start the cooking process as the unit is fully preheated.
SETTINGS:
BROIL FUNCTION
This mode is ideal for small cuts of meat, open sandwiches, poultry, fish, and vegetables. The broil function can also be used to brown the top dishes such as gratins or casseroles. When broiling, preheat oven for 10 minutes. We suggest using the top rack position for better results during this cooking process.
- Begin by preheating the unit. See “Preheating” section.
- Once preheated, place the baking tray or rack with food on the highest rack position (close to the top of the oven).
- Turn the function switch to BROIL.
- Adjust the temperature knob to the desired temperature by turning the knob to the right.
- Adjust the timer knob to the desired cooking time, between 1 and 60 minutes. Once time has been set, the Power indicator light will turn on. The Air Fryer Oven starts as soon as the timer is set.
- The Heating indicator light will turn orange to indicate that the unit is heating up and will turn off once the temperature has been reached. The Heating light will then cycle on and off as it regulates and maintains the set temperature.
- When the cooking time has elapsed, the timer bell will ring, the oven will now turn off on its own.
- Carefully take your food out with oven mitts.
Note:
– Using the broil function usually requires shorter cooking time.– Do not use glass oven dishes to broil.– Food gets cooked quickly during broil, it is best to watch over food to prevent overcooking.
Caution: Aluminum foil is not recommended for covering the accessories. If covered, the foil prevents the fat from dripping into the drip tray. Grease will accumulate on the foil surface and may catch fire. If you choose to use foil to cover the Baking Pan/Drip Tray, be sure foil is cut to neatly fit into the pan and does not touch the wall or heating elements.
BAKE FUNCTION
Use the bake function to cook cakes, baked goods, or to roast meats. This mode can also be used with pre-packaged frozen meals. For best results when cooking and baking, we recommend preheating the oven at least for 10 minutes at the desired temperature setting.
- Begin by preheating the unit. See “Preheating” section.
- Once preheated, place the baking tray, rack or basket with food in the unit.
- Turn the function switch to the BAKE position.
- Adjust the temperature knob to the desired temperature by turning the knob to the right.
- Adjust the timer knob to the desired cooking time, between 1 and 60 minutes. Once the time has been set, the Power indicator light will turn on.
- The unit starts operating as soon as the timer is set.
- The Heating indicator light will turn orange to indicate that the unit is heating up and will turn off once the temperature has been reached. The Heating light will then cycle on and off as it regulates and maintains the set temperature.
- When the cooking time has elapsed, the timer bell will ring, the oven will now turn off on its own.
- Carefully take your food out with oven mitts.
Note:
– Use the baking rack for fresh pizza and frozen pizza.– Place the baking pan / drip tray on the lowest level when cooking if cooking with the basket or baking rack. The baking pan will catch any grease or crumbs during the cooking cycle.
TOAST FUNCTIONUse the toast function to toast bread to perfection: crunchy on the outside and soft on the inside.
- Begin by preheating the unit. See “Preheating” section.
- Once preheated, place the baking tray or rack with food in the middle slot.
- Turn the setting knob to TOAST position.
- Adjust the temperature knob to the desired temperature by turning the knob to the right.
- Adjust the timer knob to the desired cooking time. Once time has been set, the Power indicator light will turn on. The unit starts as soon as the timer is set.
- The Heating indicator light will turn orange to indicate that the unit is heating up and will turn off once the temperature has been reached. The Heating light will then cycle on and off as it regulates and maintains the set temperature.
- When the cooking time has elapsed, the timer bell will ring, the unit will now turn off on its own.
- Carefully take your food out with oven mitts.
Note:– Use the baking rack to toast items, making sure all food is centered and spaced evenly on the rack as well as placed in the middle of the oven.
AIR FRY
Use the air fry function to Air Fry as a healthy alternative to frying without the use of excess amounts of oil. This function lets you cook with less fat and calories and gives the food a lighter and less greasy taste.Preheating is not necessary for the air fry function but can be used to speed up the cooking process. Keep in mind that preheating will interfere with recommended cooking times. If the unit is already hot, remove 3 minutes from the recommended cooking time.
- Place the mesh basket or rack with food in the unit.
- Turn the setting knob to Air Fry position.
- Adjust the temperature knob to the desired temperature by turning the knob to the right.
- Adjust the timer knob to the desired cooking time. Once the time has been set, the Power indicator light will turn on. The unit starts as soon as the timer is set.
- The Heating indicator light will turn orange to indicate that the unit is heating up and will turn off once the temperature has been reached.The Heating light will then cycle on and off as it regulates and maintains the set temperature.
- When the cooking time has elapsed, the timer bell will ring, the oven will now turn off on its own.
- Carefully take your food out with oven mitts.
Notes:– Although oil is not necessary, a small portion of oil can be sprayed on or brushed on food for air frying. Make sure to distribute oil evenly on food.– When cooking a large amount of food, it is recommended to flip food halfway to ensure even cooking.– Place the baking pan / drip tray on the lowest level when cooking if cooking with the basket or baking rack. The baking pan will catch any grease or crumbs during the cooking cycle.
ROTISSERIE
Use the rotisserie function to roast chicken.For best results when cooking and baking, we recommend preheating the oven at least for 10 minutes at the desired temperature setting
- Begin by preheating the unit.
- Once preheated, place the rotisserie fork with food in the unit.
- Turn the function switch to the Rotisserie position.
- Adjust the temperature knob to the desired temperature by turning knob to the right.
- Adjust the timer knob to the desired cooking time, between 1 and 60 minutes. Once the time has been set, the Power indicator light will turn on.
- The Air Fryer Oven starts as soon as the timer is set.
- The Heating indicator light will turn orange to indicate that the unit is heating up and will turn off once the temperature has been reached. The Heating light will then cycle on and off as it regulates and maintains the set temperature.
- When the cooking time has elapsed, the timer bell will ring, the oven will now turn off on its own.
- Carefully take your food out with oven mitts.
Note:– Use the rotisseries accessories to roast chicken.– Place the crumb tray when cooking, crumb tray will catch any grease or crumbs during the cooking cycle.
CLEANING AND MAINTENANCE
- Make sure to clean the appliance after each use. Cleaning regularly prevents the accumulation of grease and helps avoid unpleasant smells.
- Make sure the unit has been turned off by switching the timer to 0 and setting the temperature knob back to the starting point. Unplug the appliance from the outlet and allow it to cool completely.
- Do not immerse in water or wash under running water.
- The accessories are dishwasher safe except for the handle, which needs to be hand-washed.
- Do not use metal kitchen utensils or abrasive cleaning materials to clean them, as this may damage the non-stick coating. Rinse and dry thoroughly after cleaning.
INTERIOR CLEANING
- Wipe cavity with a damp cloth or sponge. Dry with paper towel. To remove baked on food, pour a little cooking oil on the food and allow to stand for five to ten minutes. This should soften the food and allow it to be removed with absorbent paper toweling or a soft cloth.
- Clean the inside of the glass door with a damp soapy cloth. If the glass has stubborn stains, open the door and cover the inside of the door with a few damp paper towels. Leave for a few minutes, then remove the towels and wipe the door clean. Never use sharp utensils as scratching may weaken it and cause it to shatter.
- Never use abrasive products in the cavity. Never immerse the appliance in water and make sure no water or damp penetrates the appliance except the cavity.
- Make sure no water comes on the oven door when the latter is still hot.
EXTERIOR CLEANING
- Wipe clean with a damp sponge. Wipe dry
- NEVER use steel wool, metal scouring pads or abrasive cleaners, as they may damage the finish.
WARNING: DO NOT IMMERSE THE OVEN IN WATER OR ANY OTHER LIQUID.
DISPOSAL
Do not dispose this product as unsorted municipal waste. Collection of such waste separately for special treatment is necessary.
![]()
WARRANTY:
1-Year Limited Manufacturer’s WarrantyYour Colston product is backed by a one-year limited manufacturer’s warranty. For a period of one year following date of purchase, Colston will repair or replace your product should it fail due to a manufacturer’s defect (subject to certain limitations such as, but not limited to, use of the product as directed or performing the intended function during which the product may become damaged).
This one-year limited warranty does not cover any damage that results from unauthorized or improper use, service, or repair. Further, it does not cover damage caused by accident, negligence, purposeful harm, or normal wear and tear. Should you discover your Colston product is not functioning properly, please send your product to our repair center for evaluation, at the address listed below. If your product cannot be repaired or serviced, we reserve the right to exchange it for a similar or newer model.
Please note that a flat processing fee of $35.00 will be charged to cover the service evaluation and return shipping of your product. All limited warranty claims must be accompanied by a copy of your proof of purchase from an authorized retailer. Please send your product, proof of purchase, and a check or money order in the amount of $35.00 made out to Colston to:
Address:Colston Appliances3069 Taft StreetHollywood, FL 33021Contact: [email protected]
By purchasing this product and/or utilizing this limited warranty, you expressly waive the right to be a member of or the lead plaintiff in any class action or any group civil action against the manufacturer and agree that any dispute involving Colston shall be resolved in Broward County, Florida as the exclusive jurisdiction in any court case and/or proceeding
 report this ad
![]()
[xyz-ips snippet=”download-snippet”]