
User Guide
![]()

CONCEPTRONIC Enclosure USB-C 3.1 Gen 2
M.2 PCIe NVMe SSD Enclosure USB-C 3.1 Gen 2DDE01B
Assembly Guide
Step 1

Remove the two screws out, and then remove the PCB.
Step 2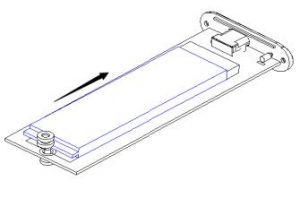 Install the M.2 PCIe NVMe SSD into PCB and secure it with a screw.
Step 3

Slide the PCB back into the enclosure. Replace the front plate and fix it with the screws which were removed in step 1.
Assembly Finished!
Installation & usage
Connect to computer
- Connect the USB Type-C cable to the enclosure and to a free USB port on your computer.The computer will automatically recognize and install the new hardware. No driver installation is required.
NOTE:To enjoy USB 3.1 super speed up to 10Gbps, your computer must be equipped with built-in USB 3.1 ports, or a USB 3.0 host PCI-e card. (If the USB cable is connected to USB2.0, the transfer speed will down to 480Mbps.)
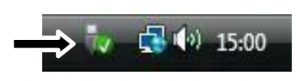
Disconnect to computerThe M.2 PCIe NVMe SSD Enclosure must be removed safely before you disconnect it from your computer, in order to prevent data loss.
- Double click on the “Safely Remove Hardware” icon in your system tray.
 The “Safely Remove Hardware” window will be shown.
 - Click on the connected M.2 PCIe NVMe SSD Enclosure (often listed as “USB Mass Storage Device”) and click the “Stop” button.
- Confirm the disconnection by clicking “OK”.
 The “Safely Remove Hardware” window will be shown.
The M.2 PCIe NVMe SSD Enclosure is now safely removed from your computer.
[xyz-ips snippet=”download-snippet”]